Category Archives: Hummingbirds

Bird Migration- August Field Notes

They Come, They Go

August 10

The House Wrens that were so prevalent in our yard during the spring and summer are suddenly no where to be found. I miss their bright beautiful songs and their industrious display and hunting behaviors.  I’ll keep watching, but I’m pretty sure they are laying low, going through their molts, taking advantage of the ground level hunting opportunities and resting up for migration.

Rose Breasted Grosbeaks and Baltimore Orioles who were so busily tending to their fledglings only a week ago are no longer showing themselves. I can see an abandoned Oriole nest from my window, hanging by only a few threads, in disarray and looking quite uninhabitable. One good wind will bring it down.

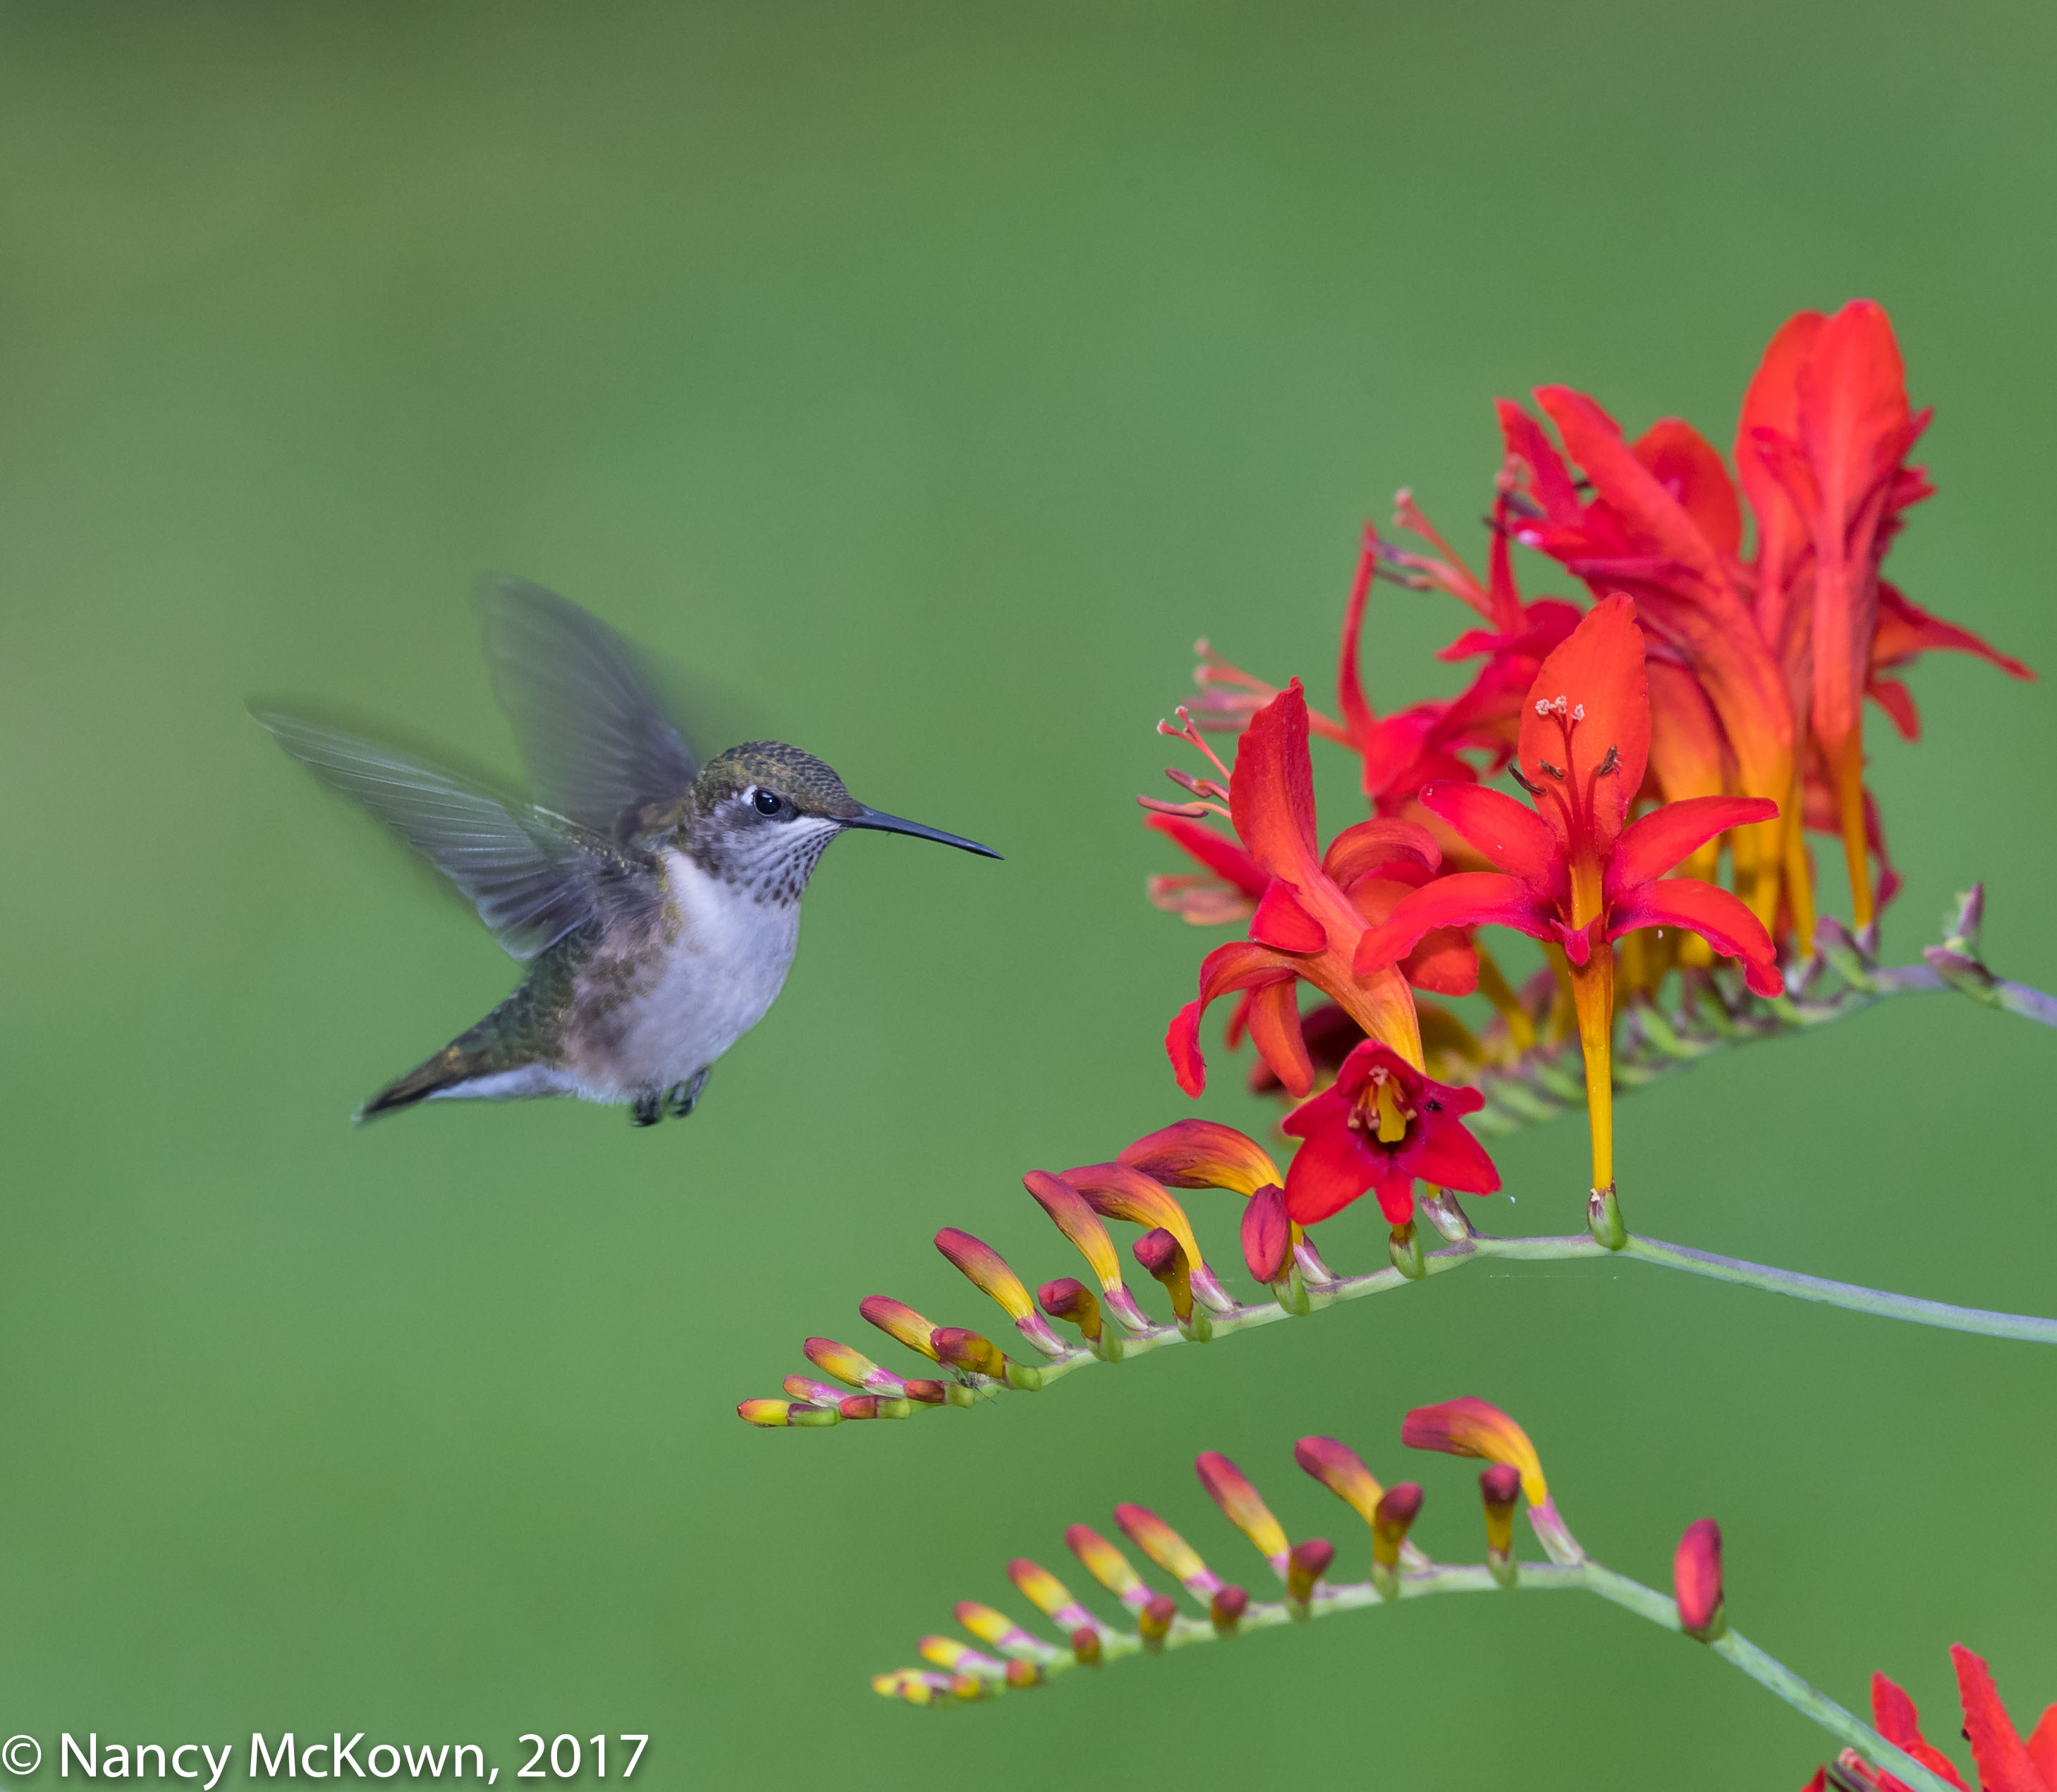
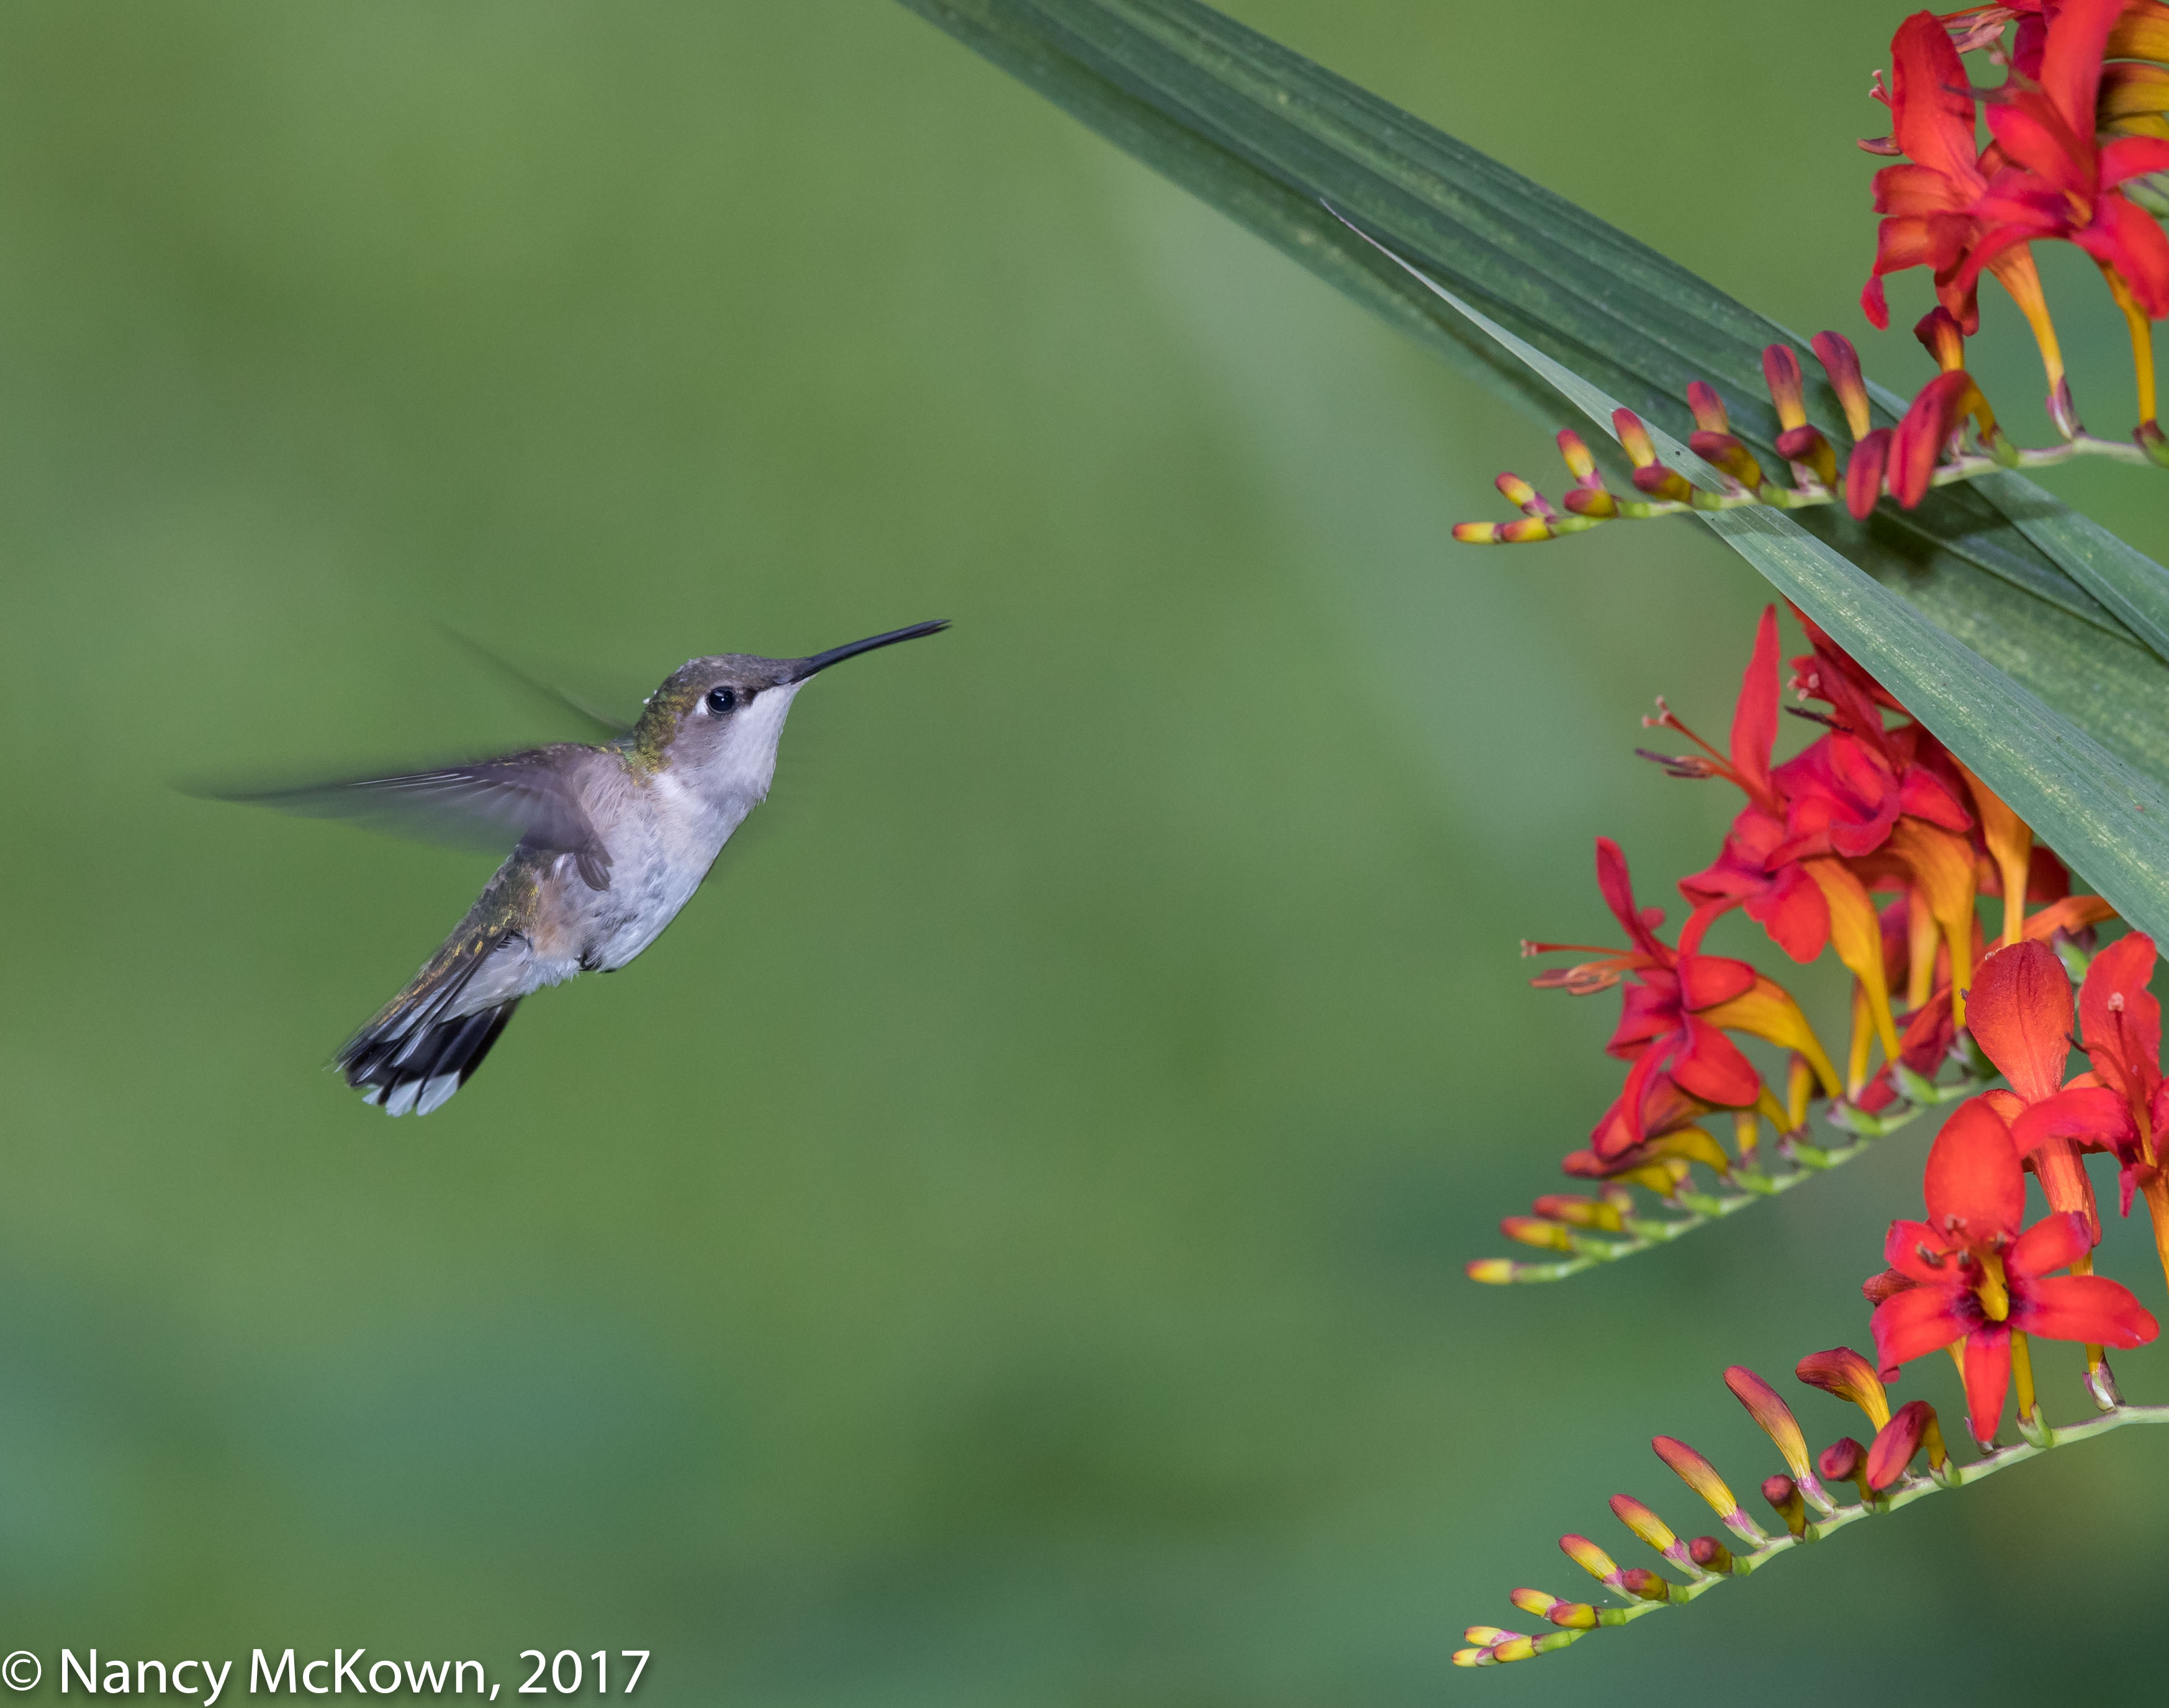
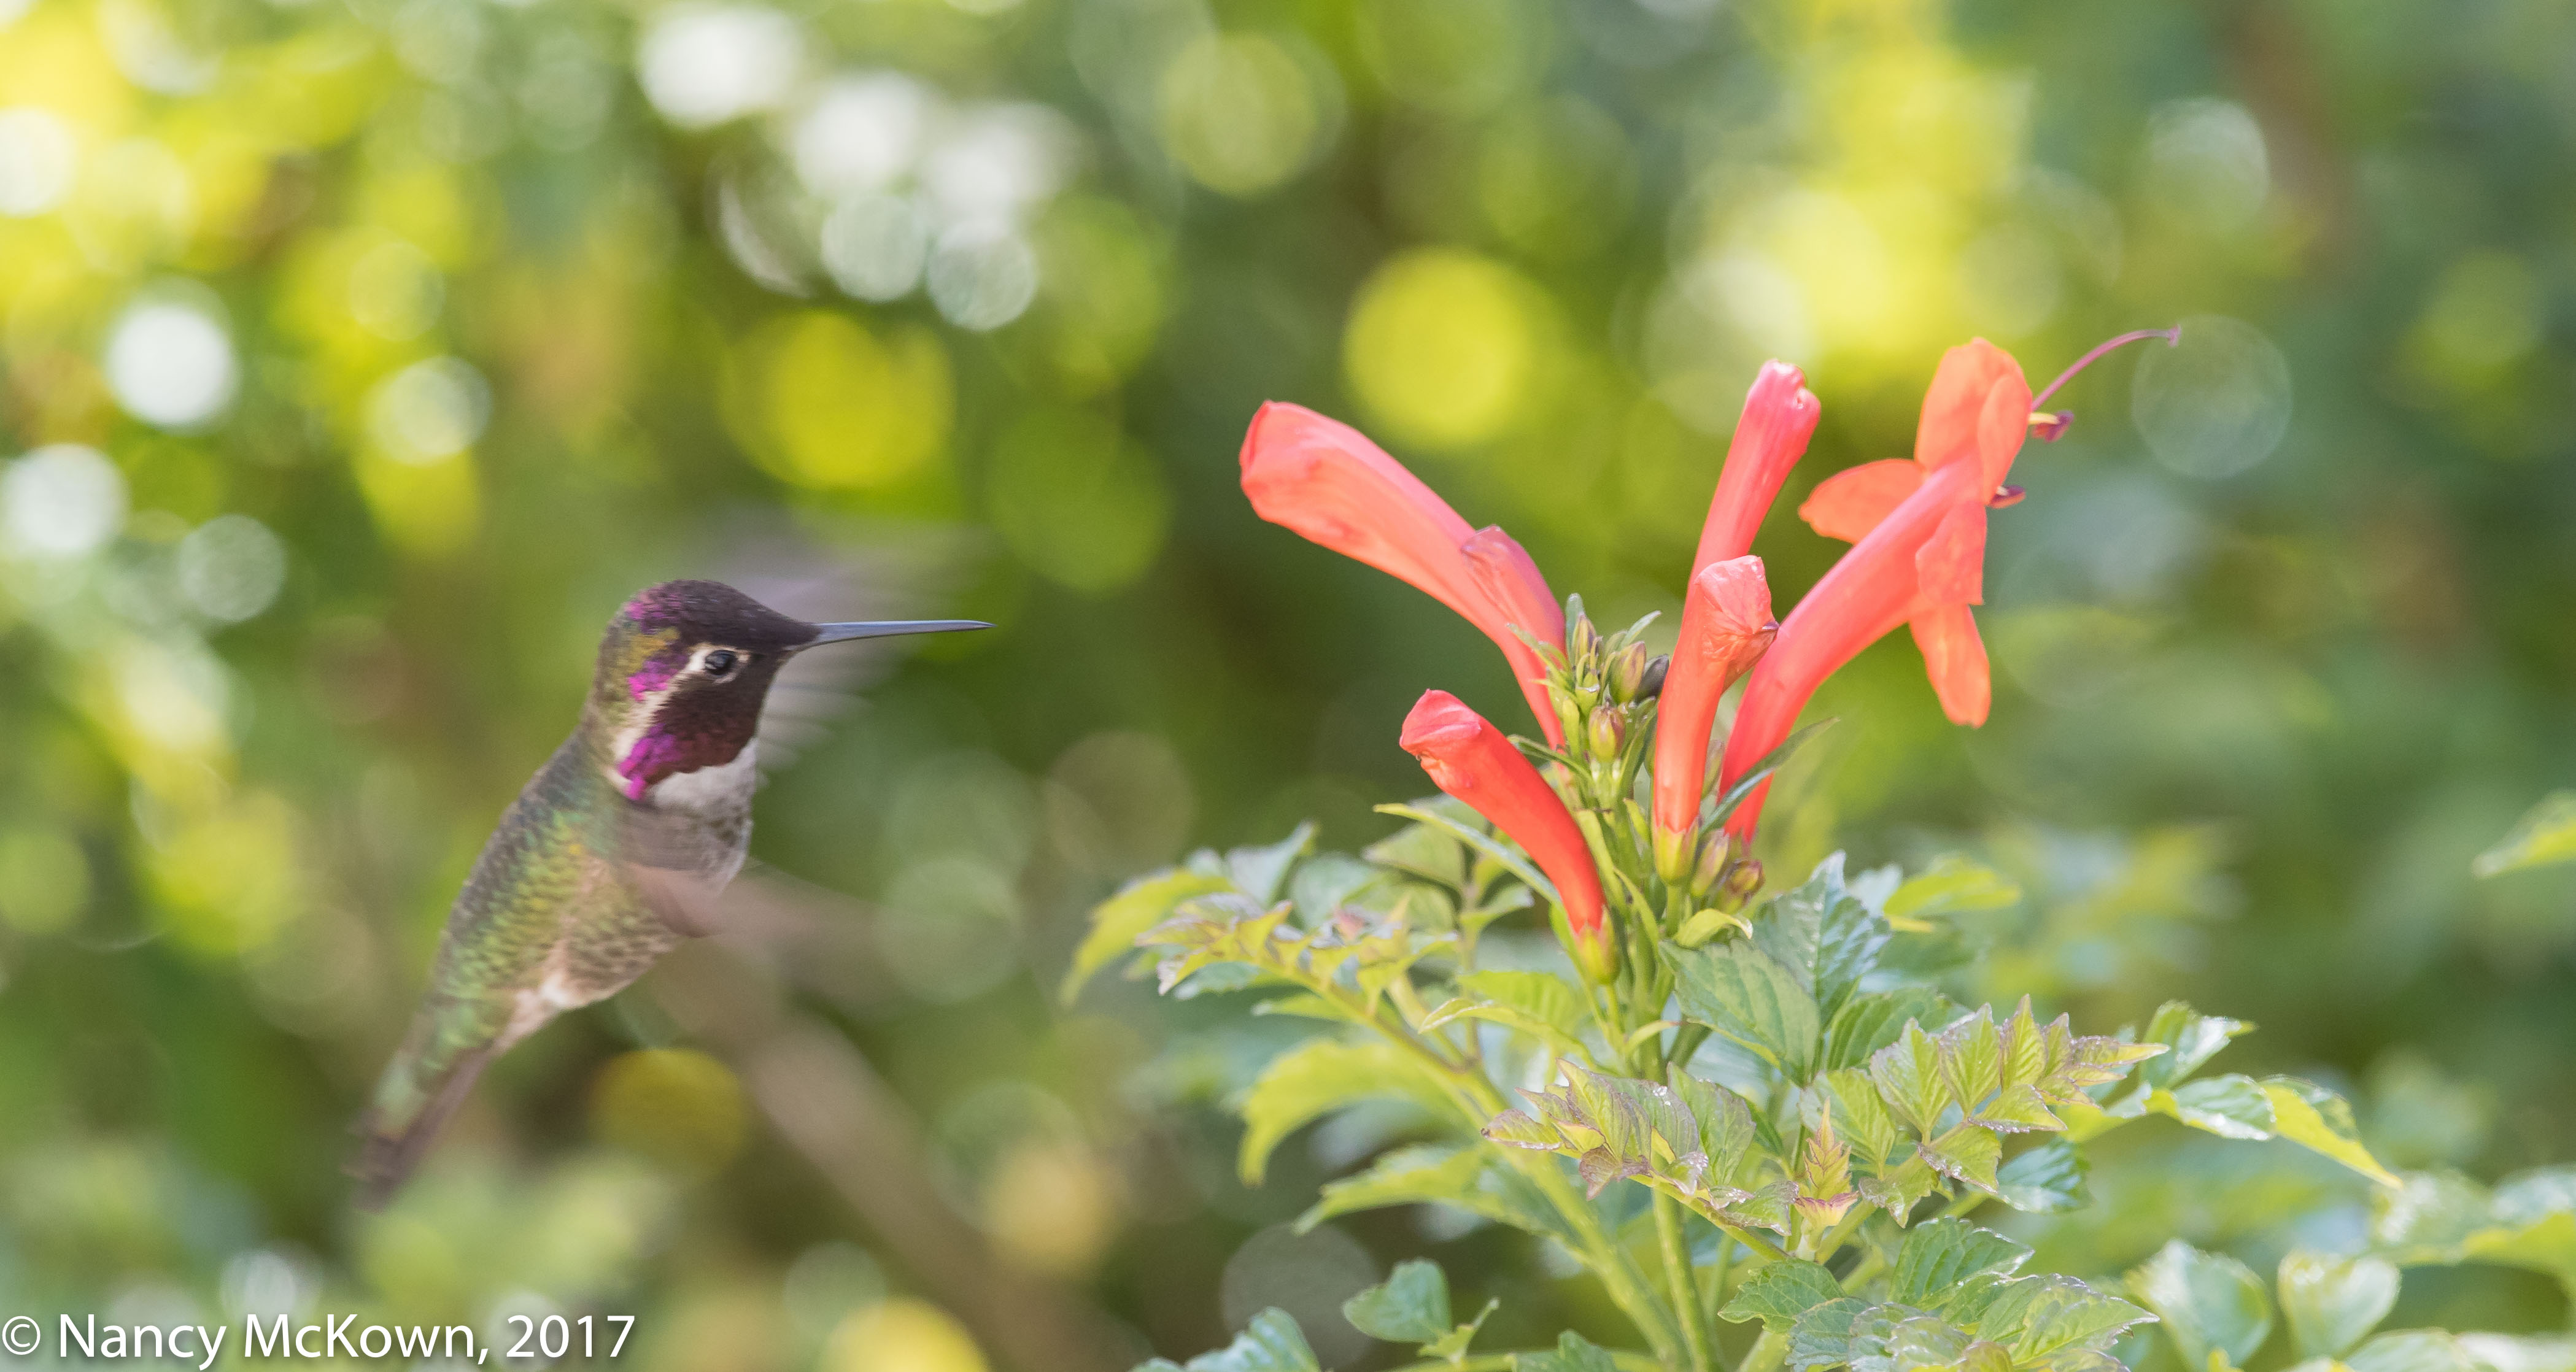
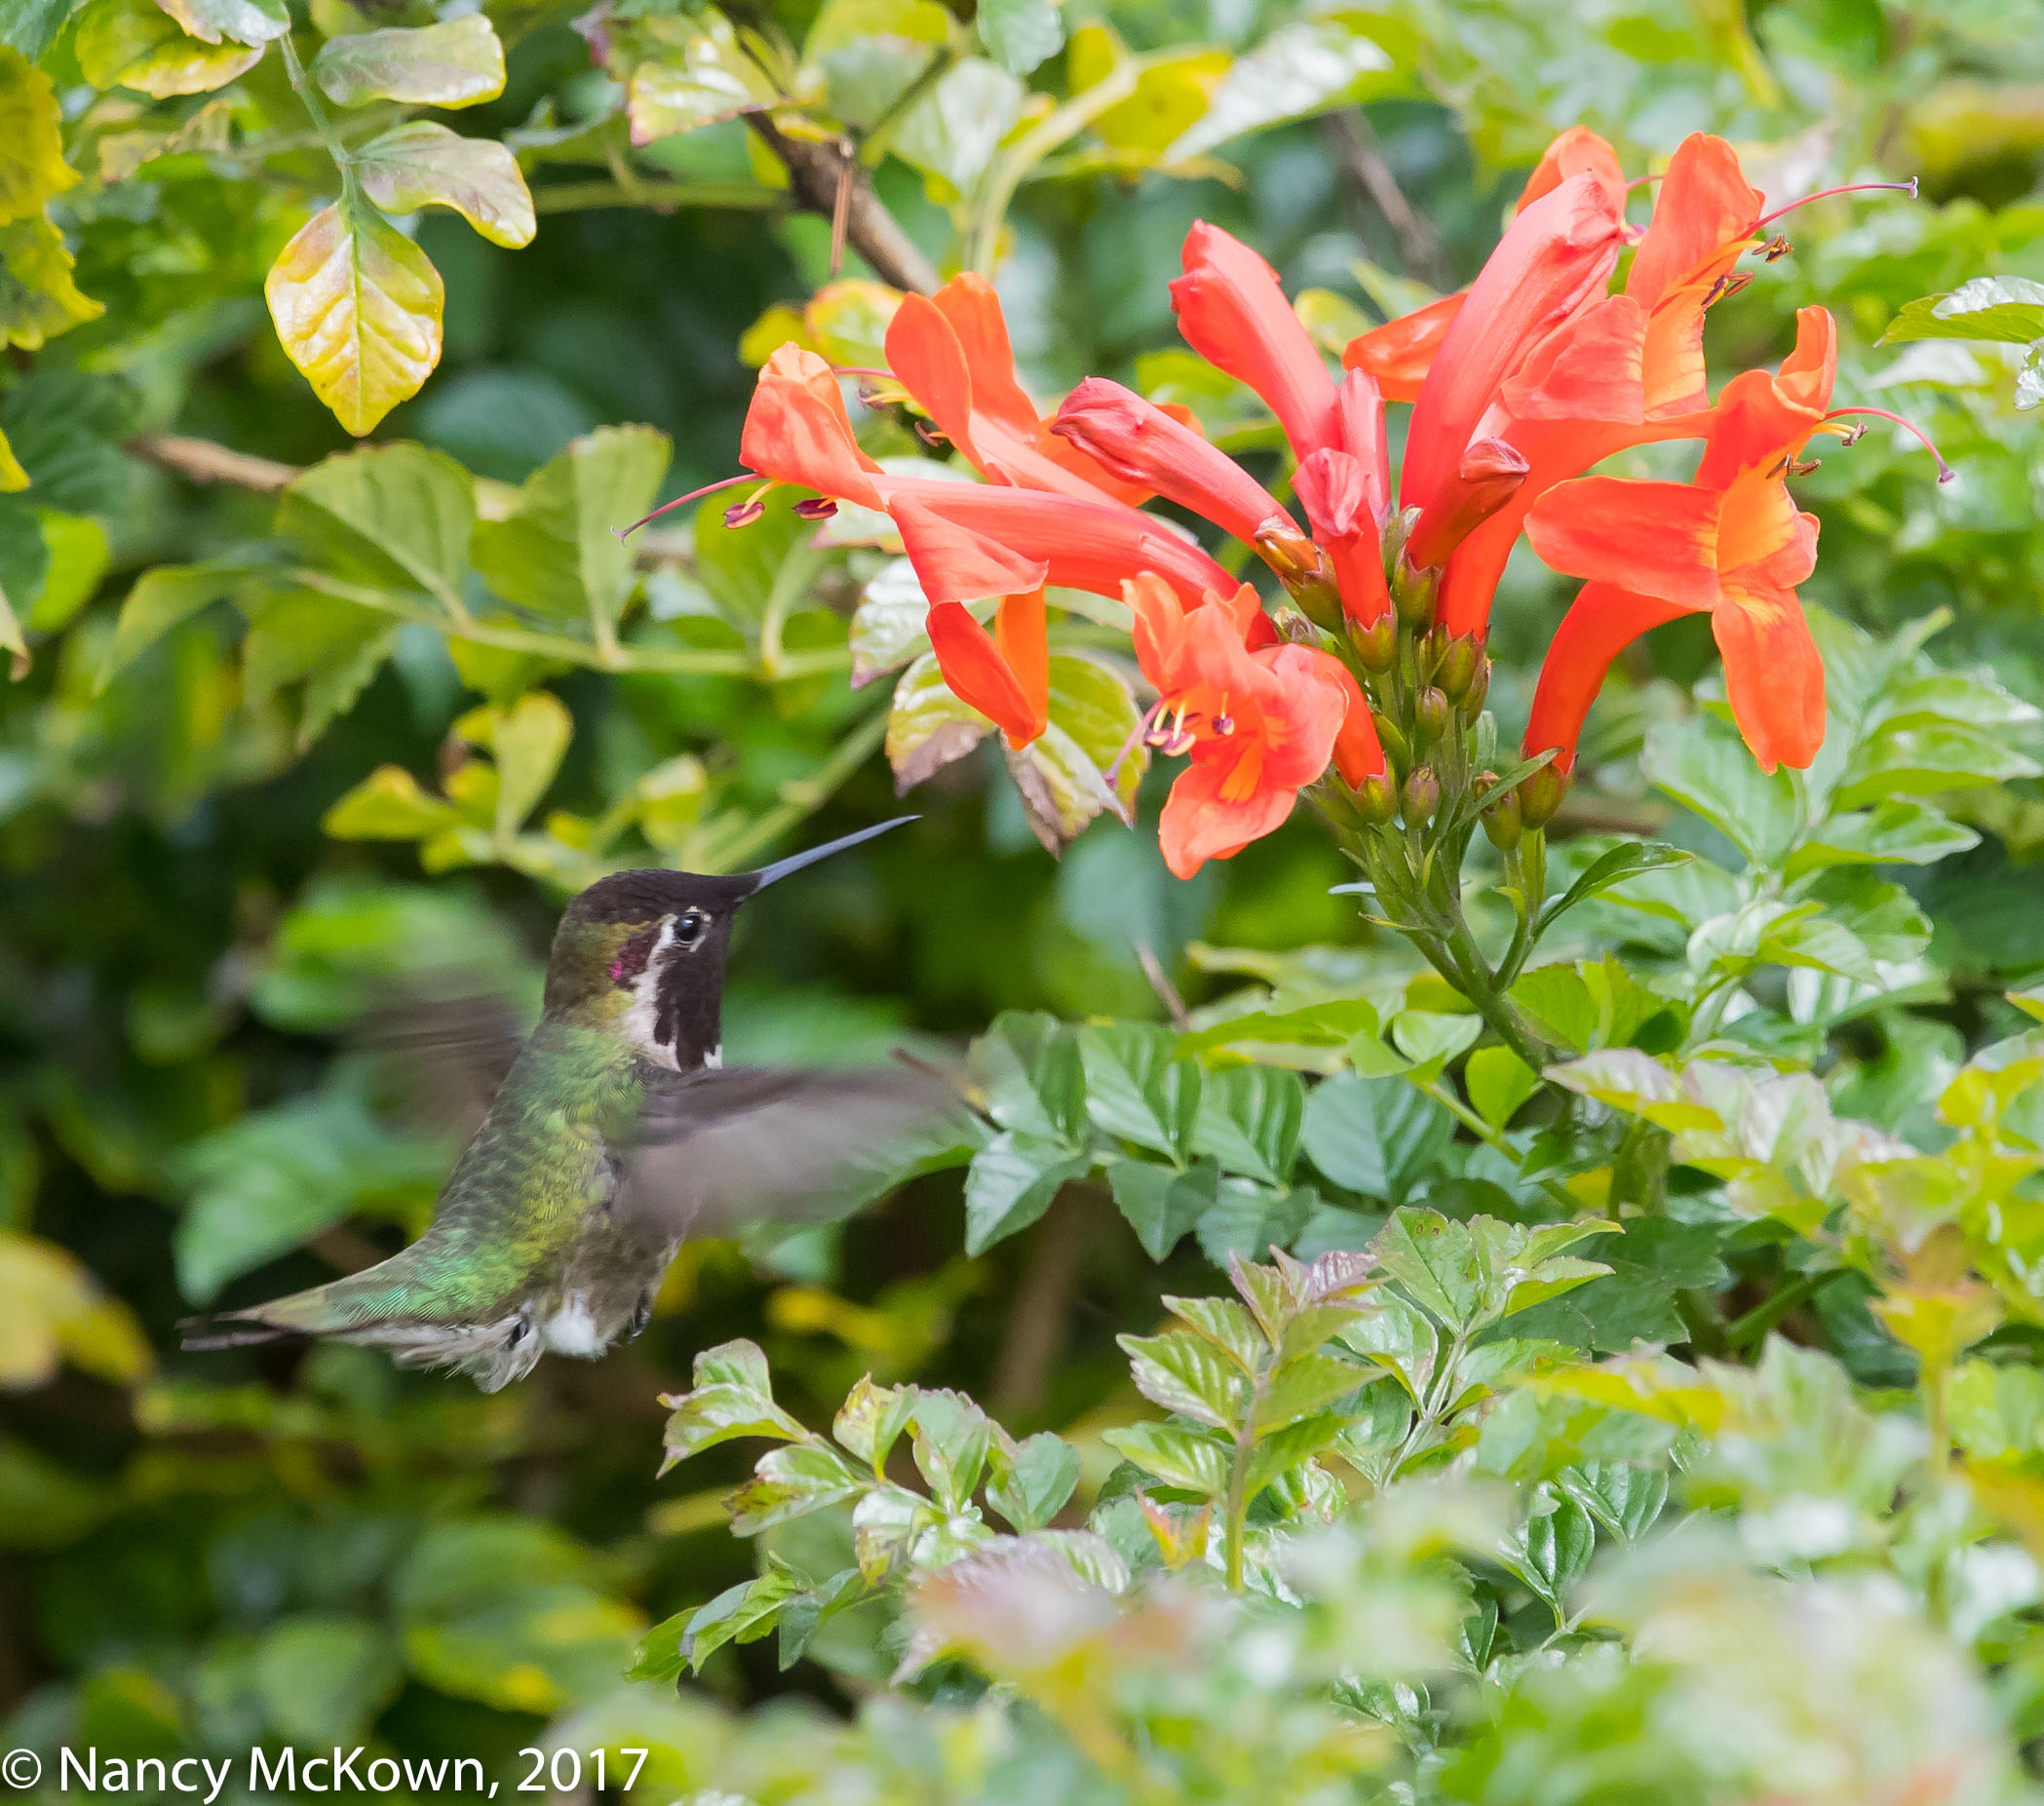
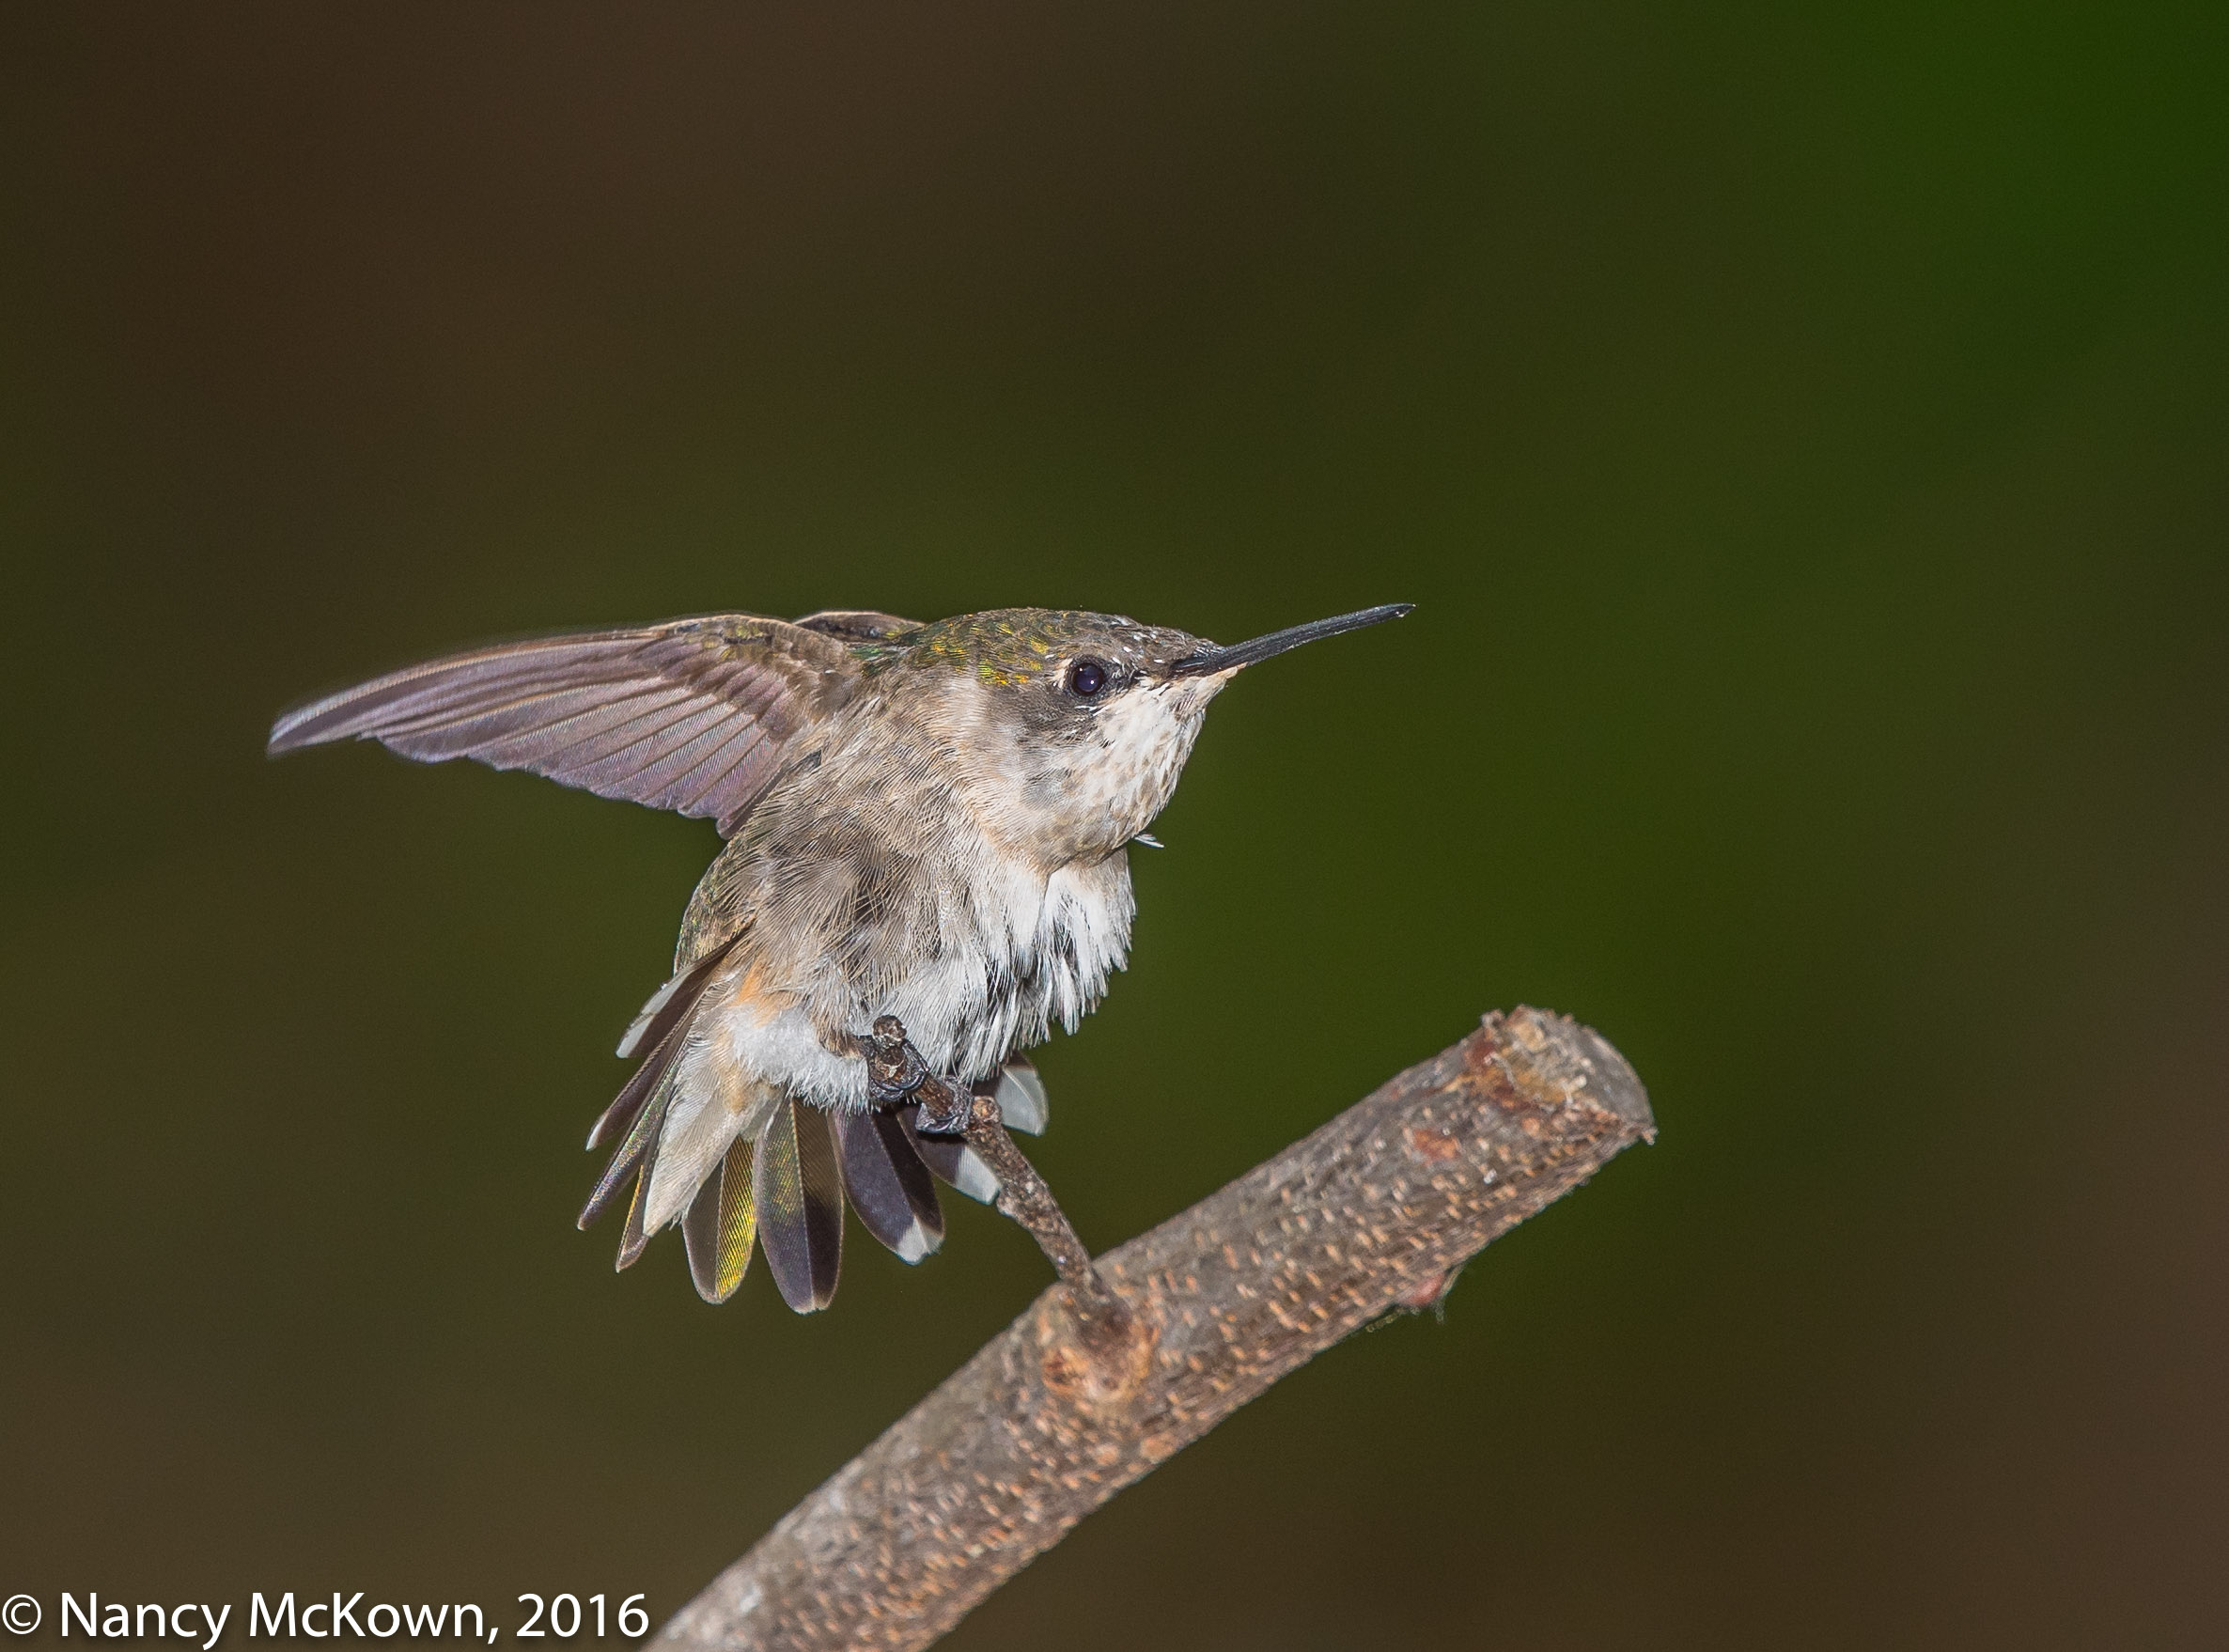
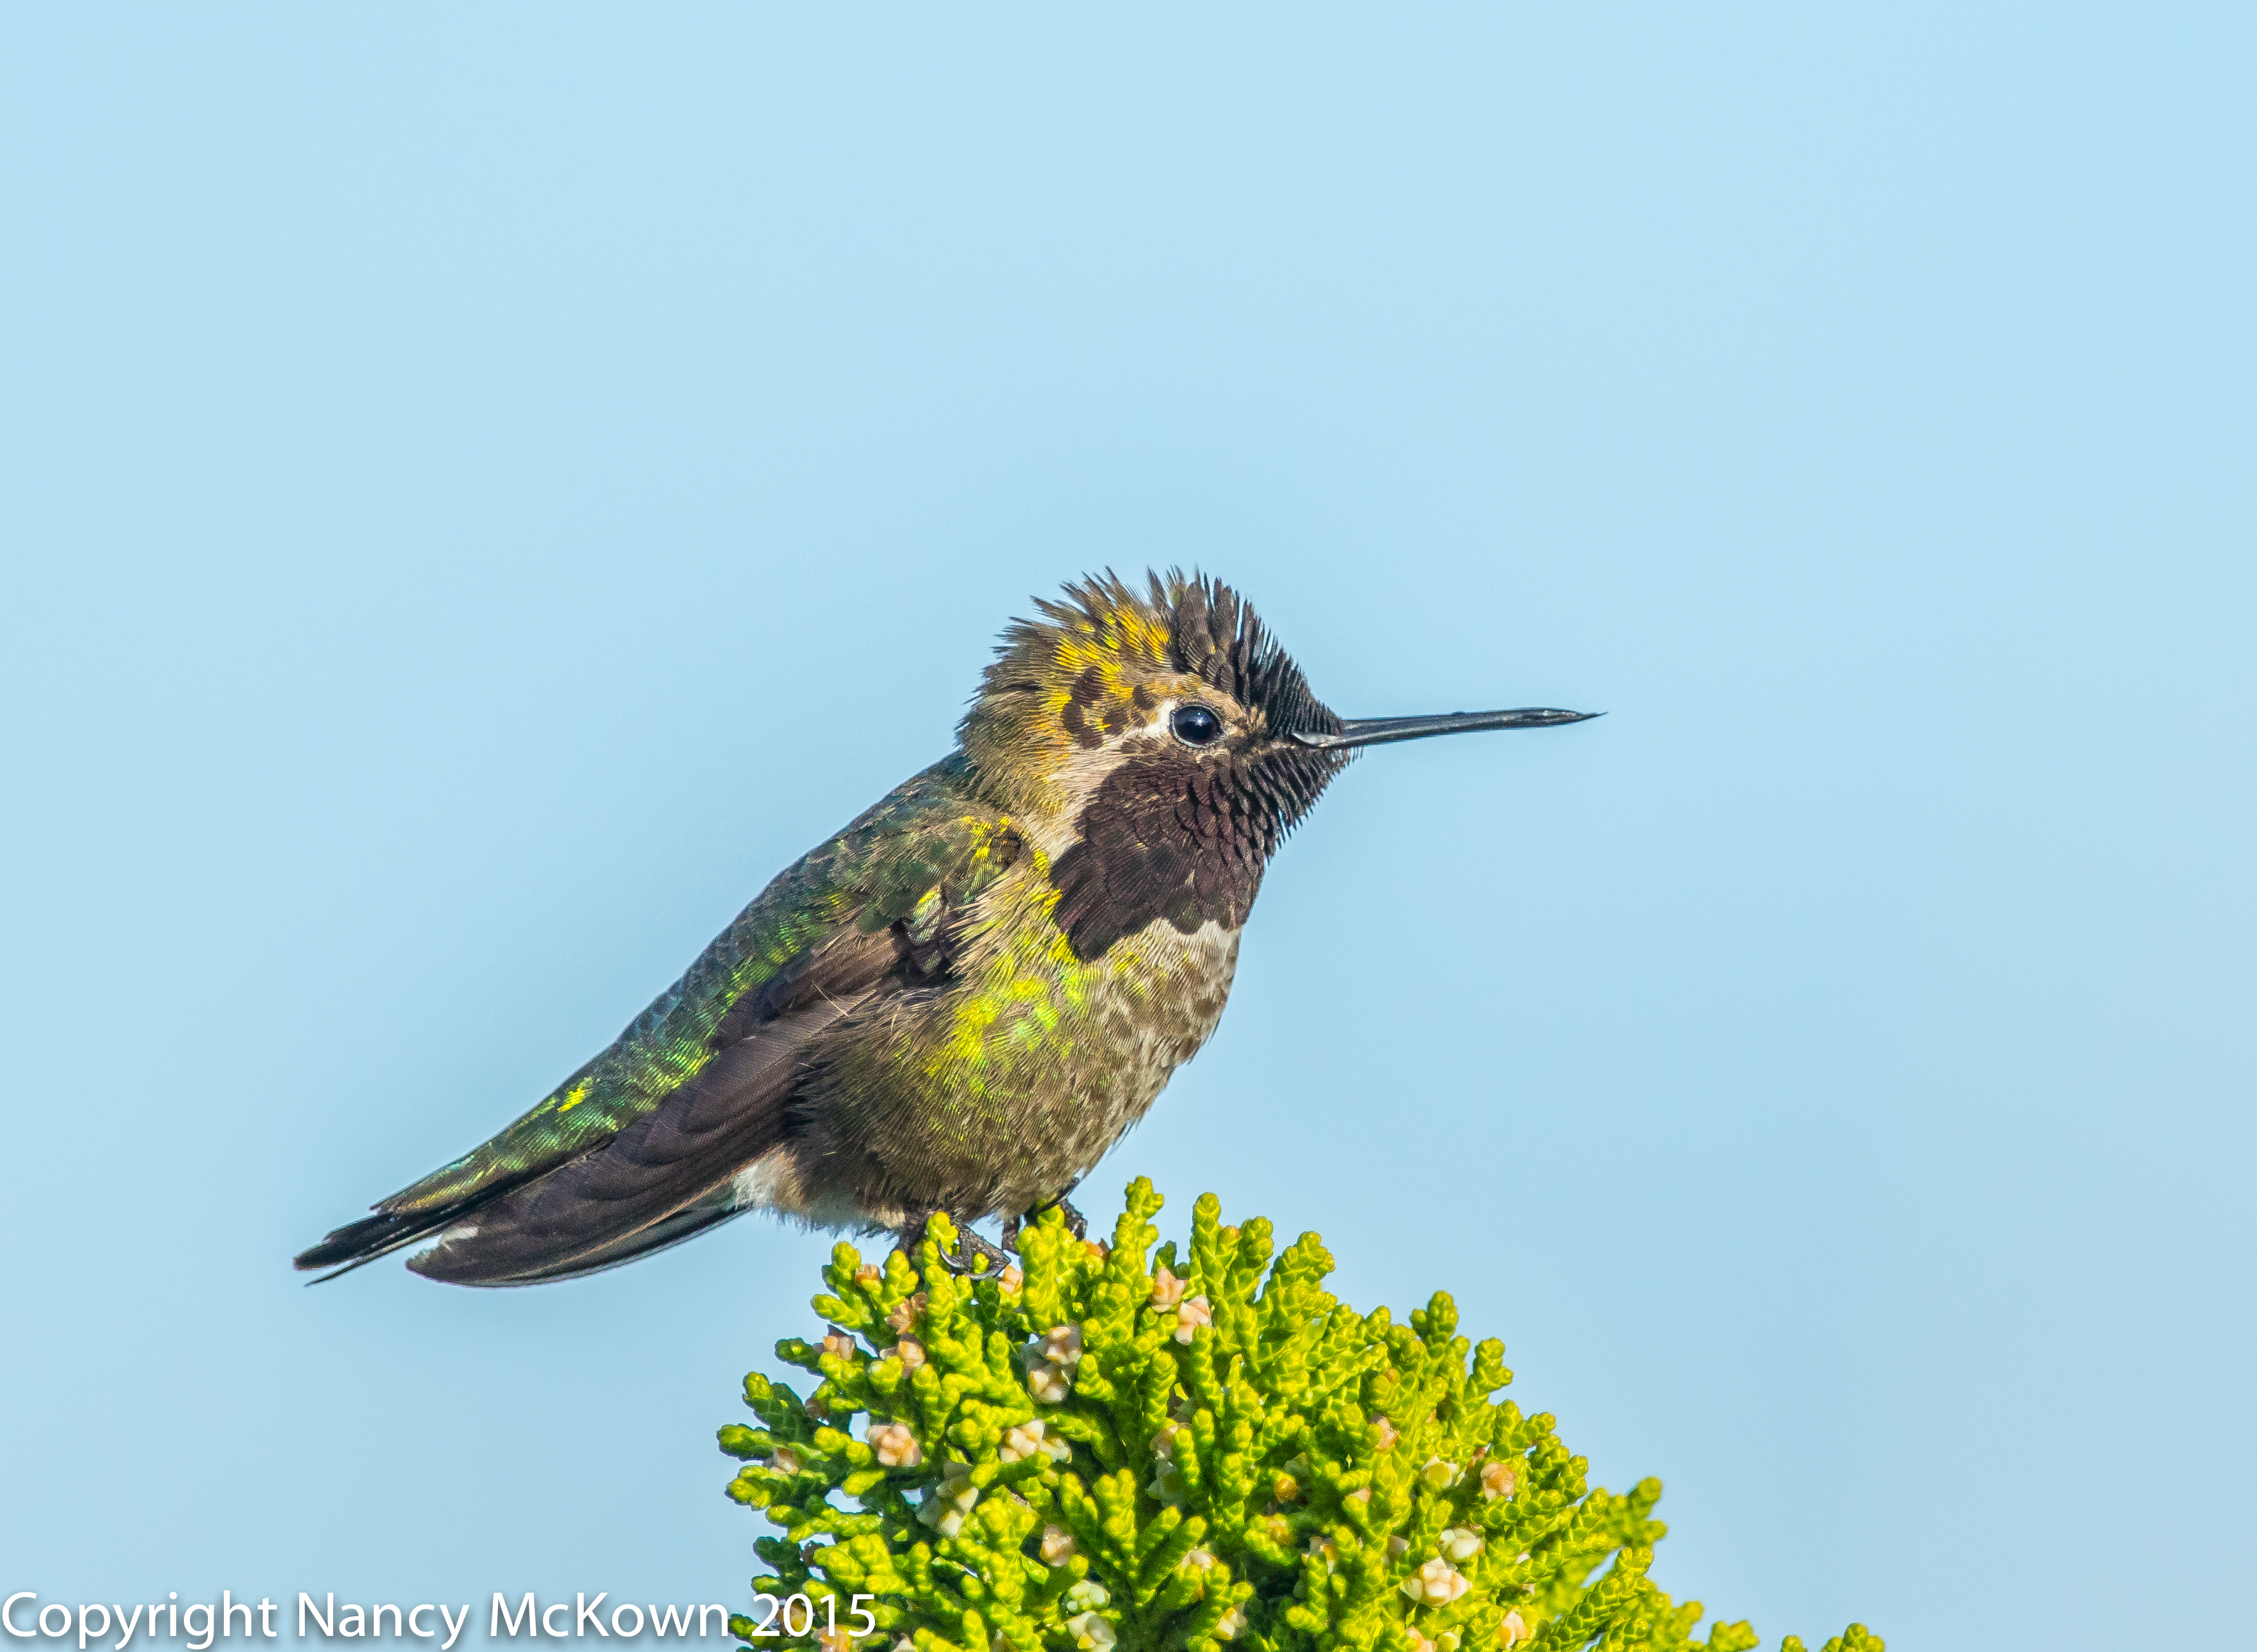
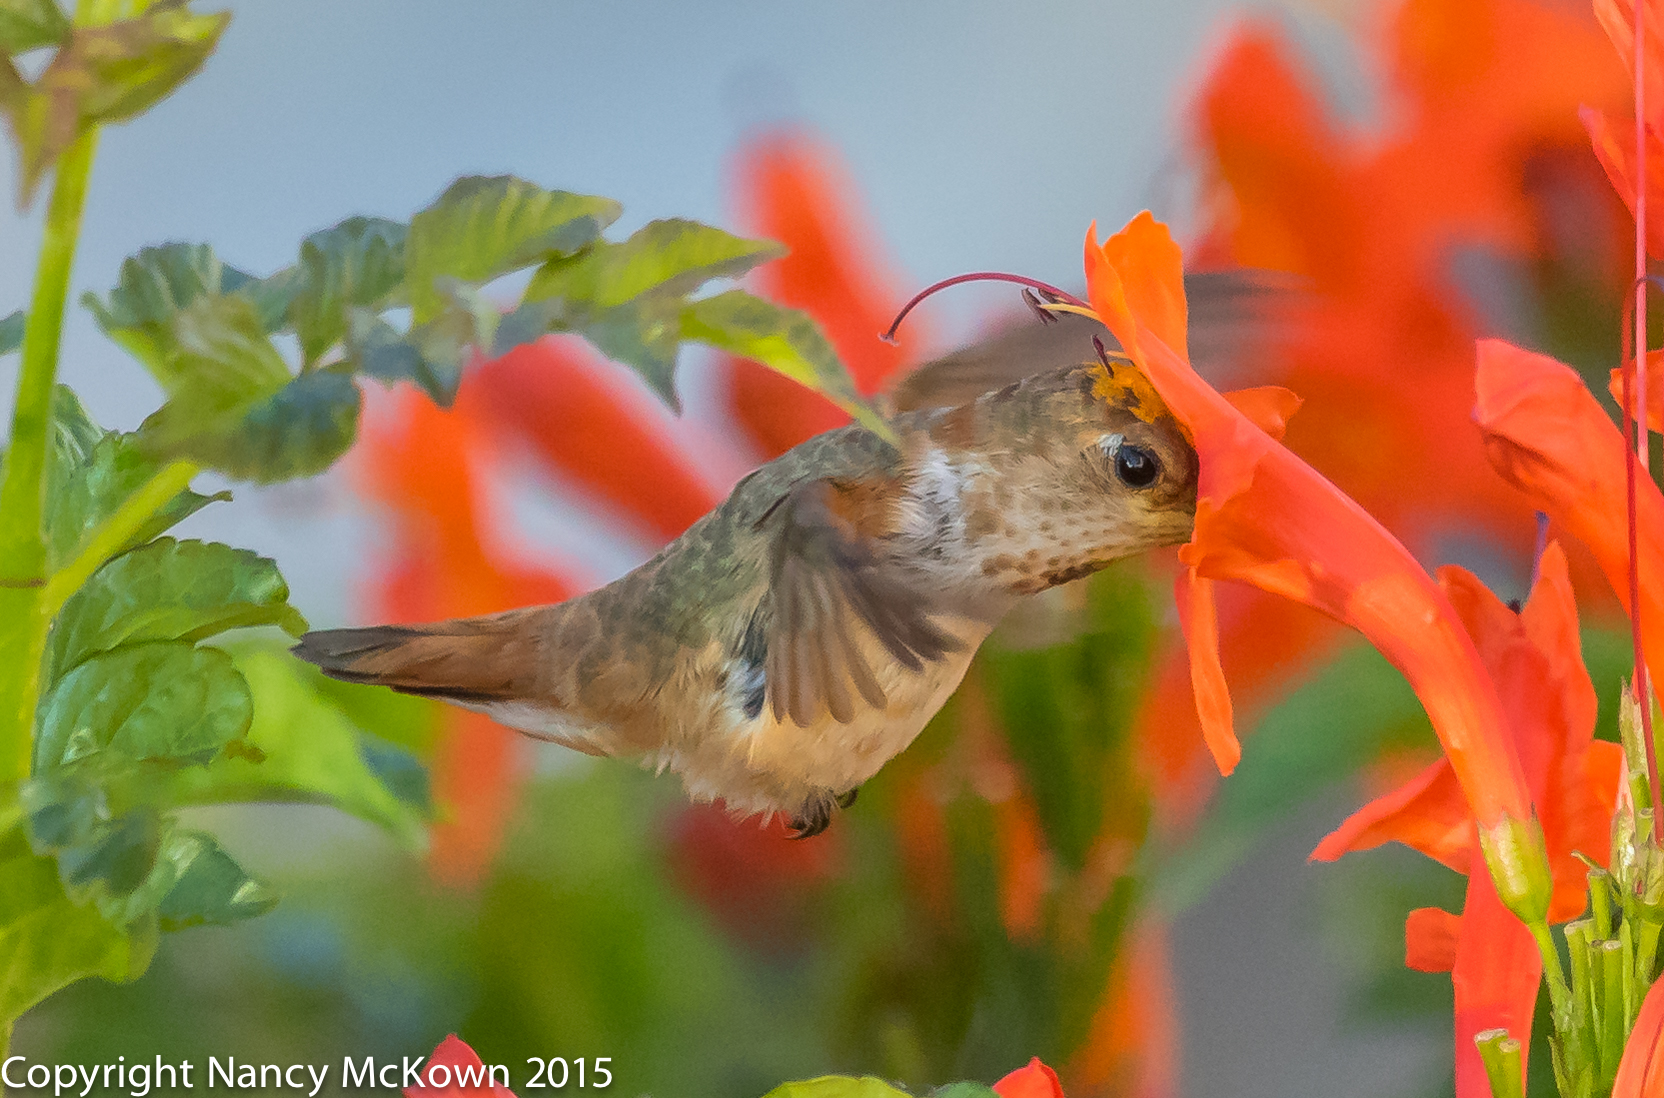
The Hummers never disappoint…. always flitting in and out, displaying, chasing, divebombing… ever watchful. They will continue their activities through September undeterred, no matter how close the camera and flash intrude into their escapades. Why these diminutive birds don’t feel the biological urge to rest before their long migratory journey ahead I’ll never know.

Ruby Throated Hummer
Hummers Let the Camera Get Close.
Female Ruby Throated Hummingbird.
ISO400; f/7.1; 1/250 Second.

August 15

I no longer hear the the cacophony of bird song that use to fill the air in early morning, even though migrators like Robins, Red Winged Blackbirds, Gold Finches, Song Sparrows, House Finches, Towhees, and Wood Thrushes are still around. No journey ahead for Titmice, Chickadees, Cardinals, most woodpeckers and doves. Is it more of a relief to stay through the MI winter or face the perils of migration?

I look around and note that the Gray Catbirds, Cowbirds, Phoebes, and Chipping Sparrows are not showing themselves in our yard anymore.

August 20

Glimpses of yellow flash around the fountain. Too quick to get an ID shot. We have a nesting pair of American Redstart Warblers so what I see may be the female. Both cameras are set up in different locations in the house. Soon I’ll have those windows open most of the day…..mosquitoes permitting.

August 25

Leaves are still green and heavy on the trees, making bird ID and tracking birds with a long lens very difficult. Cicadas are droning -alternately loud then fading. It’s hot and muggy here in SW MI. The windows are open to facilitate a clear shot and that makes for a damp and sticky house. I have the fans going to help keep out the mosquitos.

Sunny with a strong east wind today. I saw a Tennessee Warbler, a Red Eyed Vireo and one Merlin Falcon on Lakeshore Drive. Got in a couple shots to confirm ID but the resulting images were awful.

August 26

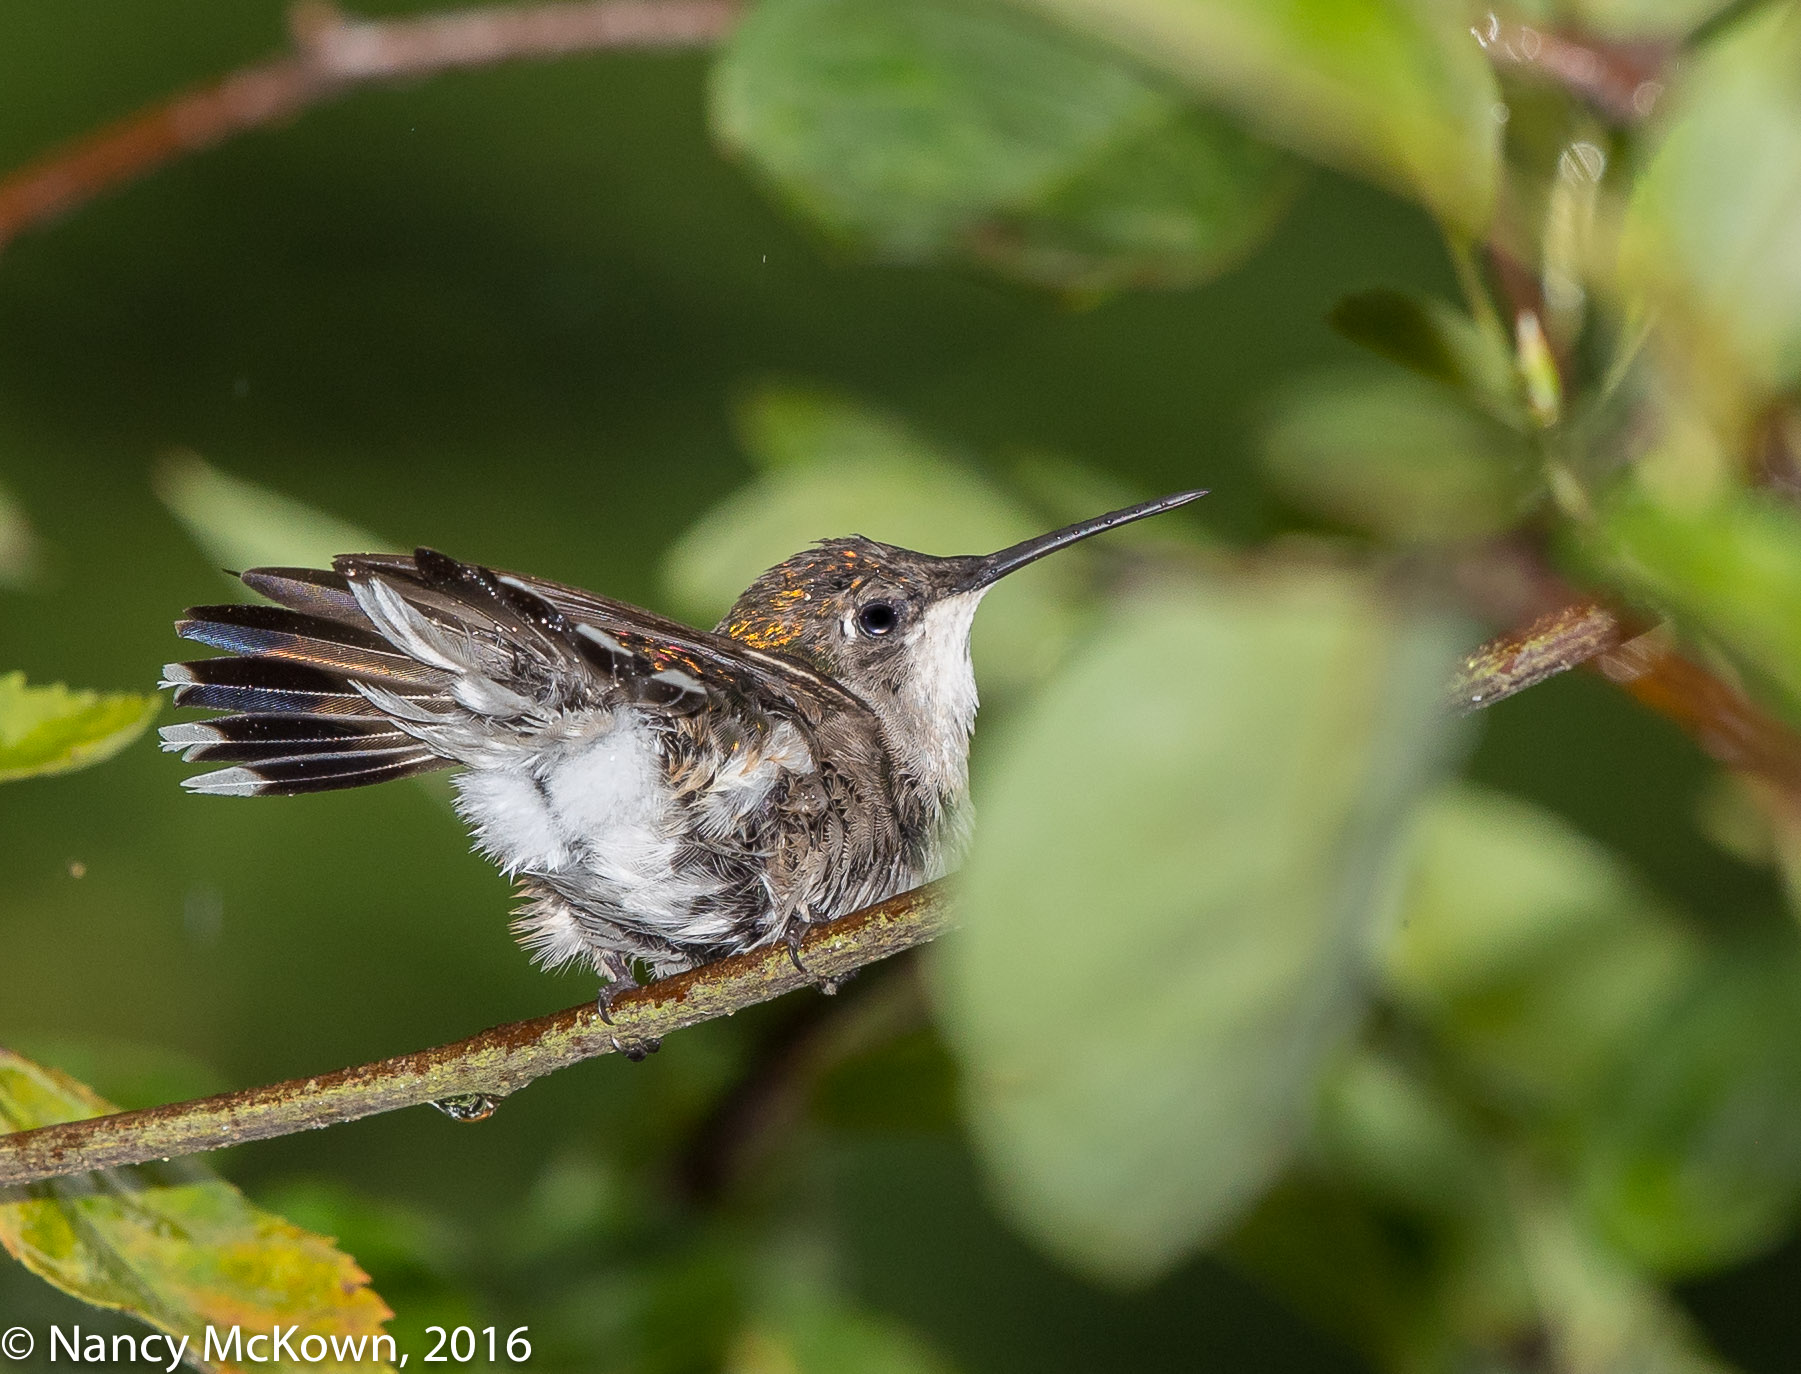
Spent most of the day watching, but only saw a Least Flycatcher peeking around in his hiding place in the Serviceberry tree. A few gold leaves have a tentative hold to their branches.

Least Flycatcher
Least Flycatcher, trying to Hide
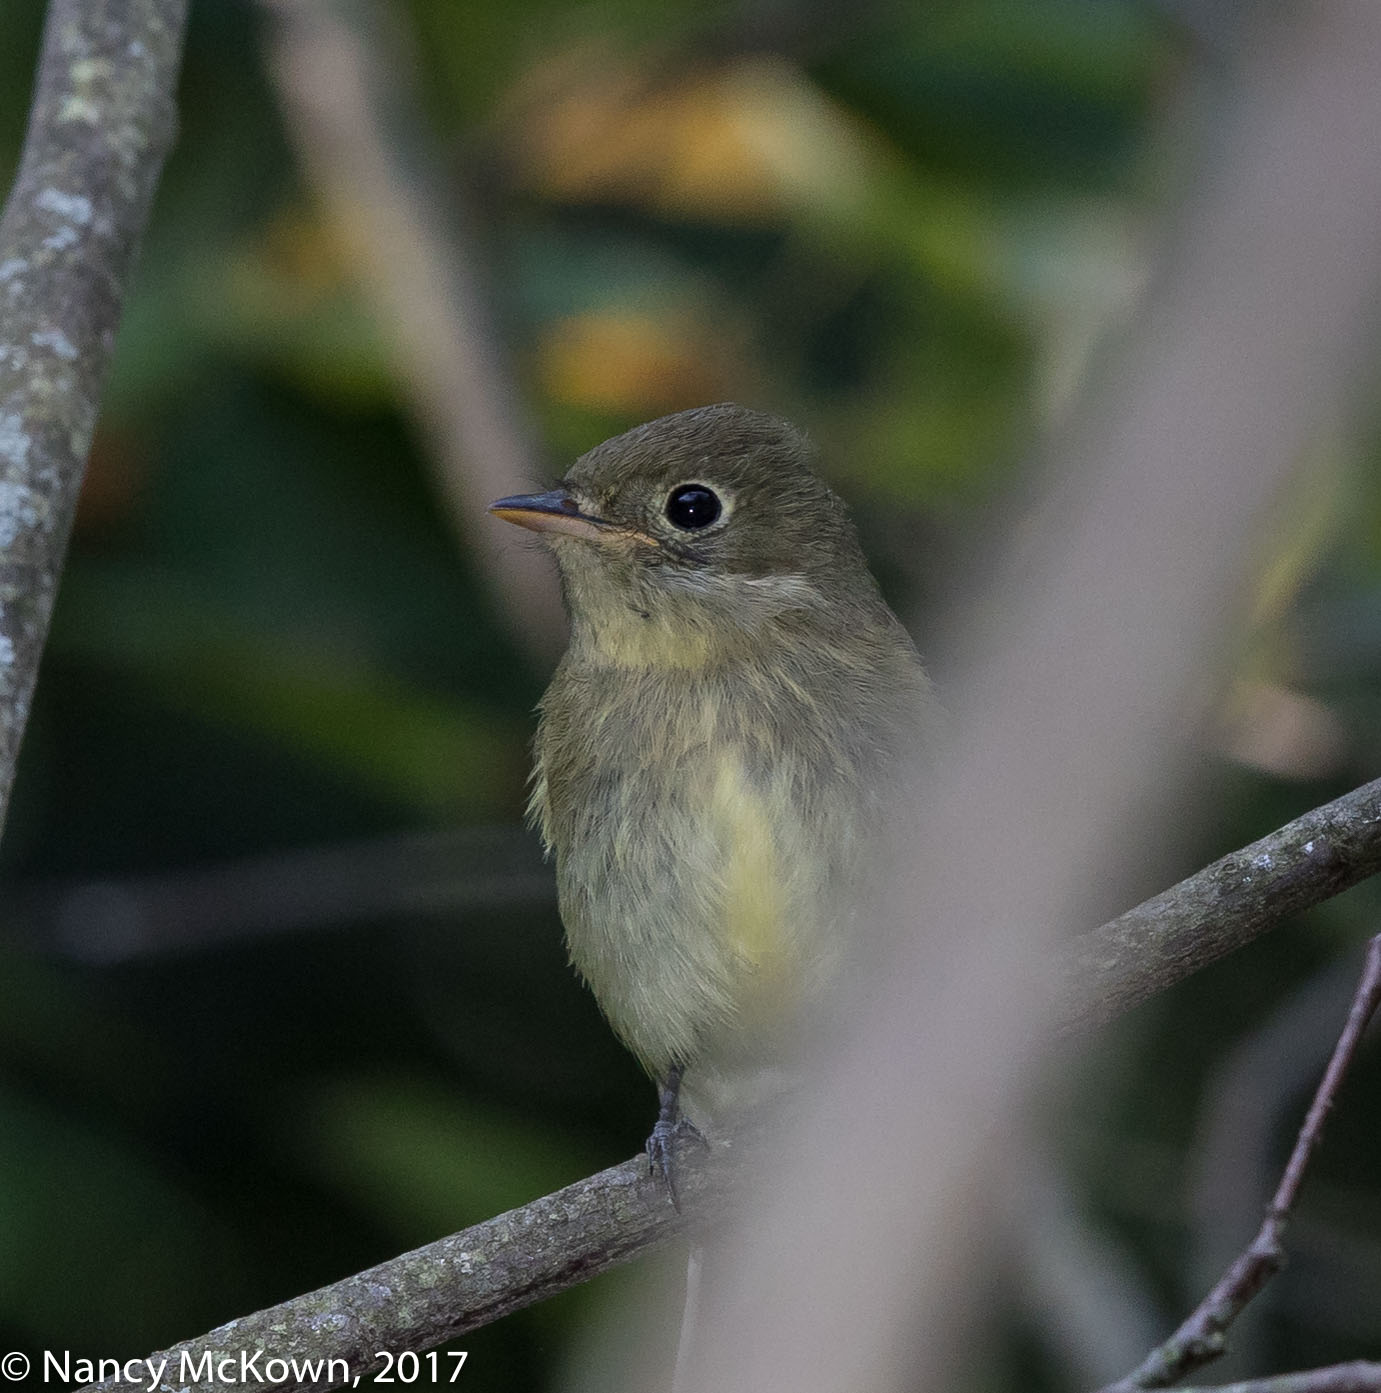
Deep within the Serviceberry Tree.
ISO1000; f/9; 1/250 Second

August 27

A rain storm –might it bring some traveling warblers down to the understory trees?  Two cameras on swivel tripod heads facing different directions in the library. I keep checking other possible warbler landing spots–like near the dining room, in back near the fountain or off the front porch. Thinking about relocating one of the cameras… but doesn’t make sense to keep moving the equipment unless I see more activity in that location. I can stretch myself only so far. Uneven cloud cover blankets the yard with intermittent light, mostly sparse. Each camera has a flash and telephoto extender attached. (I fiddled with the wires on my old Canon 580 flash with old Better Beamer flash extender. So far, it’s been working, although I don’t know how accurate the Flash enhanced exposure readings will be.) The rain tickles the leaves. So much movement to track even before I point the lens.

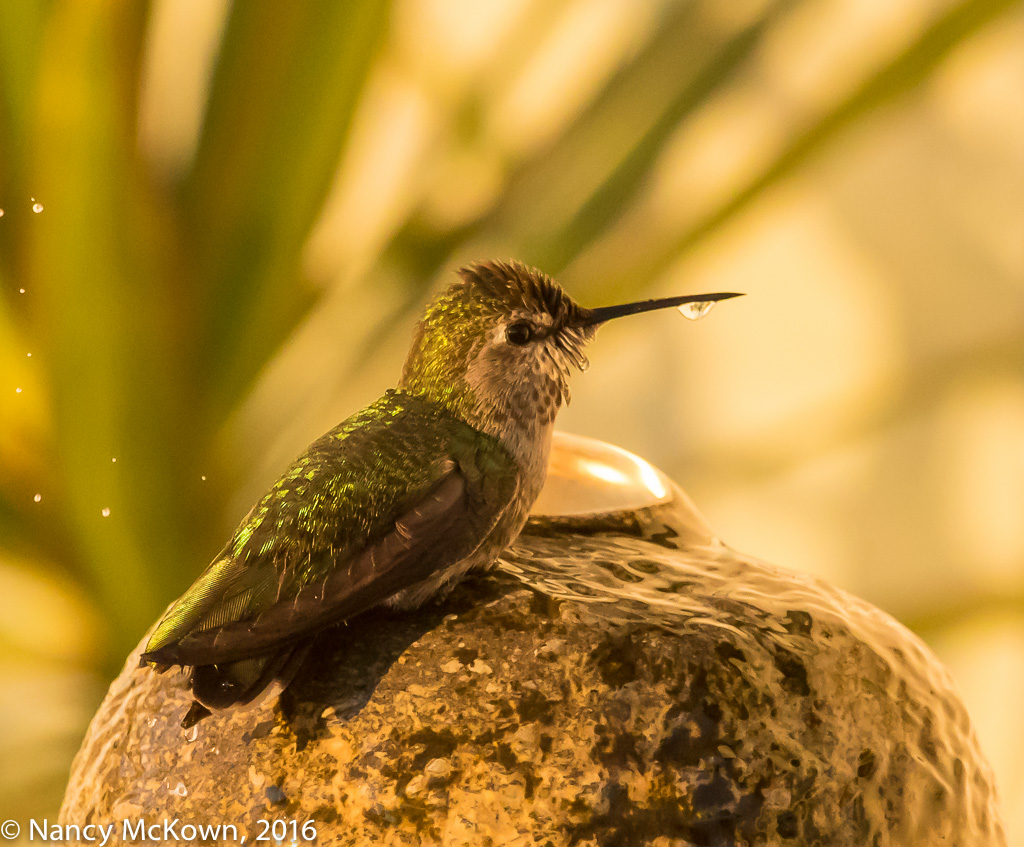
Last year on this date, two warblers were feasting on the bugs on the Serviceberry trees (A Black Throated Green Warbler male and a female Magnolia Warbler). This year I saw and managed a shot of a perky little Chestnut Sided Warbler. (See below. Female or first year male…so different looking than the mature males.)  The flash intensity was reduced to -2/3. (Surprisingly the flash blast doesn’t seem to worry the birds.)
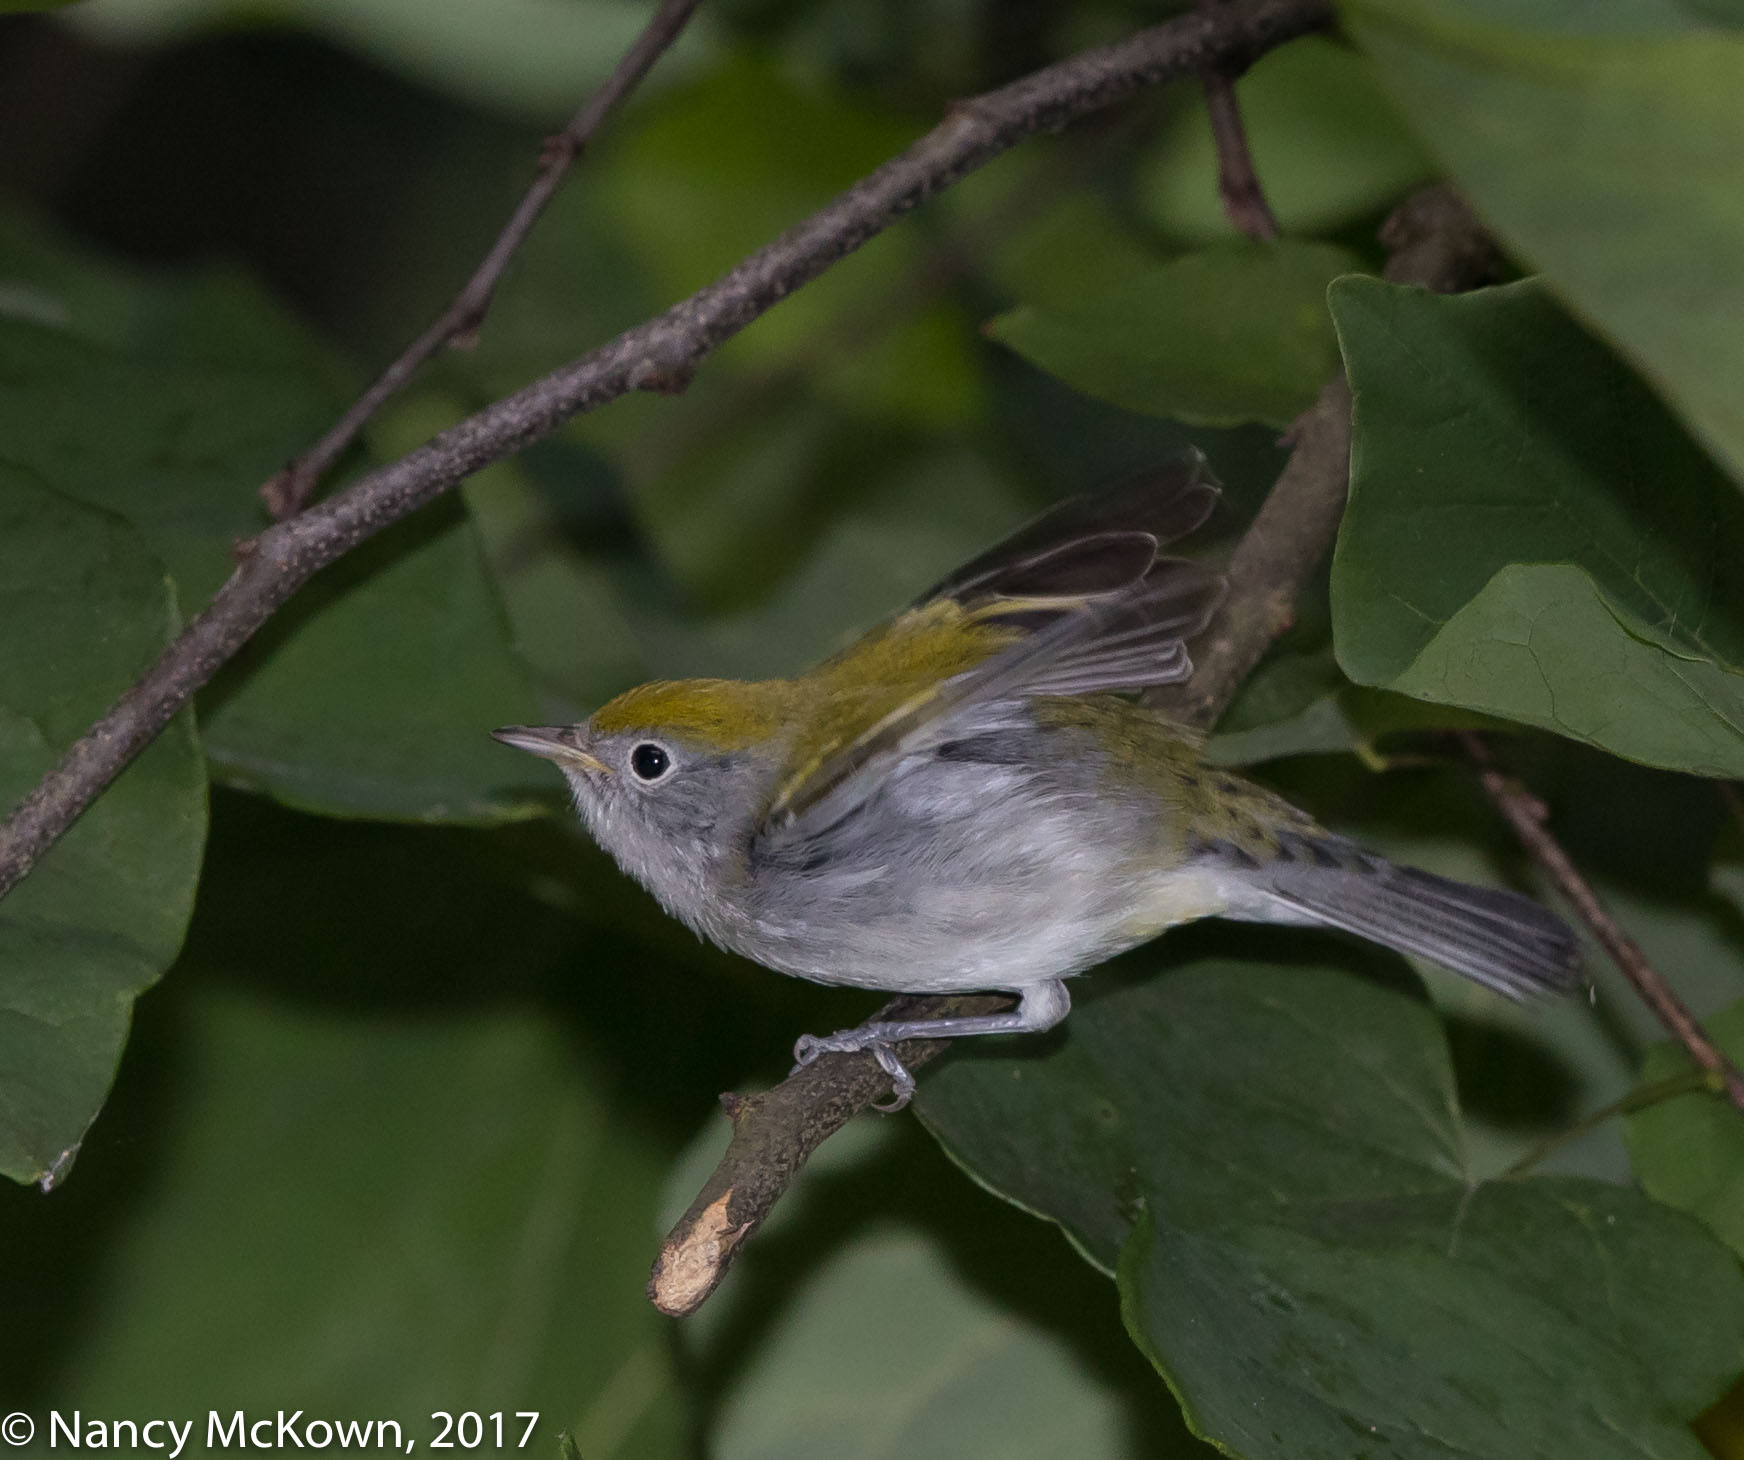
Female Chestnut Sided Warbler
Chestnut Sided Warbler
An Early Arrival
ISO1000; f/9; 1/250 Second

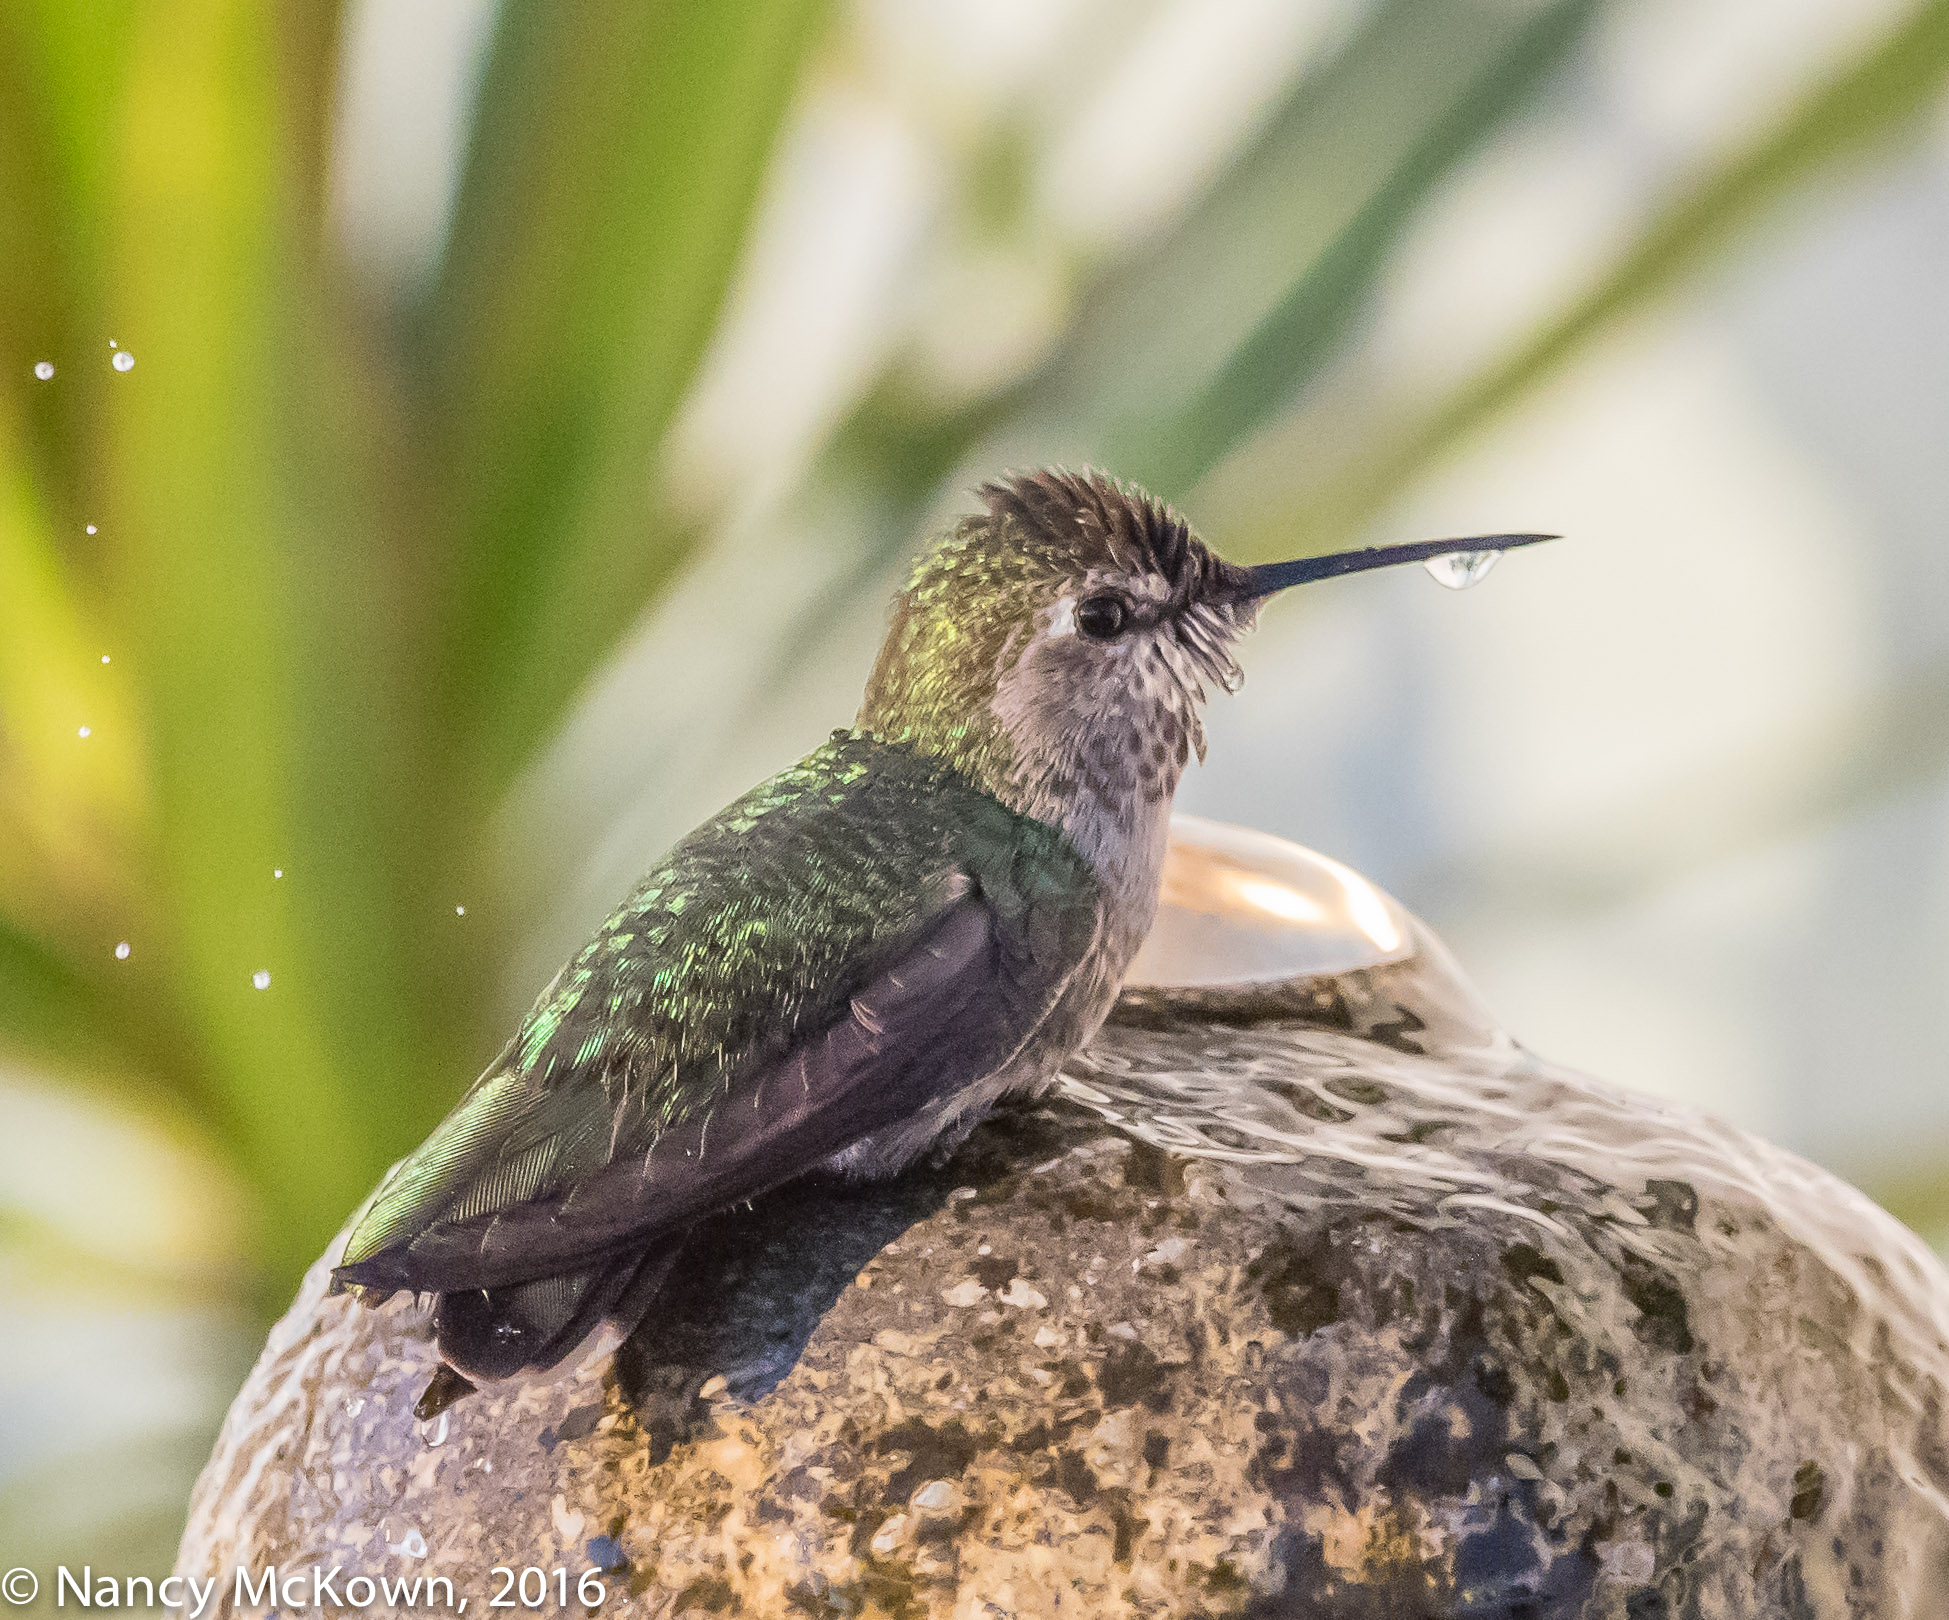
The usual birds are out and about….. Titmice, Blue Jays, Gold Finches, Downy Woodpeckers.  That’s good.  It seems that birds find comfort and safety in crowds…. much more likely to have a warbler sighting when there’s lots of other activity. I take a few shots of the oft photographed faithfuls/dependables to review the exposure settings and flash intensity. Keeps me going.

August 31

Keep hoping for a migrating newcomer, but no luck. I was happy to get ID shots of a Wilson’s Warbler and female Magnolia Warbler. I look forward to September… migration has only just begun.


Photographing Ruby Throated Hummingbirds Near the Crocosmia

Photographing Ruby Throated Hummers Near The Crocosmia

The Crocosmia (Lucifer) flowers…with their arching stems and bright green pleated blade-like leaves are showy and exotic-looking right now. The Hummingbirds are buzzing in and out, attracted to the intense scarlet red of the tubular flowers.

The flower clusters sport lots of blossoms which poke out every which way. Some of the blooming and almost blooming flowers reach out above the 3′ high stems, affording one or two places where the camera’s lens could isolate the delicate petals from the busyness of foliage.

My goal:  Set up the camera on the front porch, approximately 14-16 feet from the Crocosmia and try to capture an uncluttered image of a hummer very near, but not drinking from the flowers.

Photo of Female Ruby Throated Hummer
Ruby Throated Hummingbird, Female.
With Fill Flash
ISO1000; f/9; 1/250 Second

Judicious Cropping

This grand Lucifer patch is too lovely to prune so I have to manipulate the camera rig in to just the right position, and perhaps gingerly fold or tuck a few of the stems to one side or the other. (NOTE: Most of the judicious cropping will have to be done in post processing.)

Hummingbirds appear confident and fearless once they get used to you. My plan required that the hummers cooperate by choosing one of the designated patches of flowers upon which to drink and pose. After only a day, this little one zoomed in close to my face, chittering away as she looked me over. She then proceeded with her nectar drinking routine..sip-back away-hover-look around-repeat.

Flash or No Flash

The morning light was filtered by the fully leafed-out tall trees above and around the house.  As I set up, I noticed that the wind appeared uncertain about its direction and intensity. The hummers didn’t seem to care, but an unexpected gust would certainly impact my efforts to achieve image clarity.

To stop wing motion on a hummer (without flash), I have had to set the shutter speed to as high as 1/6400 second. (NOTE: Think about how fast that is! I remember when the shutter speed on a couple of my old cameras did not go above 1/1000 second.) Setting the shutter speed that high in our sun filtered yard would send the ISO soaring to unacceptable levels. I attached the flash.

Stopping wing motion with flash requires that I set the exposure parameters to shoot with little or no ambient light. With the flash attached, the shutter is synced at 1/250 second or slower. The more I tightened the aperture, the less the ambient light creeped in – the darker the background became. It would then be up to the synced, instantaneous and powerful flash burst to not only illuminate, but freeze all movement.

Ruby Throated Hummer
Female Ruby Throated Hummingbird
With Fill Flash.
ISO1000; f/9; 1/250 Second

More Ambient, Less Flash

I have to choose between freezing the hummer’s wing motion or maintaining a more natural look. An exposure conundrum because I can’t have both. The more ambient light I let in, the more natural the image looks, and the more impossible it becomes for the flash to freeze the wing action. This is especially true if the overall ambient light illuminating the flower and bird scene meters out to be very similar to the exposure settings required for the background.

For this shoot, I raised the ISO settings in order to let the ambient light on the scene dominate exposure settings more. This strategy helped reduce the impact of the flash blast on the subject, creating a better balance of light.

Ultimately, I liked the look of ambient light more than I liked the look of tack sharp wing feathers. I chose to set the exposure parameters so that ambient light dominated and the flash provided only fill light.

Photographing An Anna’s Hummer — Long Lens Polarizers

Photographing An Anna’s Hummingbird

Bird photography opportunities rarely come at times when the light is optimal.

These images of an Anna’s Hummingbird were captured in sunny San Diego at mid-day. The camera and 300mm lens with 1.4 extender were pointing downward toward a row of flowering bushes. I took a few shots using only the drop-in gelatin filter that came with the lens. (See image directly below.) I then removed the gelatin filter and dropped in Canon Circular Polarizing Filter (PL-C52). It took a while for my hands to get used to positioning the filter with the external control rotation wheel. Eventually I got the hang of it.

What a difference! (See second image below.)

Anna's Hummingbird
Anna’s Hummingbird
Mid day Sun Overhead. No Polarizer on Lens.
Colors are Muted. Image Looks Washed Out.
Lots of Flare and Glare on the leaves
ISO1000; f/6.3; 1/500 Second

(NOTE: This drop-in circular polarizing filter will fit in both of my telephoto lenses – the EF300 f/2.8 L IS II and the EF500mm f/4L IS II.)

Long Lens Circular Polarizers

A polarizer manages reflections and cuts glare in much the same way as polarizing sunglasses do.

  • A polarizer will reduce the amount of light reaching the sensor and impact your exposure settings (from 1-3 stops).
  • Circular polarizers have dials which must be rotated to optimally cut glare. As you rotate the polarizer, your goal is to dial-in the best color saturation and contrast and dial out reflection and glare. The end result should be more balanced light on the scene. (NOTE: You simply can’t do this much glare reduction in post processing).
  • If a bird flies to a shady spot– a no glare zone– the polarizer does not negatively impact the image, except for light loss.
  • Wearing polarized sunglasses while using a circular polarizer on your lens will prevent you from seeing all the leafy glare and rotating the filter optimally. In addition, polarized sunglasses on top of polarized drop-in filter make for dark and difficult viewing.
  • Polarizers are most effective when the lens is pointed at a right angle to the sun. Depending on the location of the bird and the angle of your lens, the polarizing impact may not be uniform across the whole image.
  • Because you must dial in the best position for optimal glare control, composing may take longer. (NOTE: Repositioning the polarizer was a constant battle as this hummer flitted up and down forcing me to change the len’s trajectory and re-rotate the polarizer’s dial.)
  • Linear polarizers are cheaper, but won’t work with auto exposure and auto focusing functions– making them pretty useless for bird photography.
Anna's Hummingbird
Anna’s Hummer
300 mm lens with 1.4 extender
and Circular Polarizer Inserted.
Did Not Remove All Reflections
But the Image Looks Much Better.
ISO1600; f/7.1; 1/1000 Second

Lens Flare and Lens Glare

Lens flare is no more than stray light (usually unintentional and undesirable) sneaking in and bouncing around the inside of a camera lens and leaving on your images an assortment of light specters, streaks, fogging and ghost images shaped like the diaphragm of the lens. Lens Flare is almost always a consequence of backlighting coming into the lens. To control or otherwise reduce flare, you either move the lens or attempt to shield it, using a hood on the lens barrel, your hand, your hat, or a polarizing filter.

Glare is reflected and scattered light on the surface of water, leaves, flowers, glass, bald heads, etc that does not necessarily originate from the lens.

Filters On A Long Lens

In all my long years as a photographer, I never purchased a polarizer or any kind of filter for my lenses, until now. I assumed that these tools were better suited for landscape photographers even though I often found unbalanced light and shimmery glare on my bird images. I should have known better.

Soft, diffused natural light is elusive….even when you show up at the right time and follow all the rules. Too much mid-day unshielded sunlight... contrasty and harsh, is impossible to avoid and hard to control without proper equipment to make shade or reduce shadows.

You can’t purchase filters large enough to put on the end of Canon’s big telephoto lenses. Most of Canon’s longer telephoto lenses come equipped (close to the base of the lens) with a drop-in gel filter holder (with a clear glass filter installed). Quality drop-in circular polarizers are expensive, and only useful on longer lenses.

Bottom line, the best quality of light for bird photography is still sun rise or sun set. However, opportunities abound for bird photography at mid day.  A polarizing filter is a good light weight solution to tame the sun.

Photographing the Ruby Throated Hummingbird – Guarding Food Sources

Photographing the Ruby Throated Hummingbird

Ruby Throated Hummingbirds are plentiful in our yard and feed on a wide variety of small insects, spiders, sap and nectar. They linger into early October before commencing on their migration journeys. During Spring and Summer, these tiny birds are commonly seen on and around feeders making them relatively easy to photograph.

Guarding Food Sources

Every time I photograph birds in our yard, I always notice one or two aggressive Ruby Throated Hummingbirds acting like bullies around a hummingbird feeder. This behavior can be described as territorial and takes the form of menacing, purposeful, greedy dive bombing of other hummers who attempt to drink from the same hummingbird feeder.

Photo of Ruby Throated Hummer
Ruby Throated Hummingbird.
An Aggressive Pose.
ISO400; f/9; 1/250 Second

On this particular shoot, an aggressive female unconcerned with me established herself on a camera level perch very close to the feeder. She spent the whole morning standing guard, watching, waiting, only occasionally coming to the feeder for a quick drink. I also managed to photograph another female hummer (see photo below). She crouched down in the wet foliage to hide and watched for an opportunity to sidle past the sentry and sneak in for a drink at the feeder.

Ruby Throated Hummer
Ruby Throated Hummingbird.
This non aggressive Individual
is Watching and Waiting for her
chance at the Feeder.
ISO400; f/9; 1/250 Second

Some (Anthropomorphic) Observations of Aggressive Hummer Behavior

  • The aggressive Hummer (either male or female) will defend food resources relentlessly, so much so that I wonder when they find the time to get enough nourishment for themselves.
  • They are not afraid to insistently confront humans when their feeders run dry.
  • They choose a “watchtower” perch near the feeder that provides the best vantage point from which to watch for trespassers.
  • They create a “no fly zone” into which all other hummers are considered trespassers. If another hummer gets too close, they initiate an attack.
  • This aggressive behavior includes: loud chittering, tail and wing displays, dive bombing, pursuing the interloper until he is out of the designated territory,  aggressive ramming using their chests, sharp beaks, and claws.
  • These individuals guard their food source all summer, right up to the time they leave on migration.
  • Solutions to this behavior include clustering multiple nectar feeders in one area or widely separating them….. making them impossible for one individual to police.
Photo of Ruby Throated Hummer
Ruby Throated Hummingbird
ISO400; f/9; 1/250 Second

There were plenty of opportunities to photograph the hummers on the feeder, but where’s the challenge in that?  I wanted to capture some hummer flight action– but for the most part, the dizzying speed and agility of these little birds left my tracking abilities in the dust. I did manage to capture the aggressor hovering over the feeder in between dashes to and from her watchtower perch.

Hoping for a Vagrant Hummer to Visit

As I sit and watch the birds, I keep hoping I will see and photograph an uncommonly seen species of hummer as she passes through our yard in the Fall or Spring. The most likely species for Southwest Michigan would probably be the Rufous Hummer. More rare and accidental spottings have been documented in Michigan of the more elusive Broad-billed Hummingbirds, the Green Violet-ear Hummingbirds, and the White-Eared hummingbirds.

It could happen.

Photographing a Anna’s Hummer Bathing – Lightroom’s “Auto” White Balance

Photographing An Anna’s Hummer Bathing

It was early in the morning in San Diego with the sun (my only illuminate) rising fast in the sky. We came upon a small house decorated with a bubbling stone bird bath pushed up close to a creamy stucco wall. A dozen or so palm fronds leaned against the wall, their green and brown shoots mingling with the creamy wall and creating distracting shadows on my background. Two bathing Anna’s Hummingbirds darted in and out of the gushing water. My presence did not disrupt their activities, so I positioned myself so the sun was slightly to my left. White balance on my camera was set to “Cloudy” (as usual), to bring out the warm tones that I prefer.

Photo of Anna's Hummingbird
Anna’s Hummingbird in
Early Morning Light.
ISO2000; f/7.1; 1/1600 Second

“As Shot” White Balance Setting In Lightroom

In post processing, I try not so much to accurately reproduce the color temperature, but to create a pleasing balance between warm and cool tones. The first image (above) illustrates how the camera interpreted the “Cloudy” white balance setting. (NOTE: To bring out the detail, I had to heavily adjust the highlights and shadows sliders in Lightroom.)

I generally like the golden tones I get from the “Cloudy” setting, but the color cast in these photos looked very unnatural to me-a gaudy and unpleasant yellow.

In Lightroom, I corrected these brassy colors by changing the “As Shot” white balance setting to “Auto”.  As you can see in the second image below, “Auto” rather drastically neutralized the color temperature to a cooler and, to my eye, a more natural and pleasing tone. 

NOTE:  Sadly, no matter what white balance color hue I chose, the bird’s chin and breast area closely matched its stone perch, making the subject rather indistinct from its surroundings. 

Photo of Anna's Hummingbird
Anna’s Hummingbird.
Same Photo as Above,
Using Lightroom’s “Auto”
White Balance.
ISO2000; f/7.1; 1/1600 Second.

Color Tint and Temperature

White Balance allows you to choose how the camera sees the color temperature. (Almost all cameras have an “auto” white balance setting, allowing the camera to guess at the color of light appropriate for the scene.) The “goal” of setting the white balance is to customize color tint and temperature to get an image with a specific color tone. It can be warm, neutral or cool; as true-to-life or as unorthodox as you want it. White balance settings allow you to paint with the hue of light you prefer and cast the mood appropriate to the image.

Trust Your Creative Judgment

Assuming you shoot in RAW and are photographing birds using only sun light (not a mix of natural and artificial light) Lightroom’s AUTO white balance setting generates reliably good results. If you want to experiment further, Lightroom and most other post processing software offer the resources to fine tune from a wide variance of color temperature and tints, no matter how white balance was set on the camera.

When reviewing your bird photographs, take the time to become more discerning about how temperature and tint of light affect your images. Most of all, trust your creative judgment.

Photo of Anna's Hummingbird In Flight

Photographing the Anna’s Hummingbird

Photographing the Anna’s Hummer in SanDiego

Hummingbirds are fascinating to watch and photograph, especially when the light is just right and the camera catches their shimmering iridescent colors sparkling in the light.

Photo of male Anna's Hummingbird
Male Anna’s Hummingbird
ISO 640; f/6.3; 1/3200 Second

Feather Science

When the light hits on the microscopic structures on the surface of the male hummer’s feathers, it breaks up into its component colors (just like it would on a prism). On a sunny day, amplified iridescent reds, blues and purples are refracted back to the human eye. The intensity of these colors vary, depending on brightness of light, the angle of light, the movement of the feather surface, and whether the hummer is displaying his breeding or non breeding plumage.

Photographing the Light Just Right

This male Anna’s Hummingbird was photographed in late February, 2015 in San Diego, California. He displays beautiful iridescent colors on the “gorget patch” or reflective feathers on his throat. In the photograph above, the camera’s lens caught the luminous colors displayed in hummer’s forehead and gorget patch. In the photo below, the angle of light is slightly different, and the lens sees very little iridescent color.

NOTE: It’s easy to see in both of these photos that this hummer’s upper beak is shorter than his lower beak. I assume that he broke it off somewhere during one of his adventures. It did not seem to impact his ability to get nourishment.

Male Anna's Hummingbird
Anna’s Hummingbird- A Green Jewel.
At his Angle, Very Little of His Iridescent
Colors on his Gorget Patch are Visible.
ISO 320; f/5.6; 1/1250 Second

A Perfect Hummingbird Photo Shoot

This male hummer perched on the top branch of a nearby evergreen, very close to our condo rental.  He kept coming back to the very same perch, insistent in is efforts to attract a mate and unconcerned with my presence. It was the closest and easiest Hummingbird I’ve ever photographed. I had plenty of opportunities to move the camera setup, choose a different time of day to play with the light, and change lenses and telephoto extenders. Several other male hummers wandered close and were immediately chased away. I did not observe any females, despite the glorious display of color on his gorget patch.
To read more about how structural color plays a role in most birds of blue… see this post.
To read more about photographing Hummingbirds in flight, see this post.
Photo of Allen's Hummingbird

Photographing a Female Allen’s Hummingbird

Interdependence Between Hummers and their Flowers

Hummers feed constantly, mostly on a diet of sugar obtained from the nectar of bright and blooming trumpet shaped flowers. This little female Allen’s Hummer pushed her long beak deeply into the tube shaped flower (honeysuckle?) to slurp the nectar at its base. In doing so, she coated her head and neck with powdery pollen from the stamen of the flower. She will take that with her to another flower of the same species where some of that pollen will rub off onto its stigma, thereby bringing those two plants together to reproduce.

Photo of Female Allen's Hummingbird
Female Allen’s Hummingbird, dipping deep for nectar.
ISO 1600; f/5.6; 1/1000 second
Photo of Allen's Hummingbird
Plenty of Pollen on the head of this Female Allen’s Hummingbird
ISO2500; f/5.6; 1/1000 Second

Clear Shots Despite the High ISO

The sun was bright (like it is every single day in San Diego), but the flowers were shaded from the morning sun by tall trees. Hoping to photograph a female Allen’s hummingbird that I had seen feeding on these flowers earlier, I set up my camera and 300 mm lens on the balcony overlooking (and fairly close) to the bright orange trumpet flowers. I set the shutter as low as I dared to go to capture the fast moving hummer, and set the aperture as wide as I dare to go with a 300mm lens. (NOTE: Longer lenses, 200mm and longer, tend to give a very shallow depth of field. To learn more about long lenses and depth of field, see this post.)

With these manual settings, the auto ISO hovered between 1600 and 2500- very high. I usually don’t allow the ISO to rise above 800 or 1000, but I hoped the close proximity between the lens and the hummingbird would help lessen the impact of noise.

Happy with the Results

I think the 2 photographs above look fairly good, despite the relatively high ISO. The indirect sunlight accentuates the beauty and luminosity of the bright orange trumpet flowers and contributes to a strong composition. The hummer’s body is in focus…all except her wings. (See this post if you would like more information on motion blur.) I see that I could have blurred the background a bit more by opening the aperture up one or two additional stops. That would have done a lot to lower the high ISO.  The hummer fed for 4-5 minutes, so there was plenty of time to experiment with different exposure settings. I wish I had.

Hummingbird Coated with Pollen

Not often do I photograph a hummingbird so coated with pollen. She was moving about from flower to flower so fast, I did not notice her condition until after I had the photo files downloaded to my computer.

Hummingbirds are one of nature’s most prodigious delivery systems. If you’re interested in learning more about the unique relationship between a hummingbird and its flowers, press this link.

Photo of Hummingbird Coming in for a Landing

How To Photograph Hummingbirds In Flight

Anticipating Bird Movement is Very Important When Photographing Birds

Anticipation is very important when shooting birds. (Shooting the unexpected is a whole different ball game – to be addressed later.) It requires that you research, watch, and think about bird habits, speeds, and likely territories.

You’re planning so you can calculate how best to aim your long lens in the approximate direction of where the birds might be.

Hummingbird Watching- Ready to DiveBomb Any Other Hummer Who Invades His Feeder

Hummingbirds are my target today. I’ve taken hundreds of photos of them on the feeders. BORING! Even if you manage to get a clear shot, the hummer feeder is distracting and the background is unimpressive. You will discover that ruby throated hummingbirds are quite predictable in their habits.

How To Avoid the Boring Photographs

You must take the time to observe where these little guys go before and after they land at the feeder. First thing I observed is that some of these birds (male and female) spend a lot of precious energy chasing other hummers away from the feeders, watching, twitting, dive bombing, always fast and furious in their attempts to keep others away.

These little sentries don’t guard from a perch on the feeder, but pick a spot on a nearby branch, usually higher than the feeder, on which they stand guard on what they consider to be their territory. This spot is not particularly hidden because they need to watch and be ready for the attack on other hummers coming in for a drink.

Camera and Photographer Setup

These little humming sentries are watching you too. They need to gauge whether or not they can protect their feeders with you so close.   Setting up the camera and pointing it to the “spot” and then waiting takes on a whole new dimension, because you, with your tripod, camera, long lens and stool are not the only one watching, waiting and calculating. The hummers are also busy factoring in your habits, speed and likely territory.

There’s some time involved,multiple days probably. The hummers will soon figure out that you don’t pose a threat. They will observe that you are more likely to be there in the morning and evening light, that you will be sitting very still behind the camera, watching them. After a while, they will be buzzing all around you, tho they will keep darting their little heads in your direction.

Camera ISO Settings for Sharp Photos of In Flight Hummingbirds

Techie Alert. With a certain comfort level established between you and the hummer, you must turn your attention to light, shutter speed, aperture and ISO concerns. First ISO. Hummers are tiny creatures. My longest lens is 300 mm, but from where I’m setting up (the closest I can get)  the viewfinder is still mostly full of tree, with the hummer in the center. That means that once I take the shot, I must use my post processing software to zoom in to the subject on the branch.

My lens is very good and the image will be sharp, but zooming when a high ISO setting is used takes its toll on the quality of the shot.  Sharpness fades with higher ISO, and gets worse the more you zoom in. The higher the ISO, the more “noise” you will see (use to be called “grain”). It’s best to keep the ISO low, like under 600 if you can manage, but certainly no higher than 1000 for tiny, far away subjects. If you can not do that, you need to get closer and fill the viewfinder more with hummer than tree.

 The Impact of Ambient Light on Photographing Hummingbirds

Here is when you hope that the spot the hummer chooses to stand guard is not in direct sunlight when you are ready to take the shot. I’ve found that despite the appeal of early morning glow, early morning light won’t work because it is too dim to set my shutter speed as high as it needs to go and still maintain a relatively low ISO. (Capturing Action with Flash will be addressed in a future post.)

Photograph of Hovering Male Hummingbird
Male Hummingbird Hovering While Watching The Feeder In His Territory

So I’m going to be relying on strong, but not necessarily direct, sun. Strong sun usually comes later in the day and its proximity in the sky paints unattractive shadows and washes out detail and texture on your subject.  If the hummer consistently chooses a spot with direct sun from which to watch the feeder, shoot anyway to see if you get any photographs that are worthwhile.

If you don’t get any photos you like, move the feeder and start watching where the hummer re-establishes his perch.

Photographing In Flight Hummingbirds With Fast Shutter Speed

The most important setting when photographing hummers is the shutter speed. I usually start out by using “shutter preferred” option on my camera. (I set the shutter and the camera decides, based on ambient light, the settings for the aperture and ISO.) To stop action effectively, when hummers are taking off or landing, I’ve learned through trial and error, that I have to set the shutter at 1/6400 second. NOTE: When landing, hummers are slowing down, so definitely easier to anticipate the shot, but you still need a very high shutter speed.

I set the shutter speed and then look thru the viewfinder to see what 1/6400 second does to my ISO. If  there’s enough light and I’m below ISO 1000, I leave it on shutter preferred, set at 1/6400 second. Think about how fast that is!  I remember when the shutter speed on a couple of my old cameras did not go above 1/1000 second.

How to Focus Your Camera Lens to Stop Movement of Hummingbird Flight

Because hummers are so tiny, I choose spot focusing. Our subject is definitely spot like. I focus right on the branch where I anticipate he will land.  Spot focusing can be difficult because if the subject hasn’t flown in yet, and the wind is blowing the branch, the spot focus may loose its lock on the spot area, and focus on a leaf in the stand of trees in the distance or search back and forth, unable to lock onto your chosen spot area.

Most telephoto lenses allow you to set the lens so it only searches within a certain limited range, vastly reducing the distance (front & back) that it searches. A very good lens will let you lock in the focus, so there’s no searching at all.

Of course, you can always set the lens to manual focus, though I find the auto focusing lens mechanism is much more precise at focusing than I am.

Time and Planning Needed to Capture a Special Photographic Moment

This will take time. You can not stand there behind the tripod, looking thru the view finder with your finger hovering over the shutter release. You will get stiff and begin to shake. Believe me, I’ve tried it.

Photo of Hummingbird Coming in for a Landing
Hummingbird approaching branch to land

First of all, there is a slight camera shake when you press that shutter button with your finger. A remote is a must, not only to save your back and reduce camera shake, but also because your eye does not have to be pressed up to the viewfinder. A remote will enable you to be more comfortable while you intently watch that hummer’s spot.

This is not the time to relax and enjoy your coffee and muffin while you gaze upon your garden. You are watching a lightning fast bird and anticipating his landing, and your finger has to be ready to press that remote nanoseconds before the hummer reaches his spot. It will be hard, but try to get comfortable.

And now, sit and wait, eyes locked on the target and finger poised to press the remote, and hope your reflexes are quick enough to capture the bird coming in for a landing, or taking off. Good Luck!