


Easy to Photograph A Tufted Titmouse
The Tufted Titmouse is a little song bird who is prominently represented at the feeder year round. These nervous looking birds expend a lot of energy flying from branch to feeder, choosing one seed, and immediately flying back to branch cover. The titmouse then wrestles the seed out of the seed casing, holding it with its feet and whacking it with its beak. He then repeats this sequence by going back to the feeder to get another seed. His quick in and out strategy allows the titmouse to continue feeding even when the feeder food is being hogged by other species who are not willing to share.

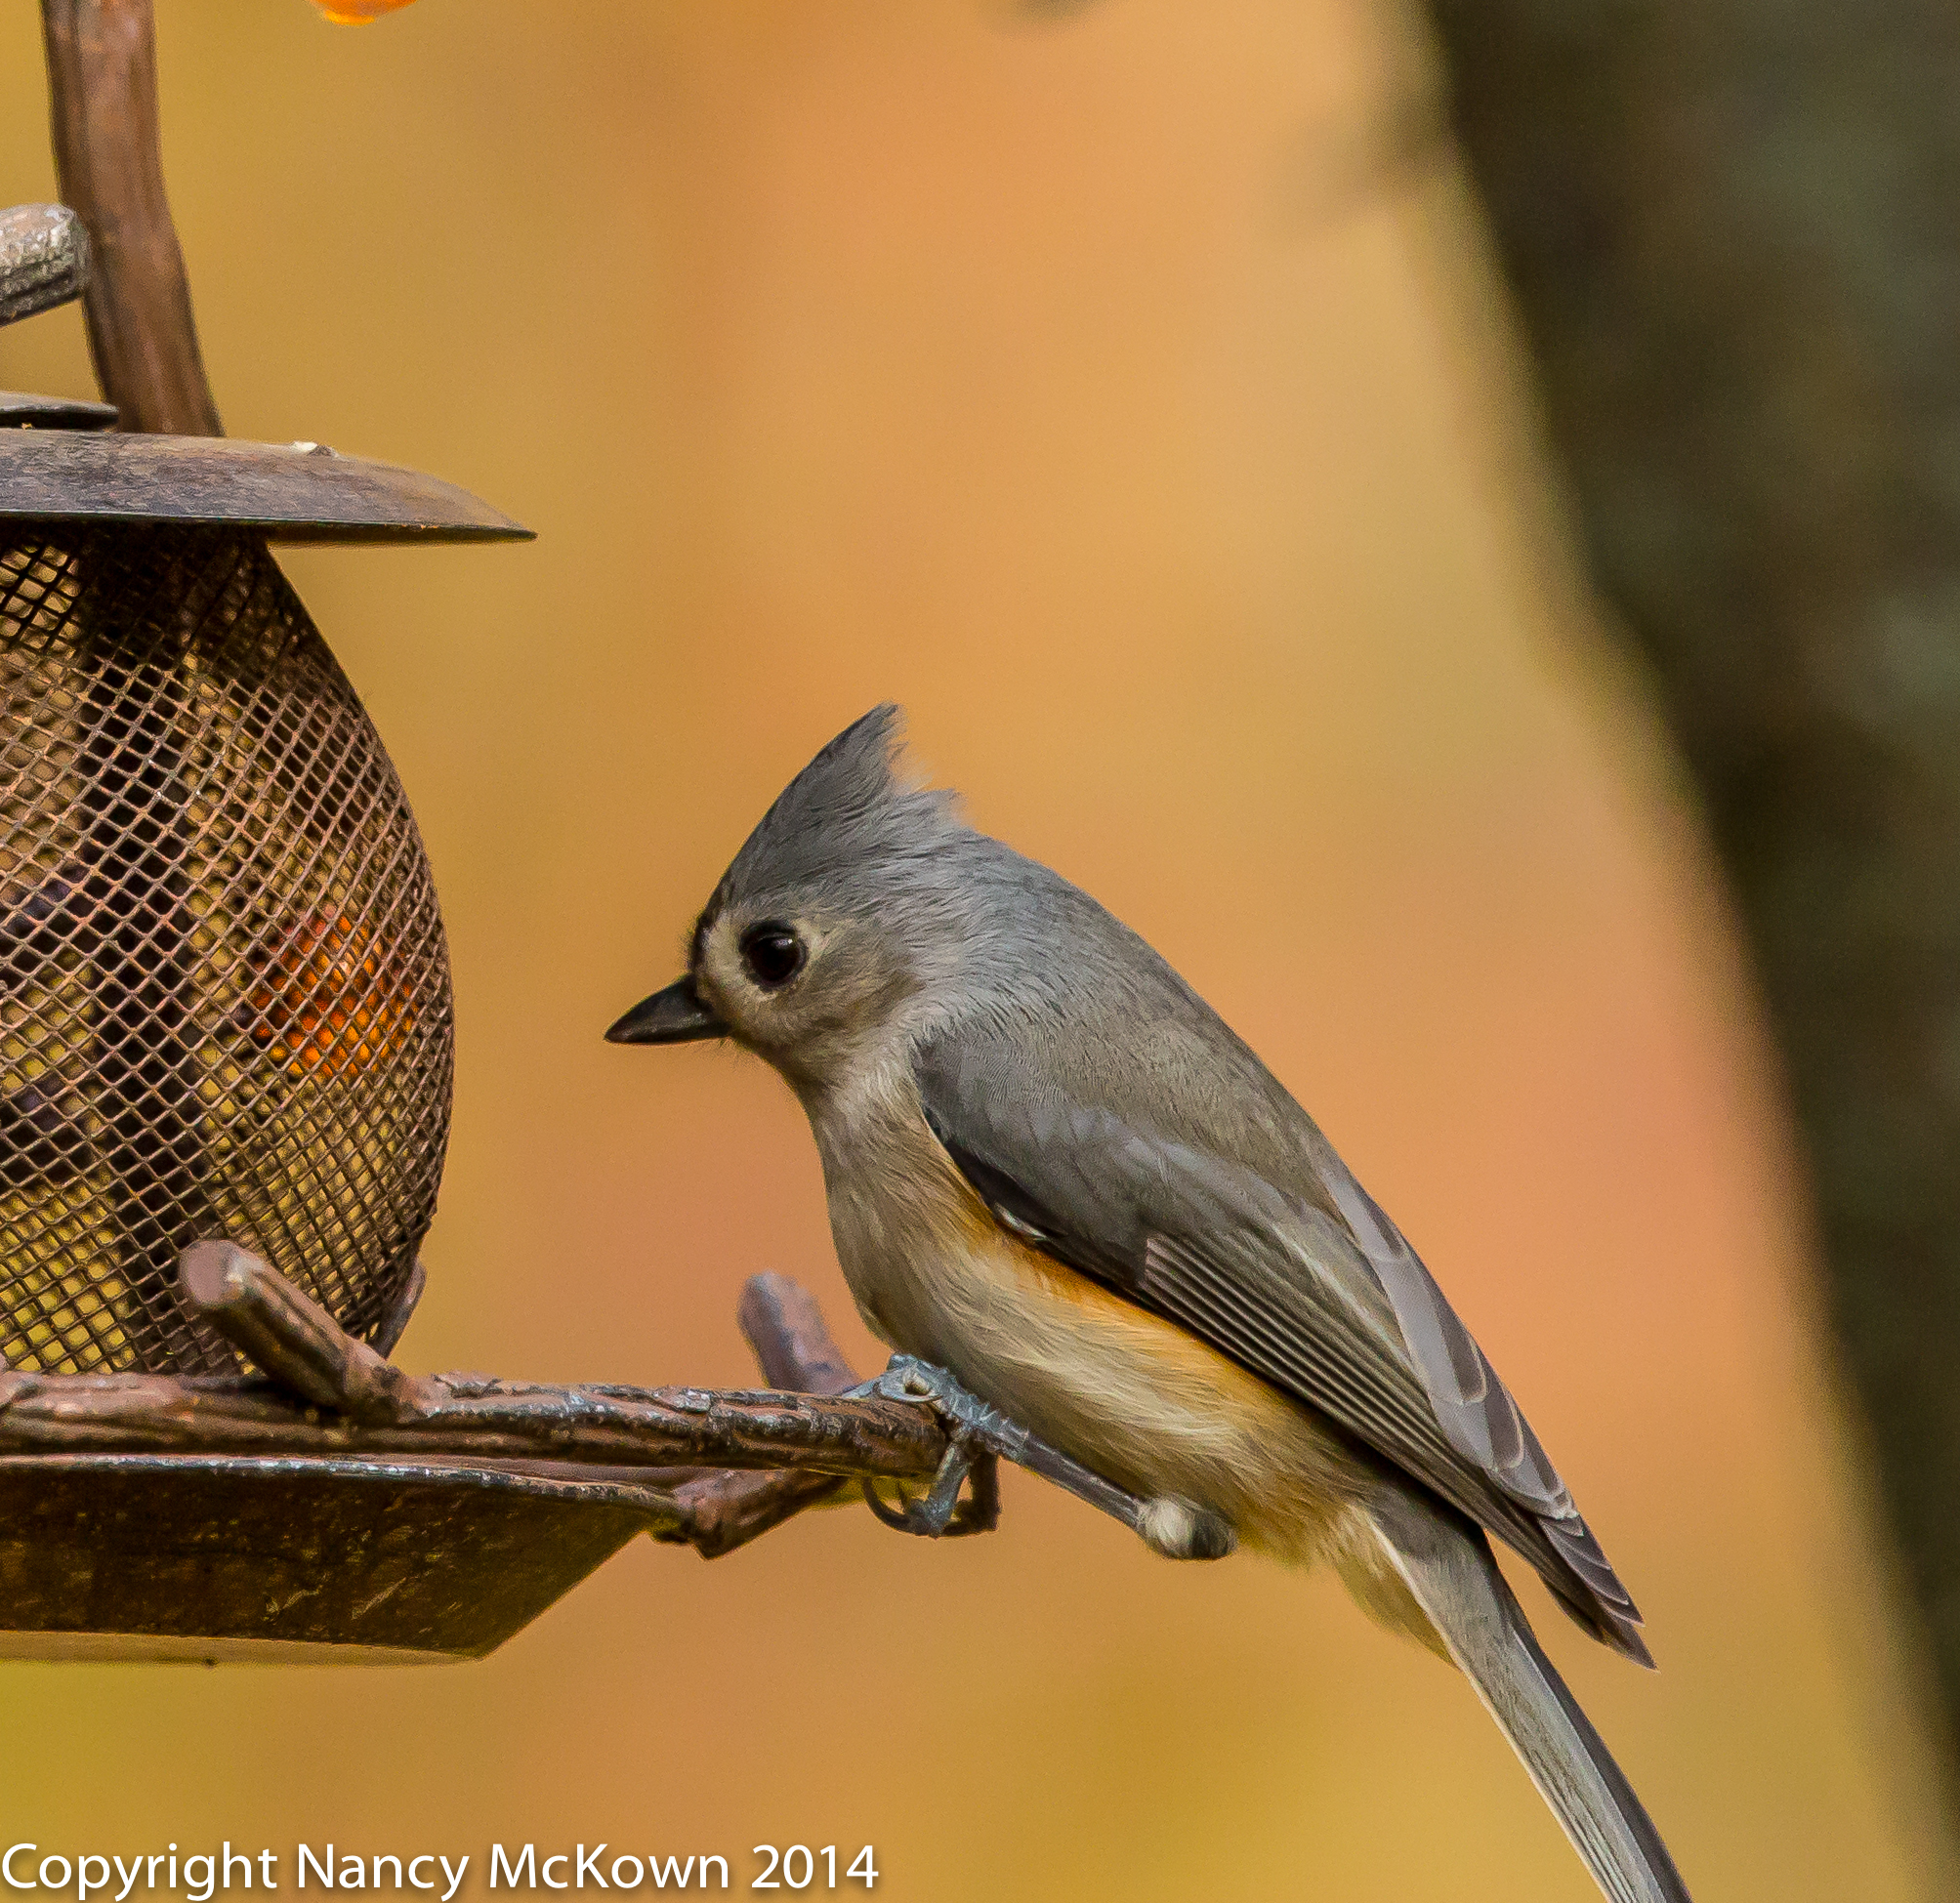
Regular Visitor to the Feeder.
My eye at the viewfinder, I adjust the exposure settings to ISO400; f/2.8; 1/800 Second
Exposure Adjustments On the Fly
Since it is so easy to photograph the tufted titmouse, I thought I would practice making exposure adjustments on the fly – that is, adjusting the aperture, shutter, and ISO without taking my eye away from the view finder.
Many times when I’m using M mode, I pre-set the aperture, shutter and (sometimes) the ISO before I go out in the field. Exposure conditions can change very quickly, sometimes during intense photographable action. If I take my eyes off the target and look at the dials to make the exposure adjustments, I waste precious moments and may miss a great shot.

Without Taking My Eyes Off the Prize, I Set Exposure Settings to
ISO 400; f/4.5; 1/500 Second
Don’t Miss the Shot
No matter what creative mode you choose (Aperture Preferred, Shutter Preferred, Manual), a photographer should know how to quickly make exposure adjustments without moving her eyes and camera off the target. After all, you don’t need to look at the dials. You can see the exposure settings and lots of other information through the viewfinder, highlighted at the bottom of the screen. It’s a matter of training your fingers to quickly move to the shutter speed and aperture dials while watching the bottom of the screen to make sure the adjustments you make still give you the proper exposure.

Trying to Respond To Changing Scene By Making Exposure Adjustments with my
Hands While My Eye Is On the Viewfinder. Fast Action in Low Light.
ISO 2000; f/8.0; 1/4000 Second
Quick Review of Your Camera’s Viewfinder Data
The highlighted data that you see through the viewfinder doesn’t remain constant. Your creative mode selection (Manual, Aperture Preferred, Shutter Preferred, etc) determines what you see in the viewfinder. Also, as you move the camera, the light meter responds by adjusting the exposure settings to the changing light conditions.
There’s so much information! Where do I start?
This is a mental exercise that requires you to train your eyes and your hands. First, find the exposure level indicator at the bottom of your view finder screen by pressing the shutter button half way. The exposure level indicator is the dial that shows what the light meter in your camera thinks exposure should be. The indicator is a graduated scale with a pointer and a “0” at the center. Get the pointer right under the “0” for optimal exposure. If it’s pointing in the positive range, you photo will be overexposed. If it’s pointing in the negative range, your photo will be underexposed.
Now find the aperture and shutter setting dials with your fingers while looking through the view finder. Move your fingers to change settings without taking your eyes off the action. Check what those fingered adjustments did to the exposure level indicator.
Break Out of Your Routine
Your main goal is to track the action and keep your eye on the prize. Experimenting with different exposure settings without moving your eye from the viewfinder will take you out of your comfort zone for a while. And that’s a good thing for photographers.
Thank you for all your beautiful photographs of all these birds. Tufted Titmouse is one of my favorites!! Just discovered them a few years back when I had three or four feeders put up. They are quick and flitty flighty birds I only have gotten a few pics of them. They are so precious. My friend and I were standing by our shared fence, when I saw one of them land on her flowery dress. She brushed it off before I could tell her it wouldn’t hurt you. I even had my camera out taking or trying to take pictures of it flying back and fourth.
Thankyou. Titmice stay all winter in Michigan. They are fun to watch.