


Photographing the Black Throated Green Warbler
As I look back on the Fall Warbler images taken in previous years (2014, 2015), I see a lot of photos full of high ISO pixel noise. Back then, I had convinced myself that despite the poor image quality ( IQ), I didn’t want to use anything but available light.
NOTE: Eugene Smith’s reaction to the philosophy of using only natural light:
“Available light is any damn light that is available!”
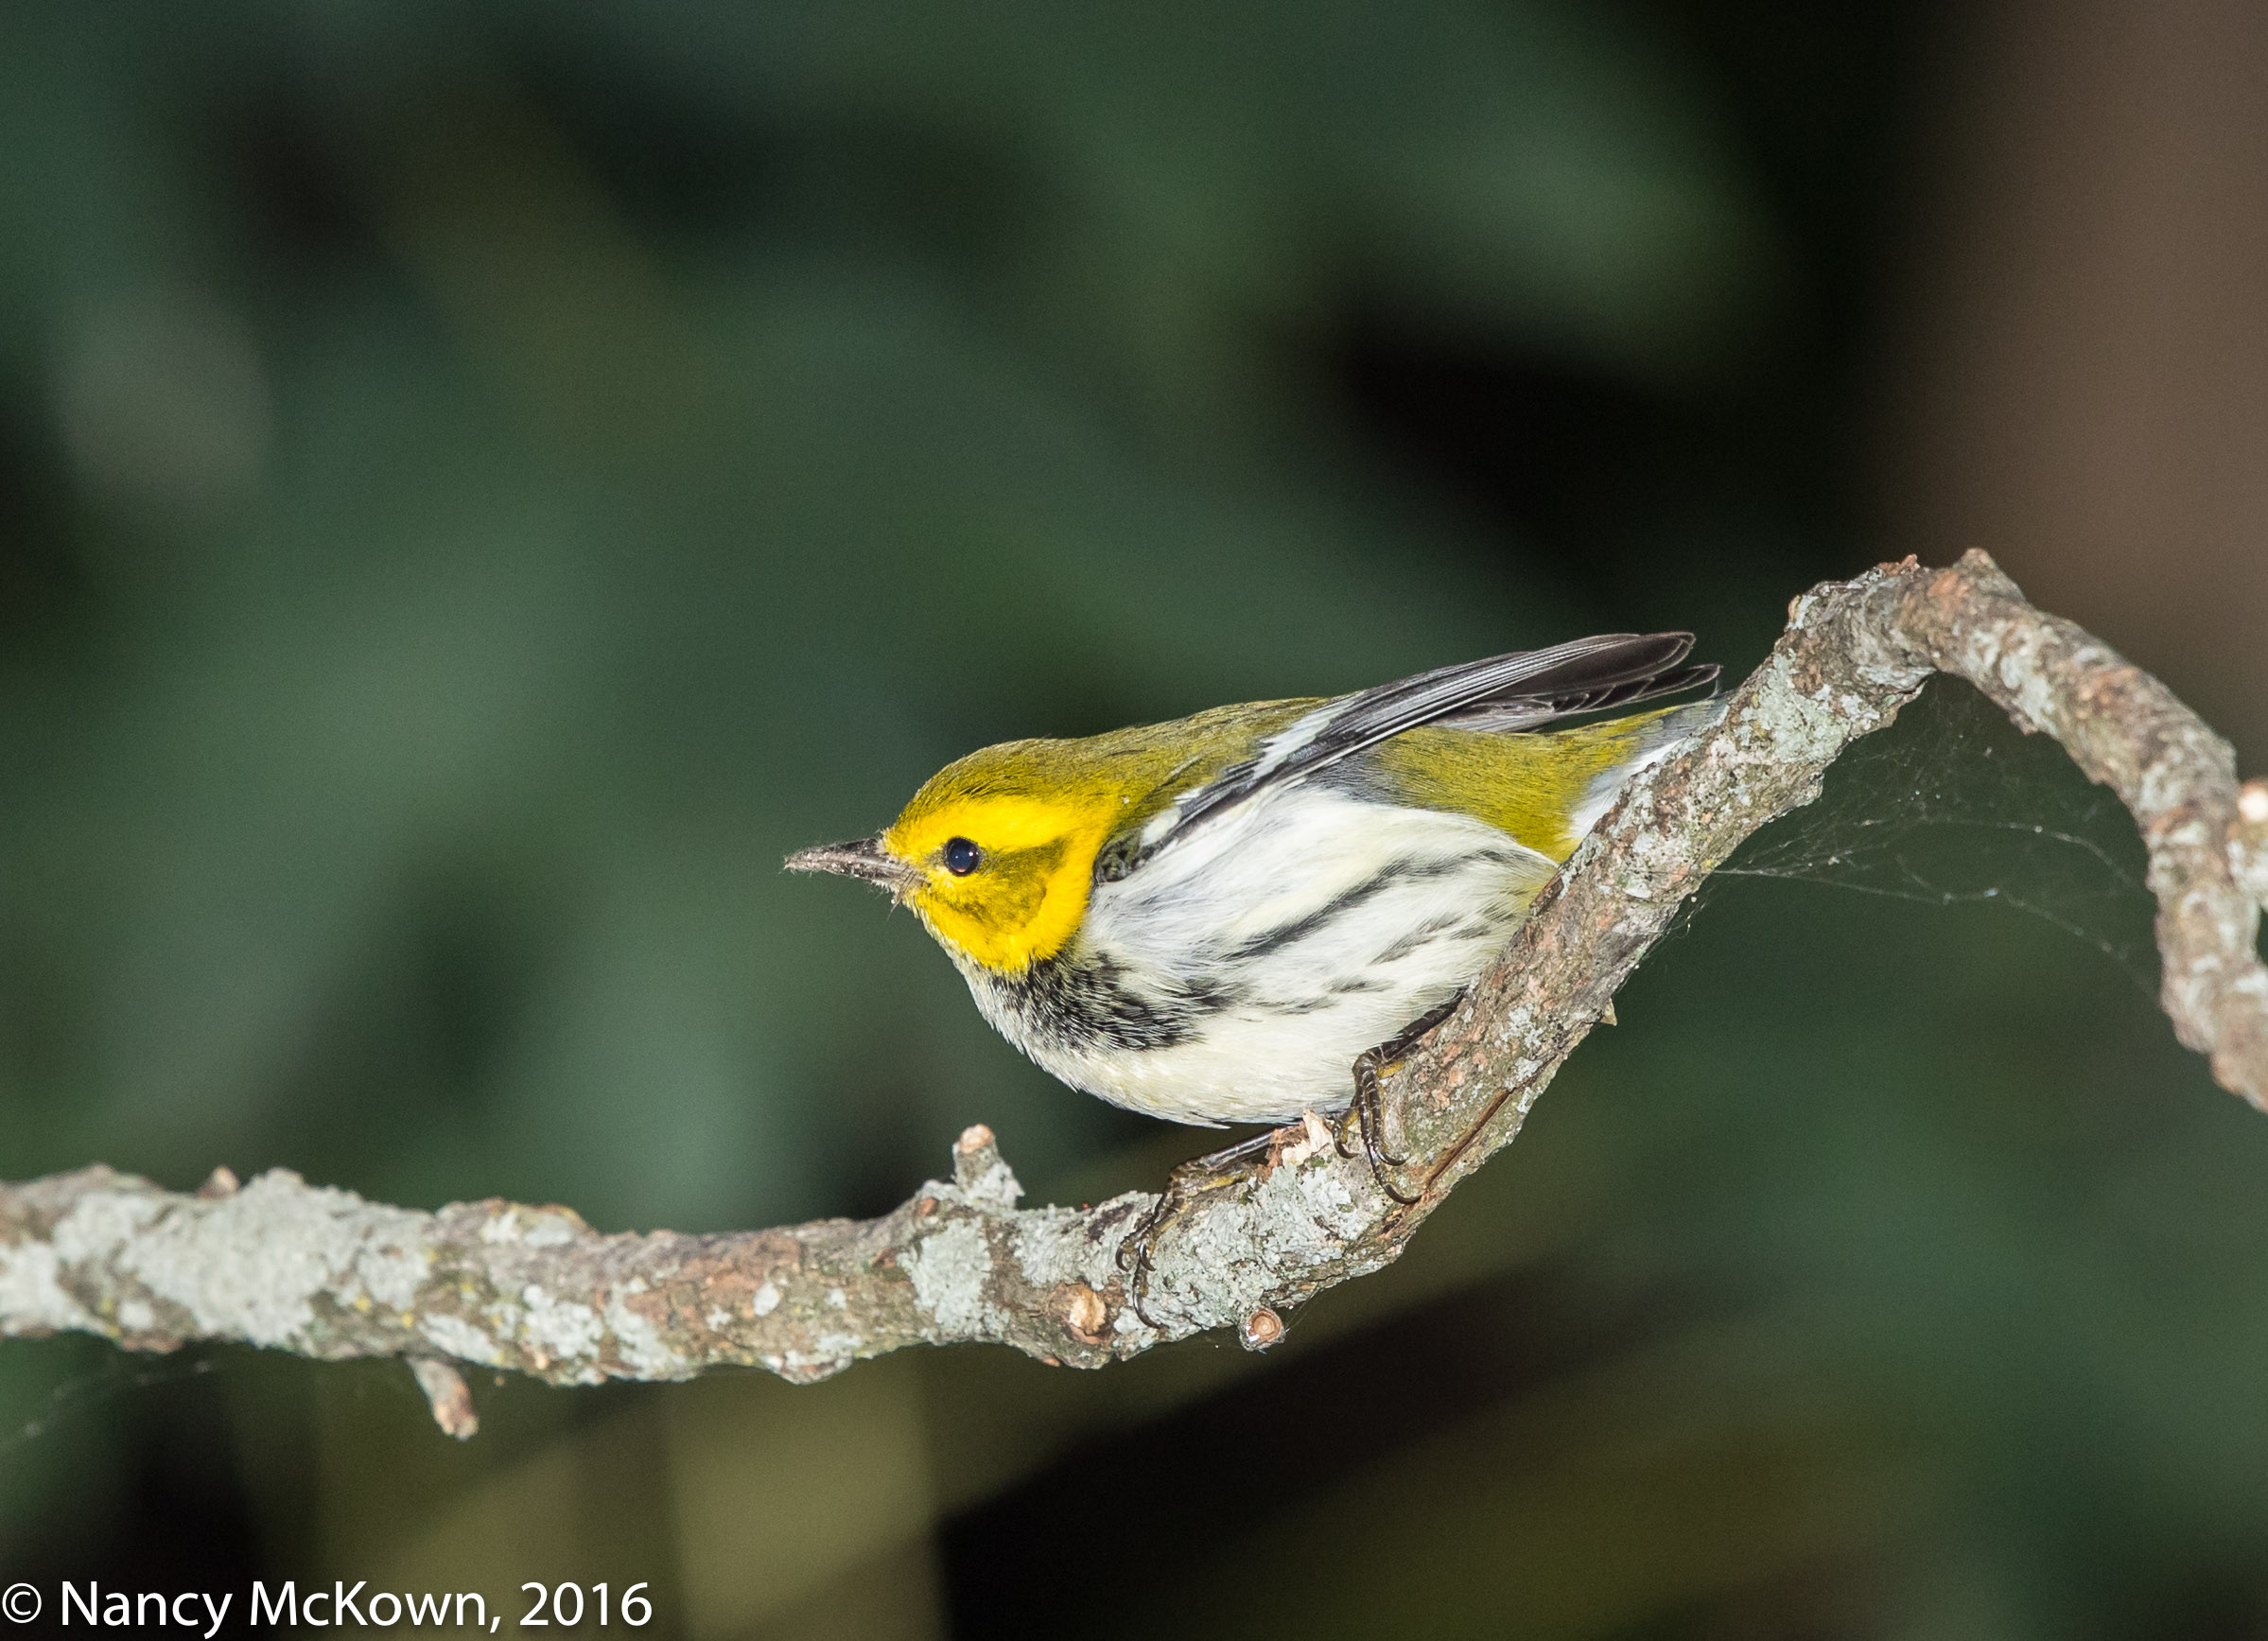
Too bright uni-directional light.
ISO1000; f/9; 1/250 Second
Balancing the Light
In general, I am pleased with the light provided by the fresnel directed telephoto flash. (NOTE: It is set to automatically manage exposure settings (ETTL) while camera is in manual mode (M). I do fiddle with the FEC to help control the intensity of the light.) The resulting image clarity and color and saturation improvements look much better then the crazy high ISO photos I took in previous years.
At times however, the subject looks too intensely spotlighted and the background is mostly black. This usually happens when the subject is close to the lens, the ambient light is low, and/or the background is just too far away to be affected by the flash.
Ambient and Flash Light Scenarios
—Without flash, ambient light is often evenly spread; it may be dim, but the exposure readings for the front and back of your subject should be similar. (NOTE: When your subject is silhouetted because the background is too bright, it’s easy enough to take the exposure readings from the background, lock the exposure settings, recompose on the subject and shoot. The flash should nicely fill in the subject with a more natural looking soft light.)
—When you add flash without a fresnel directional enhancement attached, your distant subject will most likely not be sufficiently illuminated. A lot of the light blast will spread wide, bounce and scatter depending on what’s in its path and the proximity of your subject.
—When you add uni-directional fresnel telephoto flash lighting intended to spotlight a distant subject, it is more difficult to balance flash and ambient light in the foreground and background. The best you can do is try to control the artificial light’s intensity by modifying the exposure parameters and tweaking the flash exposure compensation (FEC). (NOTE: Other less manageable elements impact exposure parameters; like distance between the lens and your subject and tonality of the subject.)
Exposure Tradeoffs
We all know the low light exposure conundrum. Low ISO settings, tight apertures and fast shutter speeds make the flash work harder to achieve proper exposure and at the same time reduce the impact of ambient light on the scene.
Widening the aperture lets in more light, but sacrifices depth of field (NOTE: On long lenses, depth of field is very tight). As for shutter speed, I am hesitant to try to capture moving birds with anything lower the the flash sync speed (1/250 second on my DSLR camera). So that leaves adjusting the ISO.
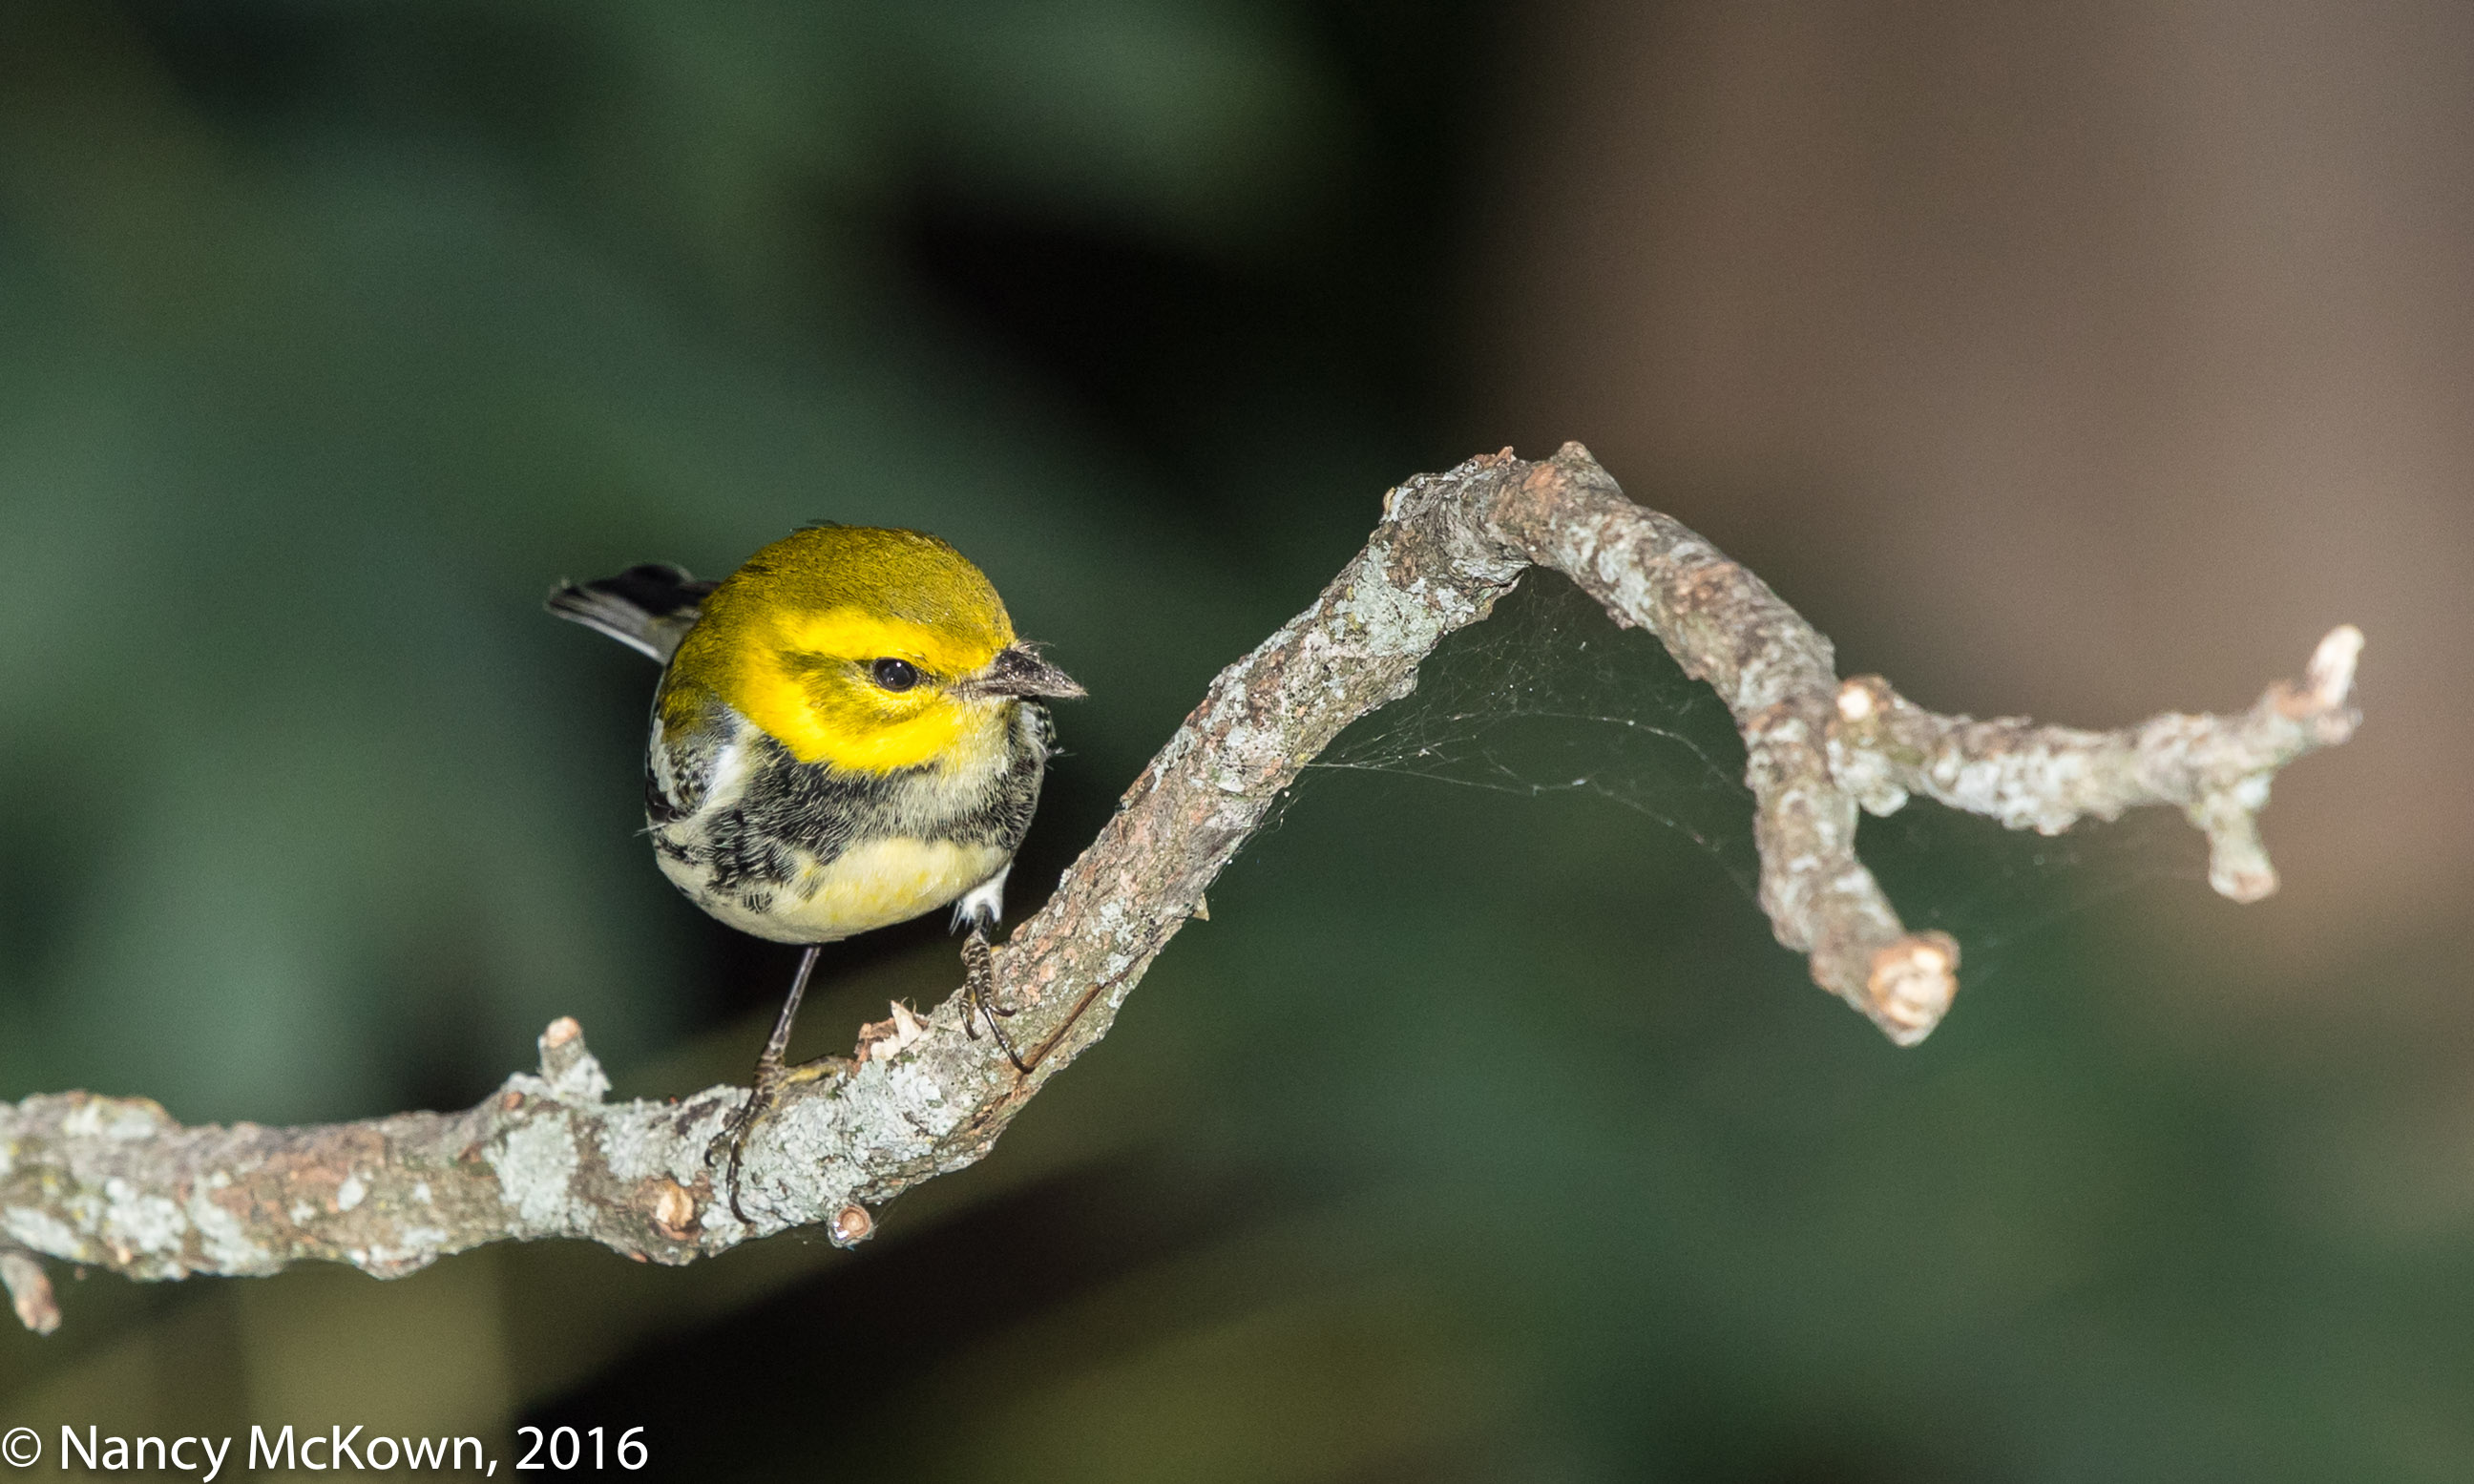
ISO 1000 helped… but not enough.
It is still obvious that this image was taken with
Flash attached.
ISO1000; f/8; 1/250 Second
Raising the ISO to Bring in More Ambient Light
Ultra sharp image quality is directly related to low ISOs, so when I started using the telephoto flash in our heavily shaded yard, I was thrilled to be able to set the ISO at 400 or below.
Lately I’ve been experimenting with raising that ISO when using flash in order to let the ambient light on the scene dominate exposure settings more. This strategy not only helps reduce the impact of the flash blast on the subject, but also creates a better balance of light.
Pushing up the ISO to reduce the intensity of the flash is a very enticing alternative, given the high quality of modern sensors in DSLR cameras. For this photo shoot of the Black Throated Green Warbler, I experimented with ISO1000, but the flash was still too intense for my liking. The question becomes: How high can I go with the ISO (with fresnel telephoto flash attached) in order to get a more natural looking image and still maintain image quality?
This Black Throated Green Warbler took off before I had a chance to push the ISO above 1000. However, I plan to keep experimenting… raising the ISO up to 5000. We will see what happens.
as in many things…. it seems that more you learn, the more you realize that you didn’t know when you thought you knew it!