Category Archives: Pelicans

Photographing Brown Pelicans in the Early Morning Light

Pre-Dawn Setup

Not yet pre-dawn…. setting up in the dark. I don’t really know where to stand for best light, so I follow the birds. Ready (I think) and waiting. It’s very quiet. Friends are with me, along with a scattering of other bird photographers scurrying about to place themselves and their equipment in position…. rising sun to their backs. This transitional time when the intense blue darkness gives way to golden light makes me feel warm and relaxed. The motion and rhythm of the water and the wind on my face have a calming effect. Dark transitioning into light happens quickly – so best not to get lost in the moment.

Pelican photo
Pelican Resting in Pre Dawn Glow
Minutes Before Sunrise.
ISO2000; f/6; 1/640 Second

That Space Between Pre Dawn and Light

The space between when the sun’s first glimmer of light emerges and when the luminous glow of full sun rests on the horizon line seems very brief. I quickly and nervously keep changing my position. In my mind’s eye I see a composition of wild grasses in the foreground-and a lone Pelican just beyond. I keep looking back over my shoulder to check the fast changing horizon-worrying that the best light has already passed.

Histogram Corroboration

It’s a good morning! A quick check at the back of the camera shows a wide range of dark and light variation on my images spread evenly within the bounds of the histogram. No blinkies!

Photo of Pelican
Pelican basking in the early morning luminous light of sunrise.
ISO1600; f/6.3; 1/640 Second.
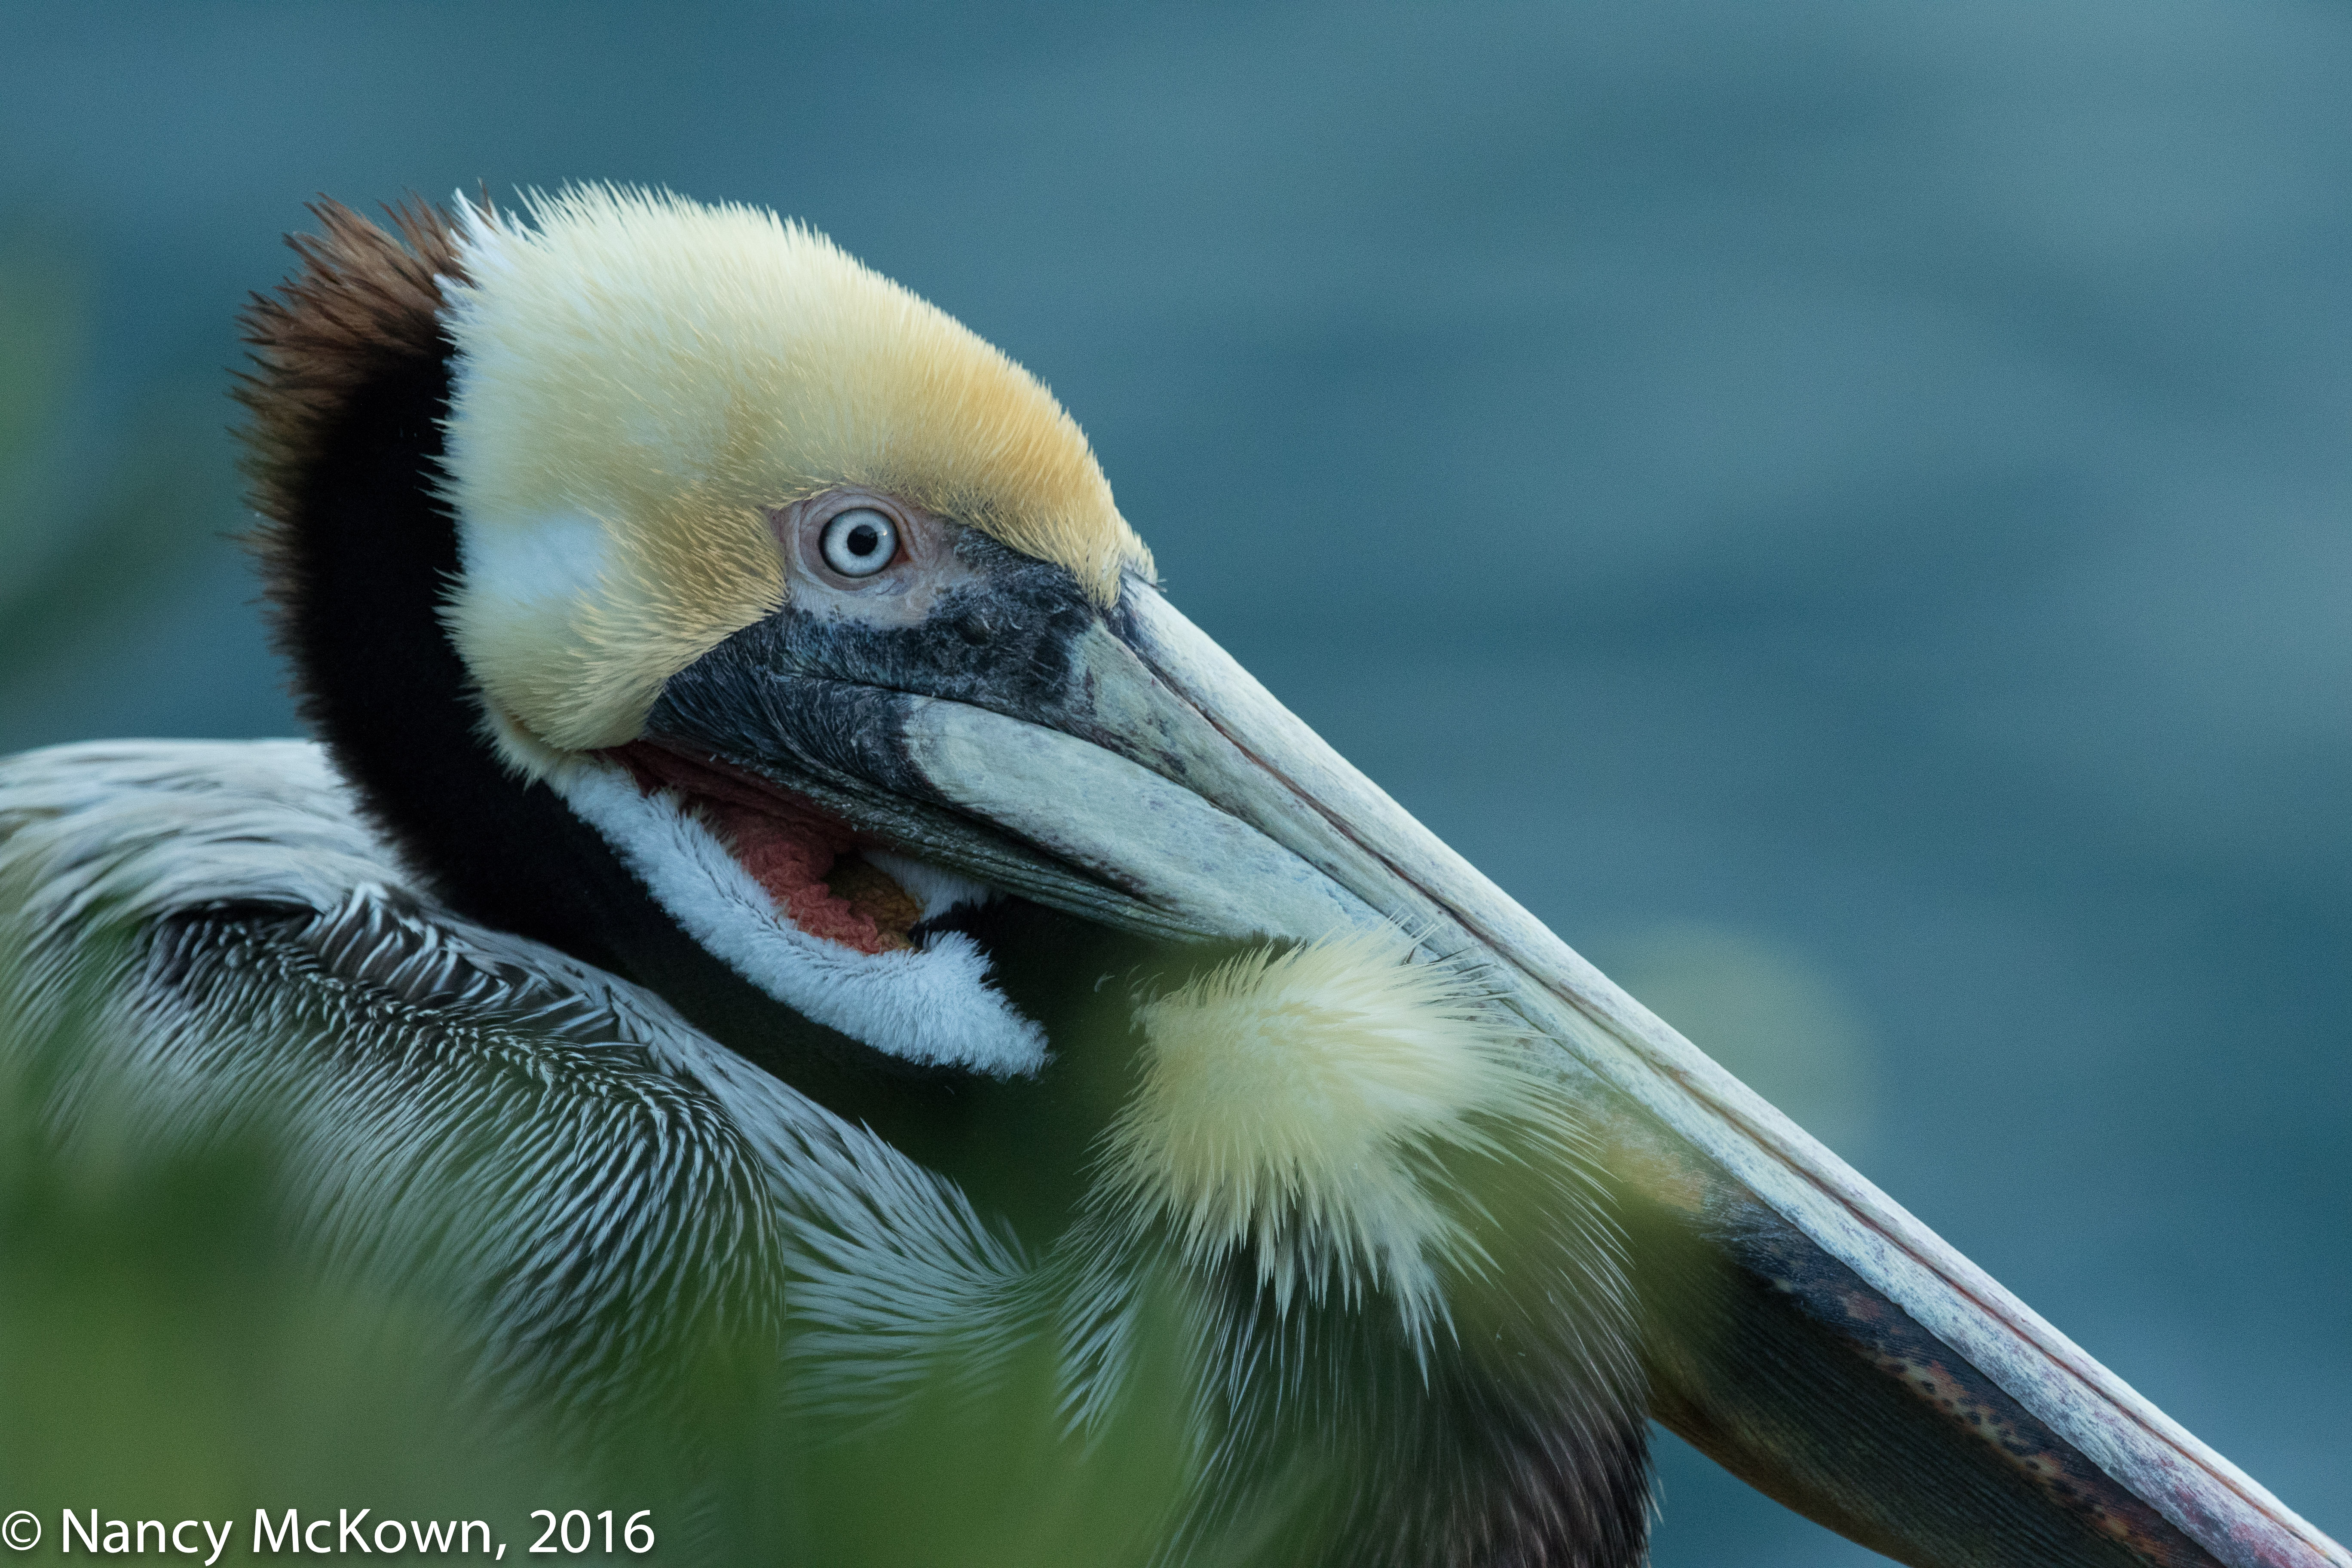
Light Transitioning

Once the images are transferred into my computer, I can track the light transitioning from predawn softness to golden sunrise. The camera recorded lots of glimmering warm tones, lush color and soft shadows. Texture and three-dimensionality make the birds sparkle. I leave the images a little underexposed because I think that helps bring out the drama of the moment.

Balancing Light

The white balance setting on the camera tells the sensor how to see various types of light and interpret exposure. I usually set my white balance to “Cloudy” because: 1) I prefer to accentuate the warmer tones of the colors and intensities rather than let the camera’s sensor neutralized the color and;  2) I always shoot in RAW, so I can easily change the white balance in post processing if I don’t like how it looks.

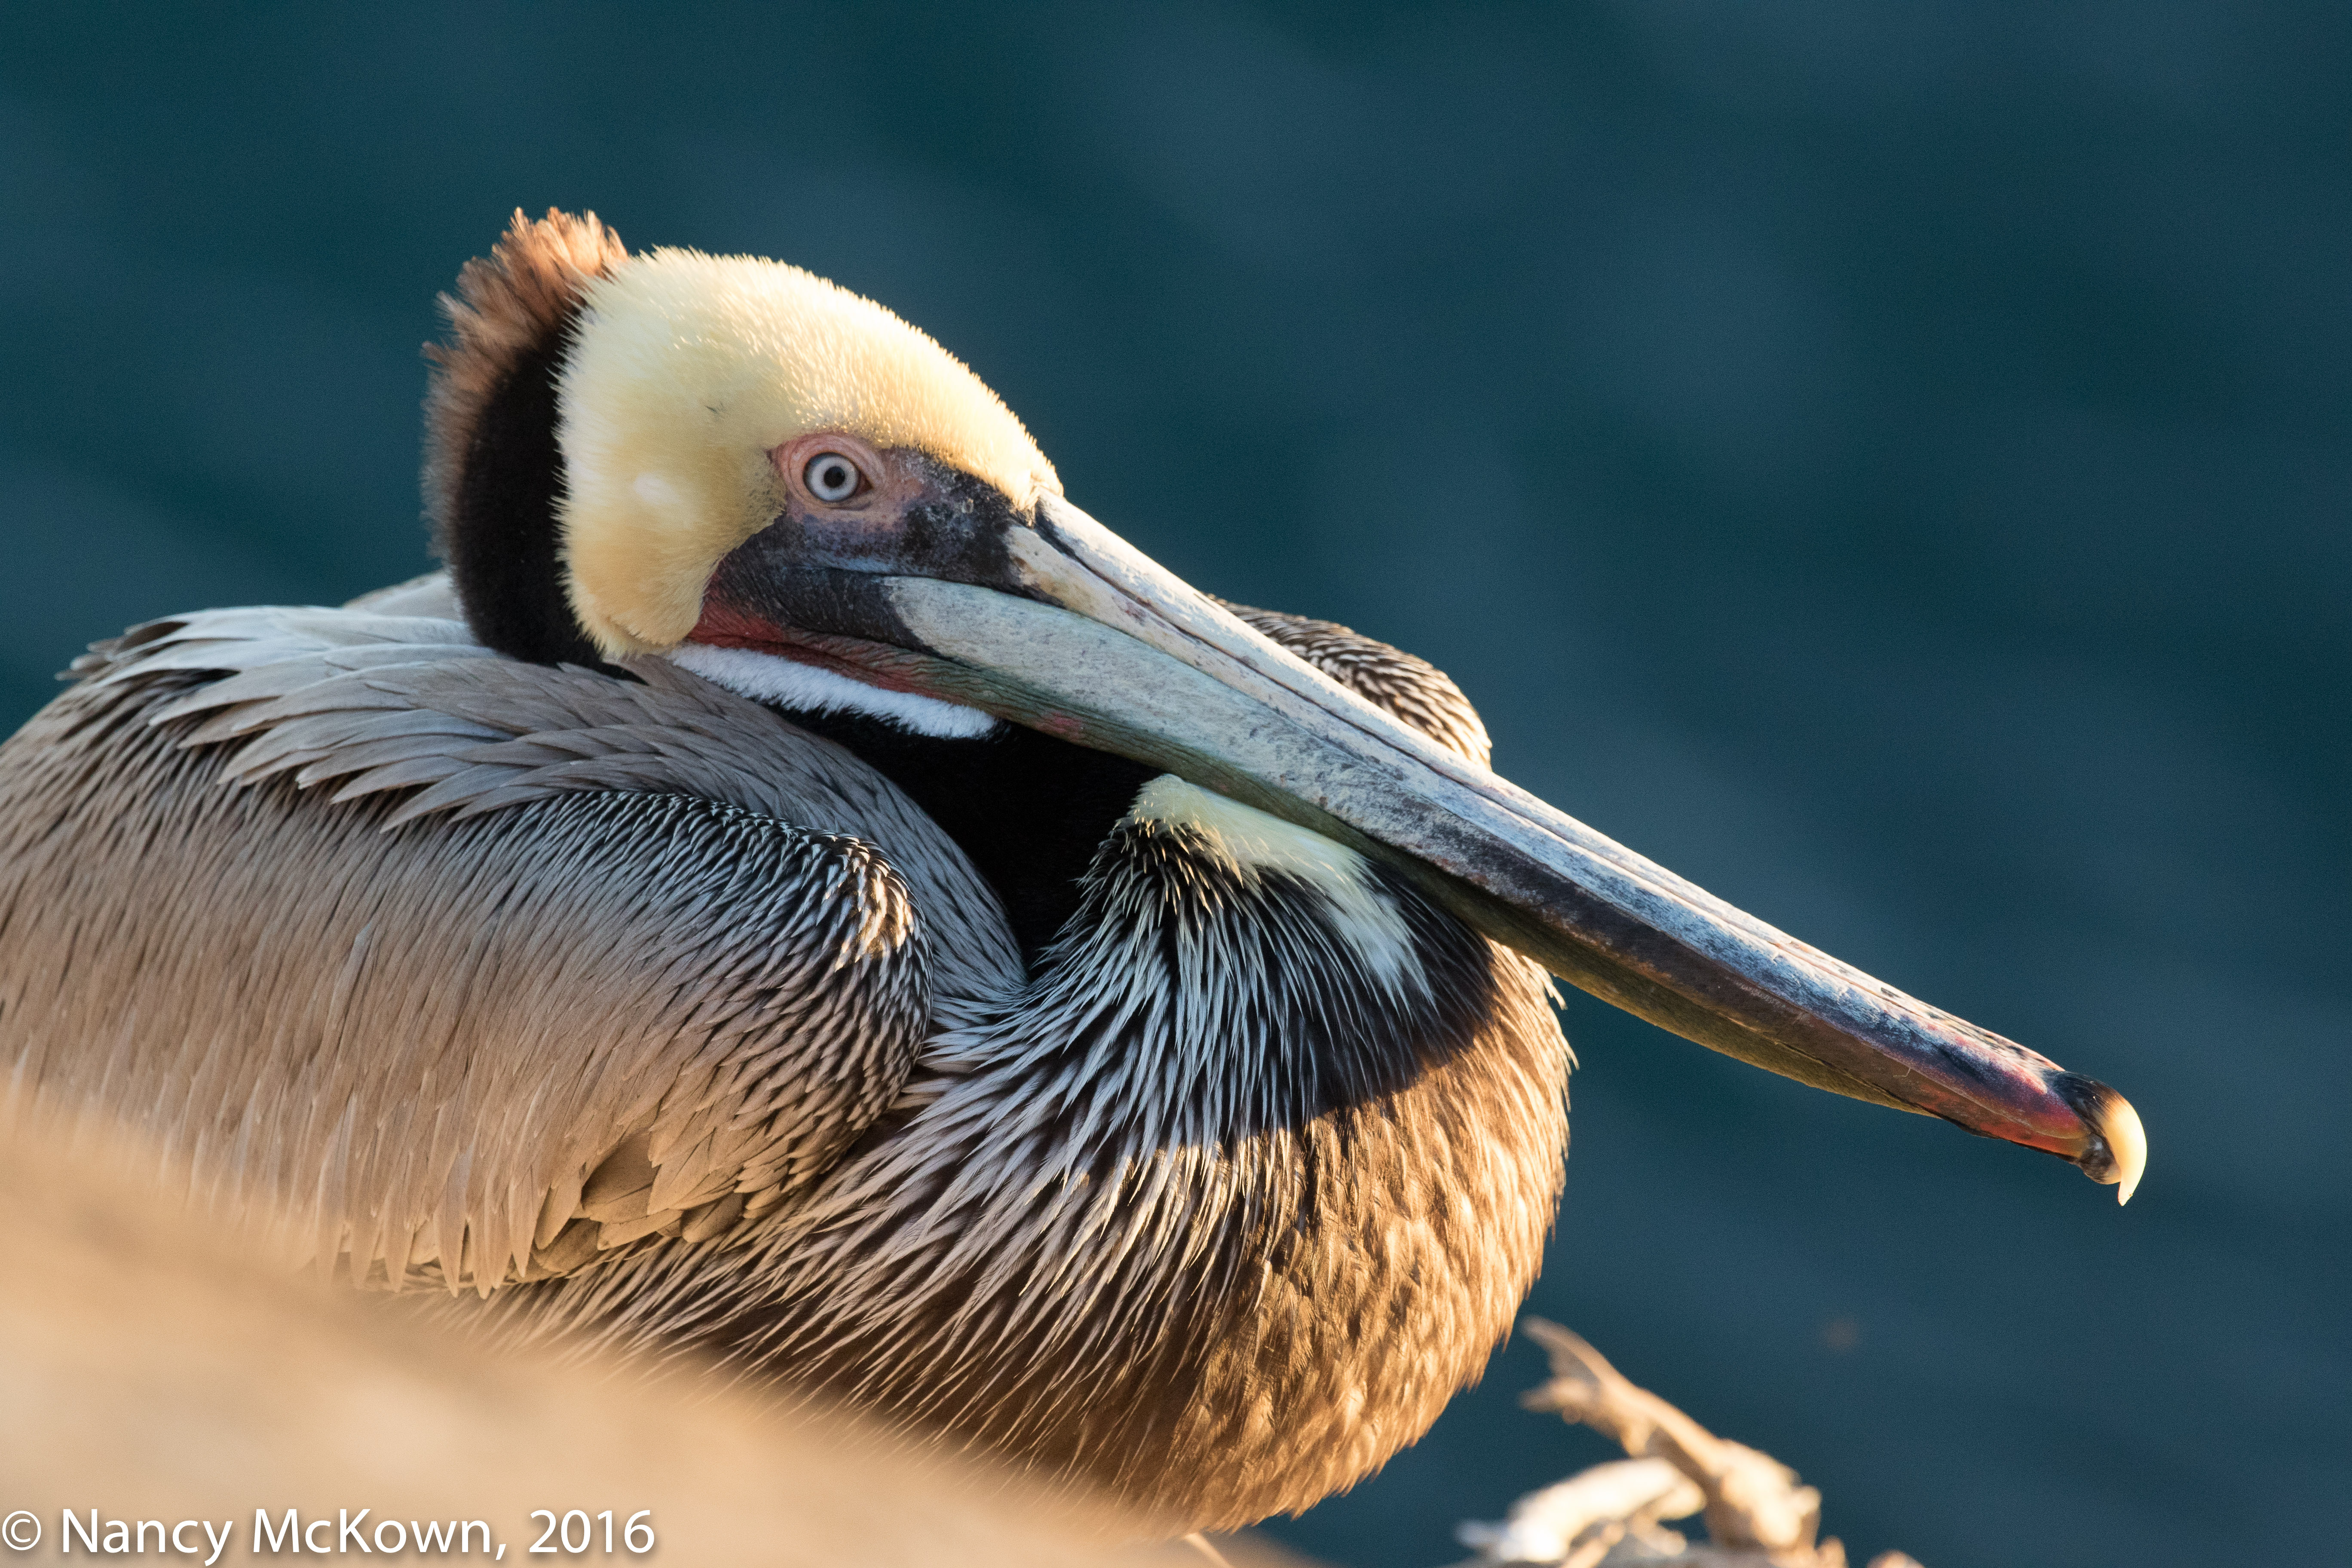
Color Can Be a Distraction in Post Processing

When making shadow and highlight adjustments in post processing, lots of image color can be distracting. If I temporarily switch from color to black and white, I can concentrate on the overall look and better gauge how much highlight and shadow adjustment is needed.

In order to accentuate the warm colors for both of these photos, I moved the Highlights slider to -100% and the Shadows slider to between +26%-+57%.  (NOTE:  See bottom of this post to view the raw images as they were before I made adjustments in Lightroom.)

Photo of Brown Pelican
Pelican looking Back at the Camera.
ISO640; f/8; 1/640 Second.

Final Positioning of Camera

I moved my camera and tripod around quite a lot before the break of dawn. For these photos, I positioned myself so I was shooting downward at dozens of Pelicans promenading on the nearby rocks. My goals were to use the rich color of the fast moving ocean currents as my background and also to mostly avoid the unsightly look of white stain on the barren rocks. Overall, I am pleased with the images; definitely worth the time and effort I put into getting them.

Images Before Post Processing Adjustments:

For Beverly, Image #1 Before Post Processing
For Beverly, Image #1 – Pre- Dawn Glow…. Before Post Processing
For Beverly; Image #1 BEFORE post processing.
For Beverly; Image #2; Sunrise on the Pelican….BEFORE post processing.


Food Fight - Osprey and Cormorant

Photographing a Tussle over A Fish

Photographing Fast and Furious Action

Let these photos tell a story of 4 species of birds tussling over one fish. I was able to photograph a rough and vigorous struggle between a Cormorant, an Osprey, two Pelicans, and an opportunistic Sea Gull. The Sea Gull mostly stayed on the sidelines, but was close enough and thus ready to pounce, given the opportunity. This scuffle over a fish occurred on Mission Bay, in San Diego, California.

“If Only” Moments in Photography

As with most bird photography, there are always those “if only” moments. If only I had a longer lens attached to my camera…. If only the shutter speed was set higher to sharpen the fast action….If only that Seagull didn’t block the shot. Suffice to say, though this tussle lasted only minutes and the photos could have been better, I was pleased to be in the right place at the right time.

I took more than 50 shots. The 7D Mark II lived up to its specs by providing continuous full resolution shooting of 10 frames per second. I’ve included 9 shots to tell the tale. There’s a lot of splashing action, so be sure to click on each of the photos so you can see the larger image and more detail.

BO3A3557

Despite the Sea Gull in flight and blocking the shot and quite a lot of splashing water, you can still see the Cormorant’s beak and the Osprey’s Talons tugging at a rather large fish.

BO3A3558

More tugging between the Cormorant and Osprey, with the Sea Gull’s white wing moving away from the center of the action.

BO3A3559

Looks like the Osprey might have the advantage as he attempts to take the fish with him and fly off.  The Cormorant holds tight.

BO3A3561

The Osprey is suddenly pulled down into the water on top of the Cormorant, who is not about to release the fish.

BO3A3564

The Osprey releases the fish and tries to lift himself out of the water. The Cormorant, holding on to the fish, tries to fly away.

BO3A3567

The Osprey flies off without the fish, leaving a jubilant Cormorant alone with his prize.

BO3A3568

Enter Pelican #1 who appears to take the Cormorant under water.

BO3A3572

Seconds later, a 2nd Pelican lands on top of the first. Exit right the Cormorant, without his fish.

Photo of Osprey

 And exit one very wet and pissed off Osprey.

Photo of Pelicans in Flight

Photographing Birds On Water Using Automatic Exposure Bracketing

Photographing Birds On or Near Water

I spend a lot of time walking on the shoreline with my camera. Generally the birds keep their distance from intruders, but once in a while they fly or swim close enough to challenge my photography skills.

Choppy waters, glare, uneven lighting, and erratically moving birds all present different challenges for photographers. The merganser duck in the photo below kept bobbing and ducking under the water and then coming up quite a distance away from where he originally ducked under. The pelican flying low close to the surface of the water would continually circle and then dive in head first.

Whenever I am presented with unpredictable bird activity near or in choppy waters, I set the camera to Automatic Exposure Bracketing. The camera take several shots of the same scene instead of  just one, thus increasing my chances of getting the right exposure.

Photo of Merganser Duck
Merganser Duck Swimming. Seemingly Unaware of the Choppy Waters. Lots of Glare and Uneven Lighting
ISO 800; f/3.2; 1/2000 Second

Automatic Exposure Bracketing

Most DSLR cameras offer the option of AEB, Automatic Exposure Bracketing. At the very basic level, engaging AEB sets your camera to take 3 shots instead of 1 of the same scene, using different exposure values – in 1/3 or 1/2 stop increments.

DSLR cameras have highly sophisticated light meters, but  around water, when conditions are not average, they can give you the wrong exposure. The goal of setting your camera’s AEB is to increase your chances of nailing the exposure, especially in uneven lighting conditions or high contrast situations.

The easiest and most basic way to set AEB is to have the light meter choose a starting exposure, and then bracket that starting exposure. (NOTE:  The camera must be set for continuous shooting.) Once set, the camera will automatically take 2 extra shots, and include 1 shot underexposed and 1 shot overexposed.

Photo of Pelican in Flight
Pelican in Flight Over Choppy Waters. Set AEB to Different Shutter Speeds ISO 250; f/4.0; 1/3200 Second

Multiple Options Available When Using Automatic Exposure Bracketing

AEB is not just about setting the camera to take one shot over-exposing and one shot under-exposing from a pre-set starting point. You have more flexibility than that. If the lighting is such that you need only negative compensation (or positive compensation) you can set the camera’s bracketing settings to take 3 shots in the direction of the desired exposure values. For instance, if you think the light meter is incorrectly gauging the scene to be brighter than it is, set the AEB to take 3 shots in negative exposure range. Conversely, if you think that the light meter is incorrectly gauging the scene to be darker than it is, set the AEB to take 3 shots in the positive exposure range.

Many professional DSLR cameras allow the photographer to specify 2, 3, 5 or 7 exposures (instead of just 3) within the AEB set. Choosing the number of shots is usually on the menu where you choose the 1/2 or 1/3 exposure increment. Check your camera’s manual to learn how to get to this menu.

Getting the Best Exposure Value Before Post Processing

It is true that post processing software enables the photographer to fix most exposure adjustment problems. So why bother with AEB?  I use AEB because wild birds move unpredictably and fast. When shooting in uneven or problematic light, a primary concern is to preserve as many tonal values as possible on your image. Engaging the AEB function reduces the chances that your exposures will overshoot the right edge of the histogram, thereby losing critical detail data forever. (For more information on why  using the camera’s histogram is important, see Photographing Sandpipers on the Beach).

How Does the Camera Calculate AEB?

AEB sound complicated?  It’s not. One of the best web resources I’ve read on the functionality and use of AEB for Canon Cameras is available at this link: Guide to Auto Exposure Bracketing on Canon DSLR. The author is Jason Franke. I especially like the charts the author includes that precisely explain how the camera alters shutter speed or aperture to achieve AEB. Definitely worth a look.