Photographing Northern Cardinals in Late Summer

Seasonal Changes in Bird Activity

Autumn is fast approaching and sightings of even our most common birds are down. Bird song is replaced with the high pitched hum (alternating strong then fading) of male cicadas. The prolonged lack of bird activity is eerie, but it is not unusual for this time of year.

Many of the migrators and year round residents are still around….just less conspicuous.  They just finished raising 2 or 3 broods and are thoroughly done with displaying, singing and nest building.  Molting feathers and plentiful ground level food supply allow them to remain less active. Plus, they’re resting up, getting fatter and conserving their strength.

Photo of Fledgling Cardinal
Immature Northern Cardinal,
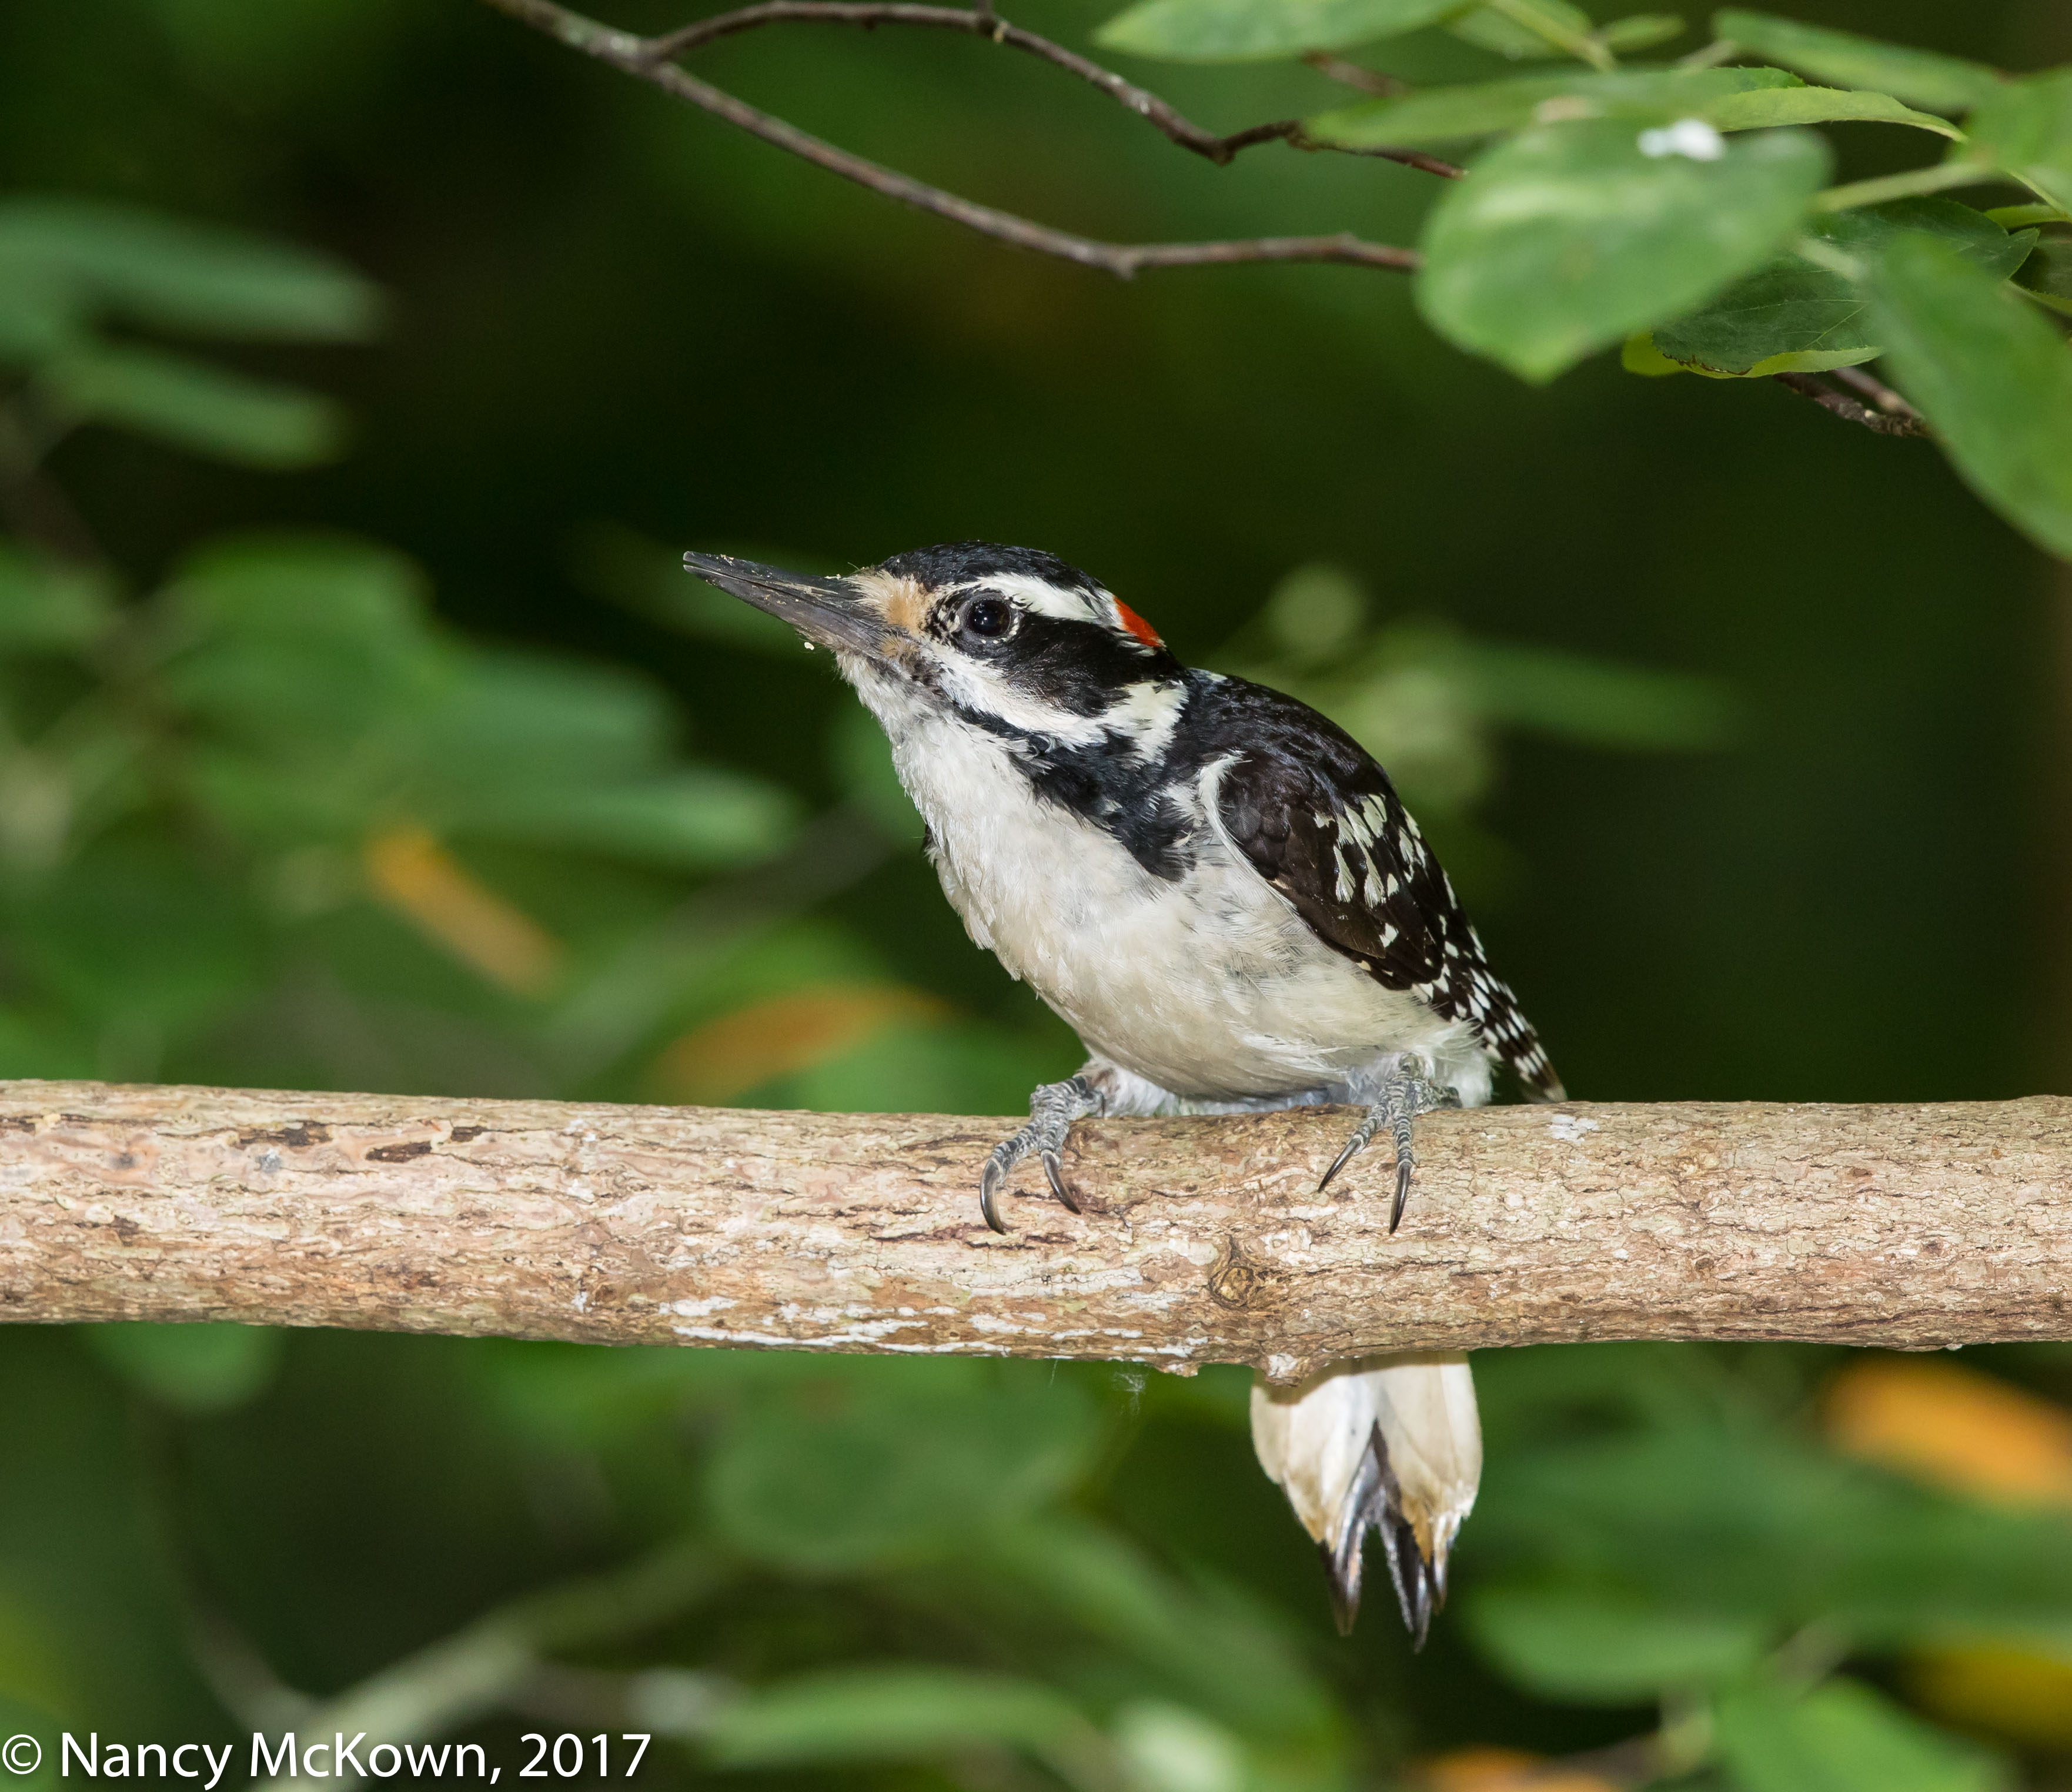
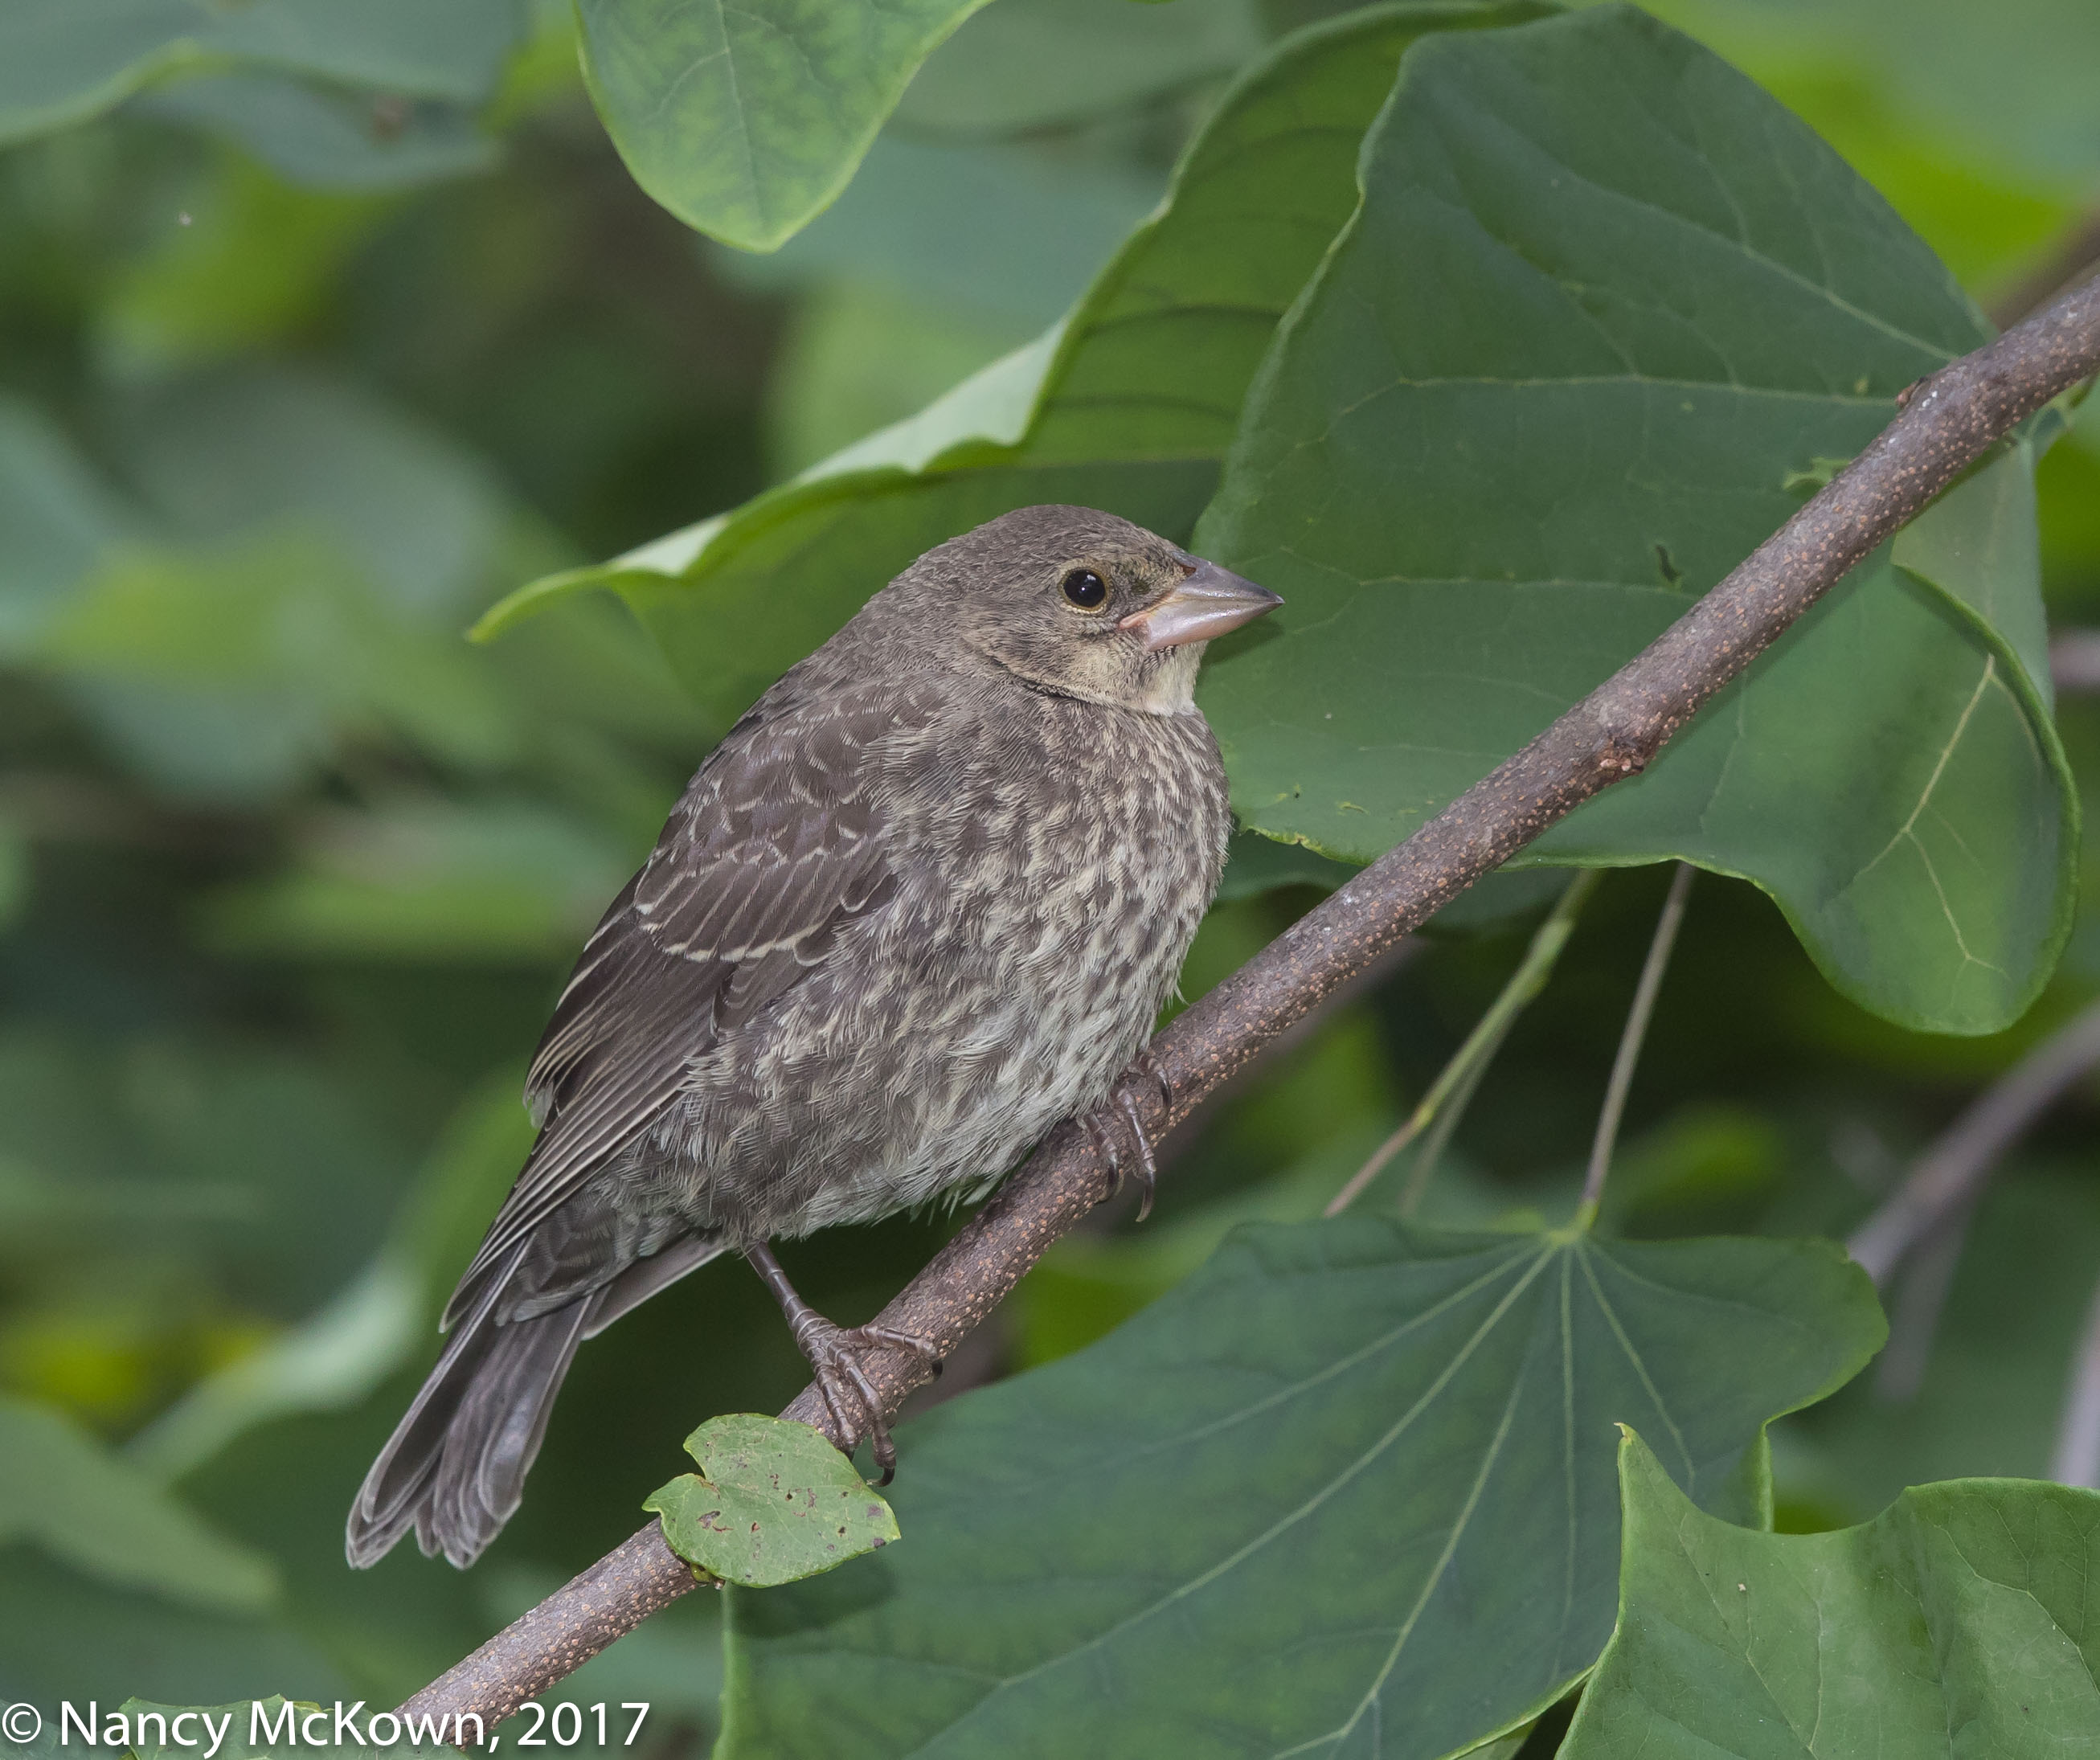
Anxiously Looking Around for a Parent.
No Flash attached.
ISO4000; f/4; 1/640 Second

Photographing Fledglings in Late Summer

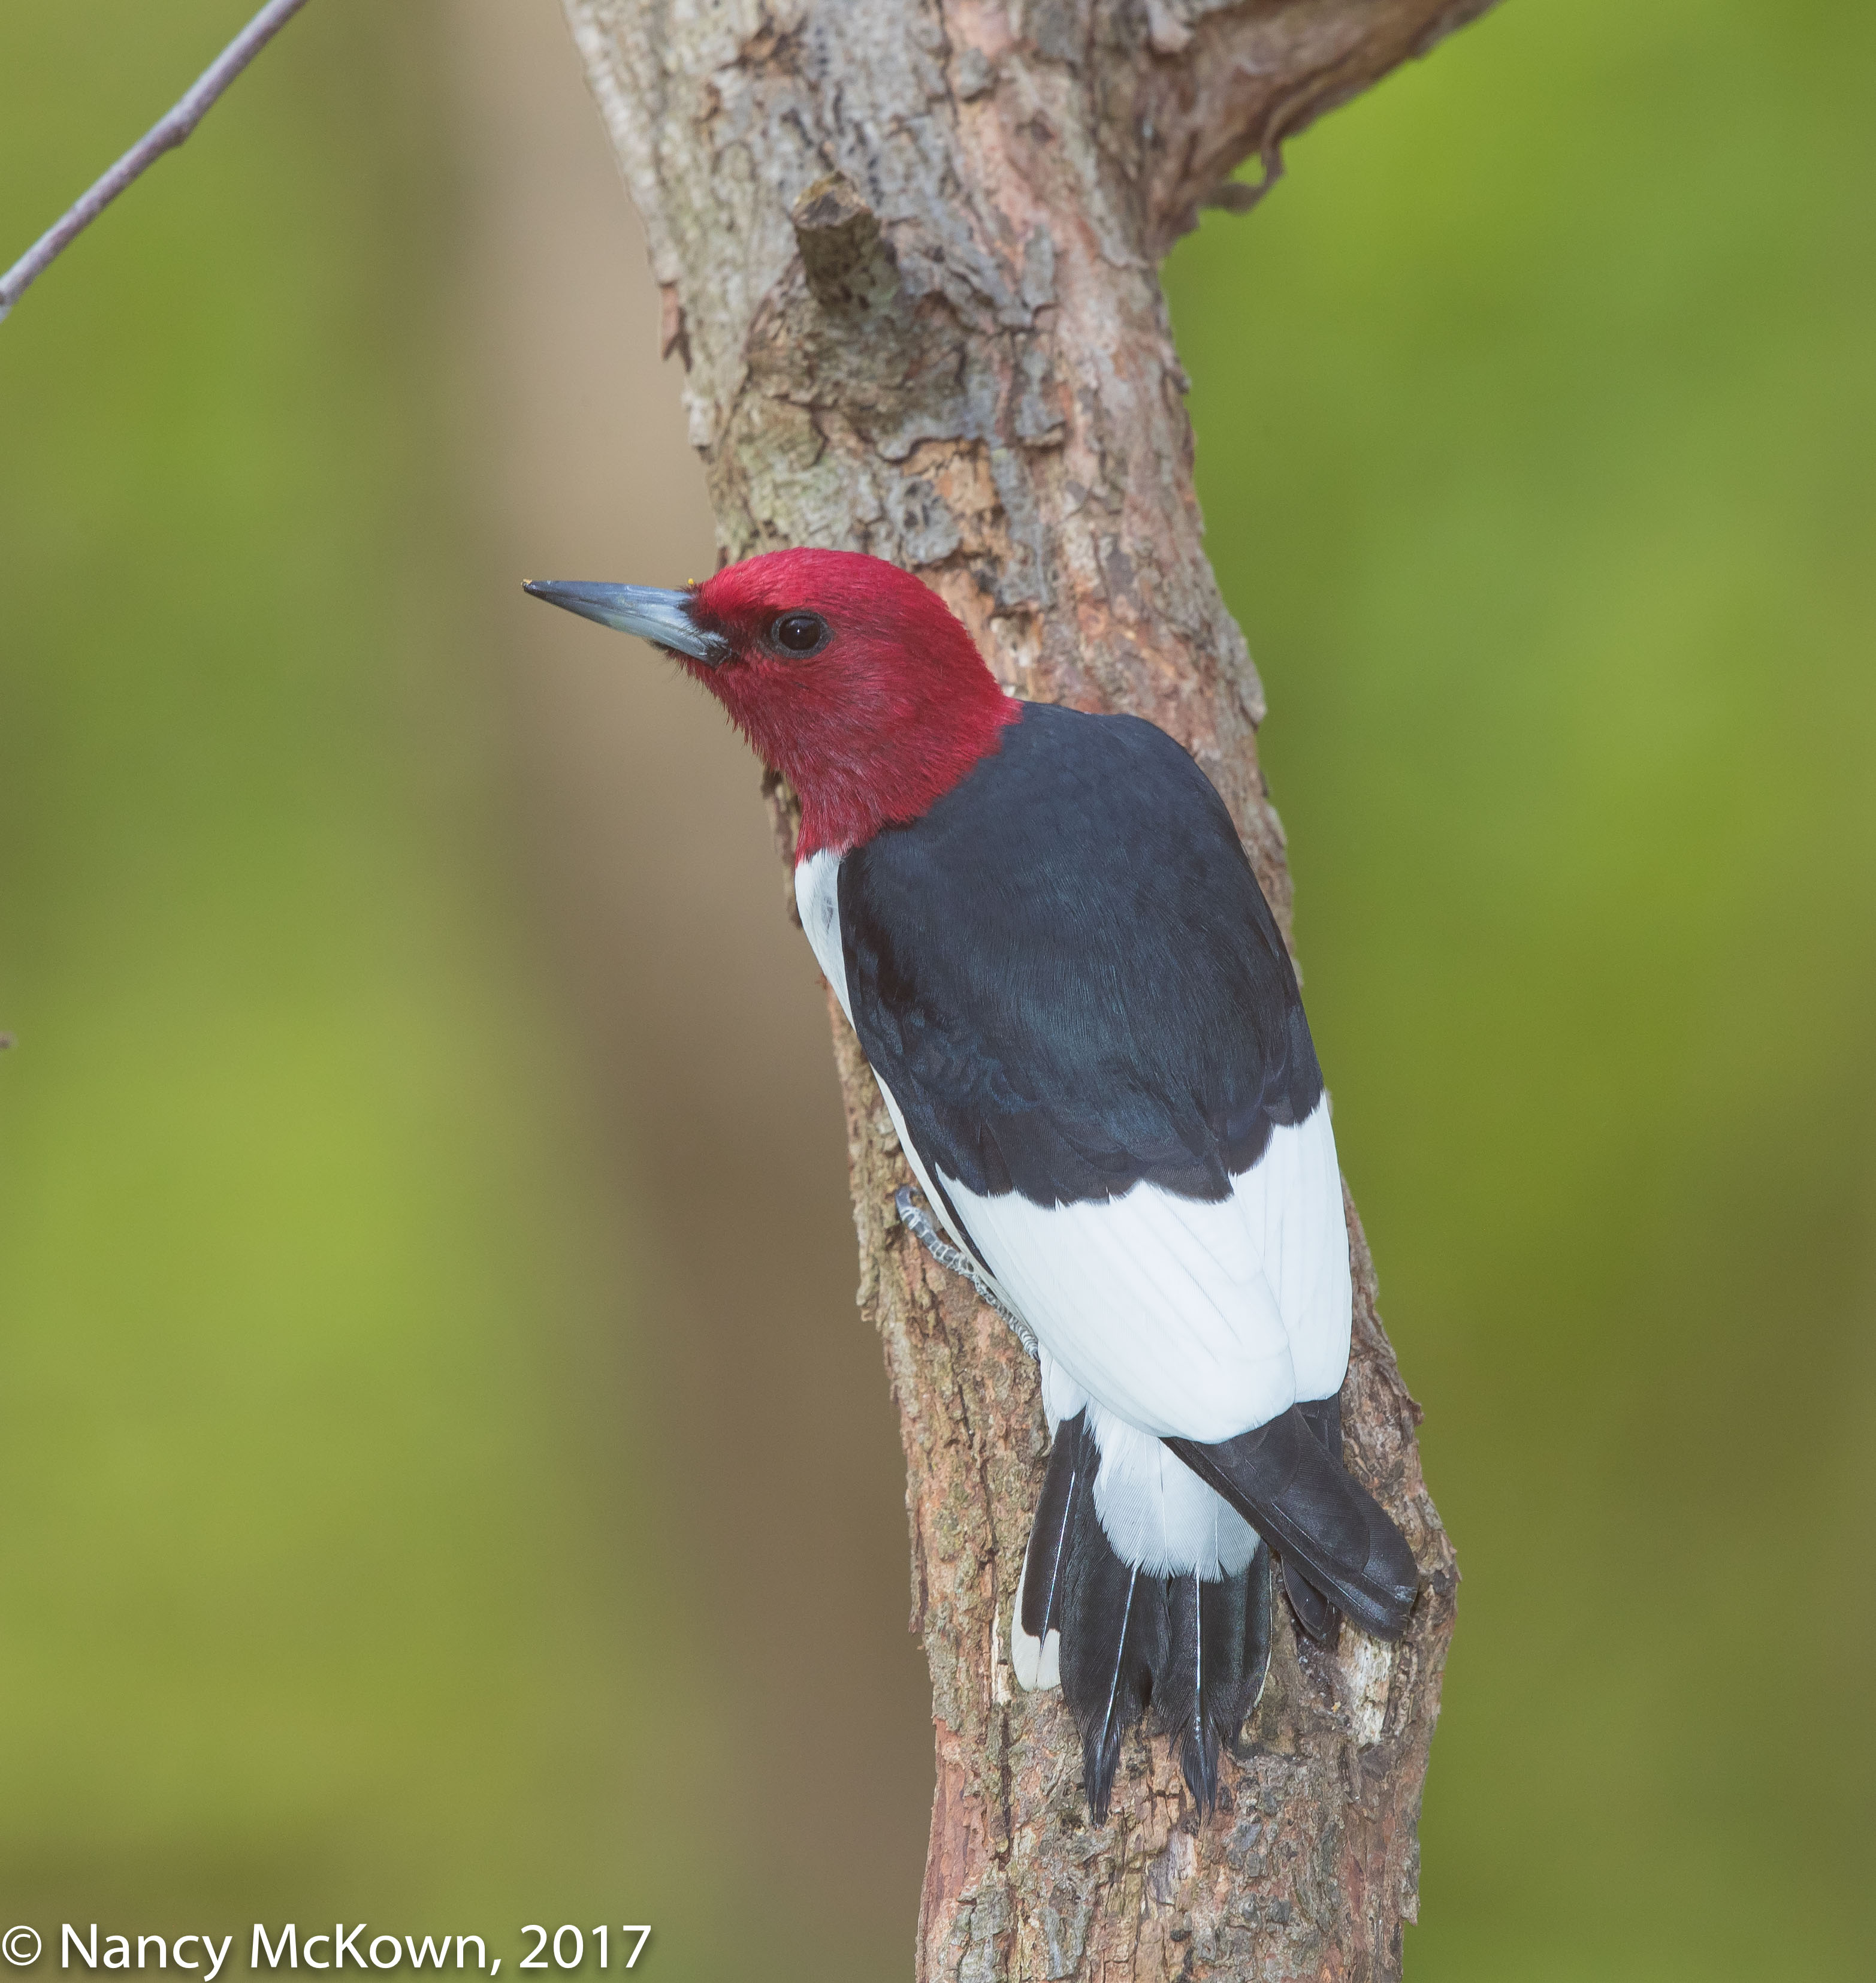
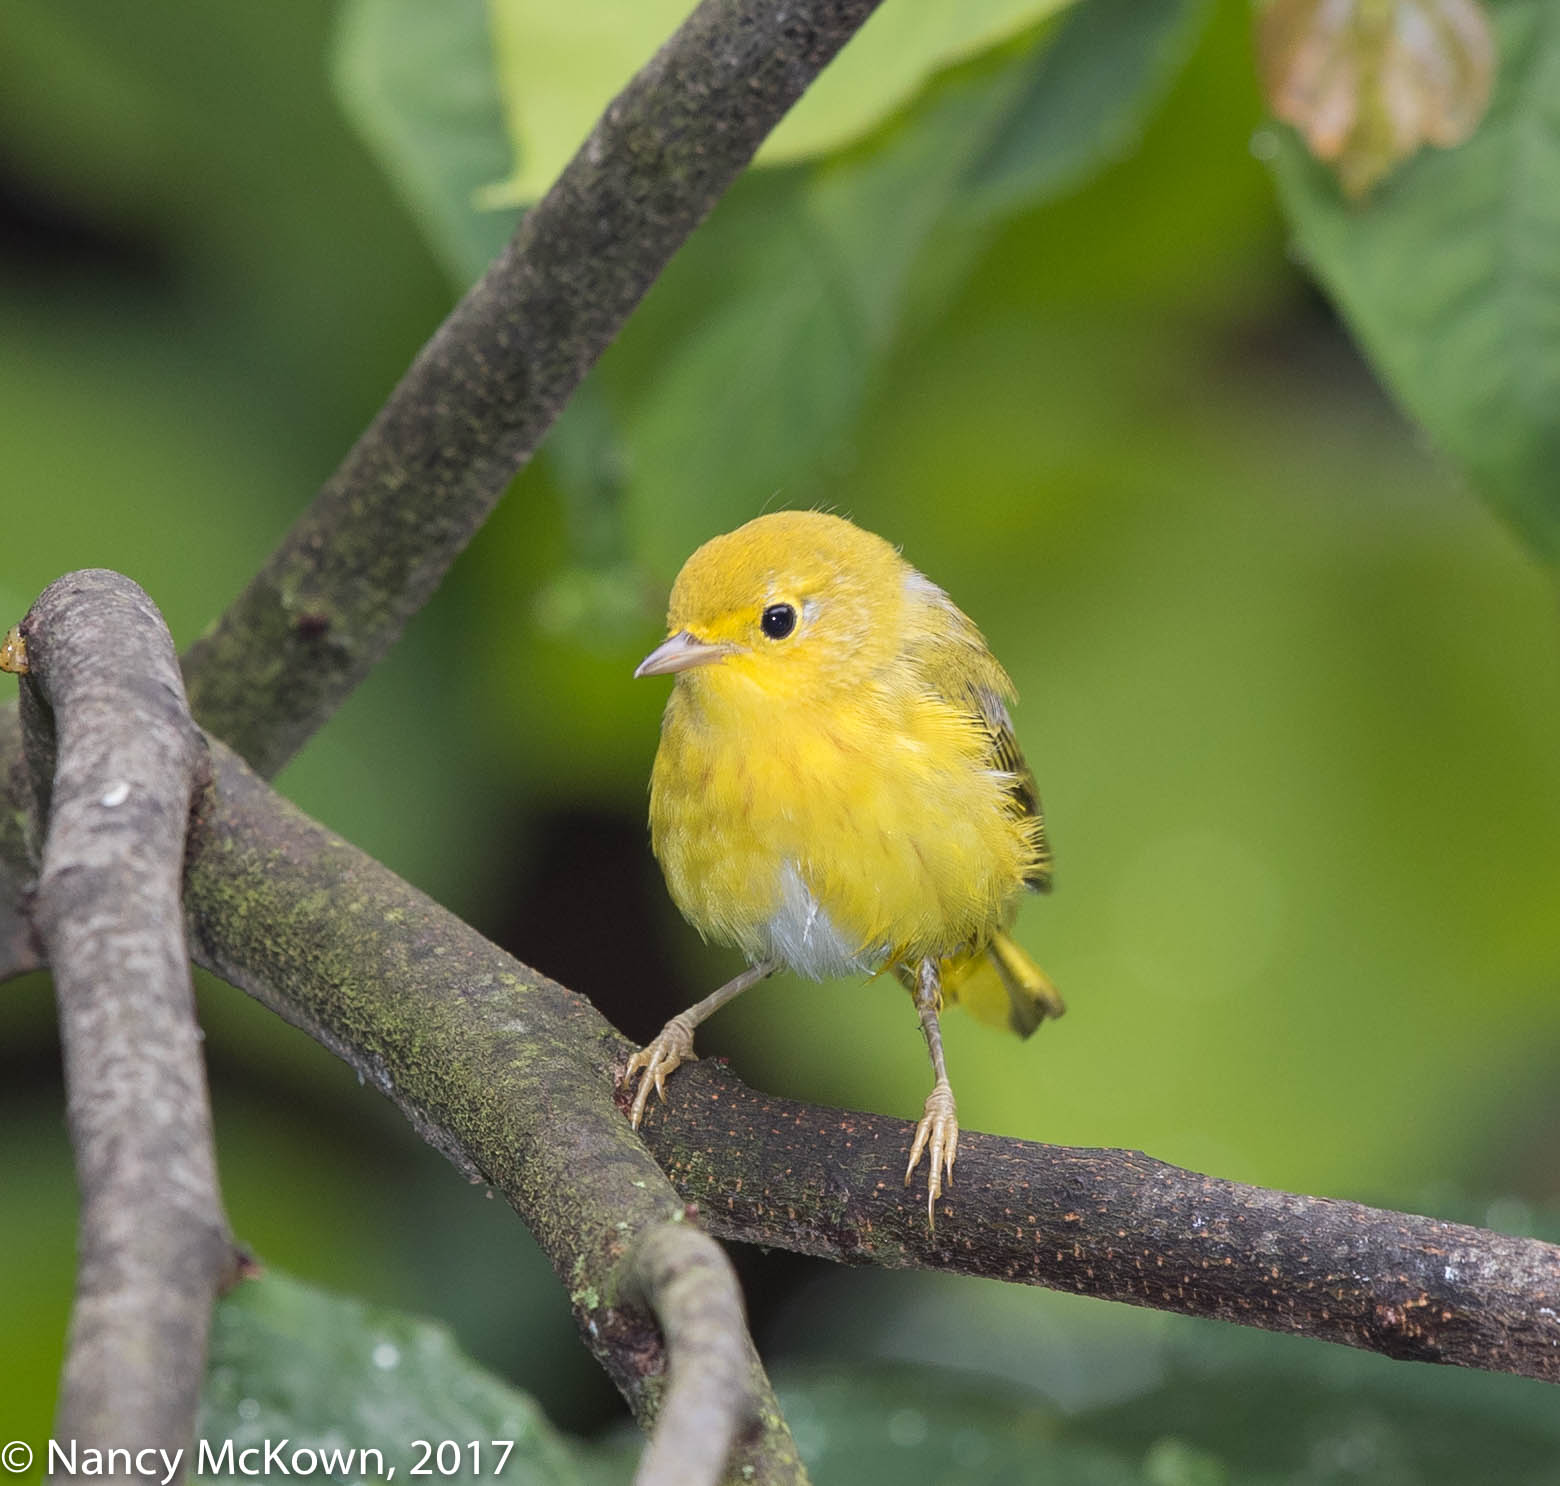
There are a few late nesters (migrators and year round birds) who are still rushing around in an effort to raise their families. Cardinals can have as many as four broods and are often still going strong in late August and September.

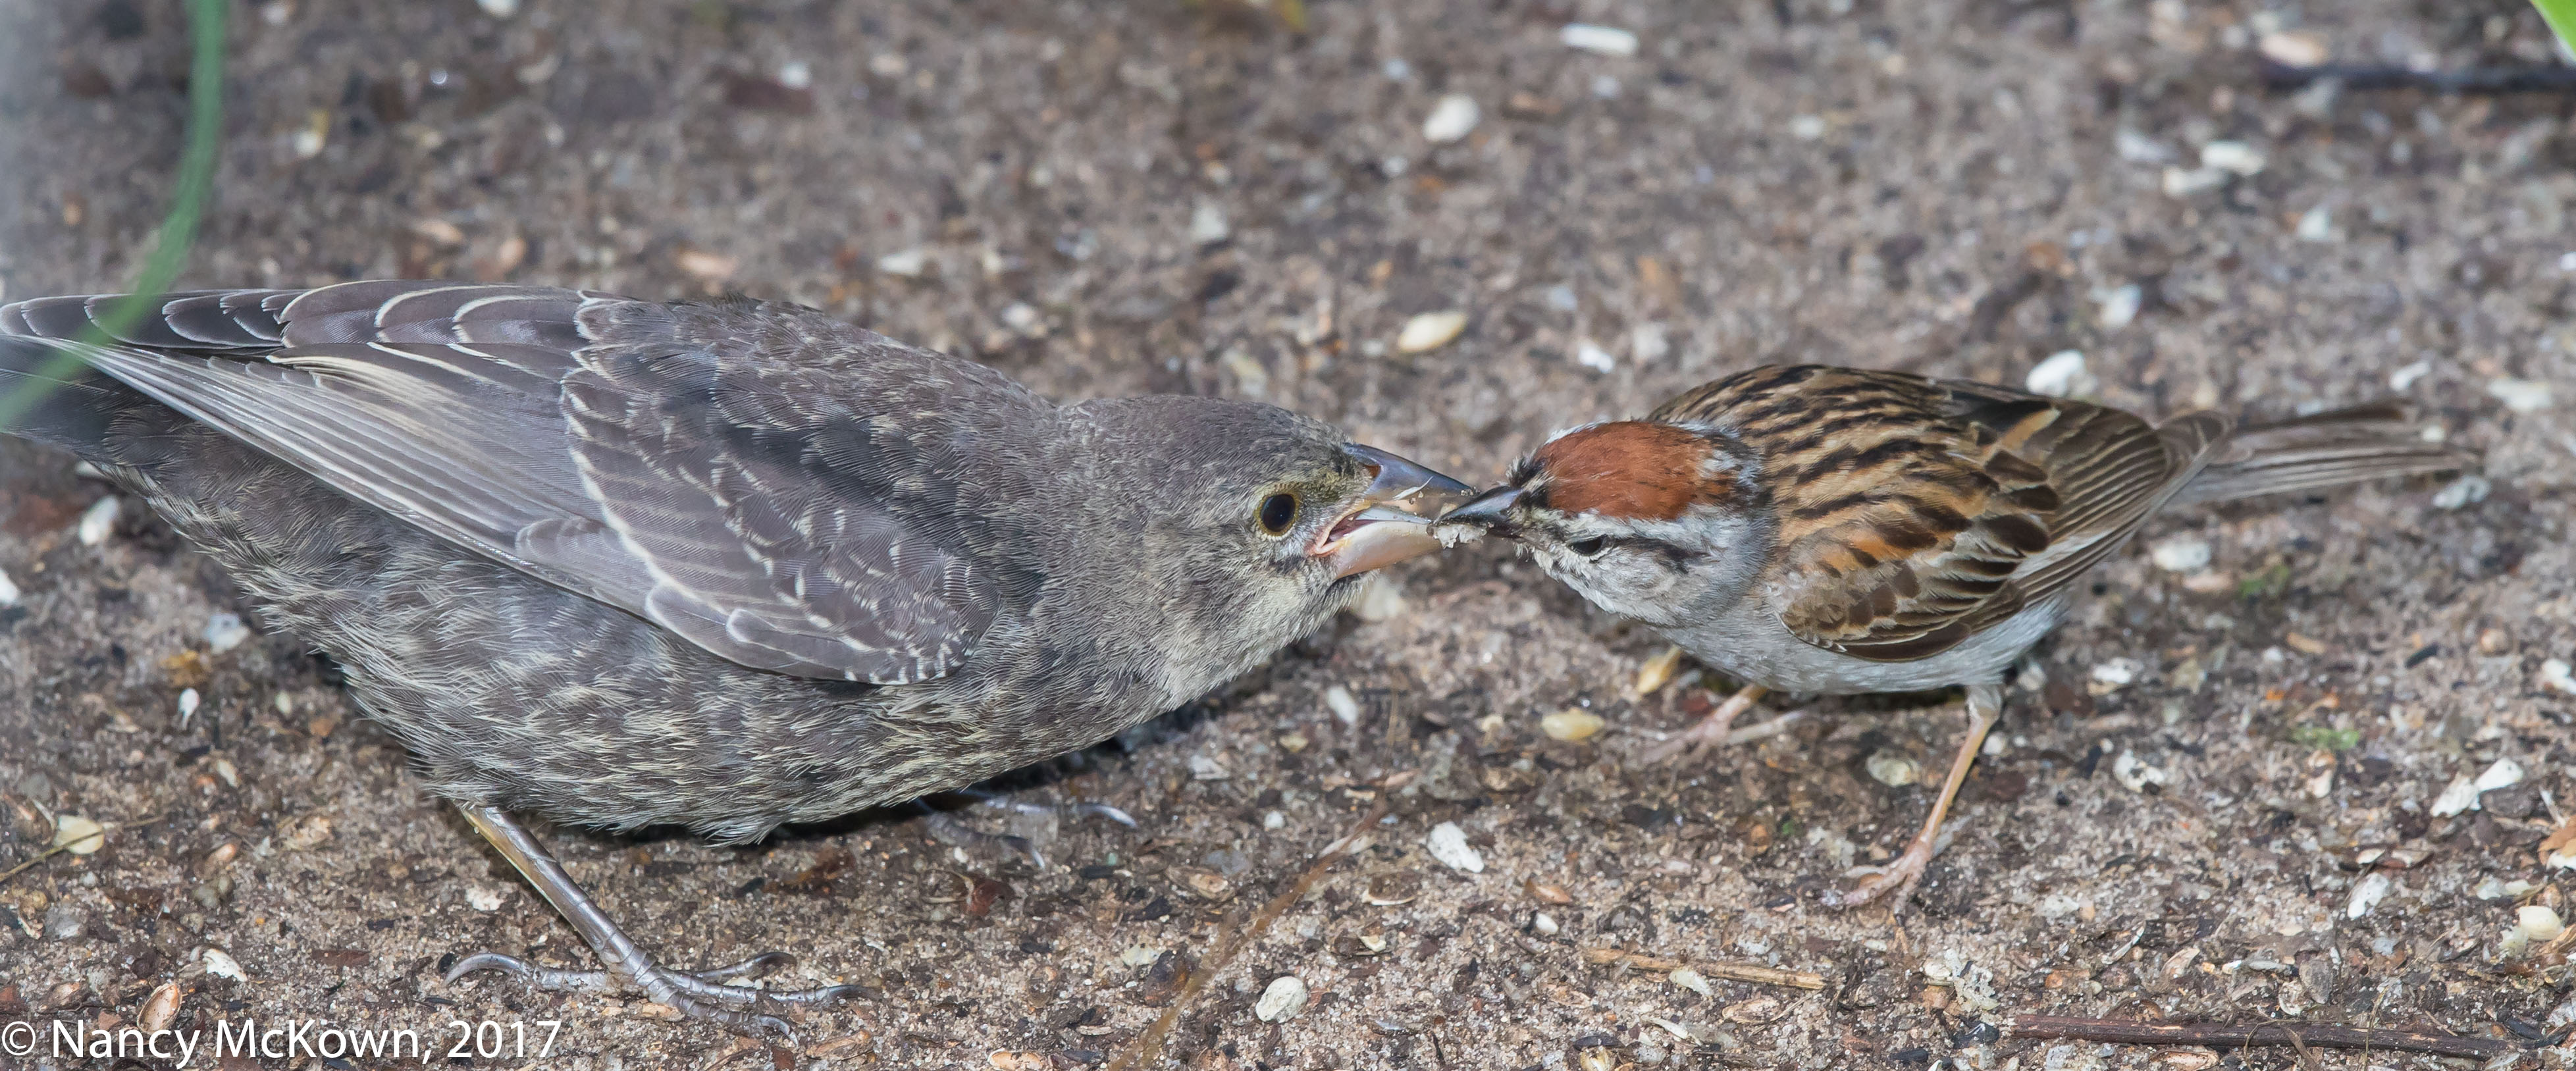
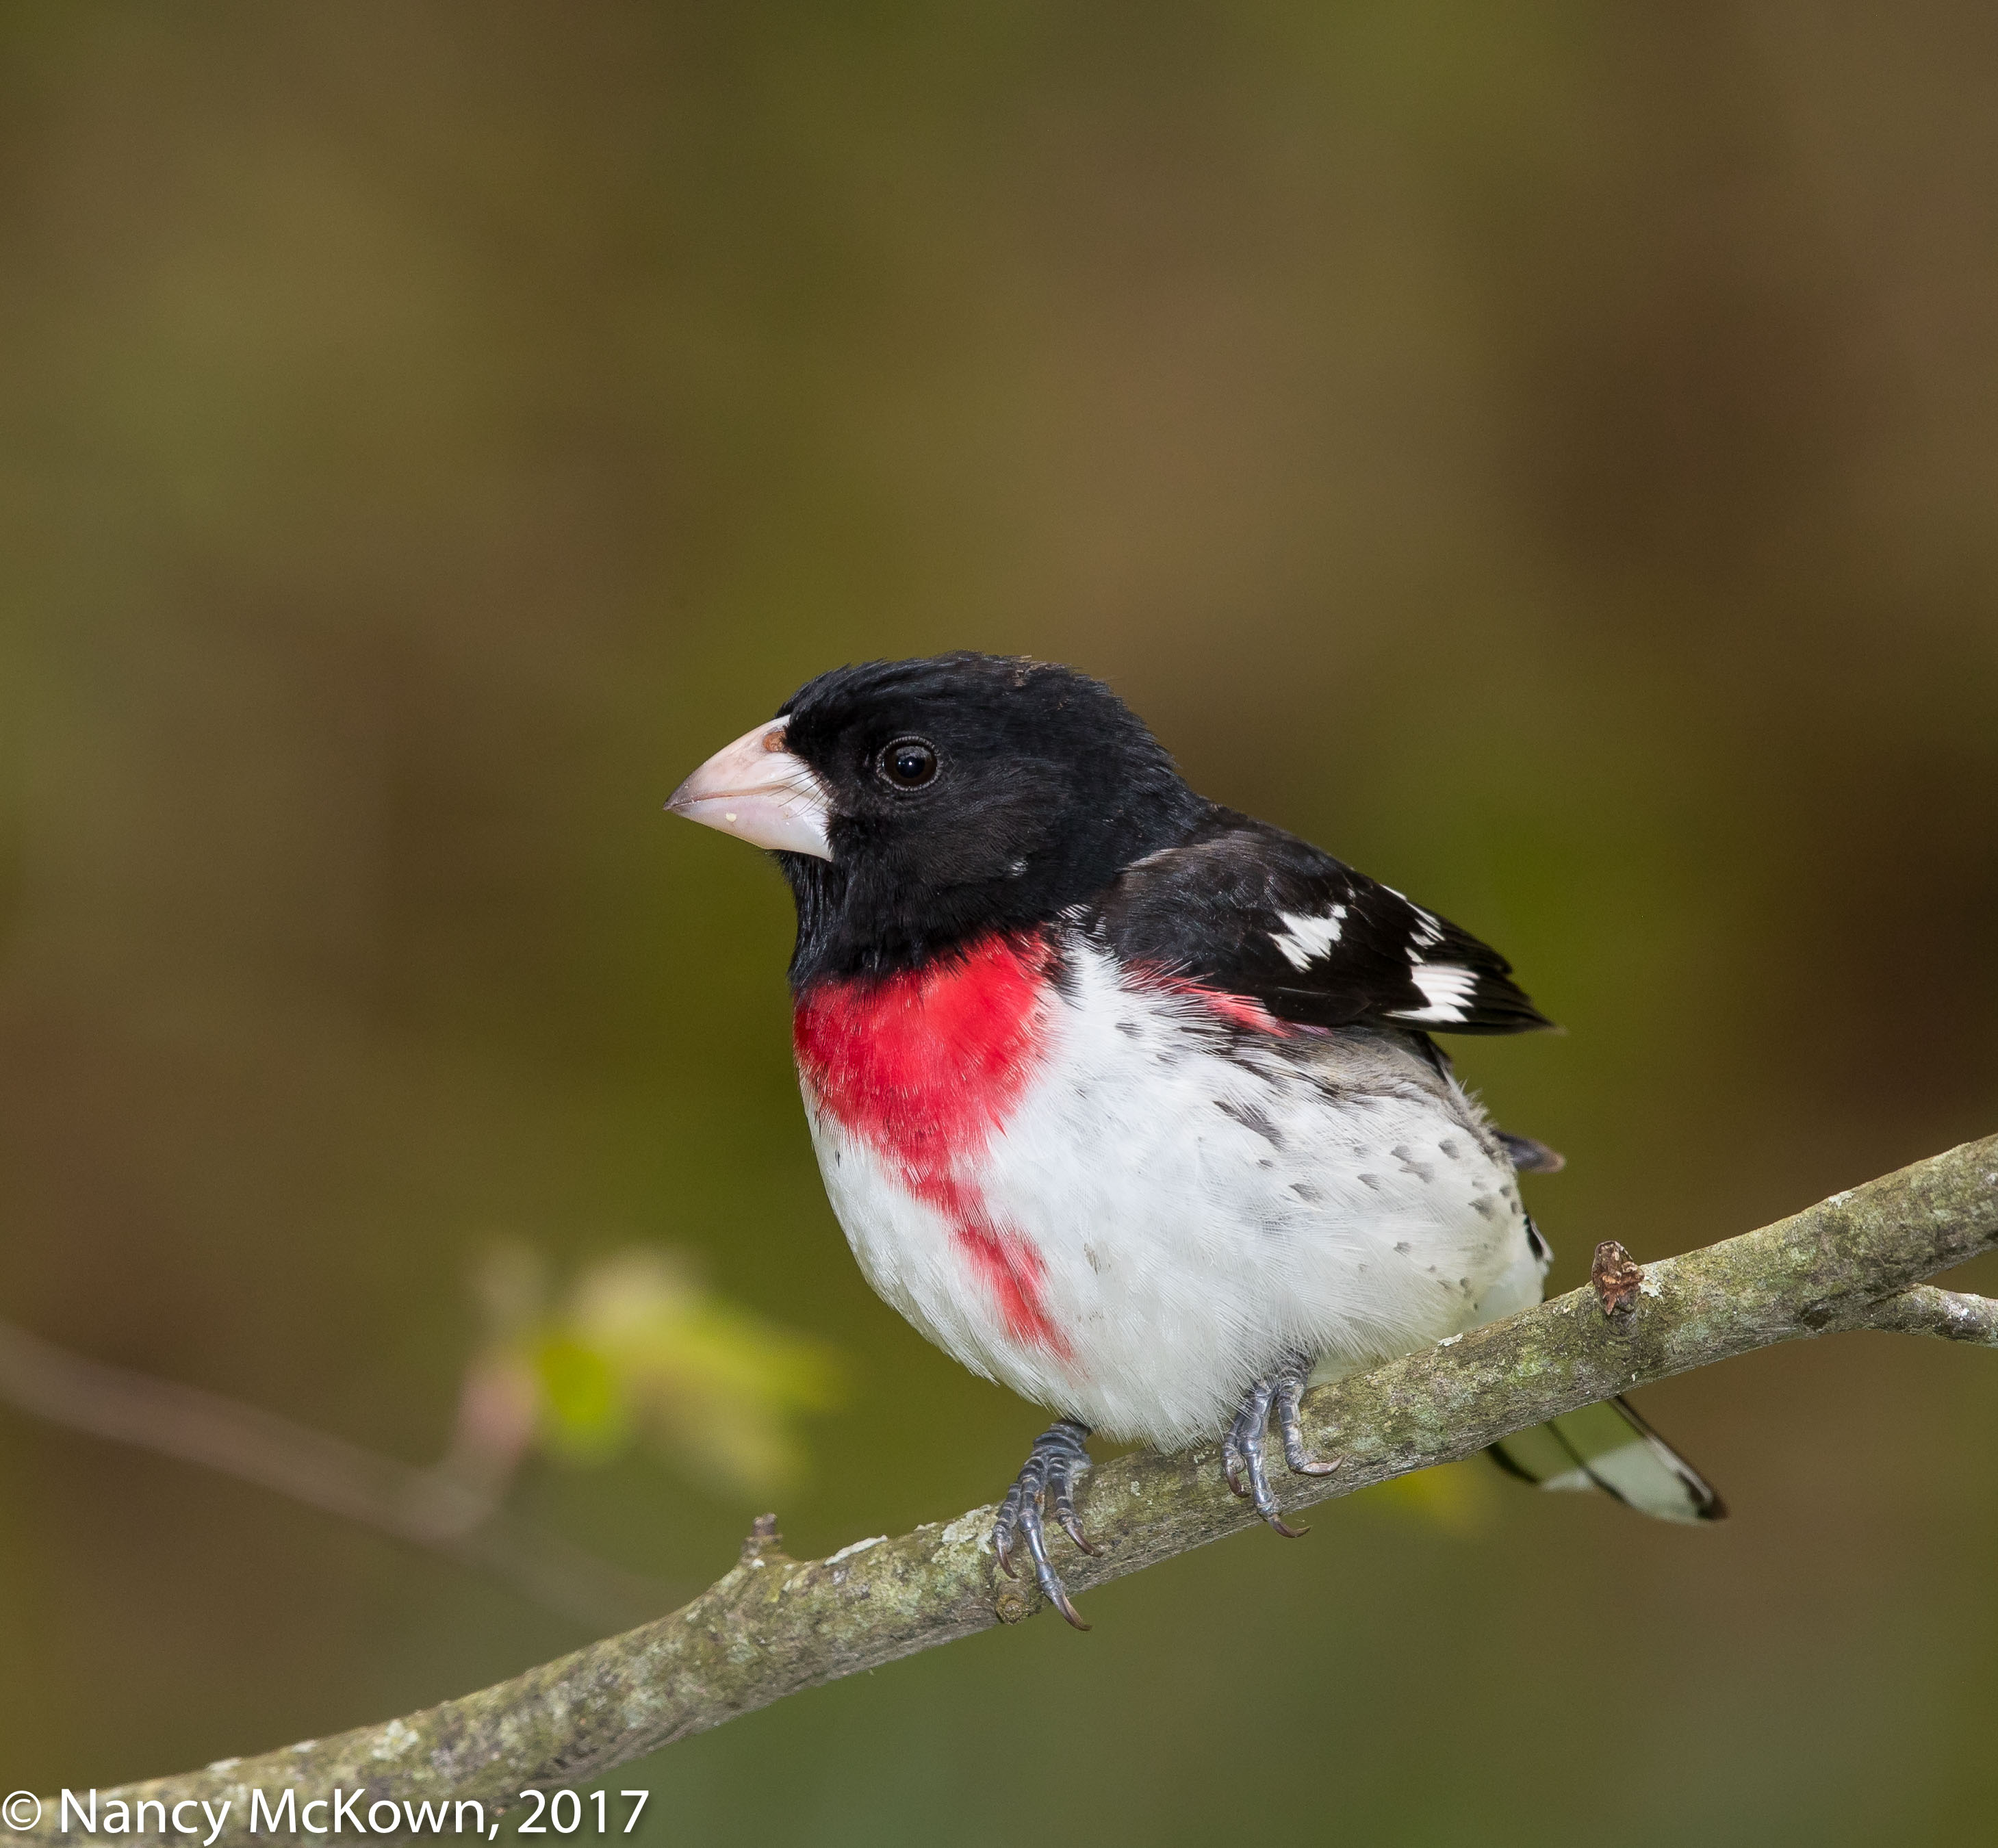
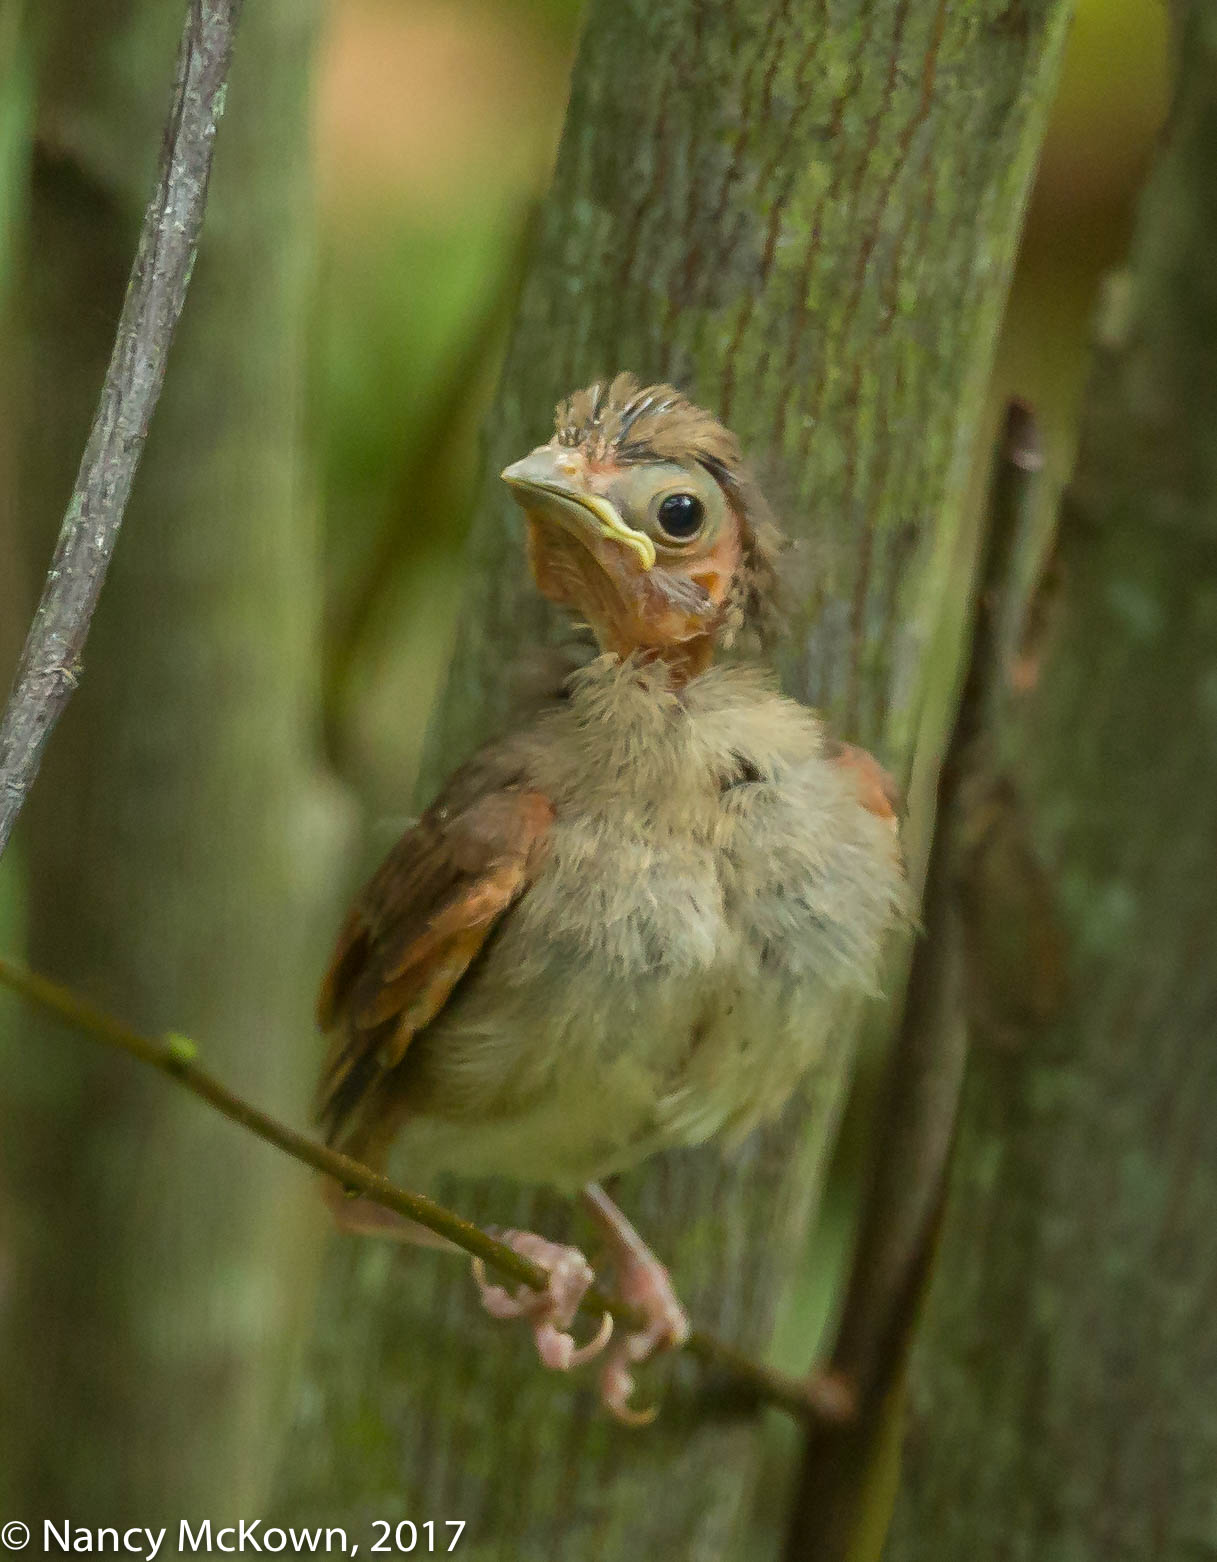
This hungry young Northern Cardinal looks like he either fell out or was ejected from the nest a little early. He seemed comfortable when sitting on a branch, but struggled to climb up the tree trunk to get to his parent. (See photo 2.)  I did not see him fly….but he was brave enough to jump and then use his feathers to float down to a lower nearby branch. The male parent in his post breeding molt still feeds the demanding fledgling. (See Photo 3.)

No Flash

I was on my way out the door when I noticed this little fledgling. It’s pretty obvious with the high ISOs and wide open apertures that I did not have time to attach a flash to the camera when I shot these images. Despite the shallow depth of field and somewhat grainy overlay, the filtered light was even and complimentary- enough to bring out some of the detail and texture of the emerging feathers on the fledgling and the molting feathers on the parent.

Northern Cardinal Youngster
Northern Cardinal, Just Out of the Nest
Looking more like a Nestling than a Fledging.
Using His Wings For Balance.
Climbing is Easier Than Flying.
ISO4000; f/4; 1/640 Second
Photo of Cardinals
Male Cardinal Feeding Fledging
Male adult in his Post Breeding Molt
ISO3200; f/4; 1/640 Second.

It’s a face only a parent could love.


Photographing Red Headed Woodpeckers -Understanding HSS on Flash

Photographing a Red Headed Woodpecker

This year, a pair of Red Headed Woodpeckers has been visiting the yard (infrequently) to feast on suet and bully the other Woodpeckers who dare to cross their paths. Red Headed Woodpeckers are very skittish around humans and quick to pick a fight with other species of birds, especially other woodpeckers. They consume a wide variety of seeds, fruits, nuts and any insects they come across while foraging in trees. Unlike most of the year-round woodpecker residents in our yard, Red Headed Woodpeckers will head south in the Fall to escape the harsh Michigan winter.

A Haze in the Air

The air was unmoving and full of haze on the sunny morning I took these photos. Billions of tiny dust, smoke and other dry atmospheric particles (perhaps from a half a world away) put a veil over clarity. (NOTE: It’s harder to see these particles when the skies are overcast.)

A photo that is in-focus does not mean that it is tack sharp. And soft focusing does not mean that the photo is out-of-focus. Out-of-focus means that all the lines are blurred to some degree. In-focus means that the various shapes in the focus area are sharp to some degree.

I usually don’t notice the detrimental effects of haze in the air until I look back at the images in post processing. They just don’t look right because contrast and detail are less defined. Upon zooming in, the focus looks sharp, but there’s something obstructing the view. It appears worse when the subject is farther away.

Lightroom will allow you to selectively apply correction. I usually just use the clarity slider to brighten the overall image. Ultimately, it’s never enough because it is impossible for software to restore what was never captured.

Red Headed Woodpecker
Not as “Clear” as the 2nd Photo Below.
ISO400; f/9; 1/250 Second

Exploring High Speed Sync

I’m using fill flash more in the yard this summer. I try to be judicious as to how it is applied because, in general, the more ambient light, the more natural the image looks.

With that in mind, I embarked on a mission to better understand the High Speed Sync function (HSS) on my flash and how best to use it for bird photography. I had assumed that HSS would not only provide adequate fill light, but also freeze the action by allowing me to set whatever shutter speed I wished.

As with most things having to do with exposure, it’s more complicated than that.

Photo of Red Headed Woodpecker
Red Headed Woodpecker
The Red Bud Tree Branches
Cracked Last Winter.
Black Strips were Used to Bind the Wound.
ISO400; f/9; 1/250 Second

Normal Flash Mode

When using normal flash mode, exposure is calculated based on aperture, ISO, and the power and duration of the flash. The shutter speed does not fit into exposure analysis- except for how much ambient light is getting through during the time the shutter is open.

The calculated flash blast is very fast and very powerful. When ambient light is low, the flash blast will freeze motion more effectively than a faster shutter speed. (NOTE: It also depends on how fast your subject is moving.)

HSS – Continuous Light Mode

In HSS mode, the flash mimics continuous light and consequently shutter speed is part of the exposure calculation. HSS fires short pulses of light very fast during the whole time the shutter is open. The flash unit is working harder (sucking up to 4x more battery power) and putting out much less light in HSS mode.

With flash set to HSS mode, you do have the freedom to set a faster shutter speed. However, the higher you set the shutter speed, the less time the image sensor is exposed to light. Adequate illumination in HSS mode depends on how many fast short pulses of light can sneak through while the shutter is opened. (Of course, distance matters too.)

Normal Flash is Preferable in Bird Photography

Using the HSS function on a flash will not provide the speed, power and range needed for bird photography. Freezing motion in low light situations is better achieved when the flash is set to its normal flash mode.

Just shows how powerful and fast a single light beam generated from a flash gun can be.

Photographing Hairy Woodpeckers – The Lure of Fancy Camera Equipment

Photographing Hairy Woodpeckers

Most years we have the good fortune of seeing many sturdy, winter-hardy Downy and Red Bellied Woodpeckers in our yard. But Hairy Woodpeckers….just a few.

The Hairy and Downy Woodpeckers are examples of convergent evolution –in that both species live in similar habitats and have evolved to be almost identical in shape and color, despite not being closely related biologically. I’ve learned to tell the Downy and Hairy Woodpeckers apart by first checking the length of the bird’s beak and then overall bird size. (The Hairy is the larger of the two.) The beak of the Downy is dainty and better “fits” his face. The drilling beak of the Hairy Woodpecker is more formidable- as long as his face – and appears oversized. Predictably, both display typical woodpecker-ish behavior…. probing into tree cavities, scooching up and down tree trunks and clinging to the suet feeder. (NOTE: Sometimes a young fledging Hairy will look as though he has a smaller, undersized beak, causing me to wonder about ID.)

Photo of Hairy Woodpecker
Hairy Woodpecker
About the Size of a Robin
A Little Brown Stain Is Evident
On the Outer Wing and Tail Feathers.
No Doubt from Being
Constantly Dragged Across
The Bark of Trees.
ISO1250; f/9; 1/250 Second

Nature Photographers

I learn a lot about birds and photography by exploring the web. NOTE: I don’t have a lot of friends who are nature photographers.

Since I started this website 4+ years ago, I have grown to be a better bird photographer and a better writer. I have more knowledge and more skill. I am less of a pretender.

Photo of Hairy Woodpecker
Hairy Woodpecker
Red splotch at the Rear
of His Crown.
ISO1250; f/9; 1/250 Second

Sense of Exclusivity

I’m always watching photographers…. looking to see what gadgetry is around their necks. I can be a little dismissive if I notice an unglamorous “consumer market” camera, even though I know that brand names, high prices and the air of professionalism do not an artist make. For some reason, I simply pay more attention to individuals carrying “professional grade” cameras. It is as if all those superior imaging components and high prices allow me to elevate the photographer on to an artistic pedestal, even though her skill level may not allow her to venture past the camera’s auto settings. Snob appeal I suppose.

Few Barriers to Entry

Modern dSLR cameras are not a study in simplicity, but that doesn’t matter. The imaging technology contained within these cameras is geared to eliminate or at least reduce barriers to becoming a photographer, so much so that a lot of people don’t think of nature photography as an art or a skill. Almost anyone with a dSLR camera can present herself as a pro. Understanding the fundamentals of composition and exposure is simply not necessary. Just show up, display a little panache, take hundreds of photos (professional quality is to a large extent about numbers) and let the camera figure out the details. No mastery necessary.

Divergent Paths

Whatever you own, all gear is limiting in some way. Very different camera equipment, methods, and motivations lead photographers onto divergent paths. The skill and talent of the photographer, not the quality of the equipment, will ultimately be the key differentiator between photographer and dabbler.

“The Camera is an Instrument that Teaches People How to See Without a Camera.”

–Dorothea Lange


Photographing Ruby Throated Hummingbirds Near the Crocosmia

Photographing Ruby Throated Hummers Near The Crocosmia

The Crocosmia (Lucifer) flowers…with their arching stems and bright green pleated blade-like leaves are showy and exotic-looking right now. The Hummingbirds are buzzing in and out, attracted to the intense scarlet red of the tubular flowers.

The flower clusters sport lots of blossoms which poke out every which way. Some of the blooming and almost blooming flowers reach out above the 3′ high stems, affording one or two places where the camera’s lens could isolate the delicate petals from the busyness of foliage.

My goal:  Set up the camera on the front porch, approximately 14-16 feet from the Crocosmia and try to capture an uncluttered image of a hummer very near, but not drinking from the flowers.

Photo of Female Ruby Throated Hummer
Ruby Throated Hummingbird, Female.
With Fill Flash
ISO1000; f/9; 1/250 Second

Judicious Cropping

This grand Lucifer patch is too lovely to prune so I have to manipulate the camera rig in to just the right position, and perhaps gingerly fold or tuck a few of the stems to one side or the other. (NOTE: Most of the judicious cropping will have to be done in post processing.)

Hummingbirds appear confident and fearless once they get used to you. My plan required that the hummers cooperate by choosing one of the designated patches of flowers upon which to drink and pose. After only a day, this little one zoomed in close to my face, chittering away as she looked me over. She then proceeded with her nectar drinking routine..sip-back away-hover-look around-repeat.

Flash or No Flash

The morning light was filtered by the fully leafed-out tall trees above and around the house.  As I set up, I noticed that the wind appeared uncertain about its direction and intensity. The hummers didn’t seem to care, but an unexpected gust would certainly impact my efforts to achieve image clarity.

To stop wing motion on a hummer (without flash), I have had to set the shutter speed to as high as 1/6400 second. (NOTE: Think about how fast that is! I remember when the shutter speed on a couple of my old cameras did not go above 1/1000 second.) Setting the shutter speed that high in our sun filtered yard would send the ISO soaring to unacceptable levels. I attached the flash.

Stopping wing motion with flash requires that I set the exposure parameters to shoot with little or no ambient light. With the flash attached, the shutter is synced at 1/250 second or slower. The more I tightened the aperture, the less the ambient light creeped in – the darker the background became. It would then be up to the synced, instantaneous and powerful flash burst to not only illuminate, but freeze all movement.

Ruby Throated Hummer
Female Ruby Throated Hummingbird
With Fill Flash.
ISO1000; f/9; 1/250 Second

More Ambient, Less Flash

I have to choose between freezing the hummer’s wing motion or maintaining a more natural look. An exposure conundrum because I can’t have both. The more ambient light I let in, the more natural the image looks, and the more impossible it becomes for the flash to freeze the wing action. This is especially true if the overall ambient light illuminating the flower and bird scene meters out to be very similar to the exposure settings required for the background.

For this shoot, I raised the ISO settings in order to let the ambient light on the scene dominate exposure settings more. This strategy helped reduce the impact of the flash blast on the subject, creating a better balance of light.

Ultimately, I liked the look of ambient light more than I liked the look of tack sharp wing feathers. I chose to set the exposure parameters so that ambient light dominated and the flash provided only fill light.

Photographing a Fledgling Brown Headed Cowbird- and Her Surrogate Parent

The Way of Brood Parasites

Looking around the yard, I see many foraging Brown Headed Cowbirds. A member of the stocky Blackbird family, they feed together in groups, mostly on the ground. It is fascinating to note that even though every single Cowbird out there was nurtured in some other species’ nest, they still hang out together.

Photo of Brown Headed Cowbird
Fledgling Brown Headed Cowbird.
Waiting for Surrogate Parent to Feed Her.
ISO1000; f/9; 1/250 Second

Cowbird parents do not build their own nests. Instead they rely on other species to incubate and rear their young. Cowbirds (and all brood parasites) generally receive heaps of distain for abandoning their young. But abandonment implies that they leave and do not intend to return. Apparently, there is some evidence that Cowbird females do not abandon their eggs in a nest and then forget their biological progeny.

These furtive birds have been shown to return to observe their eggs, chicks and fledglings who were surreptitiously deposited in multiple nests. Scientists speculate that Cowbird parents go back to watch their young to determine (for future reference?) if their eggs were successfully placed and perhaps to establish a Cowbird “return to the fold” connection with them during their fledgling days. After all, if no connection is made, how are young Cowbirds to know their own species’ songs and behaviors as opposed to those of the hosting birds.

A Heartache to Watch

It still gives me somewhat of a heart-ache to watch and photograph a small Chipping Sparrow attempting to feed a large and very hungry Cowbird. The insistent demands of this sizable interloper probably kept the female Chipping Sparrow from raising her own brood. NOTE: Her own babies in her nest most likely were starved or pushed out.

Get over it!  Time to put my maternal inclinations aside and think about improving my bird photography.

Photo of Chipping Sparrow with Cowbird YoungChipping Sparrow with Her Cowbird Fledging.
Looking Rather Stunned I Think.
ISO 1000; f/9; 1/250 Second

AutoBracketing ISO

Altering exposure parameters using Automatic Exposure Bracketing (AEB) is pretty basic stuff for most photographers. The camera’s automatic bracket functionality quickly and efficiently changes exposure parameters within a sequence of shots with one shutter release. Essentially it varies the degrees of brightness within that sequence according to the specifications you set.

However, you rarely come upon a photographer using AEB to bracket only ISO. Why not?  Some thoughts:

  • High ISO settings allow the camera’s sensor to be more receptive to ambient light. Low ISO definitely means finer grain… and thus cleaner, sharper images. The higher the ISO, the more you can expect noise, or speckled images. The prevalence and appeal of the noise depends on the quality of the camera’s sensor.
Photo of Chipping Sparrow with Cowbird
Chipping Sparrow with Cowbird Fledging.
This Image Shows the Size Difference.
Quite a Mismatch!
ISO1000; f/9; 1/250 Second
  • The “look” of high ISO grainy images can be appealing, especially if produced with a high-end sensor.
  • If the photographer wants depth of field (aperture) and sharpness levels (shutter) settings to remain constant in a low light scenario, bracketing the ISO parameter can help achieve the right balance of brightness and grain.
  • But why not adjust exposure to your liking in post processing? Why bother using AEB to bracket ISO…. or any exposure parameter?  The most compelling reason I can find to bracket ISO is as follows: Pushing up that exposure slider in post processing to achieve the right exposure balance can seriously harm the “look” of high ISO images. Exposing correctly in camera will give the grain a more consistent look, especially compared with the grain you will see after fixing exposure in post.

Yet another reason to get exposure right in camera instead of relying on post processing to correct your exposure mistakes.

Photographing a House Wren and Thoughts on AEB

Photographing a House Wren

Every morning in the spring and summer, the bubbly songs of little House Wrens greet me in our front yard. Hard at work, they zip about in the understory trees and bushes to snatch small arthropods and take them back to feed their nestlings. Their almost constant, somewhat scolding songs help me find and track them with the lens.

House Wren
House Wren
With Flash
Taken Earlier in the Morning.
ISO1000; f/9; 1/250 Second

Automatic Exposure Bracketing

It was coming upon mid-morning and way past the time when the summer sunlight was low and complementary. The light in our yard was contrasty, uneven, and patchy…the perfect formula to misdirect the camera’s light meter. Instead of packing up, I removed the flash gear and started playing with the Automatic Exposure Bracketing (AEB) menu.

NOTE: There’s a big difference in the quality of light between the top photo (even, early morning light, with flash) and the bottom two photos (late morning, harsh light, no flash). I have to admit that it felt good to take the flash assembly off (flash bracket, telephoto flash modifier, off shoe flash cord and lithium battery pack). The camera foot and tripod head are better able to balance and maneuver the lens without the extra top heavy weight.

House Wren
House Wren
Without Flash- AEB -1
Unattractive Contrasty Light.
ISO1600; f/14; 1/800 Second

Thoughts on AEB

If you wish to improve the exposure balance in difficult lighting situations, then automatic exposure bracketing (AEB) can help. The camera’s automatic bracket functionality quickly and efficiently changes exposure parameters within a sequence of shots. Essentially it varies the degrees of brightness for each shot based on the designation you set in the menu. Your specifications can be programmed to use either broad or narrow image sequence sets. The camera will maintain the exact same metering while changing the exposure parameters.

Photo of House Wren
House Wren
Such Different Color Tones!
Light is Still Unappealing,
ISO1600; f/8; 1/800 Second
+1 Exposure Compensation

For instance, if you think the light meter is incorrectly gauging the scene to be brighter than it is, set the AEB to take 3 or more shots in negative exposure range. Conversely, if you think that the light meter is incorrectly gauging the scene to be darker than it is, set the AEB to take 3 or more shots in the positive exposure range.

AEB Procedures and Settings

  1. On some dSLR cameras, including mine, the photographer can use AEB with the camera set to Manual (M) mode and precisely control all exposure parameters independently. Since I most often vary only the shutter speed parameter during the AEB sequence, I use the shutter preferred semi-auto mode (TV) instead of Manual mode and choose a low and unchanging ISO setting. (NOTE: Not AutoISO).  Lastly, I engage continuous shooting mode, otherwise the shutter will stop after the first shot and wait for me to continually press the button before it fulfills its AEB mission.
  2. In the semi auto modes… the camera will operate outside of optimal exposure limits to achieve the auto bracketing exposure parameters set. If minimum and maximum hard limits have been set up in the menu (ie…shutter should never be slower than 1/30 second), the camera might be forced to alter more than one exposure parameter (ISO and shutter) to achieve the bracketing sequence.
  3. On this shoot, I changed the AEB parameters quite a lot without thinking it through. At times, camera would not execute the AEB sequence (shutter speed as the variable), and take only one shot instead of the whole sequence of shots. I finally figured out that the number and variation in exposure parameters that I set up were just not possible to execute in AEB given limitations on the shutter preferred auto mode, the ambient light and the len’s max aperture settings.
  4. You can set the camera to discontinue AEB after each sequence….but re-engaging it every time is a hassle….. especially with a highly active bird like the House Wren.  I left AEB set to “On” until I was done with the shoot.

Manual Bracketing

Bracketing can be done manually if you wish to be more precise in your exposure manipulation deliberations. This means that instead of setting up an automatic 2-3-5 or 7 AEB shot sequence in the camera’s menu, you dial in whatever exposure compensation you wish using the camera’s Manual mode and then take each differently exposed shot one at a time. (NOTE 1: Exposure Compensation Dial on the LCD panel will not work in complete Manual mode. NOTE 2:  Birds are highly uncooperative during exposure manipulation.)

AEB Rarely Does the Trick in Bird Photography

Sometimes the balancing act that makes up AEB does not work because the exposure on one portion of the image causes problems in another part of the image. AEB sequencing will only produce many poorly exposed images.

NOTE: You can combine multiple images into one by using the High Dynamic Range (HDR) process.

When photographing birds there is no substitute for well balanced light. AEB can not fix poor lighting conditions, but it may help you balance exposure parameters to create a more usable photo. Overall, judging by the results, I would rather wait for good light.


Photographing an Unexpected Yellow Warbler – Taking Cover

Photographing An Unexpected Yellow Warbler

It’s was a rainy July day in late morning when this dewy, unspoiled Yellow Warbler appeared in front of my lens. I took a few through-the-window shots to confirm ID…. and then noisily cranked opened the library window. I was surprised to find him sitting in our Magnolia tree. Generally, we see Yellow Warblers (sometimes just a blur) in our yard only during the fall migration cycle. He looked young….so perhaps he ventured out of his familiar territory to explore. Why ever he came within view, I was very pleased to see and photograph him.

Photo of Young Yellow Warbler
Yellow Warbler.
Looks Fresh and Young.
Right Before He Noticed a Predator.
ISO400; f/6.3; 1/250 Second

Take Cover and Freeze

We do not live in an open habitat, so there are plenty of places for a bird to hide from the camera and from predators. When I notice a warbler who is not obsessively flitting about searching for food, driving off the competition, or singing his heart out to attract a mate, it gives me pause. Something is wrong.

Birds alter their behavior when there’s a risk of a predator attack. Most fly off fast and erratically, searching for distant cover. This Yellow Warbler was utilizing the crouch-and-stay-put strategy that is so prevalent with Downy Woodpeckers. He was quiet, hunkered down, immobile mostly, and looking up to the sky. He most certainly saw me, but had more to worry about than the camera.

Yellow Warbler
Yellow Warbler
Barely Moving–for more than 10 minutes.
On High Alert-Watching the Sky.
ISO400; f/8; 1/250 Second

Tele Flash Considerations

The ISO was reading 5000+, compelling me to attach and connect all of the flash gear. It was much easier to manage the flash blast in the first photo because the background was free of nearby distractions. In the second and third photos, the warbler was hiding from his predator within the branches near the truck of the tree… so he was right up against his background. The Magnolia tree is 20+ feet away and the tele flash extender did a good job of lenghtening the light beam to effectively spotlight the bird.

Looking back on this photo, I think I should have reduced the e-TTL II determined flash blast somewhat. I could have pushed up the ISO, enlarged the aperture to let in more ambient light, or adjusted the Flash Exposure Compensation (FEC) by -1 stop or so. NOTE: There are lots of ways to tone down the light in order to minimize the sharpness of the shadows.

Photo of Yellow Warbler
Yellow Warbler
Feeling Safer.
Stretching Out a Little After Watching the Sky for Predators.
ISO800; f/9; 1/250 Second

On His Way

This warbler stayed hidden from the angel of death long after other avian dare devils were comfortable enough to try some quick feeder in-and-out maneuvers. Eventually he felt safe enough to fan his tail feathers and stretch his wings; and then he was gone.


Photographing A Great Crested Flycatcher-Nest Adornment

Photographing the Great Crested Flycatcher

This little Great Crested Flycatcher is a new bird for me. My bird books note that this species is a common neotropical migrant which nests in South West MI and a wide swath of the Eastern United States. The plumage on the males and females looks identical… gray and reddish brown feathers accented with a lemon yellow belly. There’s not much of a crest….let alone a “great crest” on this bird’s somewhat oversized head.

There are so many look-alike species of flycatchers that it is gratifying to photograph one that looks so distinctive and can be easily identified. When I spotted him, I wasn’t quite to the point where I was going to put the camera away, but the windows had been shut, indicating that quality of light and my expectations had seriously dwindled. He perched right near my dirty window. I could not risk cranking the window open, so I took the shot through it, knowing that sharpness and detail would be subpar in the resulting image. After he flew off,  I opened the window and waited for approximately 30 minutes, this time with my camera at the ready. He did not come back.

Photo of Great Crested Flycatcher
Great Crested Flycatcher.
Mid day Harsh Light
Somewhat tempered
in Post Processing.
ISO1250; f/8; 1/250 Second

Nest Adornment

These secondary cavity nesters make their homes in decomposing standing deadwood (SNAGS), frequently in the remains of holes made and abandoned by woodpeckers. They prefer to reside high in the leafy tree canopies and eat a wide assortment of insects -often snatching them in mid air. A quirky habit of the Great Crested Flycatcher is that they often add a scaly shed snakeskin adornment to its nest. If it can’t find that, it may substitute pieces of crinkly paper or plastic. This makes me wonder why some birds go through the trouble of decorating their nests.  Is it genetic or cultural, meant to draw attention or hide something? Is it an attempt to accessorize, or is it just meaningless adornment? Whatever, it is fascinating.

Repairing Image Highlights in Lightroom

The midday sun was creating harsh shadows when I took this photo. The histogram in Lightroom indicated that some of the highlights in the image (above) were overly bright, but not irretrievably clipped or blown out. (NOTE: You can tell there’s no clipping if the Lightroom clipping warning triangle to the right of the histogram is black.) This meant that I would be able to bring back most of the image detail by reducing the highlights… (ie.moving the highlight slider to the left). After a little time in post processing, the resulting image is not as bad as I thought it would be.

Vagrant?

When I first spotted this Great Creasted Flycatcher, I secretly hoped that he was an off-course vagrant. He is not. No doubt he is just one of many bird species who lives high above in the tree canopy and rarely makes an appearance. (NOTE: “A bird is considered vagrant if it strays far outside its expected breeding, wintering or migrating range. The key factor in defining vagrant is the distance – a bird that is just barely outside its normal range is not usually considered vagrant, but a bird found hundreds of miles from its familiar territory is a vagrant.”)

Photographing Gray Catbirds – Time, Effort, and Fuss over Flash

Photographing A Gray Catbird

Fleeting glimpses of warbler-ish activity flash before my eyes this morning. Tiny and moving fast, ducking in and out of the foliage, I strain to track them. Reliable ID requires an image, however subpar, to ponder over and compare with the photos in my bird books. I don’t get one, not even close.

No more sightings. Instead, I turn my lens to the Gray Catbirds. A National Geographic writer commented that an upper midwest nesting Catbird may have spent “the winter in the shadow of Mayan ruins in Guatemala.” That gives me pause.

Dozens of these raucously loud and expressive song birds are flitting about, filling the air with their feline-like songs. A shared community Catbird space must have been declared for the trees and bushes around our yard. Everyone is friendly and cooperating.

Photo of Gray Catbird
Gray Catbird
All Puffed Up and Singing.
ISO400; F/9; 1/250 Second

My Flash Routine

Summer is here and the dense foliage blocks much of the sun light to the understory trees below. I attach the flash with fresnel extender to the camera.  While I wait, I wonder if the light would be more natural looking if I attached the kind of camera shoe bracket that sports two or even three flash gun mounts on the top and sides of the telephoto lens.

After visualizing this setup, it seems rather too much. In order to attain enough reach, each flash unit would have to have its own better beamer type device to extend and spotlight the flash beams. The cost and effort outweigh the benefits.

My current light setup is already formidable and takes considerable time and fuss to haul around and properly set up. In sequence:

Photo of Gray Cat Bird
Gray Catbird
Perky Tail High
ISO400; F/9; 1/250 Second

Enhancing Ambient Light

Nature photographers all must make decisions about adding/manipulating ambient light with flash. I started out proselytizing about the benefits of using only natural light…but that was just because I didn’t take the time to learn the fundamentals of good flash photography.

Bird photography opportunities abound… but many of them do not come with complementary light. Instead of waiting and waiting for the perfect circumstances, open up a whole new world by attaching a flash to your camera. There is no getting around the thought, effort and time that must be put into balancing the light—achieving a light that’s natural, subtle, warm… almost like you did not use a flash. It’s worth the effort.

An excellent article: “The Catbird Has a Simple Trick to Outsmart Deadbeat Brood Parasites”, by Audubon field editor, bird expert, environmentalist, and artist Kenn Kaufman can be found at this link.


Photographing Rose Breasted Grosbeaks – Masking in Post Processing

Photographing Rose Breasted Grosbeaks

It’s quite a treat to be able to photograph a species of bird throughout the spring and summer seasons. At least six pairs of barrel chested Rose Breasted Grosbeaks nest in or near our yard each year. They arrive in late April/early May around the same time as the Baltimore Orioles. Most are bold individuals, rarely willing to wait in line at the feeders or the suet. The fledglings start following their parents to the free food in mid-June- lots of them all at once. (NOTE: My bird books note that Rose Breasted Grosbeaks produce only one clutch per season.) The females of this species look quite plain compared with the males and can be mistaken for a large female Purple Finch..until you get a look at their size and sturdiness at close range. Rose Breasted Grosbeaks head south for Central and S. American while it’s still warm….. in early September.

Male Rose Breasted Grosbeak
Male Rose Breasted Grosbeak in Spring Finery. Looks Young,
Perhaps a first year Male.
ISO 400; f/9; 1/250 Second

Masking in Post Processing

Anybody who spends a lot of time reviewing images and examining them for detail and sharpness is bound to (over time) develop a more discriminating eye. With my newest camera, the Canon 1D X Mark II, I find there is less need in post processing to use the Lightroom sliders that impact sharpening, clarity, vibrance, highlighting, saturation, shadows, and noise reduction. Once in a while though, I like to experiment with the sharpening sliders, especially the one labeled “masking”.

When I first started loading my images into Lightroom, I never really paid much attention to how the process of masking affected my images. I knew that this Lightroom post processing slider was not intended to fix out of focus photos…. I knew procedurally that I had to hold down the option key while I moved the slider to the right…. and that I was to stop moving the slider when the pebbly background looked completely black.

Female Rose Breasted Grosbeak
Young Female Rose Breasted Grosbeak
(or, with that splash of color, is it a young male?)
ISO400; f/10; 1/250 Second

Post processing is very time consuming and not especially fun. It’s best to know the what and why of those procedures before spending time on them.

A few thoughts about the process and benefits of masking:

  • When in Lightroom’s Masking view….. while you are holding down the option key (or alt key with PC) with one hand and moving the sliding bar with your mouse, you will see only a grey scale overlay of your image. In this mode, you can observe that the areas in white will be sharpened and the areas in black will remain unsharpened. No distracting colors are observable.
  • When the slider is set to 0, everything looks white so the entirety of the image gets the same amount of sharpening, as specified in the 3 sliders directly above the masking slider (amount, radius, detail).
  • When the masking slider is set to 100, only the strongest whitest edges of the image get sharpened. (You can see these edges when you hold down the alt or option key while moving the slider.)
  • How do I know how much masking to use? As you move the slider toward 100, watch how the graininess in and around your subject and in the background slowly turn SOLIDLY dark. At the point where you see the graininess disappear and only a black background remains, you stop moving the masking slider. Lightroom will then apply sharpening only to the white areas… and leave the dark areas unsharpened.
  • It’s important not to go overboard with any of the sharpening tools in Lightroom. Over sharpening brings out more noise, zigzag lines and/or unnatural looking borders around your subject.
  • Sharpening your subject and not the other parts of the image helps to make it stand out more.
Male Rose Breasted Grosbeak
Rose Breasted Grosbeak
A Flash of the Rose-Red Feathers Under His Wing.
The Enormous Bill Still Stands Out.
ISO400; f/9; 1/250 Second

NOTE: It is important to note that the detail quality improvements brought about though the process of masking will likely not knock-the-socks-off the typical fan of bird photography. In fact, I have learned NOT to expect people who are not photographers to notice or care.