Monthly Archives: May 2017

Photographing White Throated Sparrows -Two Color Morphs

Photographing White Throated Sparrows

It is a somber morning. As I set up the camera, I’m grateful that the heavy clouds at least provide an evenly lit prospect. The long hanging stems and flowers of the Bleeding Hearts droop and sway with the wind. Small flocks of White Throated Sparrows forage on the ground in our yard….using their anisodactyl toes (3 facing forward and 1 pointing backward) to rake layers of wet leaves and snatch whatever treat surfaces.

Unless I want to get down on my belly with the camera and long lens, capturing ground foraging birds at eye level in their natural environment is not an appealing idea. So I wait for these birds to rise up onto a stump pedestal or into one of the understory trees.
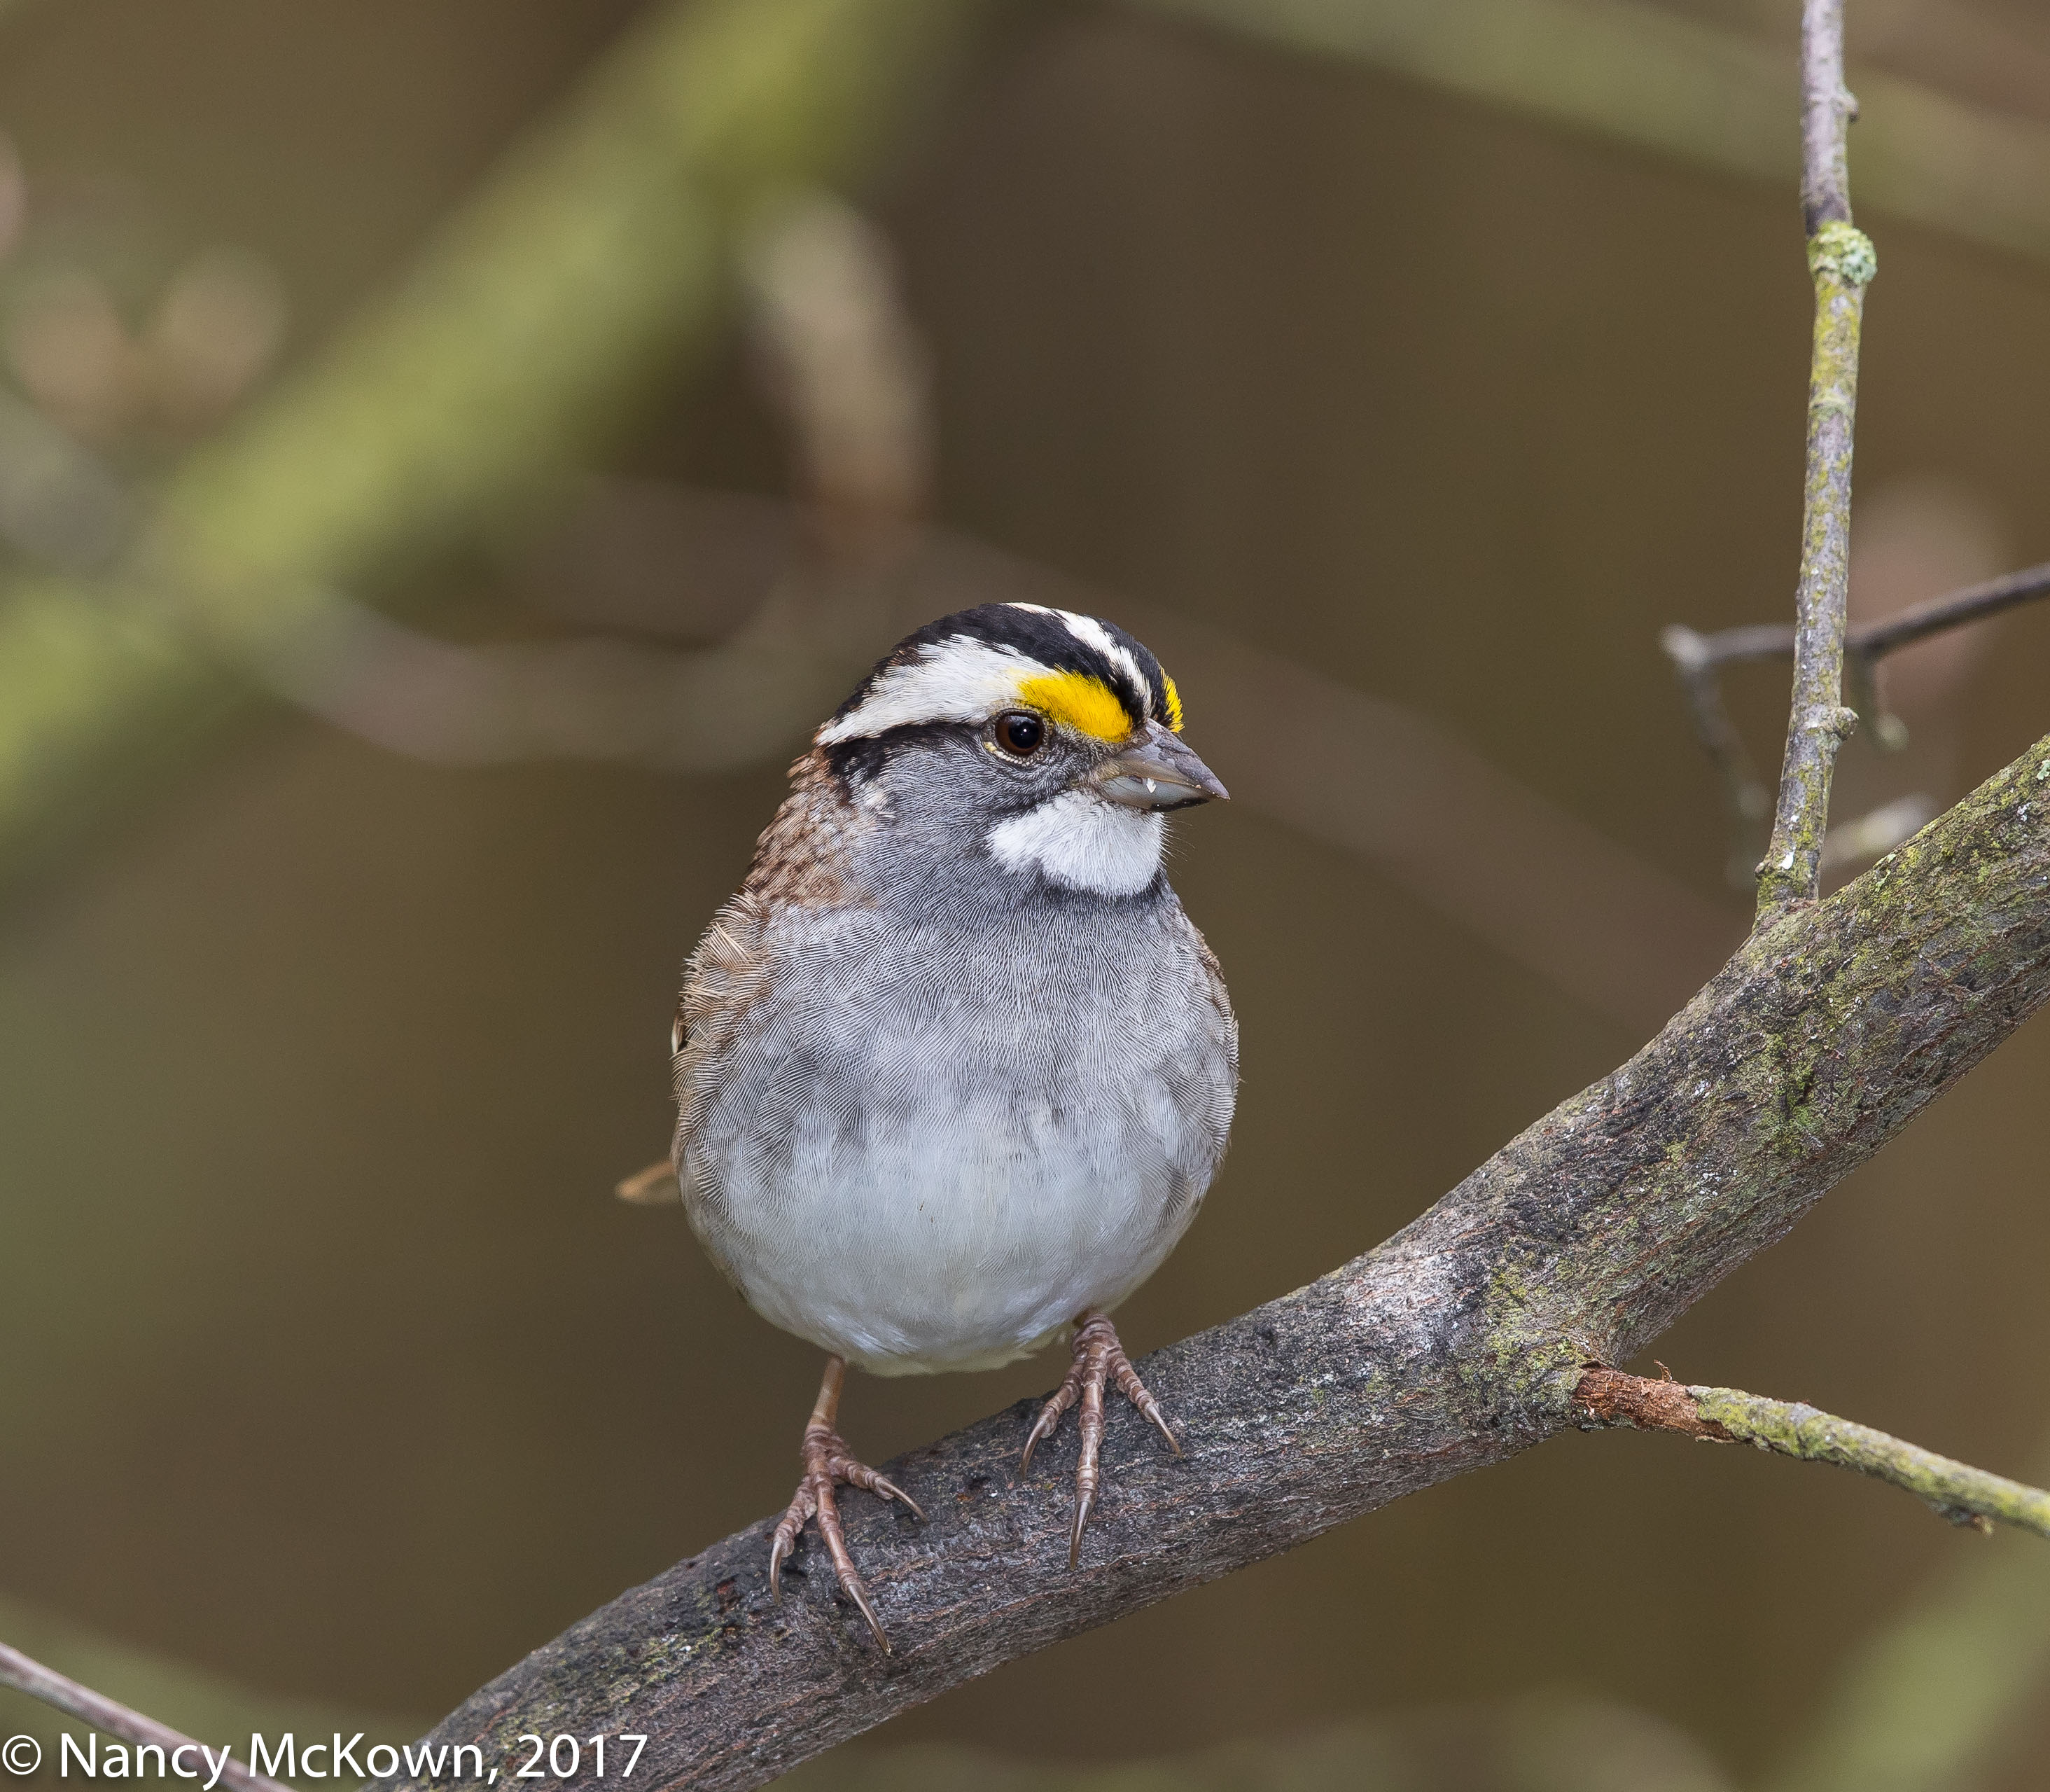
Photo of White Throated Sparrow
White Throated Sparrow,
Bright Yellow Supraloral
Contrasting with Bright White Eyebrow
ISO400; f/9; 1/250 Second
White Throated Sparrow
White Throated Sparrow,
Bright Yellow Supraloral
Contrasting with Bright White Eyebrow
ISO400; f/9; 1/250 Second

Distinct Color Variations

While tracking the ground foraging birds, I notice that some White-Throated Sparrows have distinctive bright white stripes on their faces and foreheads, while others sport more mellow, creamy versions of the same stripes. With birds, I always assume that the drabber version is a female or immature male. I tend to pick and choose from a group and track the more distinctively colored birds with my camera, especially in the Spring. Consequently I pay less attention and take fewer photos of the birds with lackluster colors.

This time I paid more attention. I noticed that the less distinctive birds are not just drab….but atypical in their coloration. With the help of detailed photos, the two distinct color variations are pronounced enough to make me think that I am photographing two different species. A quick check on line quickly solves the puzzle.
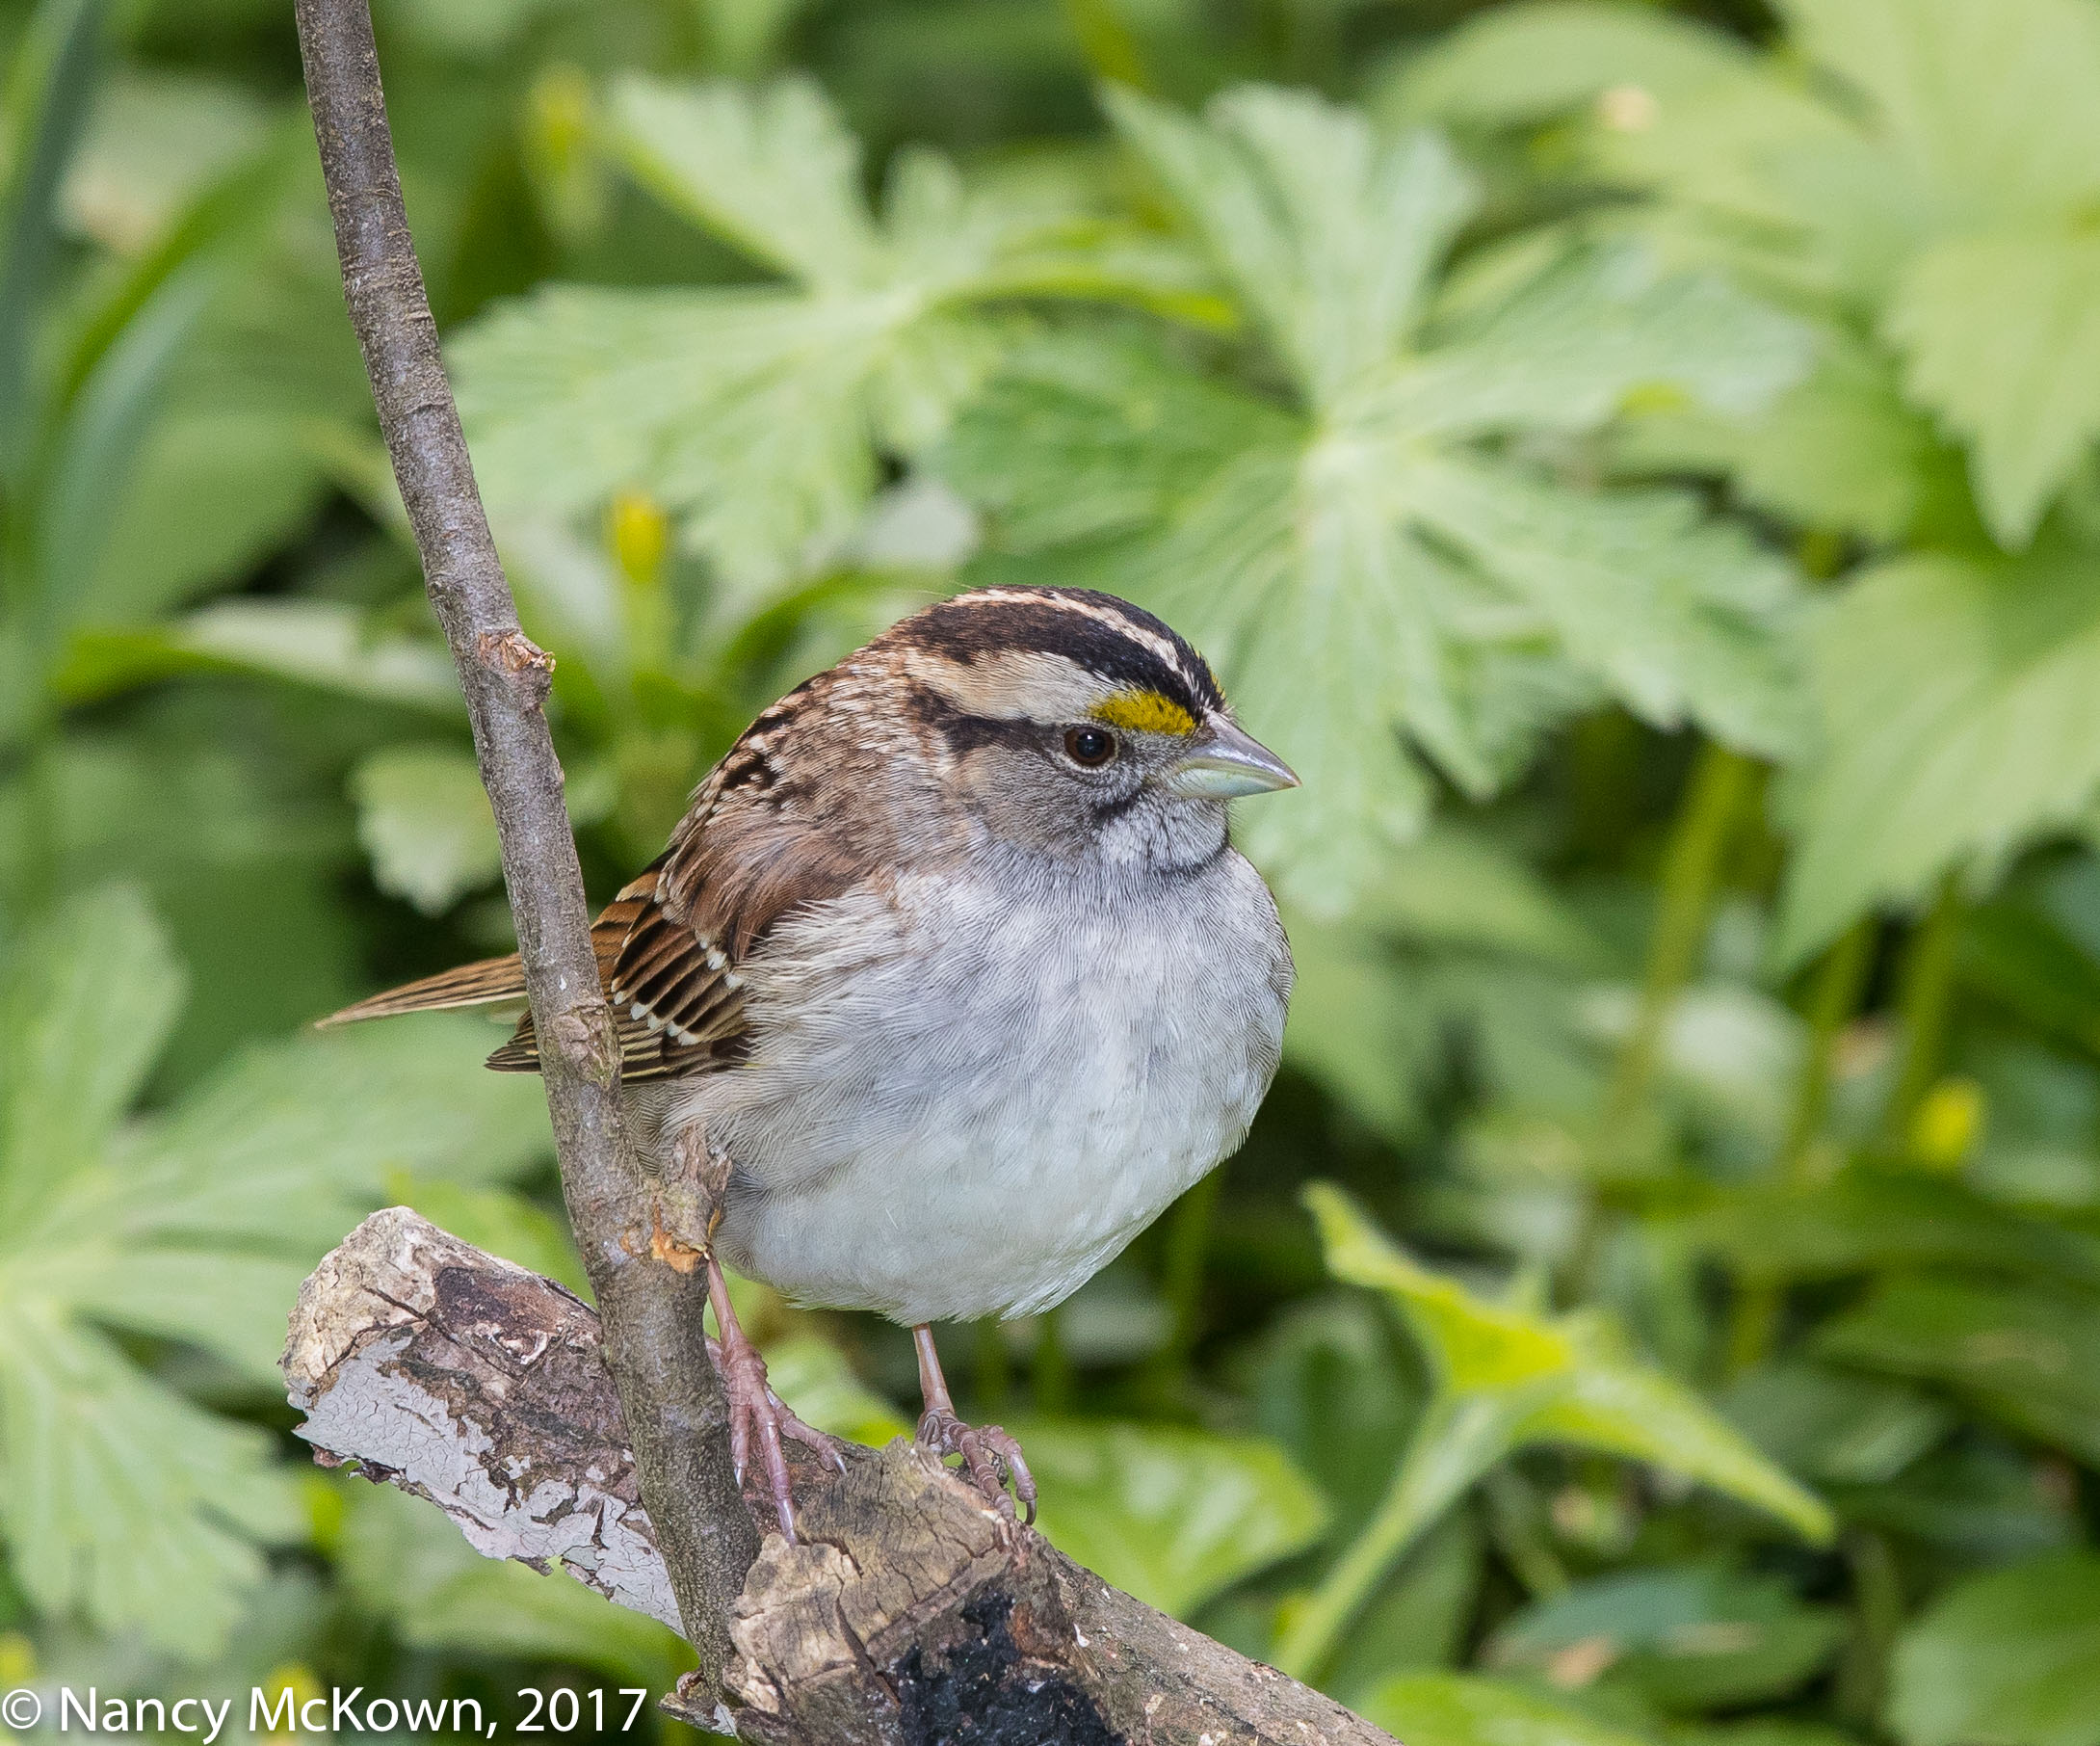
White Throated Sparrow-Tan Stripe
White Throated Sparrow
Tan Stripe Color Morph
ISO400; f/10; 1/250 Second

Subspecies v Color Morphs

Subspecies are defined as “distinct populations within a species” that overlap and interbreed in those geographic locations where the two subspecies populations meet. Color Morphs are defined as “distinctly different plumages within a species”.

White Throated Sparrows come in two different color forms. The not so subtle differences in the genetically determined plumage color within this species include:

  • “…….Clean black-and-white head stripes (vs. dark brown/black and pale tan)
  •  unstreaked gray breast (vs. drab gray-brown, streaked and mottled darker)
  •  clean gray cheeks (vs. mottled and washed with brown)
  •  sharply-contrasting clean white throat with clean border (vs. drab white with mottled border and divided by dark lateral throat stripe
  •  brighter and cleaner yellow loral spot (vs drabber)……..”

What is really interesting is that the tan morphed White Throated Sparrows almost always prefer to mate with the white striped individuals and vice versa. Different behavior and breeding habits between the two color morphs have also been documented.

NOTE: Two excellent articles about  White Throated Sparrows are: “A Closer Look At An Ordinary Species” by Smithsonian Migratory Bird Center scientist Brent Horton; and “The Fascinating and Complicated Sex Lives of White throated Sparrows” by Audubon field editor, bird expert, environmentalist, and artist, Kenn Kaufman.

Photographing an Indigo Bunting Framed in Red Bud Flowers

Photographing an Indigo Bunting

It was a dreary day when I took these photos, and that matters when photographing birds with blue plumage. On a sunny day, you can easily see blue, purple, and aqua hues glimmering on the feathers of male Indigo Buntings. The more light, the more intense the colors appear to be. But it’s really just an illusion. There are no blue pigments in the feathers of Indigo Buntings, or any of the blues we see in nature.

Photo of Indigo Bunting
Indigo Bunting,
Lots of Brown with the Blue due to Low Light.
ISO1000; f/6.3; 1/400 Second.

It’s All About Light

Indigo Buntings (and all other birds of blue) are unable to manufacture blue pigments. Pigment is what gives us true color. We see blue only because of the reflective structure of the Indigo Bunting’s feathers. When light waves fall on his feathers, the feather structure breaks the different colors of the light apart. Only blue tones are reflected back out. (The other colors of visible light are absorbed by the feathers.)

You can see in these photos patches of black and brown colors because when there’s little or no light, the feathers of Indigo Buntings are actually all brown and black. I was a little disappointed that the feathers of this male were not more colorful for the camera, but he was sitting amongst glowing Red Bud flowers, and that helped.

Encircling Floral Frames

I love showy flowering Red Bud Trees. The long graceful twigs are wide spread, slim and tender, with heart shaped leaves leaving plenty of room for the camera lens to intrude. Its fruit consist of purplish black pods in which are nested tiny, bird attracting black seeds. These understory beauties are one of the earliest to flower in our shaded yard and consequently attract a lot of migrating avian pollinators. Tiny rosy purple flowers even grow on the Redbud’s bifurcated trunk.

Photo of Indigo Bunting
Indigo Bunting .
Blue Plumage Lackluster due to Low Light.
ISO1250; f/6.3; 1/400 Second

Framing Strategies

Some considerations when framing birds within branches and flowers are:

  • The frame is essentially a wrap around intended to spotlight an eye catching subject and the beauty of its natural surroundings. It should accentuate and complement the subject.
  • You can frame with flowers, shadows, dark patches- any defined area that can serve as an enclosing border. The fewer the distractions, the better.
  • Since you control what your viewer sees,  judicious cropping in post processing is an important part of framing.
  • In addition to accenting and complementing the subject, the frame should give the photo context (in this case Spring).
  • Texture, color and detail add emotion, thus engaging the viewer.
  • Depth of field add to the sense that there’s a frame. Tight depth of field accentuates the front and back. Blurred background and foreground make the frame less noticeable.
  • You can prune and rearrange flowers and foliage to create the perfect perch. If you do not, you will likely have to maneuver the lens to focus tightly within lots of branches.

Attempting to frame a bird in a picture perfect natural setting takes timing and perservance, and no small amount of luck. It’s worth the effort, even on those days when the bird’s plumage colors are muted.

Photographing Baltimore Orioles-The Difference Between Nesting and Roosting

When the Wind Blows, the Cradle Will Rock

At least, the Baltimore Orioles’ nesting cradles will rock.

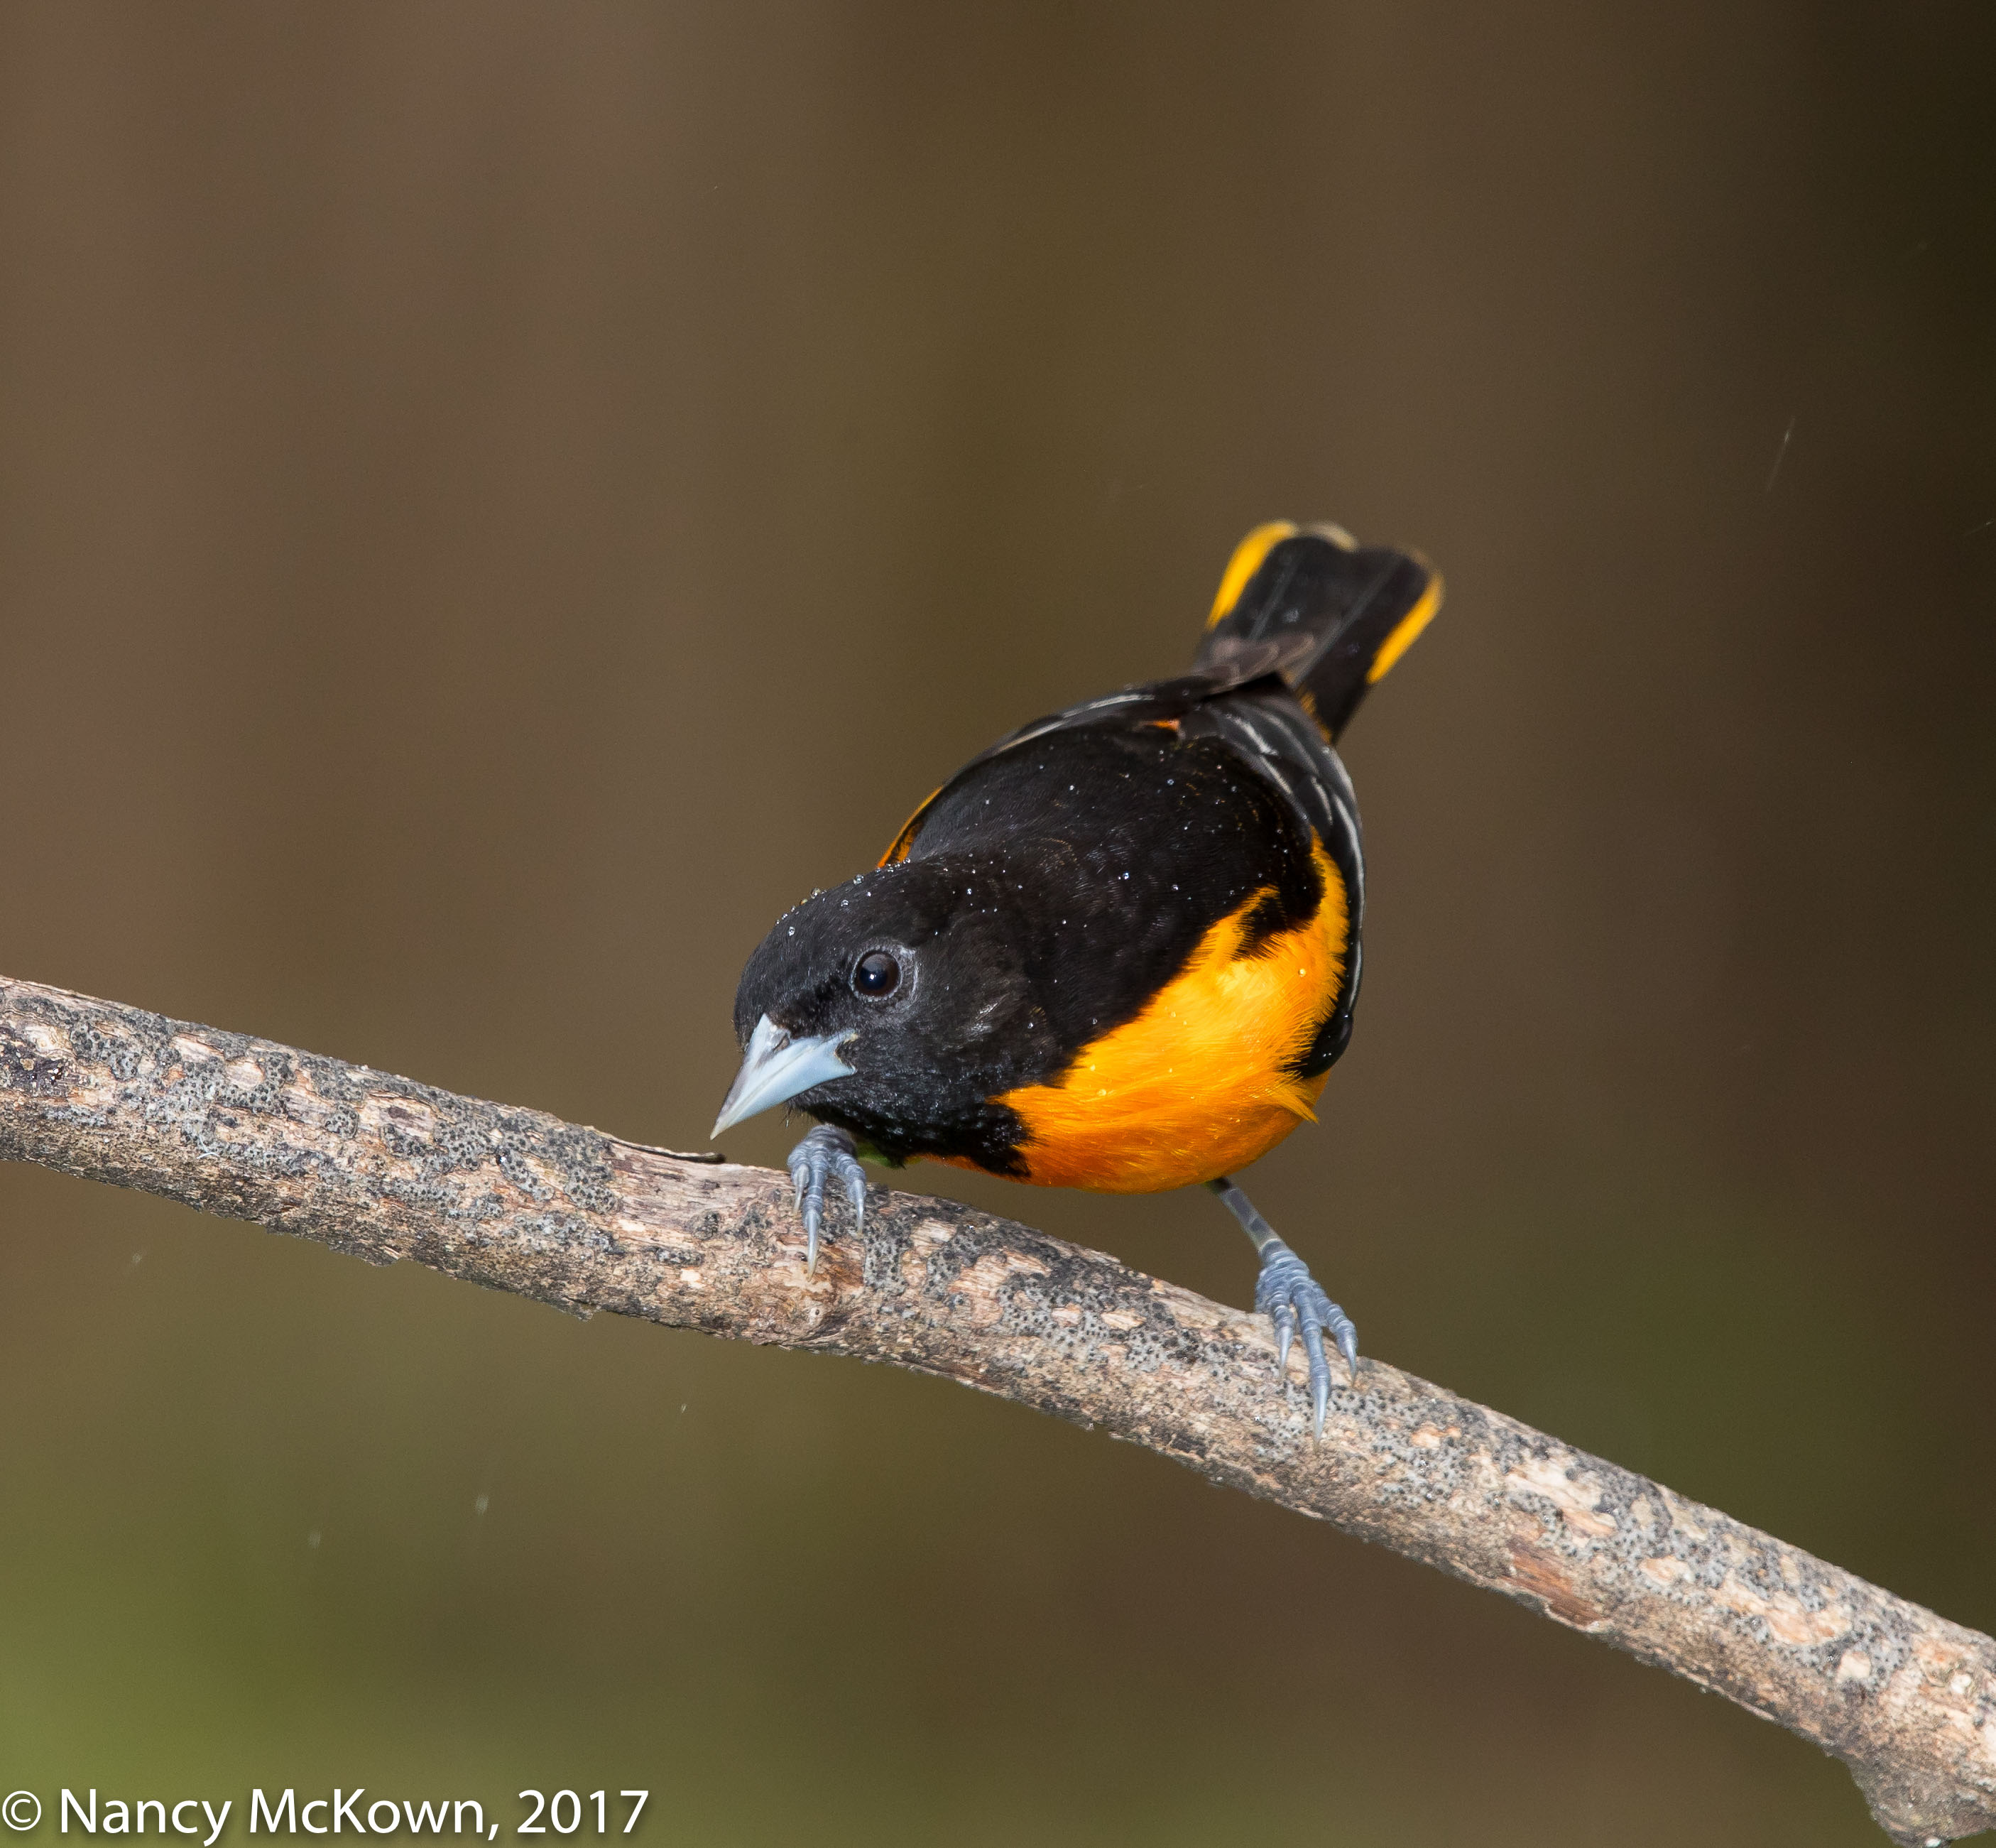
Photo of Male Baltimore Oriole
Male Baltimore Oriole
ISO400; f/9; 1/250 Second

Nest Building

Watching the Spring courtship and nesting rituals of birds is always invigorating. One of the most conspicuous performances is staged by the blazing yellow and orange Baltimore Orioles. The males display their finery and sing their hearts out in the usual way and pretty soon the females are busy weaving nests made of grass, ferns, leaves, hair, and twine, with feathers for the inner lining. She stitches these building materials together in tangles and knots, using the longest fibers to hang the nest from the outer end of a concealed tree branch. These sock-like hanging nests sway with the wind, but are only really noticeable in the Fall after the tree leaves have dropped. (NOTE:  Each Spring I spread a few dozen short pieces of yarn about the yard, in the basement window wells and near the foot paths, hoping the birds will incorporate them into their nests.  It disappears…. but I’ve never seen these fibers carried by any bird nor incorporated into a nest.)

The Disney Version

Last winter, we spied an Eastern Screech Owl in the owl house we erected 3 years earlier.  How exciting, we thought. Perhaps he is exploring nesting opportunities, hoping to snatch a space to house a future family. After 3 weeks, the owl was gone and we haven’t seen him since.

Time to change my mental model – the wildly inaccurate Disney version of birds sleeping with their families in the nests they find or build.

Baltimore Oriole
Female or Juvenile Baltimore Oriole
ISO400; f/9; 1/250 Second

Nesting is Different than Roosting

Nests are not homes for birds nor are they a place to rest or sleep. Birds who build nests build them to be temporary. They are often a sagging, parasite filled poopy mess after raising one or more broods.

Roosting simply means: “A place where winged animals, especially birds or bats, rest or sleep. 2. A place for temporary rest or sleep”.  Birds use nests seasonally as a place to incubate their eggs and to hide, protect and nurture their young. Once the fledgings have flown the nest, the parents typically abandon them too.

Roosting Places

At night, most birds need a safe place away from roaming nocturnal predators. Some bird species crowd together communally for protection and warmth, while others sleep in secret isolation in some hidey hole, cliff, cavity, porch, barn, bucket, storage container, marshy lowland or high tree top.

Birds who stick around during the day must find places to settle down out of harm’s way for the night. Every time we add to a pile of dense vegetative debris, plant an evergreen, or erect a protective shelter, we are setting up safe places for bird roosting. After all, unlike nesting, sleeping is an essential, nightly, all season behavior.

To attract tired birds, roosting box designs should have the following characteristics:

  • Heat conservation (especially in the winter)
  • Plenty of room and perching spaces within to accommodate more than one bird
  • Cleanable design, with space on the bottom for wood chips
  • Multiple exits to escape predators
  • Entrance/exit holes that are designed to accommodate and protect certain sized birds (so the big and aggressive birds don’t hog all the good spots).

Not too much to ask. We’ve started searching on-line for roosting boxes, especially for the year round birds.

NOTE: This Spring the owl house is empty. The Eastern Screech Owl we observed last winter obviously a found better place to nest….. away from the prying eye of the camera.

Photographing Chipping Sparrows and Thoughts about Computerized Metering

Photographing Chipping Sparrows

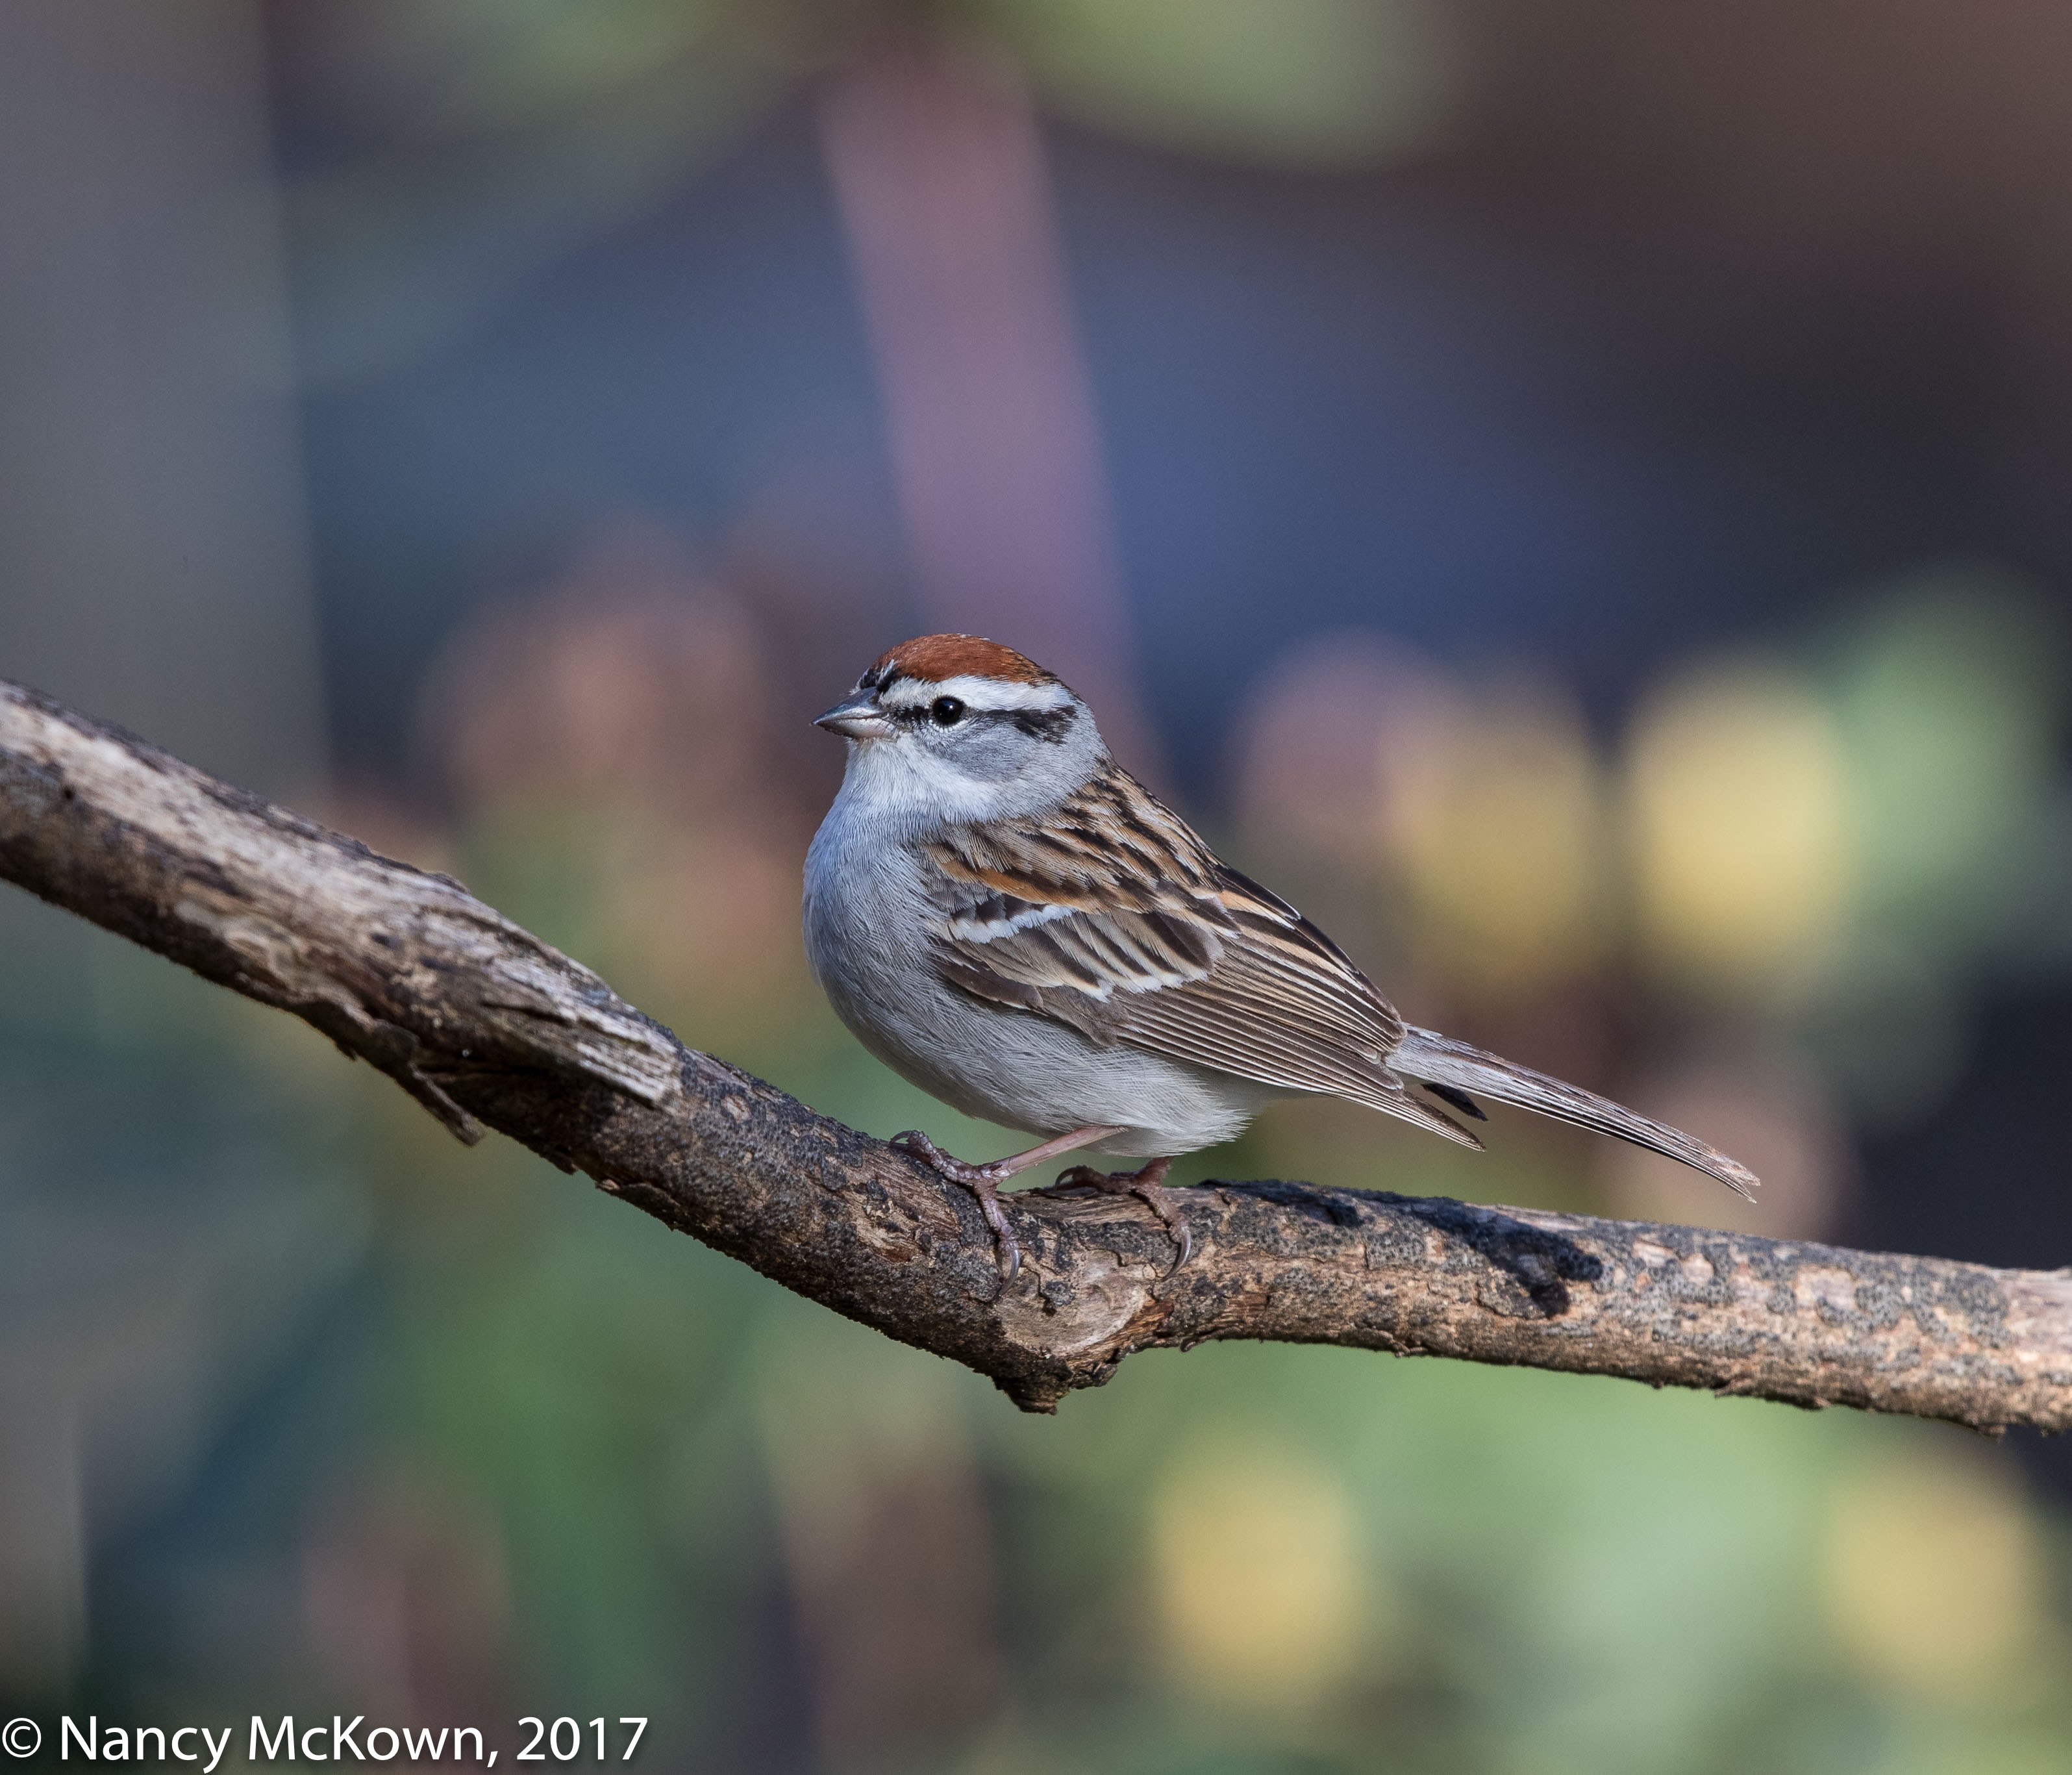
Chipping Sparrows nest in our yard each summer.  They are bold and persistent warbler size sparrows, especially when ground foraging in the yard or at the feeder. During the Spring plumage cycle, the male sports a bright rust cap and a lot of distinguished looking gray, black and brown on his body and long notched tail. Except for the size, Chipping Sparrows look similar to American Tree Sparrows and Clay Colored Sparrows.

Photographing Chipping Sparrows
Chipping Sparrows
A Variety of Background Tones
Reflecting Back Through the Lens.
ISO800 f/8; 1/400 Second

Chipping Sparrows are common in our wooded yard. They don’t spook easily while foraging and that gives me time to experiment with the camera. These three photos were taken in different settings, with different backgrounds and at different times of day in order to better understand how the camera’s light meter discerns light.

Computerized Metering

For most photographers, “perfect” exposure depends on how effectively the camera’s light meter analyzes the scene.  When I’m out in the field, my go-to metering mode is Evaluative,  a “smart” system with a multi-level internal light metering system.

The Light Coming Through The Lens

Internal light meters, regardless of the meter mode set, will not read the light falling upon the subject and its surroundings, but only the light reflecting off of them and back through the lens. A black iridescent Crow is not going to reflect back as much light as a Snowy White Egret. A brown tree lined background is not going to reflect the same light as a highly reflective mix of spring colors.

Conditions affecting the light’s direction, intensity, absorption and bouncability also impact how light travels through the lens.  Attach a flash and a whole new level of light meter E-TTL analysis kicks in, gauging the ambient light reflected off of the subject and calculating how much flash is needed to maintain exposure parameters. (NOTE: To read about the physics of how light travels and reflects off an object, visit this link.)

NOTE: You don’t often see bird photographers carrying around hand-held or separately mounted light meters. These exterior meters calculate the amount of light falling on the scene….the “incident” light, not the light reflected back through the lens (TTL).

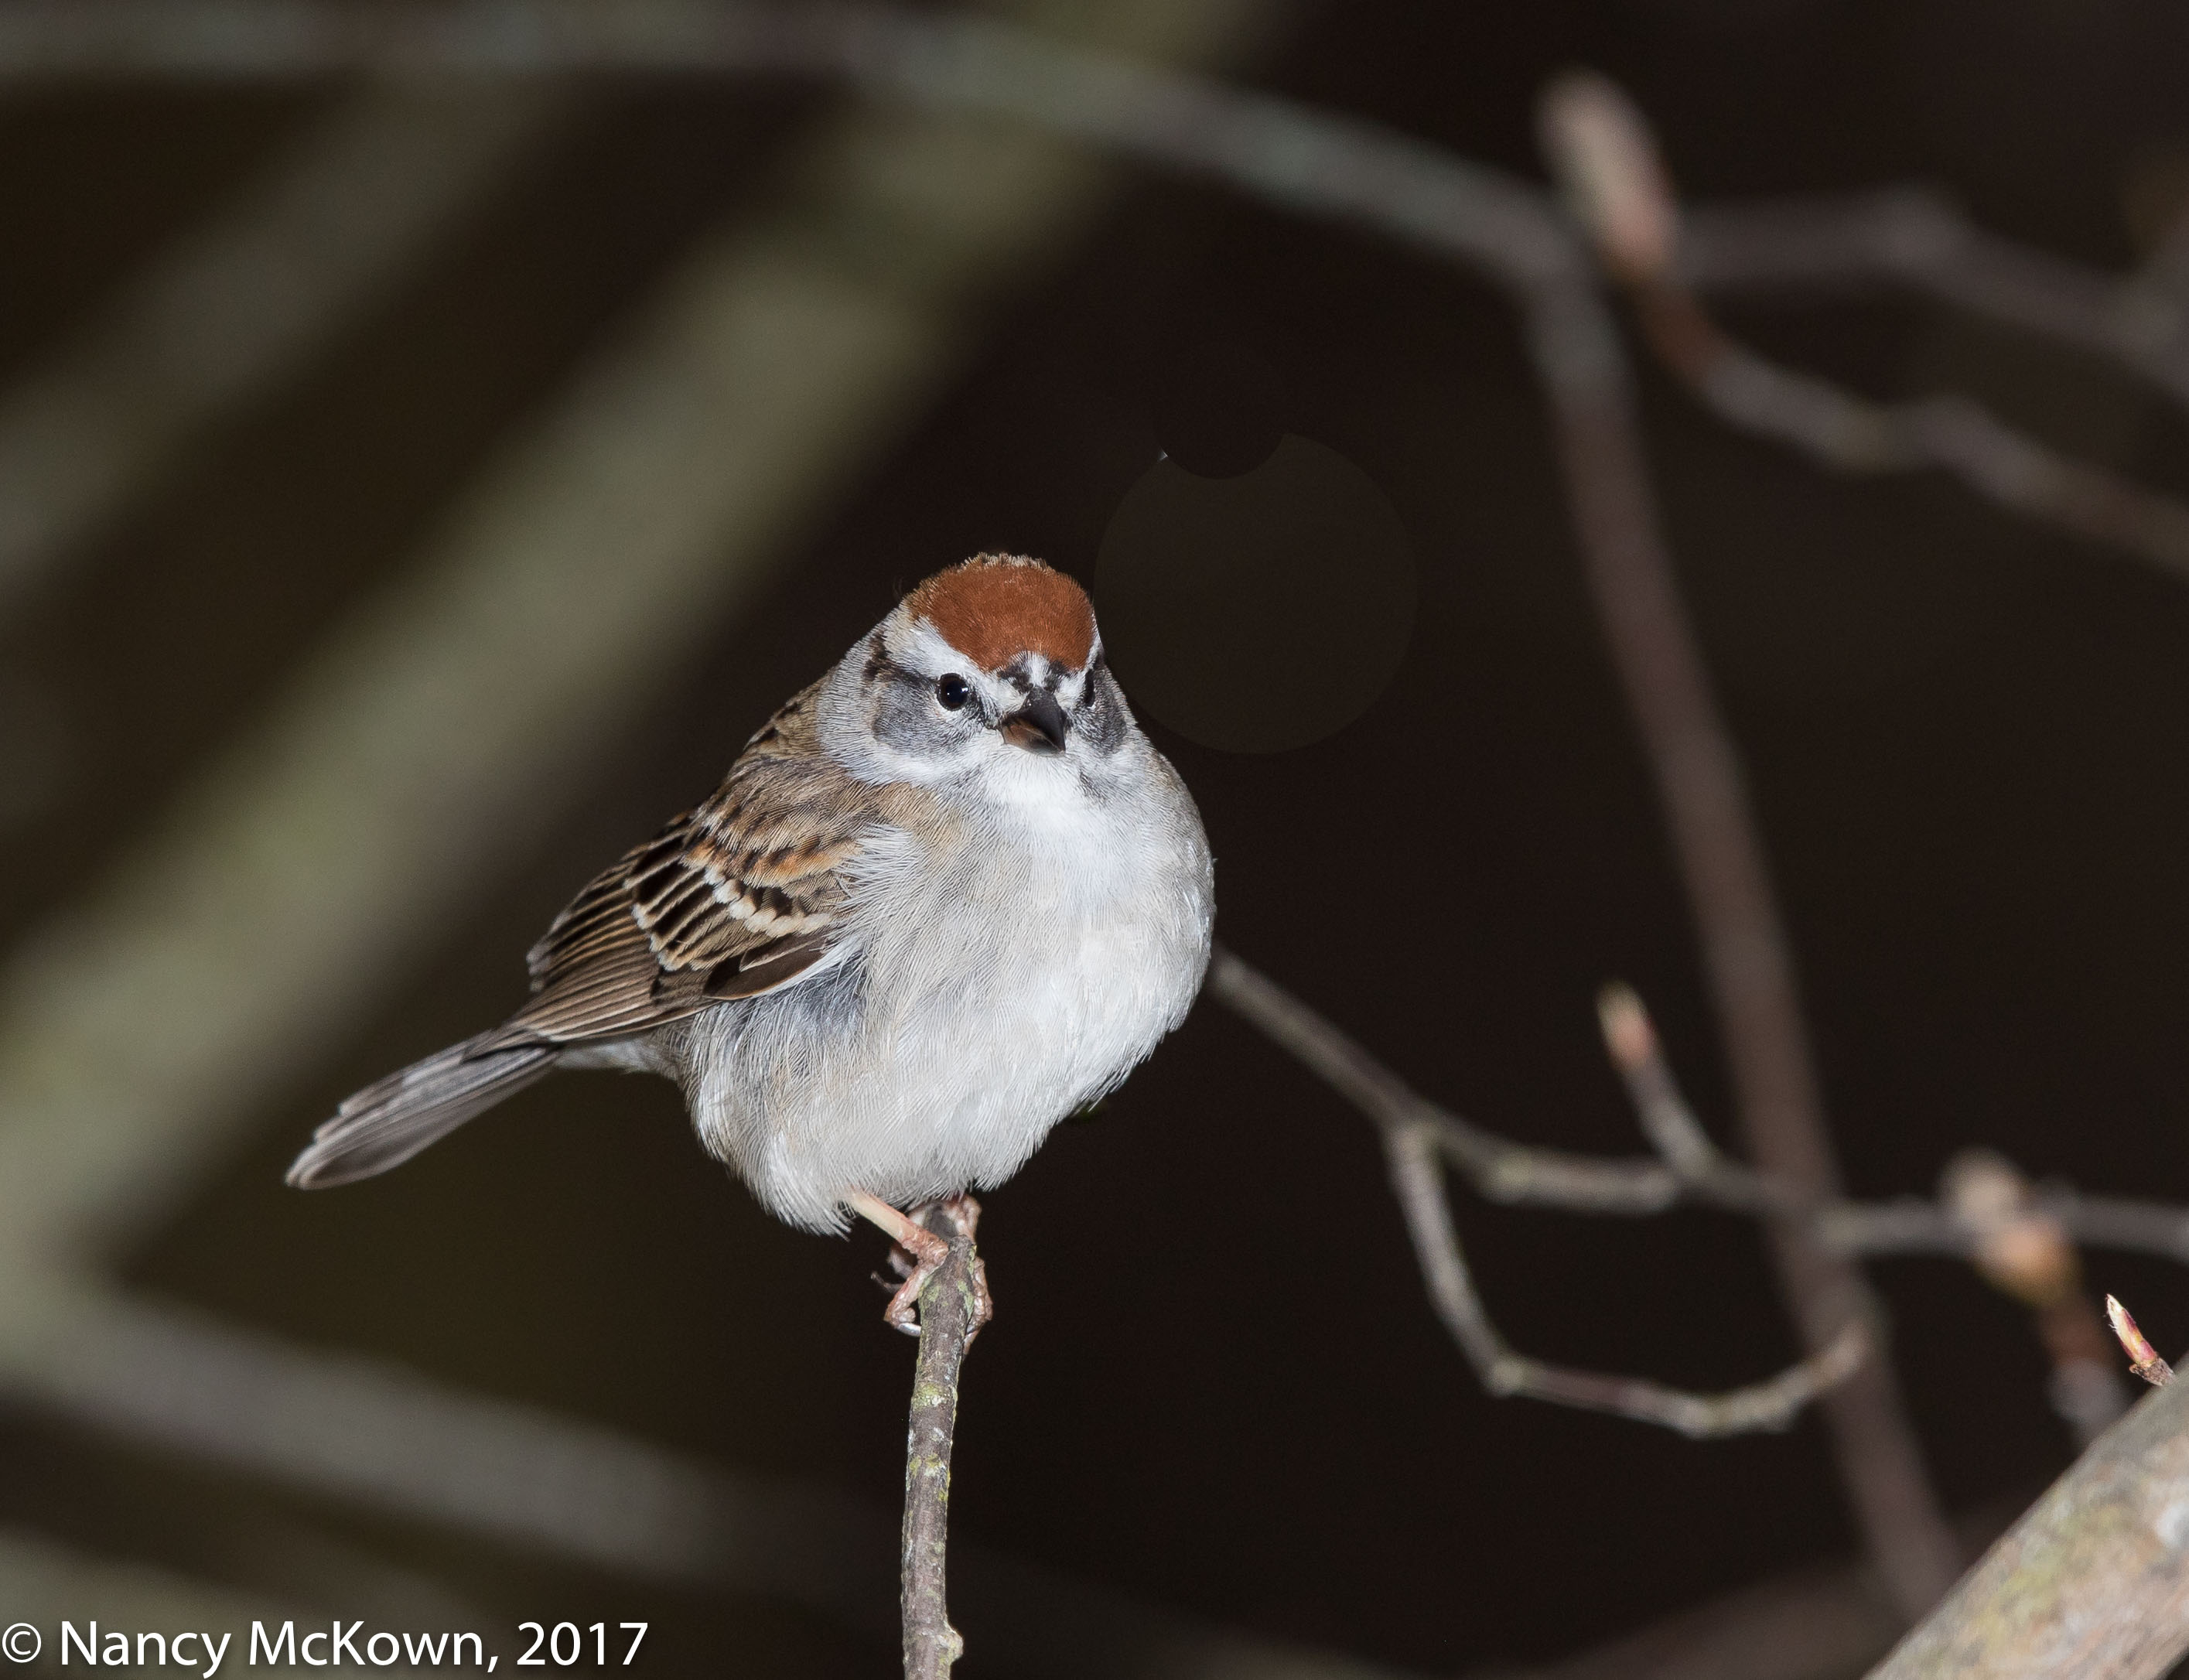
Photographing a Chipping Sparrow
Chipping Sparrow
An Even, Brown Colored Background
ISO500; f/8; 1/400 Second

Light Meter Calculations

Modern in-camera light meters do more than just average the light reflecting back through the lens. The camera’s micro computer divides the scene and separately analyzes each zone. It then weighs the focus point placement, reflectivity, color, distance, and lots of other variables. Too many dark or light tones reflecting back without the balancing act of middle gray shades will throw off your meter and result in overexposed or underexposed images.

(NOTE: The histogram is a reliable way to see how the light meter is balancing the light coming into the lens.)

Restricting the Metering Area

Metering modes tell the camera system WHERE in the scene to meter the reflected light. If you change the metering mode from evaluative (total scene) to partial (approx 6-10% of the area) or spot (approx 2.5% or less of the area), the light meter will narrow the area it takes into account when metering and possibly use different algorithms to read the reflected light. No matter the size of the area being metered, if the subject and/or its surroundings are bouncing back wildly unbalanced light through the lens, your exposure will most likely not be calculated correctly.

Spot Meter Off of Middle Gray Tones

It’s helpful to understand how best to override the light meter when it is handicapped by confusing incoming data. A well known strategy: Try spot metering off middle gray tones that you know won’t confuse the meter (like grass down by your feet) and then set exposure based on those readings. If your camera is set to  Manual (M) Mode, set exposure parameters and then recompose, making sure that Auto ISO is not engaged. If you prefer to use one of the auto modes (Av, Tv, P, A), have the camera take the exposure readings of the grass by your feet, lock down exposure settings using auto exposure lock and then recompose the scene.

Photo of Chipping Sparrow
Chipping Sparrow with
with Flash Enhancement
to Lower ISO and Better Light the Subject.
ISO400; f/9; 1/250 Second

If the photographer is not quite happy with the results of these fixes, she can fine tune with Automatic Exposure Compensation (AEC–Right is Bright) to help balance the light meter reading. If you know your light and use the histogram as your guide, you can probably make an educated guess and get it right. (NOTE: Sometimes knowing your light is not enough – you must know your camera. AEC tends to be variable – depending on the DSLR in use.)

Know Your Light

After years of being a photographer, I like to think I know my light without the help of an in-camera light meter. Still, I rely on the meter all the time. It helps to understand  how this highly complex meter system thinks and how to work with it to produce images that are exposed to your liking.

Photographing a Red Breasted Nuthatch Against A Dark Background

Photographing a Red Breasted Nuthatch

I search out Red Breasted Nuthatches when I’m birding. Tiny, gregarious, and bold birds, they seem to always pause, like they are formulating a plan before they rush off. Gives me that moment I need to get a focus fix. Last summer, we had a pair that stayed in our yard to nest. So far this Spring, we have spotted two of these nuthatches. Sadly, they seem to be only passing through.

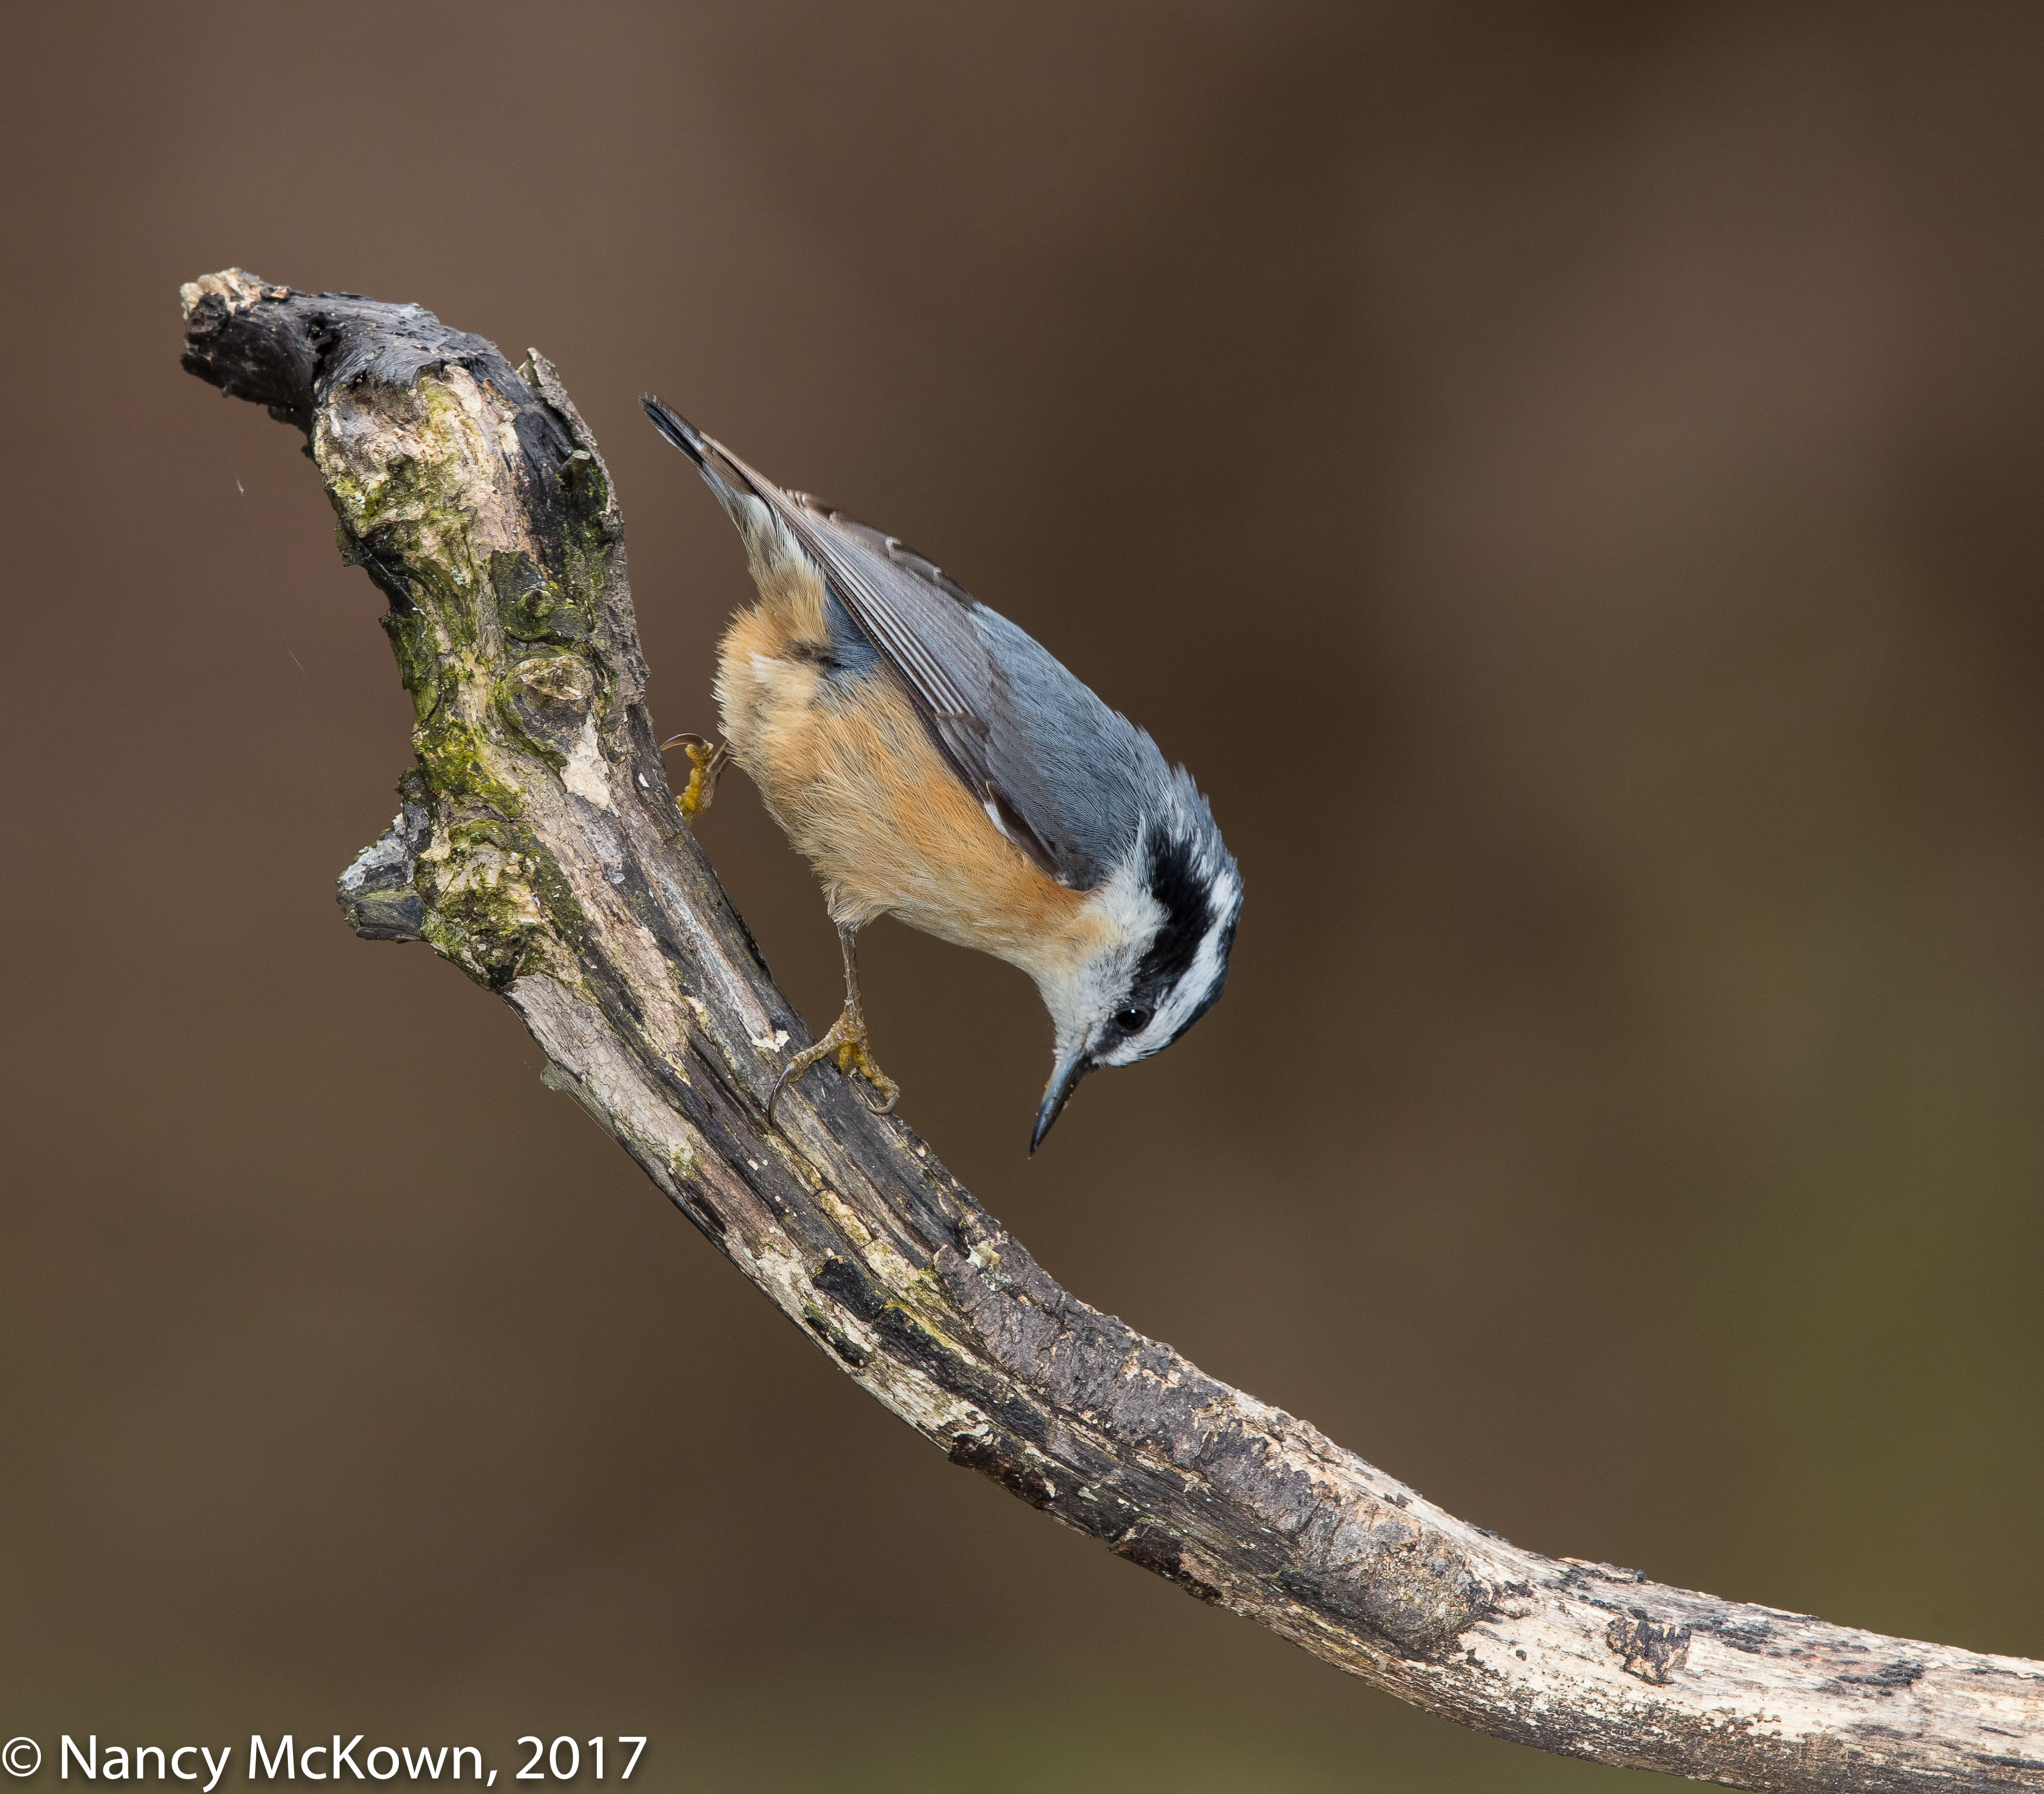
Photo of Red Breasted Nuthatch
Red Breasted Nuthatch
on Oversized Perch
With Dark Background
Taken With Flash Enhancement
ISO 400; f/9; 1/250 Second

Collecting Perches

I often venture out into the woods to collect moss and lichen coated pieces of deadwood, drag them back to our property, prop them up near the library windows and hope the birds will use them as a perch. It’s not hard to strategically arrange these perches against the forest of trees that surround our yard.  Sometimes, I have to twist and turn the camera and tripod (left, right, up, down) to build the perfect vantage point from which to shoot.

This photo shoot took place in early evening under a cloud covered sky. Ambient light provided some illumination to the perch, but very little into the woods beyond. (As the season progresses and the trees fill with leaves, less and less sun penetrates these woods.)

As I was lugging this burly piece of deadwood, it occurred to me that it was oversized for most of the birds in the yard- and might cause the perching bird image to appear unbalanced in the frame.  I used it anyway because I liked its character…. the texture, color, shape, peeling sides, notches and curves. Plus its very heftiness would give it some stability in the wind.

Red Breasted Nuthatch
More Light Creeped in.
Some Indistinct Green Hues Blend With
the Dark Brown.
ISO400; f/9; 1/250 Second

Movement Caused By the Wind

Birds don’t seem to mind the swinging copper, aluminum, bamboo and wood chimes in our yard that resonate with the wind. This music portends that the camera will likely record swirling background patterns caused by movement within the distant woods and perhaps even little blotches of white and pink from the airborne blossom petals. This evening, I would just have to hope for a spot of calm when a bird alighted on my new perch.

Methods and Observations

  • While a cluttered natural environment does give a sense of place, it also tends to distract the viewer from the bird and its perch. I was aiming for less distraction…a plain darkish background, no swirls or fancy colors, no playful bokeh, no indication of the twigs and branches protruding out.
  • The subtleties of lighting (i.e. shadows and details) on your subject are much more apparent against a plain, dark background. For this shoot, I set the flashgun to Manual “M” so I could more efficiently control the light intensity and properly expose the subject but not the background. The most efficient way to darken an image background is by experimenting with the factors that you can control: 1) Flash intensity….The stronger the flash blast, the more likely the light will travel past the subject. 2) Subject and background distance….the wider the distance between the subject and the flash the farther light will have to travel;  and 3) Aperture setting….if the camera is set to a tight aperture, the light will fall off more quickly. It’s a balancing act.
  • Since birds are often tiny and distant, they don’t come within the normal range of a flash. For most of my birding adventures, I attach a fresnel flash extender on the flashgun to create more of a spotlight effect. NOTE: Without the extender, the light blast will spread wide, bounce and scatter depending on what’s in its path and the proximity of the subject.
  • The ambient light illuminated the perch as much as 2 stops more than the wooded background. I used the DOF button to see how much darker the background would appear compared to the subject. The more I tightened the aperture, the less the ambient light creeped in. I then played with the flash intensity, trying to control background exposure…. figuring out how much ambient light to record to produce a brown background.
  • My 500mm lens naturally creates a separation between the subject and its background. The longer the focal length, the more the angle of view is diminished.
  • I set the camera to partial metering, so exposure settings would not take into account the darker background.
  • After taking dozens of photos of a barren perch trying to get the light right, I sat back to wait for a bird to complete the picture. It did not take long for this Red Breasted Nuthatch to give me an opportunity to test out the exposure.

A Compelling Moment

Mixing up the exposure parameters in order to capture a compelling moment takes time. Doing this in-camera – not in post processing – is more desirable and rewarding.

NOTE: If you are looking for a nature photographer who is very skillful creating black backgrounds for his images, check out Joel Sartre, National Geographic photographer.