Category Archives: Woodpeckers

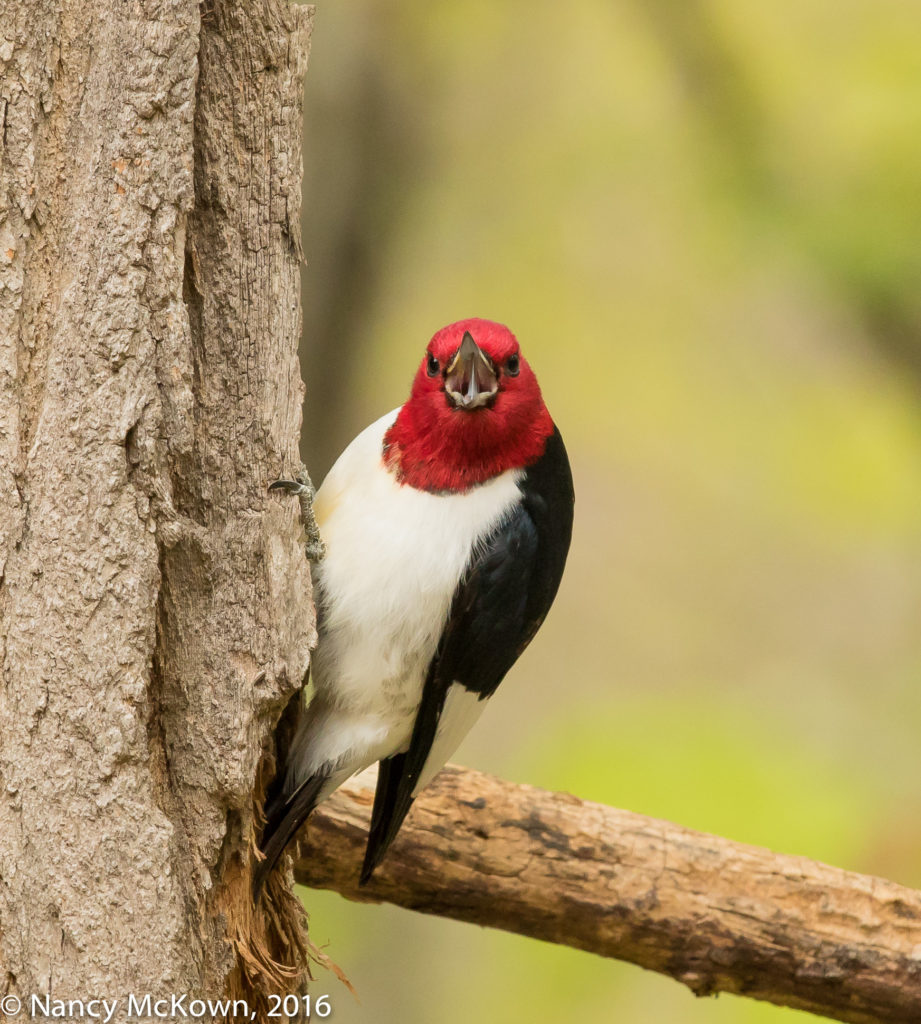
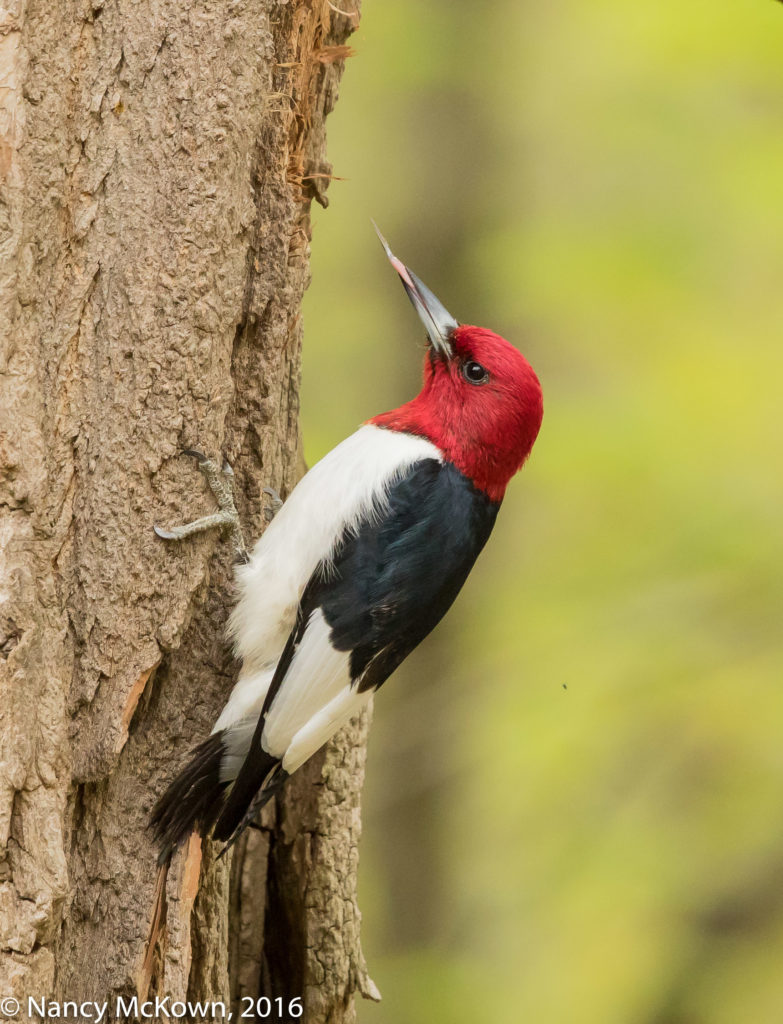
Red Headed Woodpeckers Enticed to Come Within Camera Range

The Onset of Fall Migration

It was late July when we saw an out-of-place (for our nesting area) warbler. She was fairly high in the trees, but given her size, shape, color, the poses she assumed, and the distinctly warbler-ish feeding style, I would tentatively ID her as a Yellow Warbler.(Sadly, I was unable to get any ID images.) Was she just bopping about on the fringes of her nesting area, relieved to be free from parental duties, or could it be that she had actually begun her trek south to her wintering grounds?

It’s so easy to get adrenalized about Fall migration.  Some of the species who nest in the Canadian north country show themselves in our yard by the first week in August. By mid month, it’s not too much to hope for a wide variety of transients. (NOTE: In the excitement, it’s not uncommon for me to confuse a migrating bird with a local immature bird. We saw what looked like an unfamiliar sparrow. I set up and readied the camera gear, all the while hoping I had spotted an off-course rare bird. I got a couple ID shots. It turned out to be a perfectly common immature Towhee.)

Photographing An Adult and Juvenile Red Headed Woodpecker
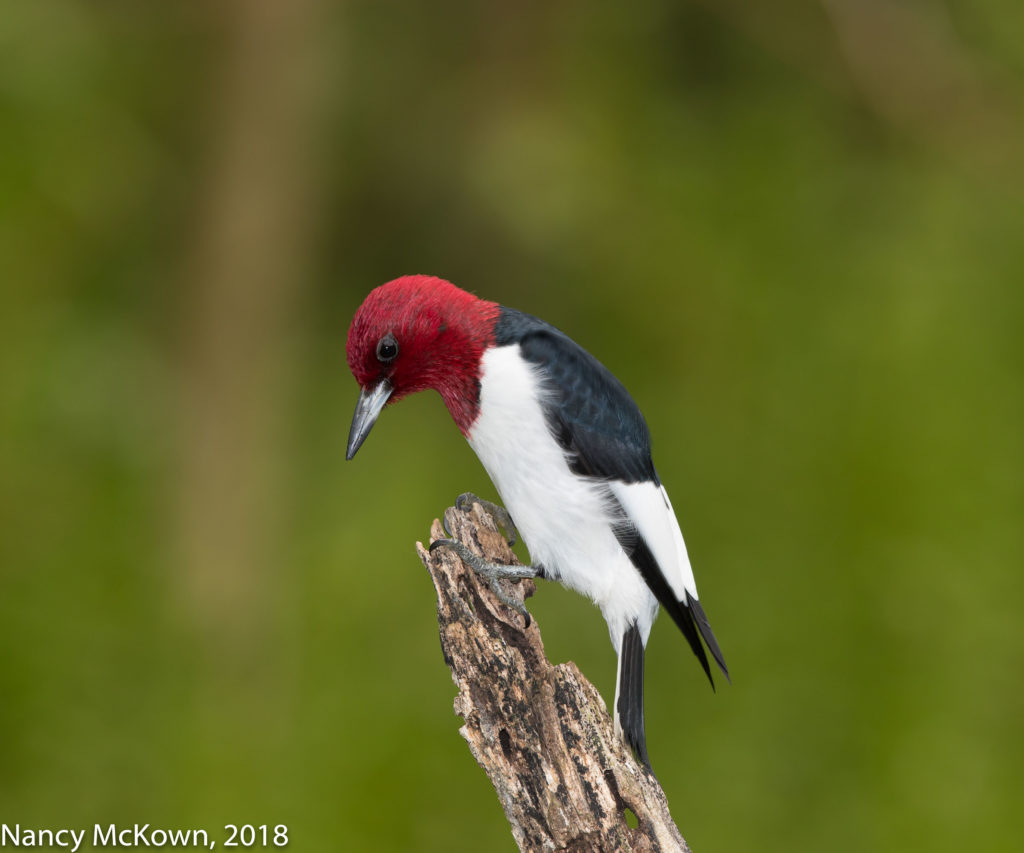
Red Headed Woodpecker
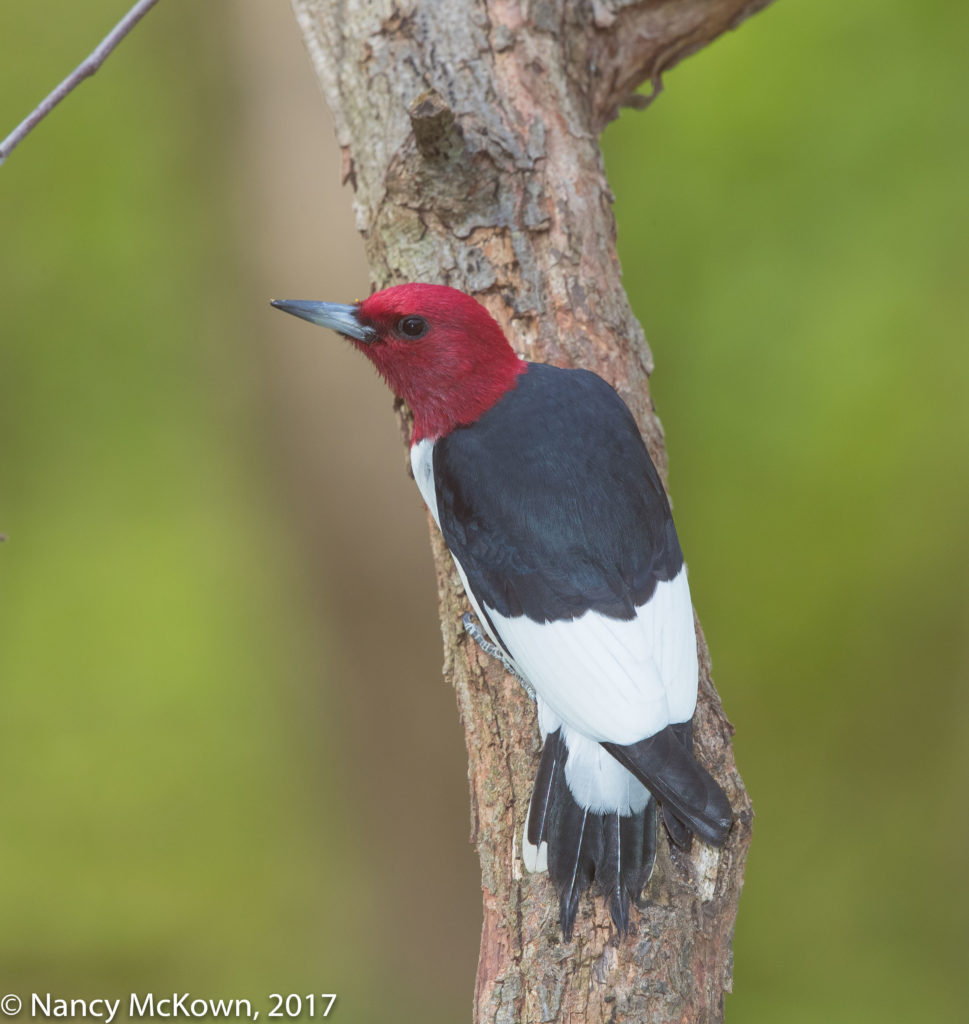
An Adult Red Headed Woodpecker
Mid Morning Light
ISO400; f/8; 1/250 Second

The Distance Factor

The distance factor is always an issue for bird photographers. Close is better, but if you want to photograph different species of birds, you should consider moving the camera a greater distance away from the subject. Earlier in the summer, I repositioned one of my favorite perches farther back, making sure that I still had a pleasing background of ostrich ferns and low lying branches. Previously, it had been much closer to the library windows and camera gear, and probably too near human activity for the more cautious birds like the Red Headed Woodpecker.  This replanted perch did prove to be alluring to new birds, but the added distance also negatively impacted the effectiveness of the camera sensor and the flash extender.  In addition, despite the larger Red Headed Woodpecker size, there was still too much frame around the subjects. I had to zoom-in more than usual in post processing.
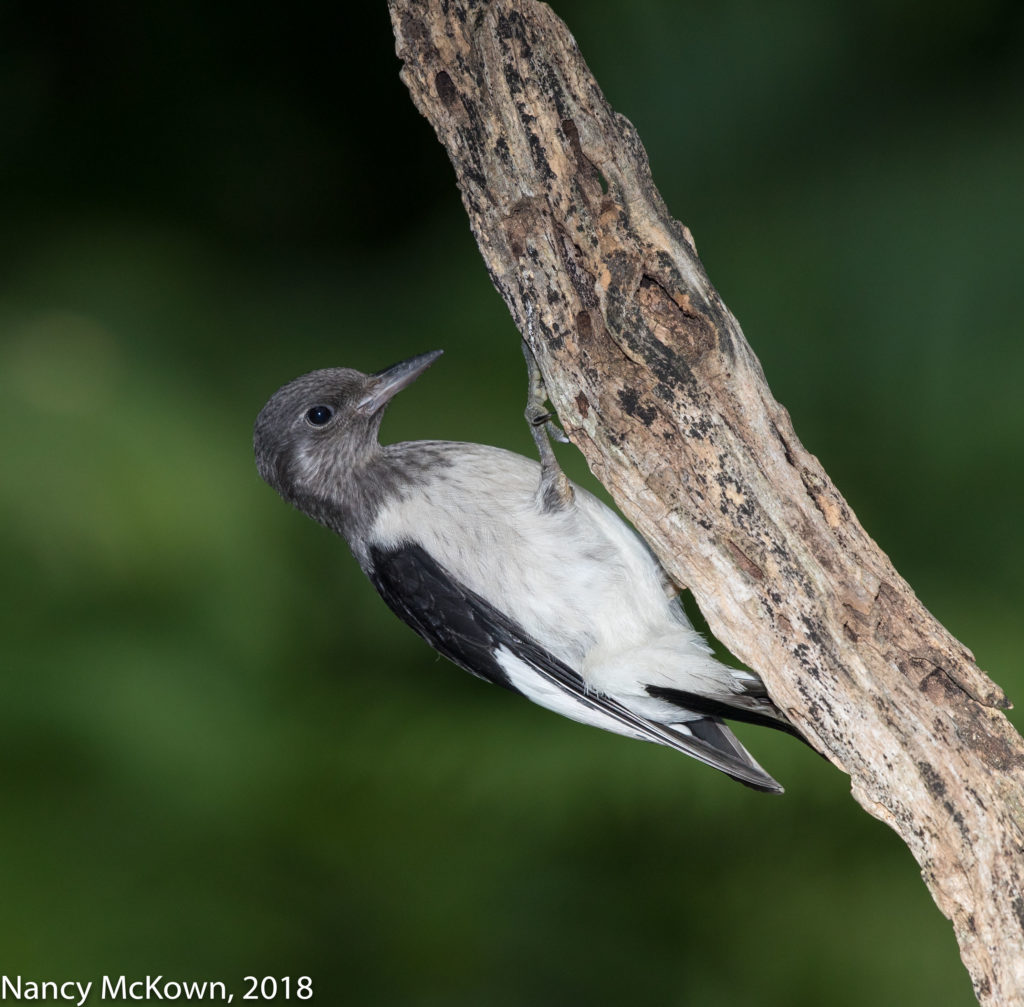
Juvenile Red Headed Woodpecker
Juvenile Red Headed Woodpecker.
Early Evening Light
ISO 400; f/8; 1/250 Second

Image Framing

My strategy appeared to work….or perhaps I was just lucky. Both a parent and a juvenile Red Headed Woodpecker took turns alighting on this relocated perch.  They still acted cautiously, swooping in and out to look the suet feeder and me over. Mostly, they watched and waited high in the trees. To minimize movement, I aimed the lens to focus on the top of the perch and I had my remote controlled shutter release attached. When they did finally decide to watch me from the perch, I was ready. (NOTE: I also regularly repositioned the camera setup inside the house to take advantage of the transitioning light and the differently colored backgrounds behind the perch.)

Looking Forward to Fall Migration

These two Red Headed Woodpeckers will be heading south to their wintering grounds soon. I look forward to Fall migration. It’s not as hectic, not as rushed as in the Spring. With the biological imperative past, unobstructed delay is in the air. Both birds and birders can relax.
Photographing a Pileated Woodpecker and Boosting Exposure in Post

Photographing a Pileated Woodpecker

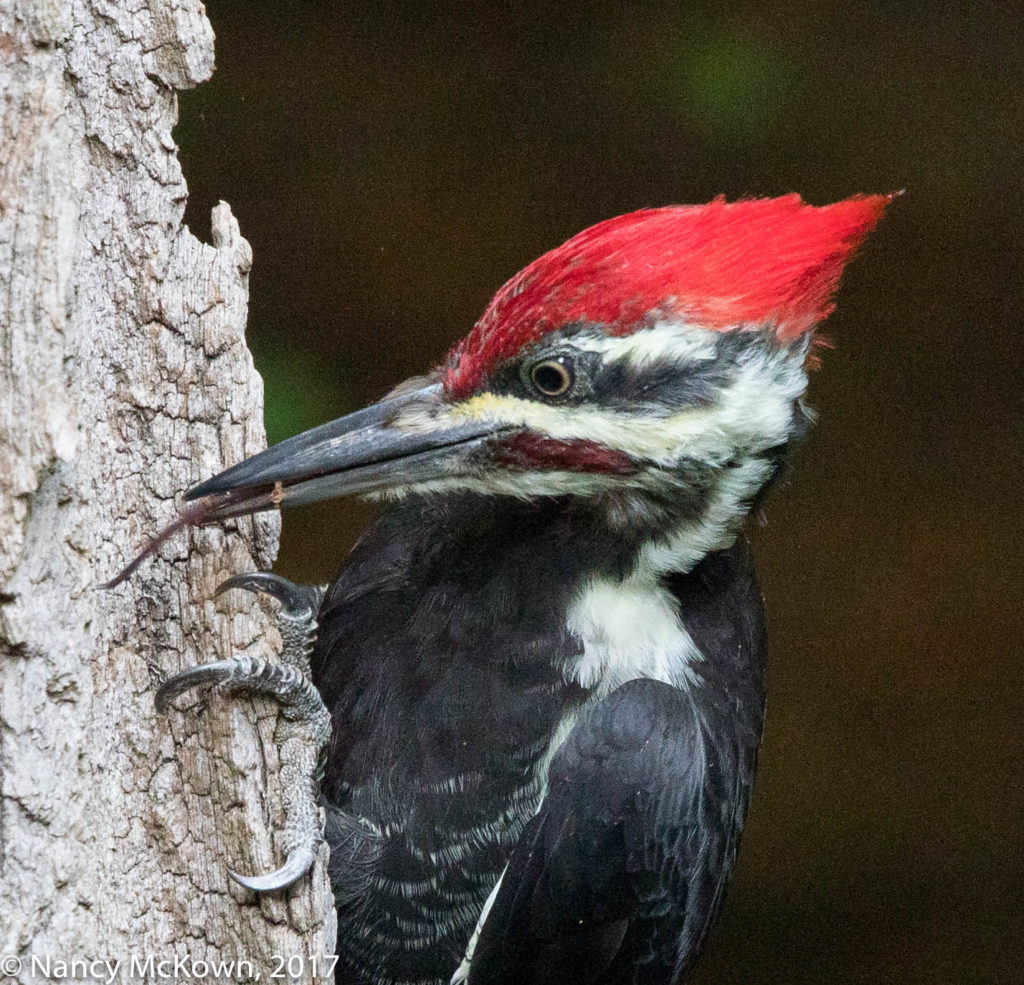
Pileated Woodpeckers are year-long residents in SW Michigan, but rarely have I had the pleasure of photographing one. These woodpeckers are startlingly large (the size of a crow) for a forest dwelling bird, and spend much of their time excavating high-in-the-sky trees to forage for carpenter ants and beetle larvae. Pileated Woodpeckers are primary cavity excavators (PCE) who tunnel broad and deep to shape a deadwood cubbyhole in which to raise their young. Once abandoned by the woodpeckers, SNAG dependent birds and mammals move in.

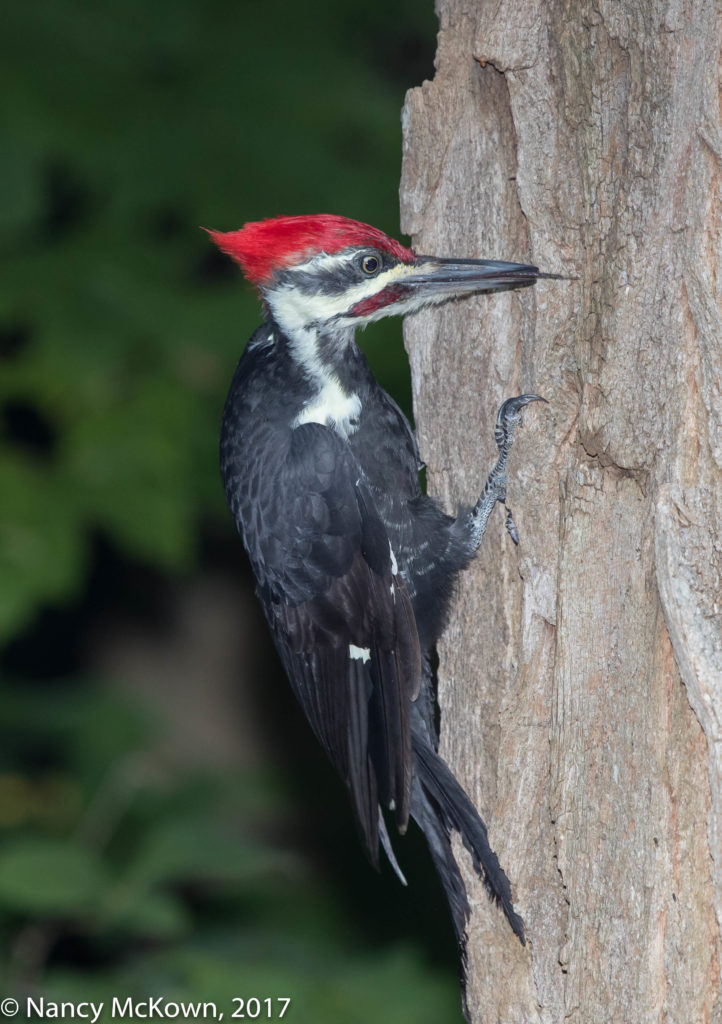
I love that conspicuous Woody Woodpecker-ish red crest atop his head and I get goosebumps when I hear the wild whinnying calls of these dashing and pre historic looking birds reverberating high above us. Pileated Woodpeckers are known to be very skittish around people. Most often by the time I see one, he has already spotted me and is headed the other way, giving me only belly or tail feather shots. This individual (see below) is obviously a male, as indicated by the mustache-like red patch of feathers on his cheek.

Photo of Pileated Woodpecker
Pileated Woodpecker
A Little Too Much Flash.
ISO800; f/8; 1/250 Second

Patience Pays Off

It was early evening with patchy light covering the foreground off the deck. The meter calculated the woodsy background at approximately 2 stops darker. I heard the Pileated Woodpecker before I saw him…something probing, prying, hammering and clawing behind the thick trunk (of a live Maple tree); and then some rustling, possibly from him hopping around on the ground amongst the wide reaching hosta leaves.

I quickly reset the len’s focusing range to 4.5m to infinity. The focusing mechanism was noisily hunting in and out, trying to pinpoint something within the darkness on which to focus. (NOTE: The Canon 500 mm 4.0L II IS USM telephoto lens has 3 specific options from which to choose a working distance or focusing range. A focus limiter switch on the lens barrel allows you to choose from 3 distance ranges: 4.5m to 10m, 10m to infinity, or 4.5m to infinity. )

It took a long 5 minutes before this Pileated Woodpecker showed himself, emerging slowly around the bend of the tree trunk. The lens immediately locked focus. As he began circling the Maple, he ignored the camera, intent on pounding the tree bark and lapping up insects with that long, sticky tongue. I pressed the shutter, set to silent, continuous shooting and held it just long enough to burst 3 shots.

(NOTE: When I first spot a bird, I always assume that the encounter will be fleeting. My camera is usually set to silent Low Speed Continuous Burst Mode, just in case I need it to capture some action. When using flash, there is no choice but to slow down to allow the flash to recycle.)

Pileated Woodpecker
Pileated Woodpecker
Slowly Moving Around the Tree Trunk and into View. Flash Worked,
Very little boosting needed in Post.
ISO800; f/8; 1/250 Second

Manual Mode Without Auto ISO

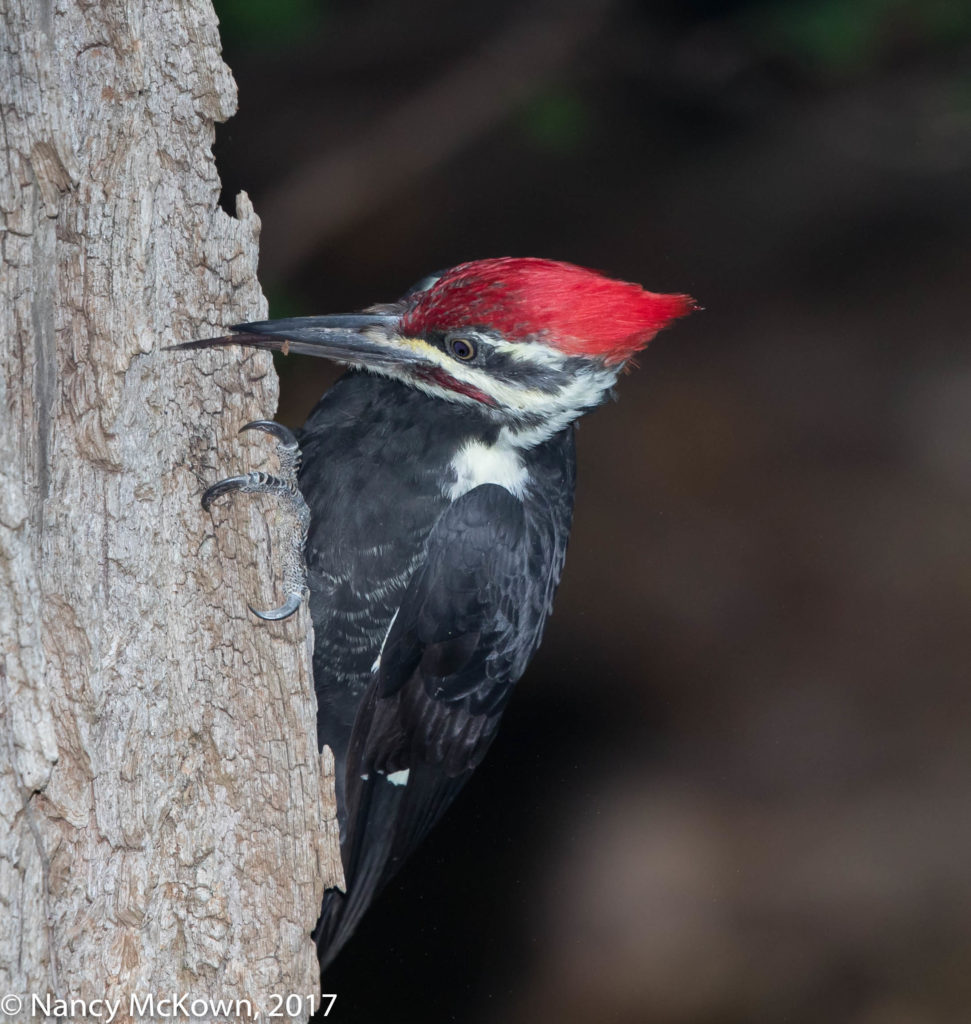
The flash did not fire in the 3rd photo of this sequence…causing a 3-stop underexposed image…no doubt because there was no time for the flash gun to refresh. See photo below.

Note: The ISO on all of these images was set to a relatively low ISO800. Generally, when I set exposure parameters for flash use, I leave the ISO at “Auto”. When the flash fires, Auto = ISO400. If the flash does not fire, Auto ISO will automatically readjust the exposure parameters for the scene. Since ISO was set to ISO800 during this shoot, the camera was in total manual mode. The ISO exposure parameters did not auto adjust and the image was underexposed.

Pileated Woodpecker
Pileated Woodpecker
Flash Did Not Have Time to Fully Recharge.
Boosted Exposure in Post Processing +3.06
Creating Noise on Bird and background.
ISO800; f/8; 1/250 Second

Fixing Underexposure Problems in Lightroom

It’s relatively easy to remedy underexposure in Lightroom by fine tuning the Brightness, Highlights, Shadows and Contrast sliders until you get the look you want. In the severely underexposed image shown directly above, I had to boost exposure +3.06 in Lightroom. I used as much of the noise reduction slider as I dared and that helped to soften the gritty look. You can see in the last image (especially if you enlarge and compare the images) that the bird’s crest lacks feather detail and the dark background looks as though it has a grainy image lustre coating applied. Evenly distributed background noise is prevalent, even though: 1) I was shooting in RAW; 2) Used a low ISO; and 3) Applied noise reduction in post. Even with my camera’s high end sensor, there was not enough data in the darkest portions of the image, forcing Lightroom to insert a good amount of amplified pixelated noise in those areas.

The image above looks OK, especially when I don’t enlarge and examine it carefully. Would the image have been as noisy if exposure parameters had been correct “in-camera” (with an auto-adjusted and sky high ISO) as opposed to a post processed exposure adjustment?  I don’t think so.  Dramatically pushing up those exposure sliders in post processing to achieve the right exposure balance can seriously harm the “look” of low and high ISO images. In general, getting exposure right in camera instead of relying on post processing to correct your exposure mistakes will give the grain a more consistent look, and create more pleasing images.

Photographing Red Headed Woodpeckers -Understanding HSS on Flash

Photographing a Red Headed Woodpecker

This year, a pair of Red Headed Woodpeckers has been visiting the yard (infrequently) to feast on suet and bully the other Woodpeckers who dare to cross their paths. Red Headed Woodpeckers are very skittish around humans and quick to pick a fight with other species of birds, especially other woodpeckers. They consume a wide variety of seeds, fruits, nuts and any insects they come across while foraging in trees. Unlike most of the year-round woodpecker residents in our yard, Red Headed Woodpeckers will head south in the Fall to escape the harsh Michigan winter.

A Haze in the Air

The air was unmoving and full of haze on the sunny morning I took these photos. Billions of tiny dust, smoke and other dry atmospheric particles (perhaps from a half a world away) put a veil over clarity. (NOTE: It’s harder to see these particles when the skies are overcast.)

A photo that is in-focus does not mean that it is tack sharp. And soft focusing does not mean that the photo is out-of-focus. Out-of-focus means that all the lines are blurred to some degree. In-focus means that the various shapes in the focus area are sharp to some degree.

I usually don’t notice the detrimental effects of haze in the air until I look back at the images in post processing. They just don’t look right because contrast and detail are less defined. Upon zooming in, the focus looks sharp, but there’s something obstructing the view. It appears worse when the subject is farther away.

Lightroom will allow you to selectively apply correction. I usually just use the clarity slider to brighten the overall image. Ultimately, it’s never enough because it is impossible for software to restore what was never captured.

Red Headed Woodpecker
Not as “Clear” as the 2nd Photo Below.
ISO400; f/9; 1/250 Second

Exploring High Speed Sync

I’m using fill flash more in the yard this summer. I try to be judicious as to how it is applied because, in general, the more ambient light, the more natural the image looks.

With that in mind, I embarked on a mission to better understand the High Speed Sync function (HSS) on my flash and how best to use it for bird photography. I had assumed that HSS would not only provide adequate fill light, but also freeze the action by allowing me to set whatever shutter speed I wished.

As with most things having to do with exposure, it’s more complicated than that.

Photo of Red Headed Woodpecker
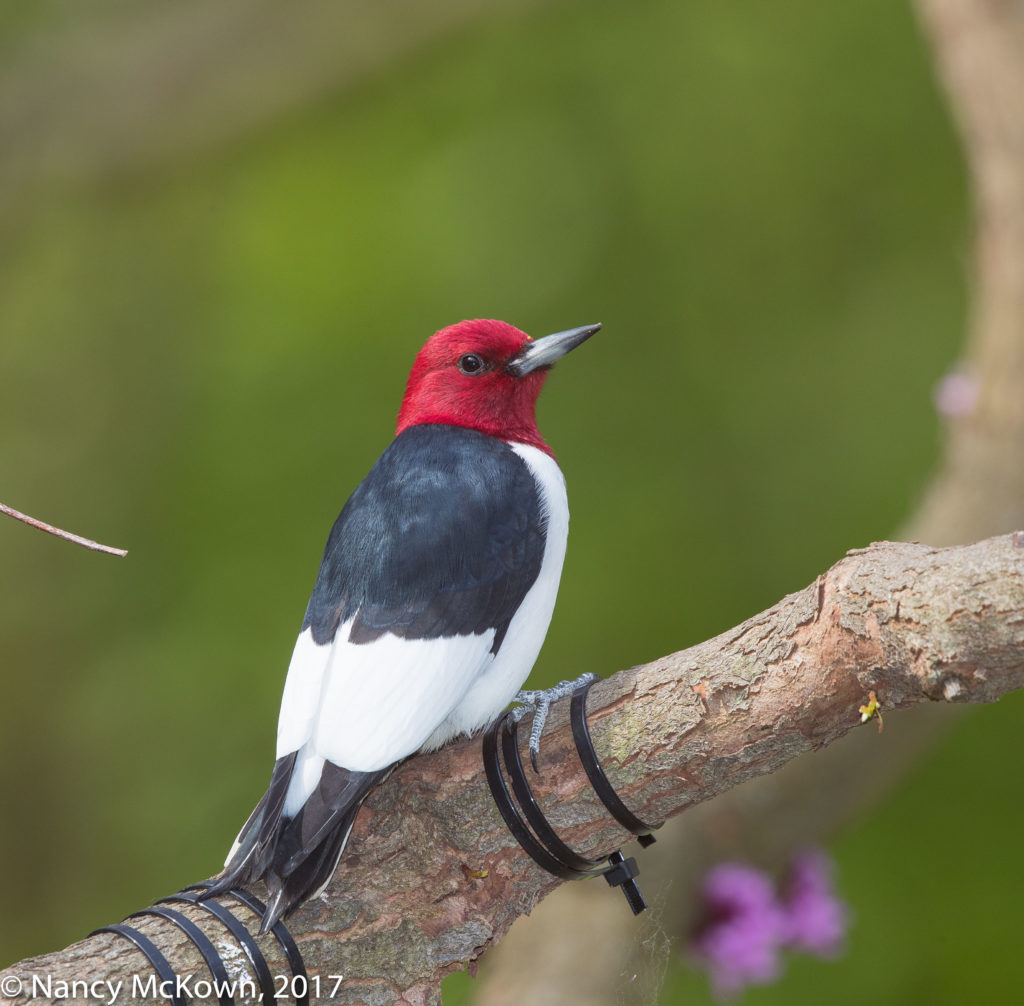
Red Headed Woodpecker
The Red Bud Tree Branches
Cracked Last Winter.
Black Strips were Used to Bind the Wound.
ISO400; f/9; 1/250 Second

Normal Flash Mode

When using normal flash mode, exposure is calculated based on aperture, ISO, and the power and duration of the flash. The shutter speed does not fit into exposure analysis- except for how much ambient light is getting through during the time the shutter is open.

The calculated flash blast is very fast and very powerful. When ambient light is low, the flash blast will freeze motion more effectively than a faster shutter speed. (NOTE: It also depends on how fast your subject is moving.)

HSS – Continuous Light Mode

In HSS mode, the flash mimics continuous light and consequently shutter speed is part of the exposure calculation. HSS fires short pulses of light very fast during the whole time the shutter is open. The flash unit is working harder (sucking up to 4x more battery power) and putting out much less light in HSS mode.

With flash set to HSS mode, you do have the freedom to set a faster shutter speed. However, the higher you set the shutter speed, the less time the image sensor is exposed to light. Adequate illumination in HSS mode depends on how many fast short pulses of light can sneak through while the shutter is opened. (Of course, distance matters too.)

Normal Flash is Preferable in Bird Photography

Using the HSS function on a flash will not provide the speed, power and range needed for bird photography. Freezing motion in low light situations is better achieved when the flash is set to its normal flash mode.

Just shows how powerful and fast a single light beam generated from a flash gun can be.

Photographing Hairy Woodpeckers – The Lure of Fancy Camera Equipment

Photographing Hairy Woodpeckers

Most years we have the good fortune of seeing many sturdy, winter-hardy Downy and Red Bellied Woodpeckers in our yard. But Hairy Woodpeckers….just a few.

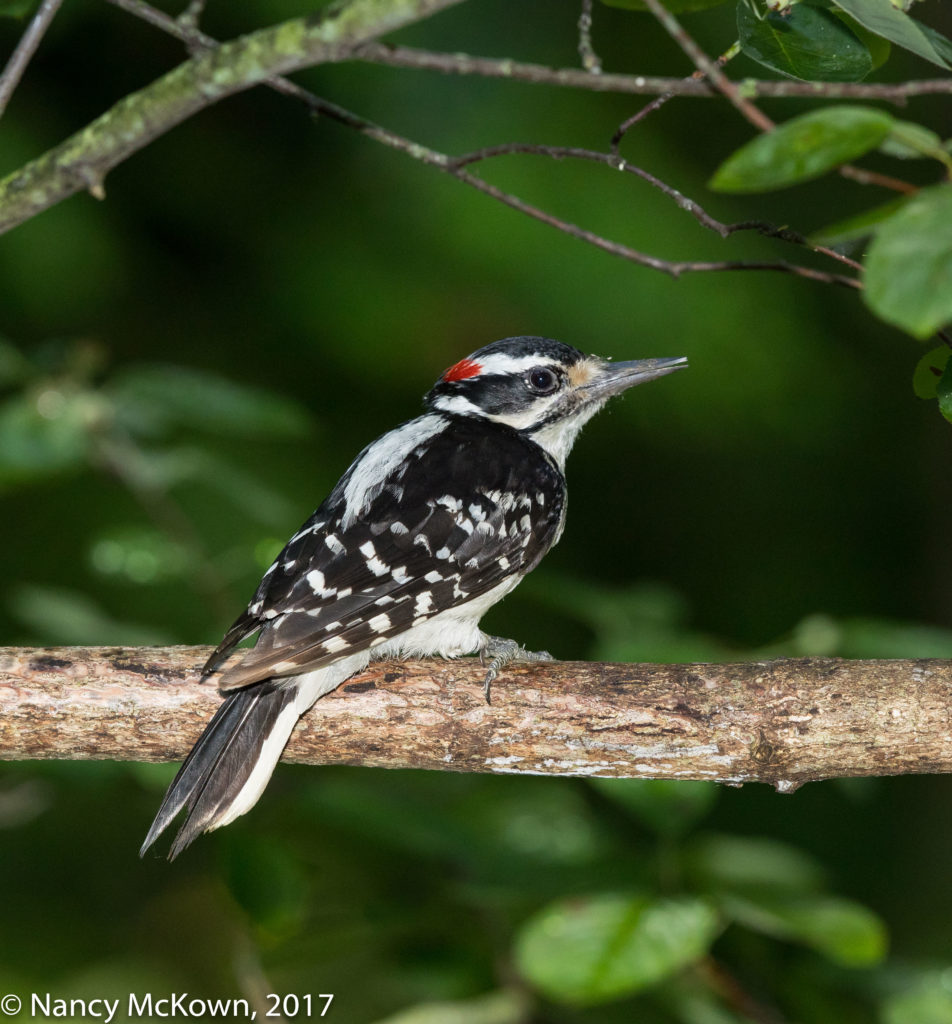
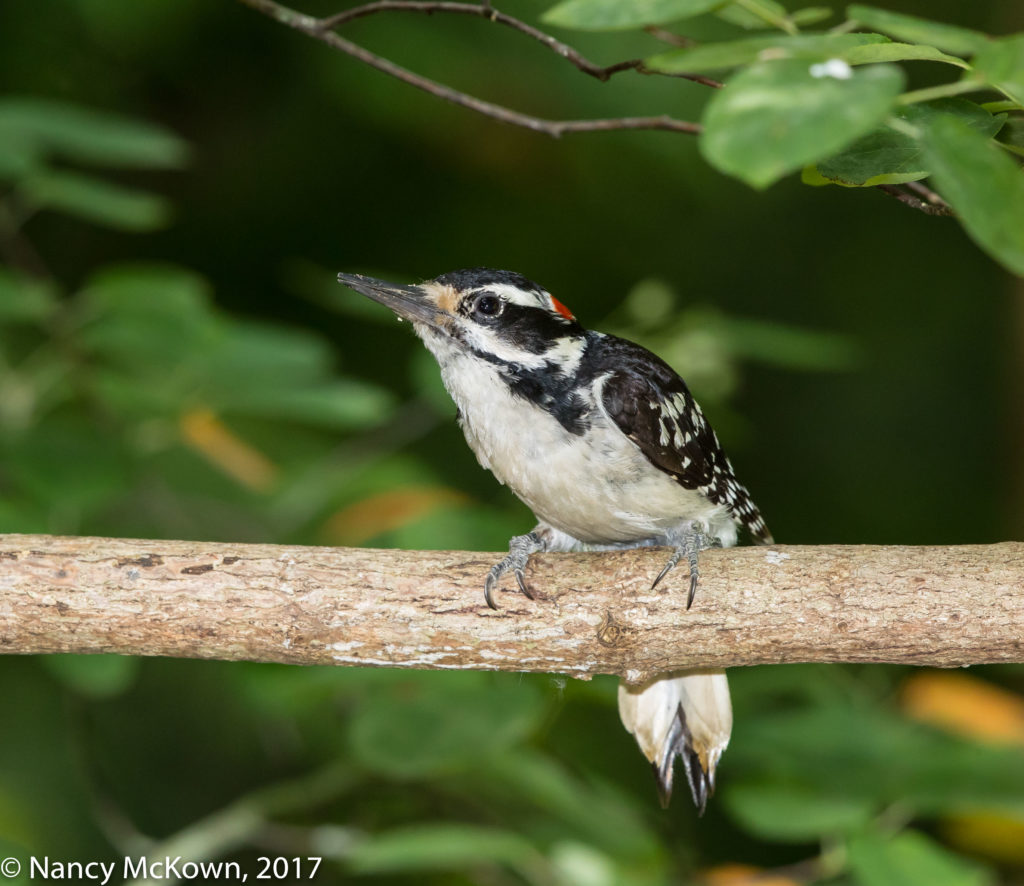
The Hairy and Downy Woodpeckers are examples of convergent evolution –in that both species live in similar habitats and have evolved to be almost identical in shape and color, despite not being closely related biologically. I’ve learned to tell the Downy and Hairy Woodpeckers apart by first checking the length of the bird’s beak and then overall bird size. (The Hairy is the larger of the two.) The beak of the Downy is dainty and better “fits” his face. The drilling beak of the Hairy Woodpecker is more formidable- as long as his face – and appears oversized. Predictably, both display typical woodpecker-ish behavior…. probing into tree cavities, scooching up and down tree trunks and clinging to the suet feeder. (NOTE: Sometimes a young fledging Hairy will look as though he has a smaller, undersized beak, causing me to wonder about ID.)

Photo of Hairy Woodpecker
Hairy Woodpecker
About the Size of a Robin
A Little Brown Stain Is Evident
On the Outer Wing and Tail Feathers.
No Doubt from Being
Constantly Dragged Across
The Bark of Trees.
ISO1250; f/9; 1/250 Second

Nature Photographers

I learn a lot about birds and photography by exploring the web. NOTE: I don’t have a lot of friends who are nature photographers.

Since I started this website 4+ years ago, I have grown to be a better bird photographer and a better writer. I have more knowledge and more skill. I am less of a pretender.

Photo of Hairy Woodpecker
Hairy Woodpecker
Red splotch at the Rear
of His Crown.
ISO1250; f/9; 1/250 Second

Sense of Exclusivity

I’m always watching photographers…. looking to see what gadgetry is around their necks. I can be a little dismissive if I notice an unglamorous “consumer market” camera, even though I know that brand names, high prices and the air of professionalism do not an artist make. For some reason, I simply pay more attention to individuals carrying “professional grade” cameras. It is as if all those superior imaging components and high prices allow me to elevate the photographer on to an artistic pedestal, even though her skill level may not allow her to venture past the camera’s auto settings. Snob appeal I suppose.

Few Barriers to Entry

Modern dSLR cameras are not a study in simplicity, but that doesn’t matter. The imaging technology contained within these cameras is geared to eliminate or at least reduce barriers to becoming a photographer, so much so that a lot of people don’t think of nature photography as an art or a skill. Almost anyone with a dSLR camera can present herself as a pro. Understanding the fundamentals of composition and exposure is simply not necessary. Just show up, display a little panache, take hundreds of photos (professional quality is to a large extent about numbers) and let the camera figure out the details. No mastery necessary.

Divergent Paths

Whatever you own, all gear is limiting in some way. Very different camera equipment, methods, and motivations lead photographers onto divergent paths. The skill and talent of the photographer, not the quality of the equipment, will ultimately be the key differentiator between photographer and dabbler.

“The Camera is an Instrument that Teaches People How to See Without a Camera.”

–Dorothea Lange


Photographing Downy Woodpeckers – Thoughts About Web Predators

Photographing Downy Woodpeckers

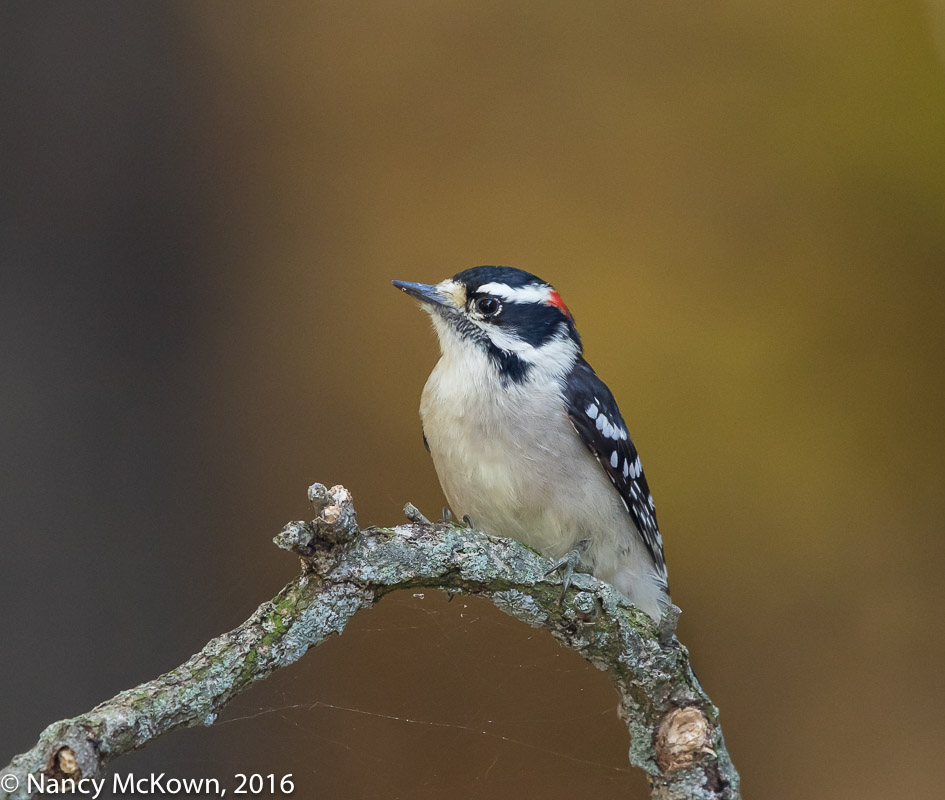
I think Downy Woodpeckers are one of the loveliest year-round residents in our yard. They are as numerous and predictable as Mourning Doves in Southwest Michigan. The ones around us have become acclimated to the camera and appear tolerant and watchful when I come around.

Like most birds, Downy Woodpeckers spend more time looking up toward the skies in search of predators than they do watching  me.  When they sense danger, most other birds quickly scatter, but Downy Woodpeckers often hide in what appears to be plain sight, hoping to camouflage themselves by being silent and motionless until the danger passes.

Photo of Downy Woodpecker
Downy Woodpecker
ISO1600; f/7.1; 1/250 Second

Little Drummers

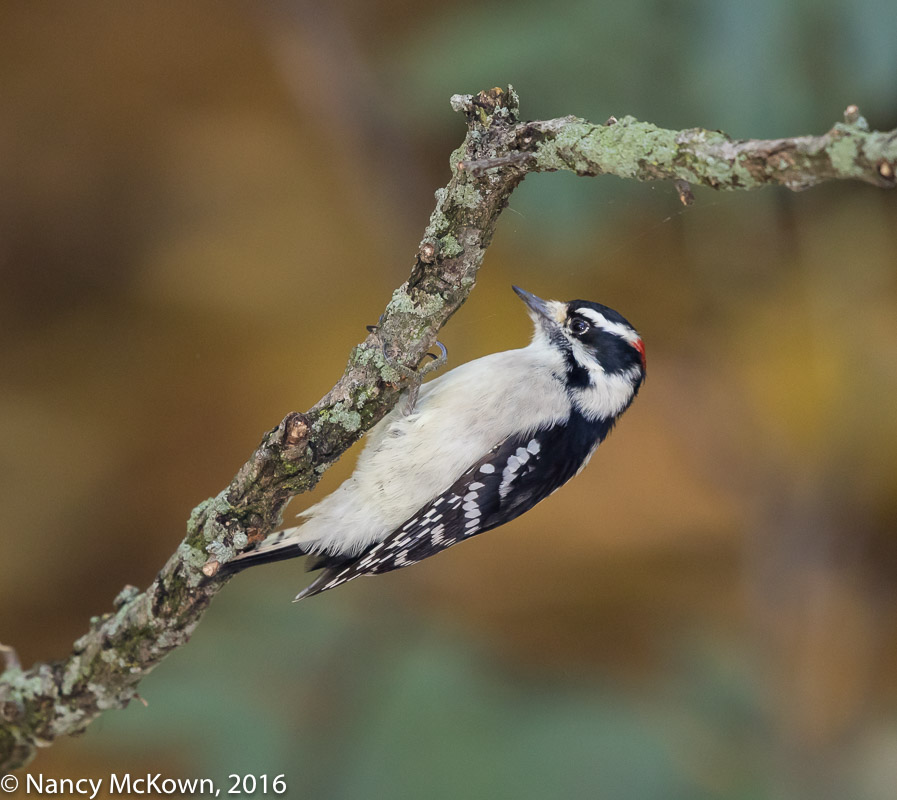
Downy Woodpeckers are not much bigger than the other familiar song birds at the feeders (titmice, chickadees, nuthatches). A small patch of red on the back of the head distinguishes the Downy male from the female. Their bills are straight and sharp, but do not look oversized on their faces like the beaks on larger woodpeckers do. In the winter you can often hear them excavating tree trunks and branches probing for deeply embedded insects and larvae. As Spring approaches they will drum more to communicate and entice partners.

Sharing Bird Photos

I love the challenge of photographing birds and publishing my experiences on a weekly web blog. Where else can photographers connect and share their work with so many people all over the world? Best of all, it gets me out to explore nature with my camera.

Anyone who maintains a blog knows that concealed naysayers and marauders come with the web publishing territory. Putting my images (good and bad) out there also makes me vulnerable to everything from condescending feedback to outright thievery.

Photo of Downy Woodpecker
Downy Woodpecker
ISO1600; f/71; 1/250 Second

Pilfering Images

The web is a treasure trove of art that is technically easy to snatch…and apparently lots of thieves do so without a care. I was not surprised to learn that some individuals are illegally stealing my images and posting them elsewhere on the web without permission.

Google Analytics has web diagnostic programs that provide a multitude of reports about how my site appeals to readers. It calculates how many people visit my site, for how long, and from whence they come. However, Google Analytics does not spotlight web pilfering. To find out if your web images are being used for unauthorized purposes, tools like “Google Image Search” and “TinEye.com” are available. You simply upload an image and these tools will point to where else that image can be found on the web.

What to Do

One of the the most logical ways to foil attempts of thieves to sell hard copies of copyrighted images is to reduce the size of the image file to 1020×800 pixels, at 200 PPI resolution. The photo still looks decently clear and large on the web, but can not be used to print images larger that 4″x4″ or 5″x4″. This also has the added benefit of reducing site load times. This strategy won’t do much to thwart those individuals who want to display your images on a website or use them as a model for their art work.

If you wish to read more on this topic, this link provides excellent information: “What to Do If Your Photographs are Stolen” by KeriLynn Engel.

Note: I don’t actively market my photographs, so I always appreciate it when artists contact me to ask for permission to use one of my bird images. My fee for a one-time use non-exclusive license is $15.00 per image for reproduction up to 5″x 7″.

Photographing a Juvenile Northern Flicker – Techno Talk Isn’t For Everyone

Photographing a Northern Flicker

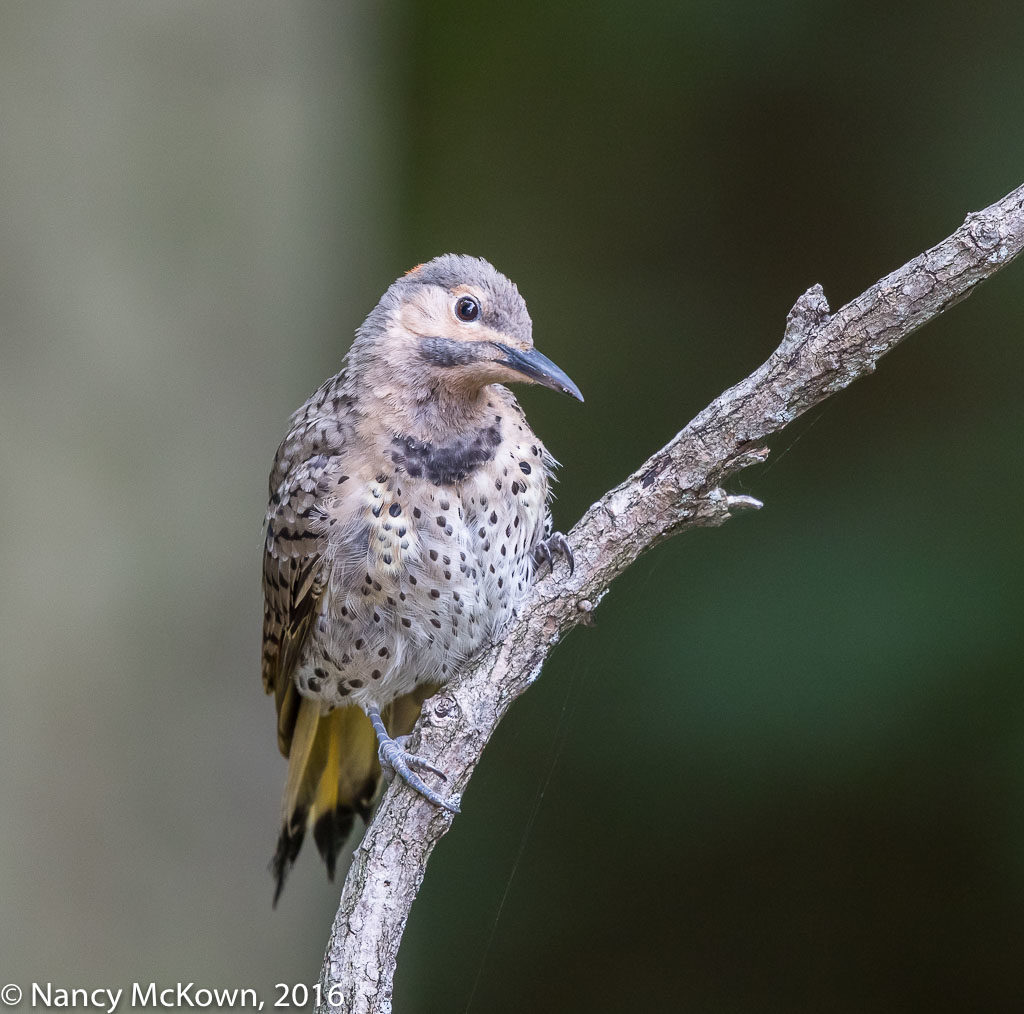
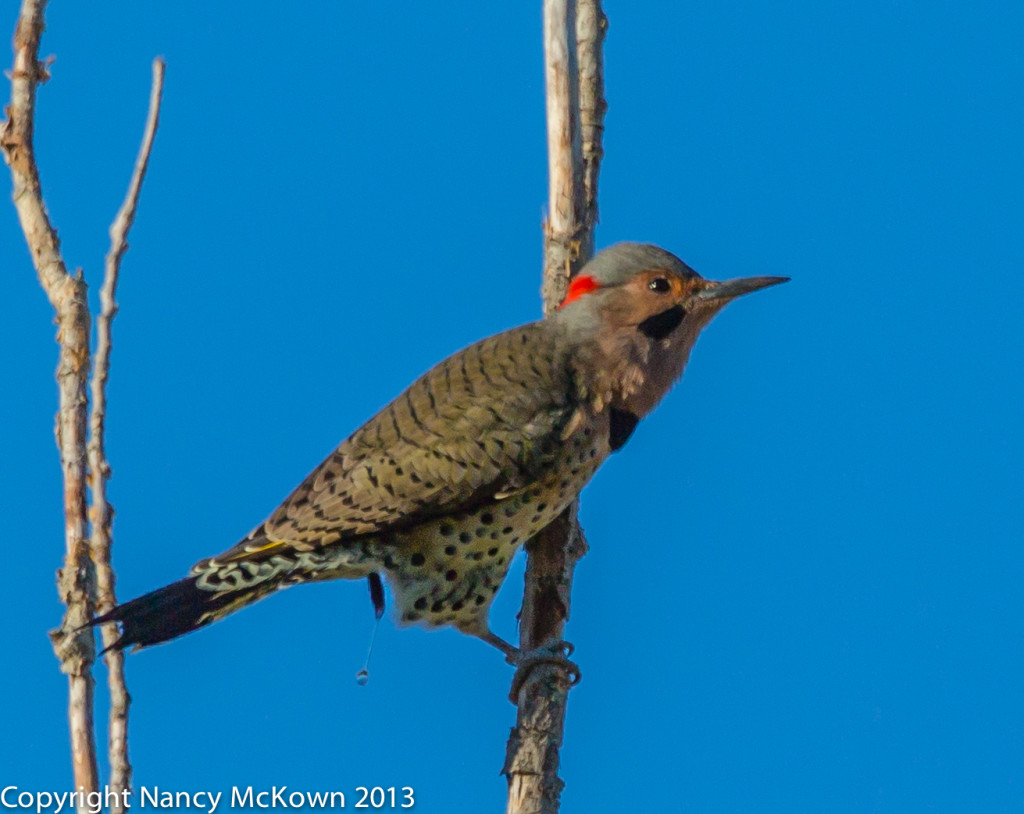
Some Northern Flickers hang around Southwest Michigan year around, but most retreat from the Michigan cold. This photo of a wary juvenile contemplating his options was taken this past fall in our yard. He never did muster the courage to hop down to the fountain and imbibe with the other birds. I was lucky to get in this one shot before he flew off.

Another member of the hammering Woodpecker family, Northern Flickers are brown and tan all over with distinctive face markings, richly patterned plumage and long sticky tongues. They don’t use their tails as a prop like most woodpeckers do and can mostly be found on the ground with the Robins and Blackbirds foraging for ants and beetles.

Photo of Northern Flicker
Juvenile Northern Flicker
Contemplating His Options
ISO2500; f/5.6; 1/320 Second

DSLR Camera Fluent

I love posting my images and writing about how DSLR technical competency translates into rewarding nature photography. Spending time and energy learning to be DSLR fluent gives me more control over the camera’s digital imagery. I find it challenging to navigate the labyrinth of precise terminology needed to figure it all out. It’s my path to creativity.

Techno Talk Isn’t for Every Photographer

I know a few photographers who choose to concentrate only on the artistic components within the frame and let the camera handle the rest. They reject my approach and ignore the mechanical, electronic, chip oriented functionality, like they do (most likely) with their computers and smart phones. Just not their thing.

These photographers are more interested in how the image strikes them emotionally.  Wildlife photography is more about the challenge to create rather than working through exposure conundrums in their head.

Camera automation is their key to artistic vision and therefore they don’t often cross the line into the technical. Manual Mode is a layer they don’t want or need. The practicality of learning how cameras work is superfluous to achieving the end game. Why bother when you can instantaneously see your image on the LCD screen? If it doesn’t work…move on and try something else.

Photo of Northern Flicker
Northern Flicker. Taken near
Lake MI a few years ago.
A Better View of the Backside
of this Beautiful Woodpecker.

Different Paths

Very different methods, motivations and interpretations lead photographers onto divergent paths. Every photographer has to decide how much she will let the camera do the thinking…..how much she will detach from the techno to accomplish her vision.

One thing bird photographers have in common. Birds come and go so fast. Often there’s only time to lift the lens and press the shutter (assuming you’ve got the camera setup on the tripod). There’s not much time to think it through right before taking the shot, artistically or technically.

So…..To bird lovers and photographers everywhere, whatever your philosophy and however you use the tools of the trade, Best Wishes and Merry Christmas!


Photographing an Immature Red Bellied Woodpecker- LCD Screen Glare

Photographing a Young Woodpecker

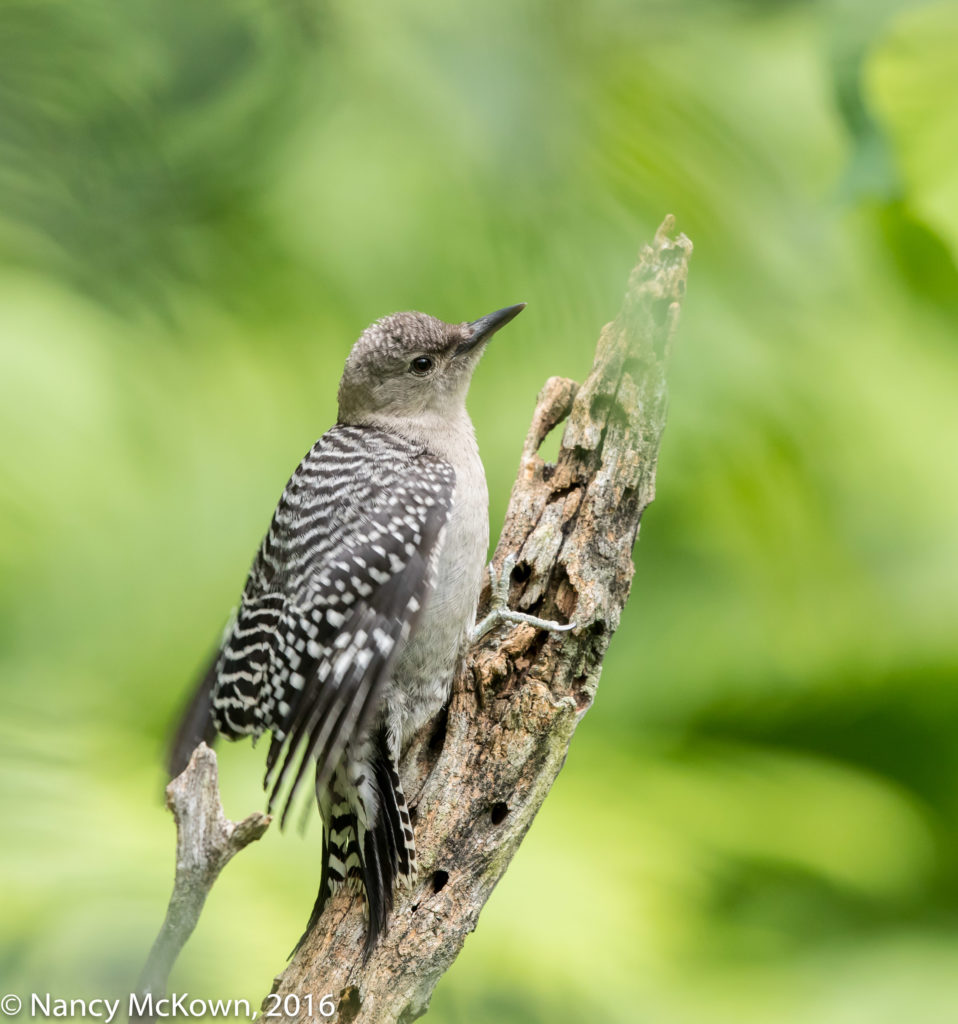
The perching bird looked like a newly fledged Red Bellied Woodpecker….innocent, very shaky, possibly on her maiden voyage out into the wild. No trace yet of the red tinted feathers that will soon appear on her head and belly. (For a moment I wondered if this bird was another species of woodpecker but the black and white streak patterns on her wings were very distinctive.) She used her oversized clutching zygodactyl feet to latch onto a cracked and decayed tree bough that had been pock-marked with dozens of woodpecker holes. It was an ideal perch for bird photography- one that we had erected between two trees in front of a lush green background and away from distracting branches.

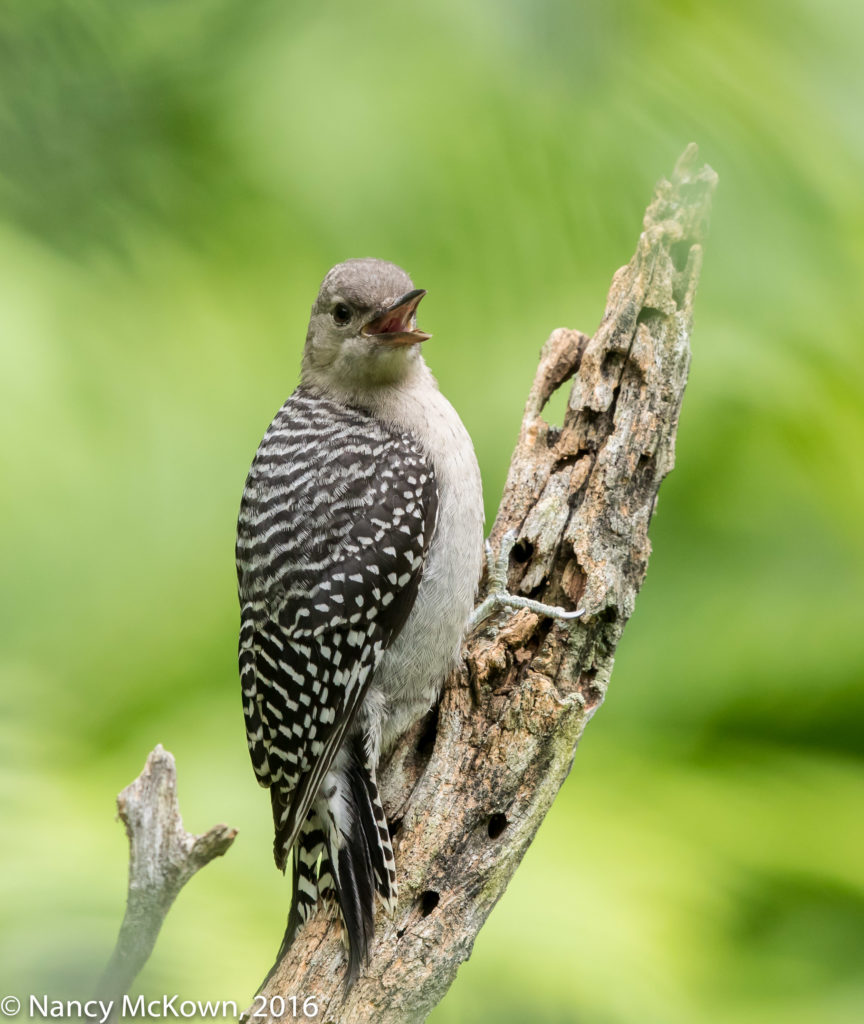
The fledgling looked around for a moment, spotted her parent, then began her harsh rattling call to be fed.

Photo of Juvenile Red Bellied Woodpecker
Fledgling Red Bellied Woodpecker.
Notice the Motion Blur– This Young Bird is
Fluttering her Wings To Signal Her Parents.
ISO1250; f/7.1; 1/500 Second

LCD Screen Glare

My camera was setup on a tripod with the low morning sun behind me. I positioned the lens to capture (as the bird’s background) a multilayered forest of feathery ferns huddling at far end of the driveway. I adjusted the aperture a little wider than usual to transform those individual fronds into lush, polished buttery green swirls-  picture perfect bokeh.

At first when I magnified the camera’s LCD screen to take a look at the images, I saw only a harsh glare. I could not review the quality of the background or see any detail on the woodpecker’s feathers. Hoping for more bird action, I stayed in that location until the light was no longer appealing and then went into the house to review my images.

Photo of Juvenile Red Bellied Woodpecker
Juvenile Red Bellied Woodpecker Calling for Food.
ISO1250; f/7.1; 1/500 Second

Anti-Glare LCD Viewfinders

It’s not uncommon to have the DSLR camera’s LCD viewing monitor compromised by reflection and glare. LCD protectors (for phones, computers, cameras) are available to help alleviate this problem. They purportedly let you closely inspect your images outdoors without the distractions of reflections or shadows. An added benefit is the claim that these anti glare covers help prevent scratches on the camera’s LCD screen.

My experience has been that these covers do work to reduce glare, but the additional layer of plastic or glass on the LCD screen make the images less sharp and colors less vibrant -especially when I attempt to closely inspect with magnification. I don’t apply them to my DSLR cameras, phone or computer.

These days, DSLR camera LCD screens are engineered to be resilient. They can still be scratched if the camera is crammed into a bag along with piercing keys, zippers or anything sharp. The scarred LCD screen will most likely still display your images – but who wants to look at surface scratch marks every time you review your images?  Professional level DSLR cameras are constructed to be ruggedly handled, but it’s best to treat them with deliberate care.

See more photos of summertime fledglings in this post.

Photographing Red Headed Woodpeckers and Controlling the Vivid Colors

Photographing Red Headed Woodpeckers

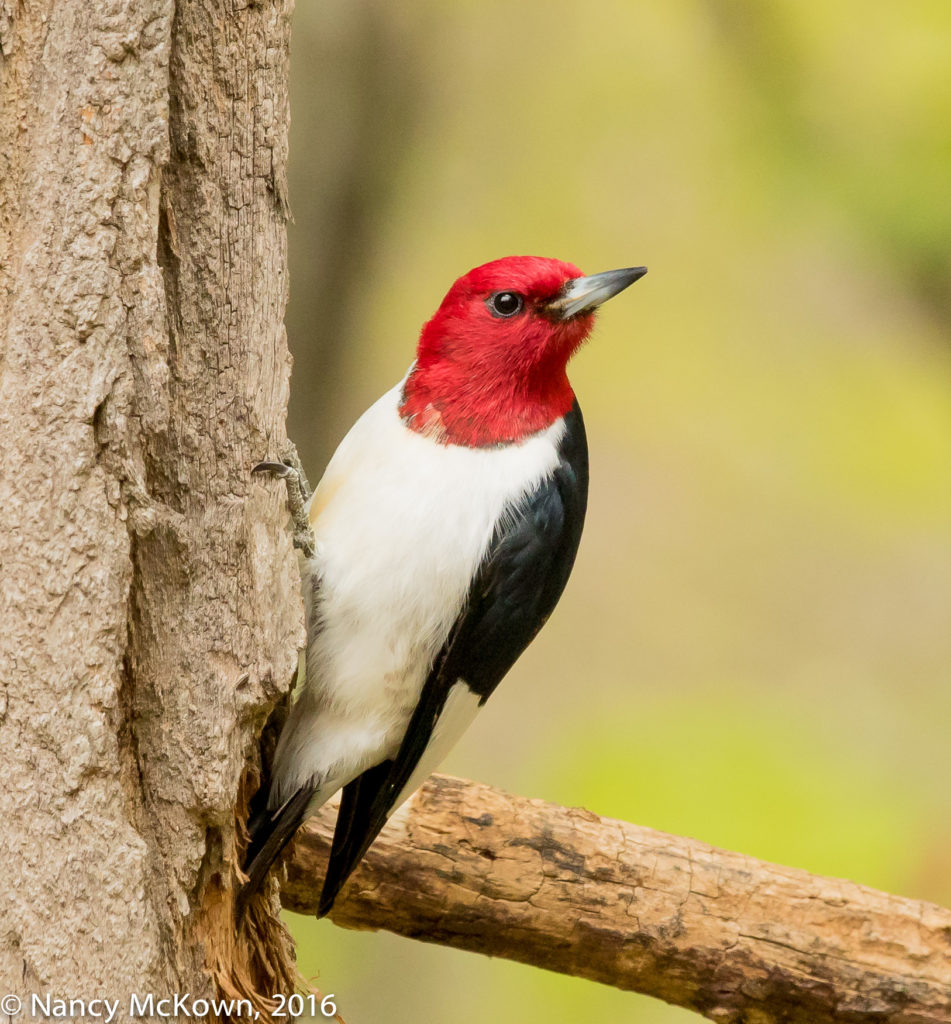
This spring, we spotted a pair of Red Headed Woodpeckers in our yard. (It’s hard to mis-identify this bird species.) They stayed for a couple weeks, long enough for me to wishfully assume that they had chosen a towering dead oak in our yard to set up housekeeping. But then one morning, they were just gone.

Red Headed Woodpeckers are very skittish around humans and quick to pick a fight with other species of birds, especially other woodpeckers. They consume a wide variety of seeds, fruits, nuts and any insect they come across while foraging in trees and tree bark. Unlike most of the year-round woodpecker residents in our yard, Red Headed Woodpeckers will head south in the Fall to escape the harsh Michigan winter.

This species of woodpecker is considered uncommon, and according to the “IUCN Redlist of Threatened Species” is on the decline to the point where they are listed as “near threatened”.

Red Headed Woodpecker
ISO800; f/7.1; 1/640 Second.

Controlling Color Intensity

The head on this Red Headed Woodpecker is vividly red. How the camera captures the color intensity of that red (and other colors) will vary from camera to camera, depending on the camera’s settings. Most DSLR and point and shoot cameras allow you to express your color preferences by configuring the “picture style” settings in the camera menu. You can choose neutral tones or vivid, knock-your-socks-off color renditions. It’s all about artistic preference.

NOTE: Other camera settings also impact color rendition. For this shoot, the camera was set to Canon’s “Evaluative Mode” which I think does a nice job of rendering colors in nature.

Photo of Red Headed Woodpecker
Red Headed Woodpecker
Objecting to the Camera.
ISO640; f/7.1; 1/640 Second

Managing In-Camera Color

In Canon cameras, you can manage in-camera color and contrast by adjusting “Picture Styles” settings. Your menu choices are: Standard, Portrait, Landscape, Neutral, Faithful, and Monochrome. Once the appropriate picture style has been selected, you can further customize that choice by refining attributes like sharpness, contrast, saturation and color tone.

If the presets offered by the in-camera menu are not to your liking and you wish to customize and save your own favorite interpretations of color, Canon cameras allow you to “register” three of your color preferences. For more information, press this link to review Canon’s Publication “Quick Guide to Picture Style Settings and Customizations”.

Photo of Red Headed Woodpecker
Red Headed Woodpecker.
A Very Long Tongue.
ISO1000; f/6.3; 1/640 Second

Balance

My camera (set to “standard” picture style) did a good job balancing the intense black, white and red colors. Once I loaded the images into Lightroom, almost no adjustment was needed to improve on the hue, saturation and luminosity.  I moved the “white” slider a touch to bring out more detail in the breast feathers. The histogram showed no overly exposed bright spots.

RAW format

Setting and refining Picture Styles can be a very creative undertaking, but it is important to remember that as long as your camera is set to RAW format, the camera will NOT apply the picture style settings to your images. You may see the impact of your picture style choice in the camera’s LCD screen, but only because you are seeing a JPEG rendition through that screen. I always shoot in RAW format, consequently, I make all picture style adjustments in post processing. (NOTE:  RAW format produces a huge image file that is processed minimally by the camera.  Further processing is done once the files are loaded into your post processing software.)

NOTE: Canon includes post processing software with all its DSLR cameras. If you shoot in RAW, you can easily apply the in-camera picture style settings you chose if you use this software.

Photographing Red Bellied Woodpeckers and Thoughts From a Camera Aficionado

Photographing Red Bellied Woodpeckers

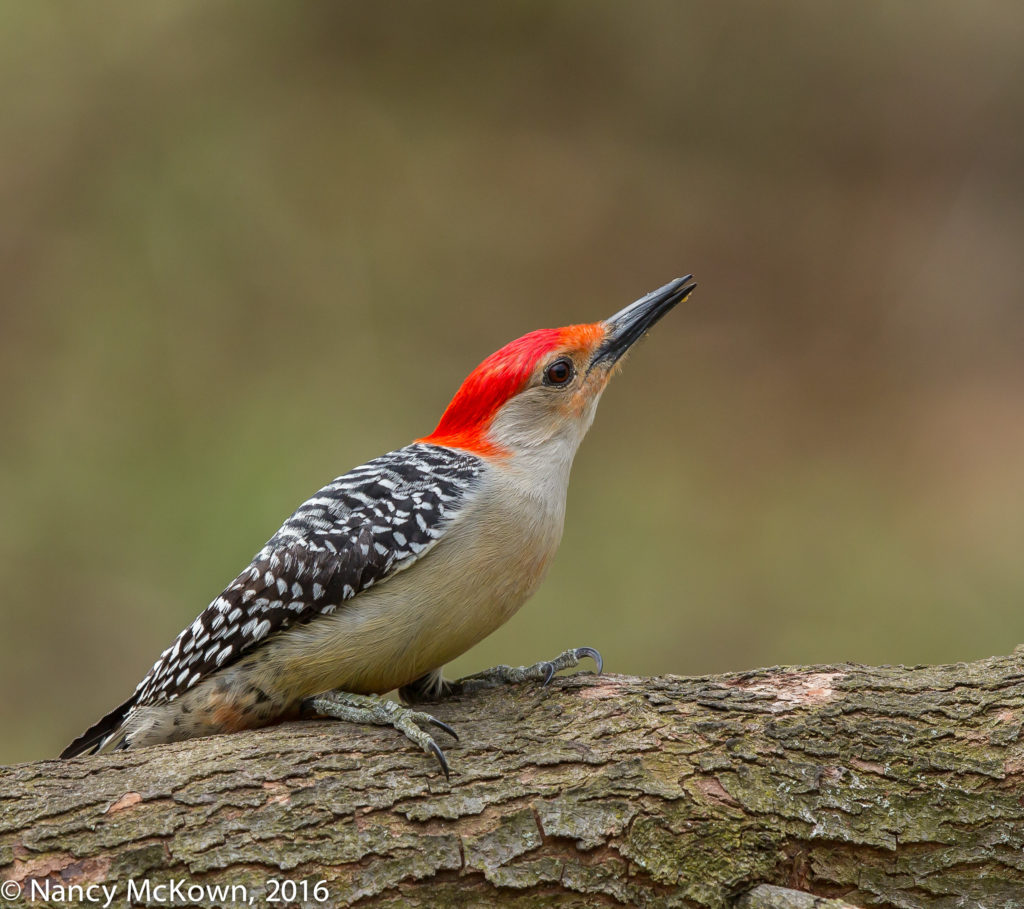
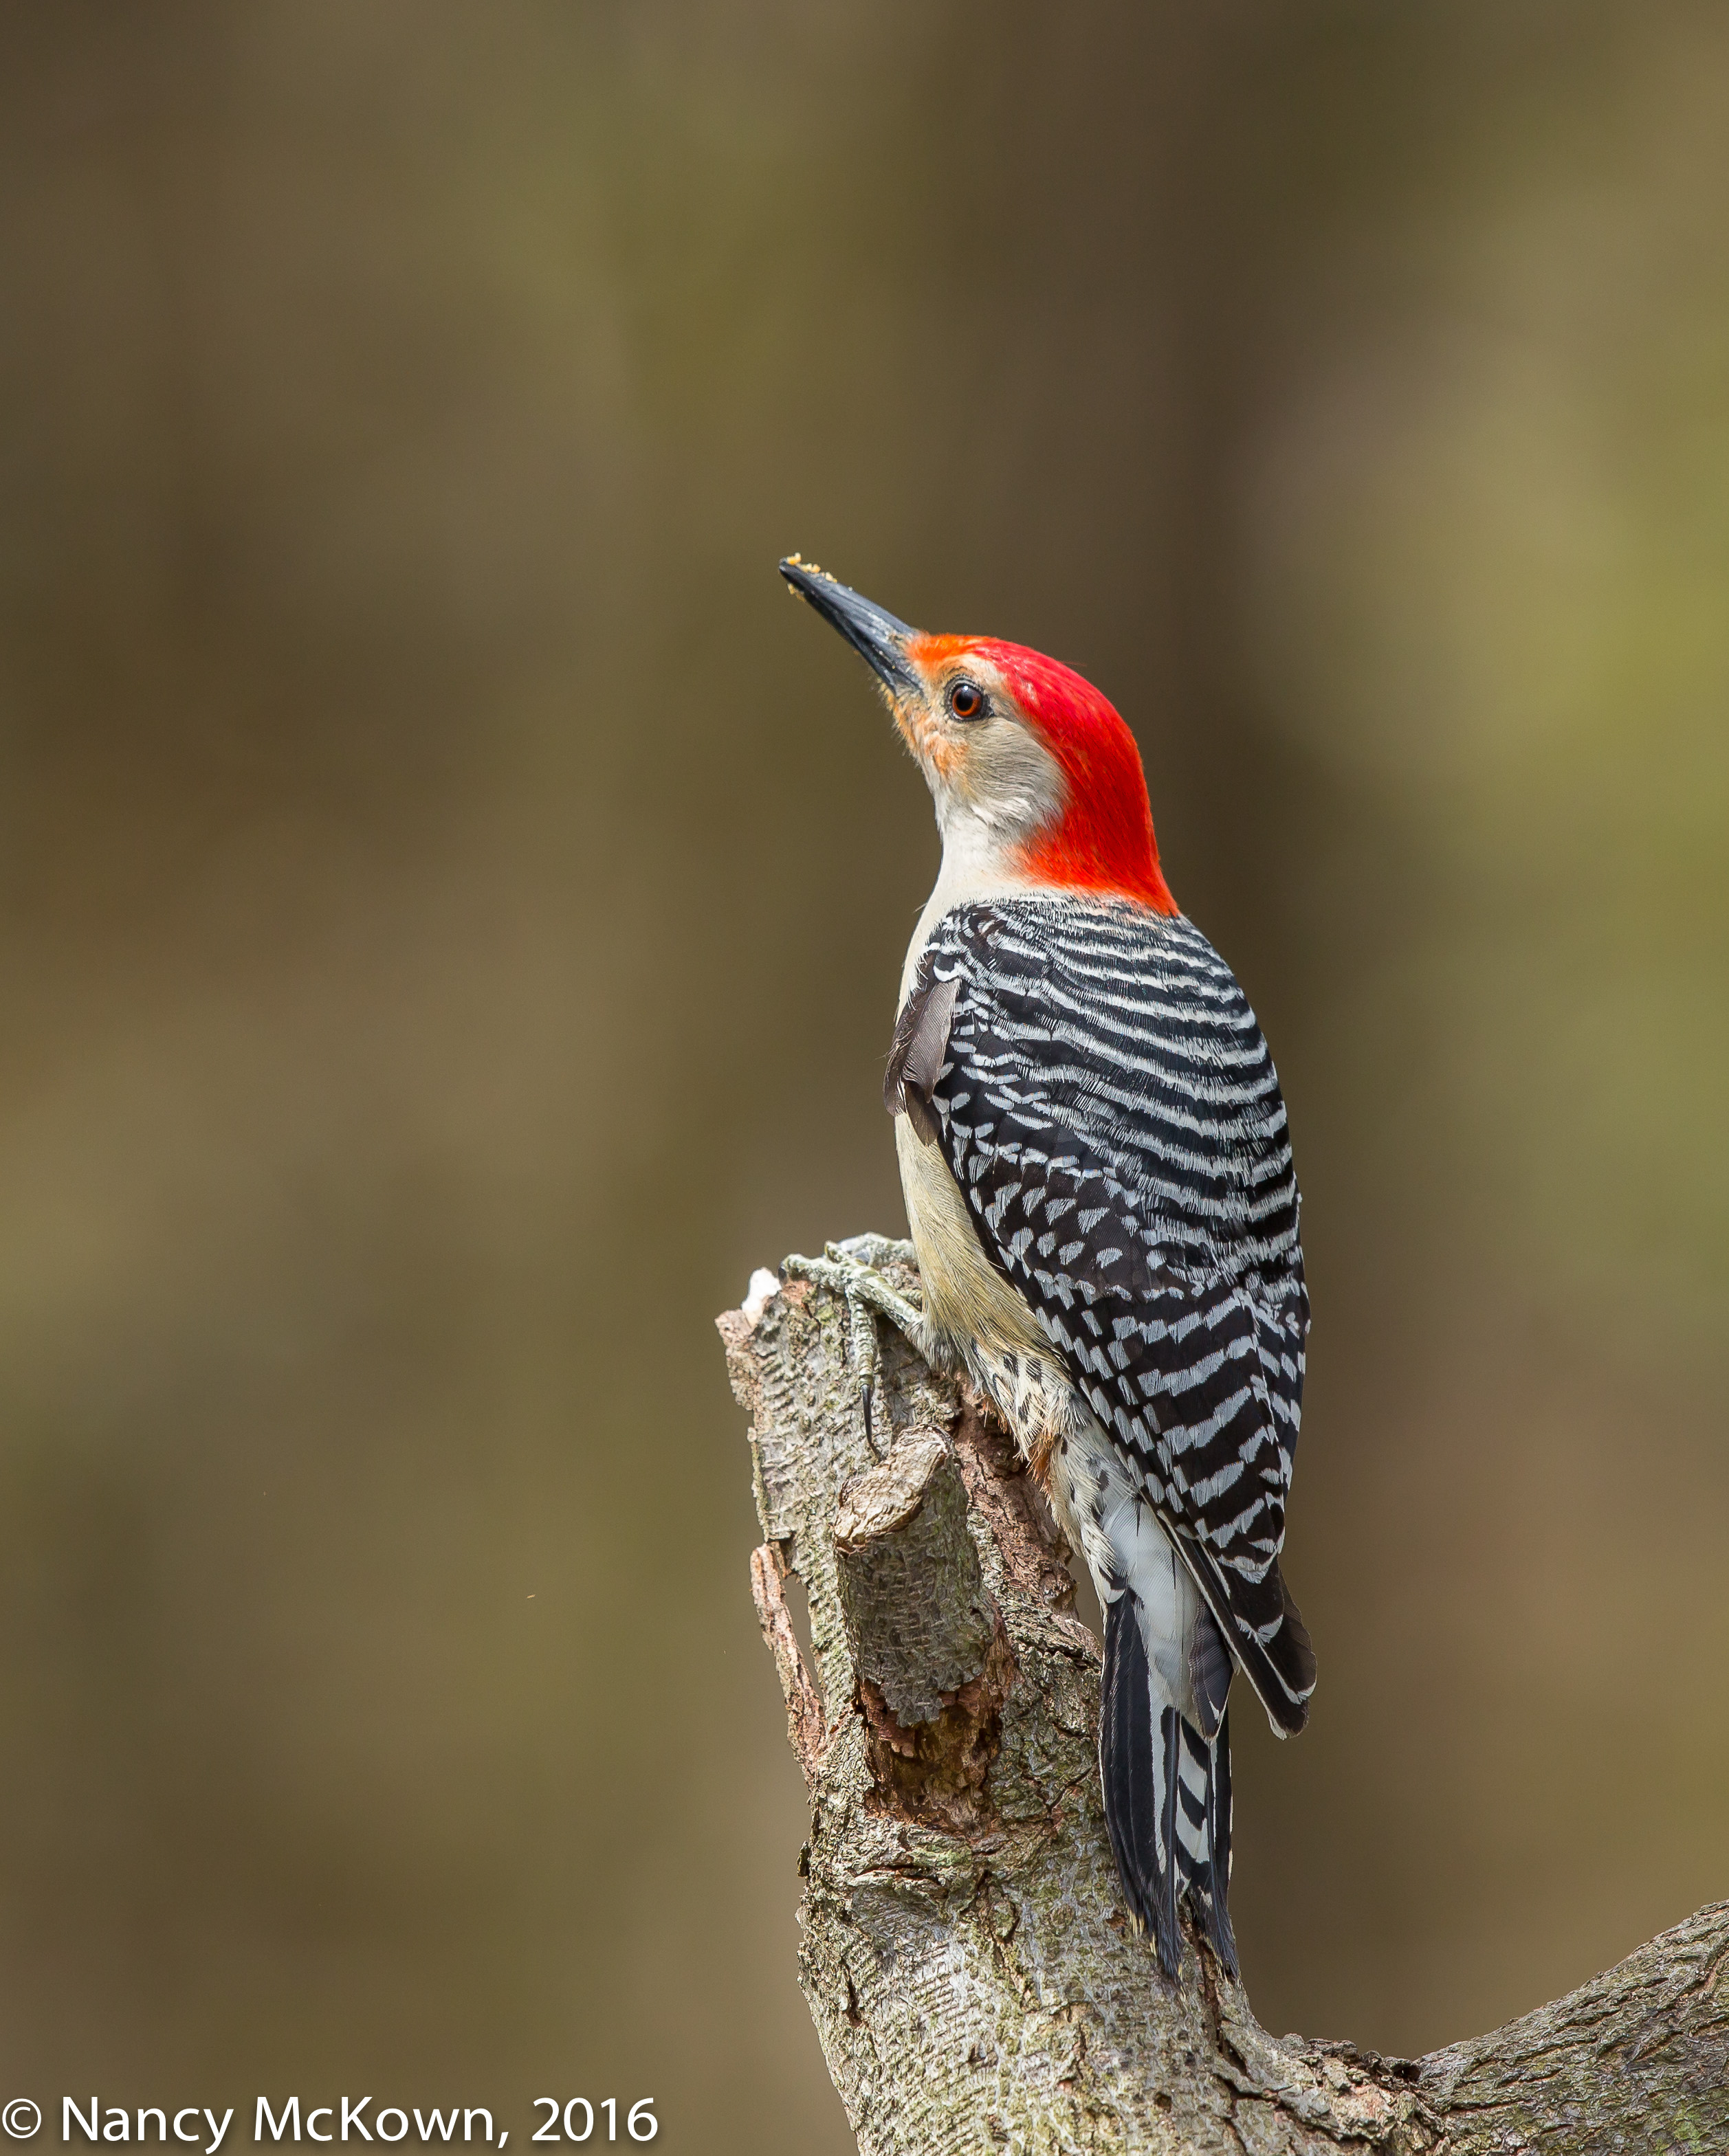
An assortment of Woodpeckers live in or visit our heavily wooded yard, but the Red Bellied is the most prominent year round resident. (Odd name, since only a slight tint of red can be found on their bellies.) The males sport a prominent red crown, right above that chiseling beak common to woodpeckers. While probing and excavating for food, these birds strategically prop their tail feathers down on their perch for balance. Most prominent on all woodpeckers are their oversized clinging 4 toed feet (zygodactyl – two toes forward, two toes back). Drumbeat roll from these guys tap-tap-tapping on trees =19 taps per second.

Red Bellied Woodpeckers are easy to photograph because they often cling to bare tree trunks and inch up and down methodically with their back feathers dragging behind. This male Red Bellied posed for me on a limb with ample morning light and no background distractions. He stayed less than a minute, but it was long enough for me to capture a couple shots.

Photo of Red Bellied Woodpecker

Red Bellied Woodpecker
ISO500; f/7.1; 1/640 Second

Read all About It

Can’t help but notice that Canon’s newest flagship camera (EOS-1D X Mark II) was due out in the Spring of 2016- right about now. Apparently, stores like Adorama, B&H, and others offered sample prototypes (for a day, a week?) to their favorite (and incredibly lucky!) photographers in exchange for writing a review. (Some restrictions did apply on the type of photos they could publish.) These teaser reviews get photographers like me salivating about owning a camera that is packed with spectacular image quality and state of the art creative control.

Photo of Red Bellied Woodpecker
Red Bellied Woodpecker
ISO400; f/7.1; 1/640 Second

Crazy?

Am I CRAZY to want to own this camera? The updated EOS-1D X Mark II is very pricy–$5999- too pricy considering that it’s not a good long term investment. Top of the line DSLR professional cameras do not keep their value like Canon’s premium lenses. 

Like computers, every camera upgrade brings enhanced speed, quality, and capacity- so much so that, after getting use to it, you wonder how you got along without it. For the last 15-20 years, I’ve always purchased Canon’s 2nd tier and 3rd tier more affordable DSLR cameras. These cameras are enticing because they typically contained two or three components that have trickled down from Canon’s best imaging technology.

Bottom line: 5 years ago I would have scoffed at the idea of buying this camera. I always presumed that the whole flagship DSLR camera package was not only out of my reach, but unnecessary.  At this point in my photographic adventures, I’m considering it.

Expectations and Potential

This newest flagship camera is all about expectations and potential. A few reviewers out there grumble that it’s a toy for the rich and that the enhancements over the last flagship model are just superficial- not worthy the upgraded “Canon D X Mark II” label. But I don’t think so. This camera is an admittedly expensive investment for bird photographers (professionals and amateurs) who take their work seriously and find pure, unadulterated delight in the possibilities of a cutting edge tool.

Camera Aficionado

I’ve always been a camera aficionado, carefully attentive to equipment and always tuned in to pioneering developments as they relates my extravagant fondness for bird photography. New, more complex electronic and mechanical contrivances are an essential part of my challenge. A new camera brings with it an aura of wonder – surprise mingled with admiration–not only because it’s bigger- better-faster, but because I have to understand what makes it tick.

Make no mistake. This new equipment won’t solve problems of poor lighting, entice a Red Bellied Woodpecker to come closer or even show up in the first place. The challenge, the rewards, the adventure, the striving to get better, the thrill of success—all these things are possible with a lesser camera.

But that’s not what I’m looking for at this time in my life. I want to devote time and initiative to new gear (trappings?) that force me to be quick and nimble, go past old boundaries and struggle to better understand the potential and rewards of the new imaging technology.

A Girl Can Dream

When everything’s said and done, this camera sounds fabulous and I want one. It has an advanced Digic 6+ processor and faster bursting, (with enhanced buffer and memory card storage to accomodate), a more precise 360,000 pixel RGB+IR metering sensor, and a more advanced 3D auto focus and tracking system. I can expect to see more comprehensive dynamic range in my images, better detail (in the shadows) at higher ISOs, and better camera stability due to a new springless mirror assembly that minimizes bounce. 

I write a lot about sensor quality…. so this is my favorite part. The full size sensor is 20.2 megapixels with increased sensitivity engineered to keep the ISO low when light is scarce, especially in the dark portions of the image. When the light is so inadequate that ISO must rise and compensate (especially in my yard) the quality of high ISO images from this new sensor promises to be much better than its predecessors.

My biggest disappointment so far: No cropped-sensor options; no 4:5, 1:1, APS-C or other crop options as have been included on the 5DS megapixel cameras.

The list goes on and on. Build-wise, it most certainly is rugged enough to outlive me –though probably won’t outlive my interest for the new and exciting.

I will sell the old to make way for the new and bite the bullet. I might hold off on this purchase just to see if other photographers who use this camera day-in and day-out are impressed. 

Buyer’s remorse may come, but, on the other hand; “You can get what you want or you can just get old.” (Billy Joel)

NOTE: Press this link for more information on my thoughts about the Canon’s 50 DS R 50 Megapixal cameras.


Photographing a Yellow Bellied Sapsucker and Thoughts About Low Light Sensors

A New Woodpecker Comes to Town

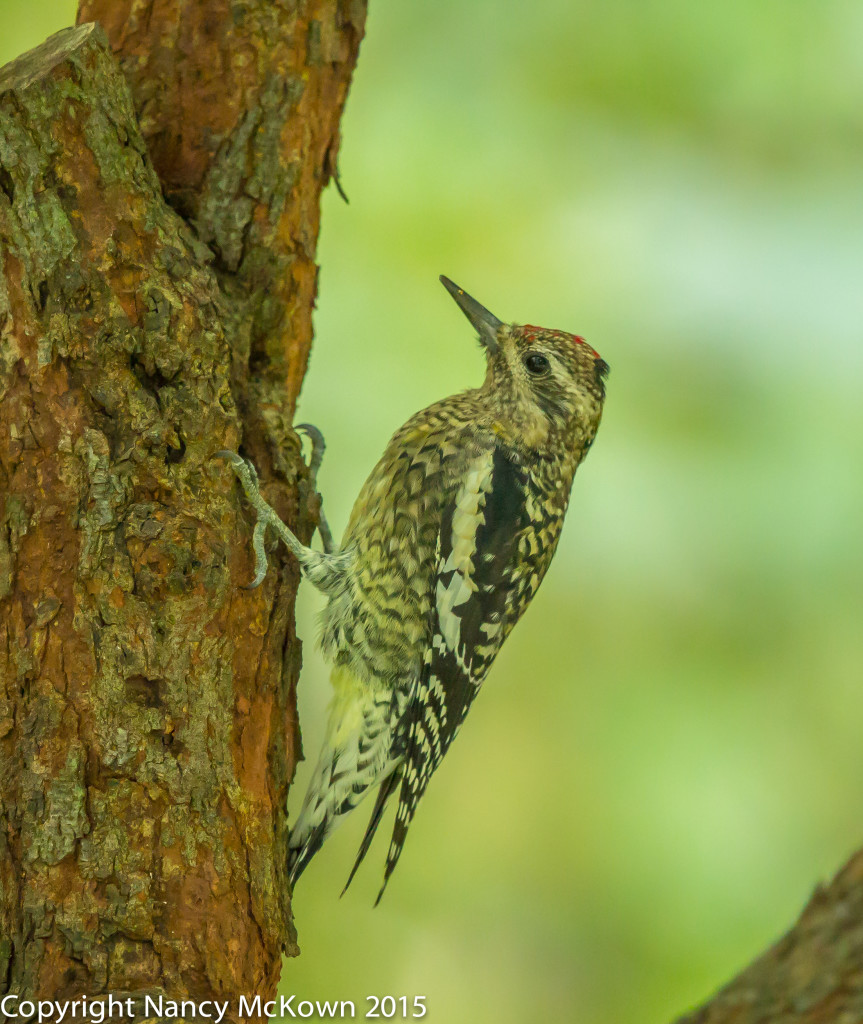
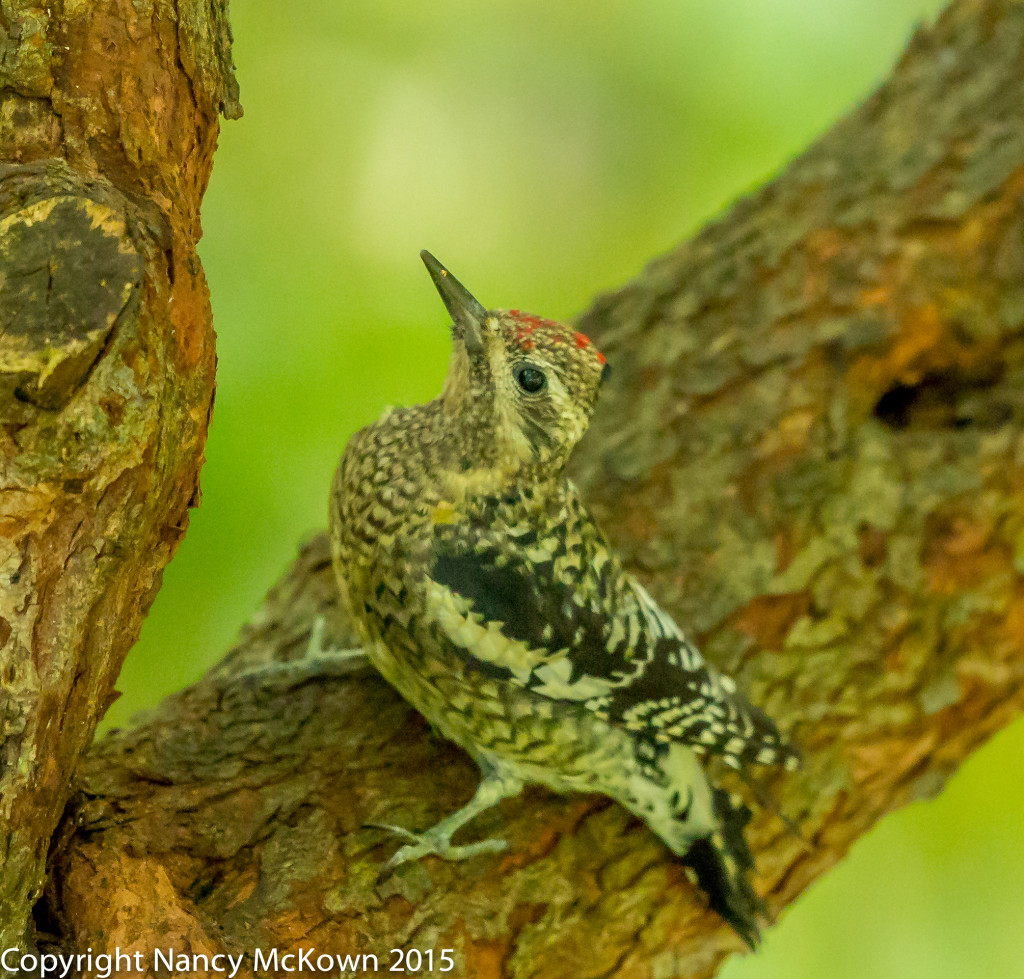
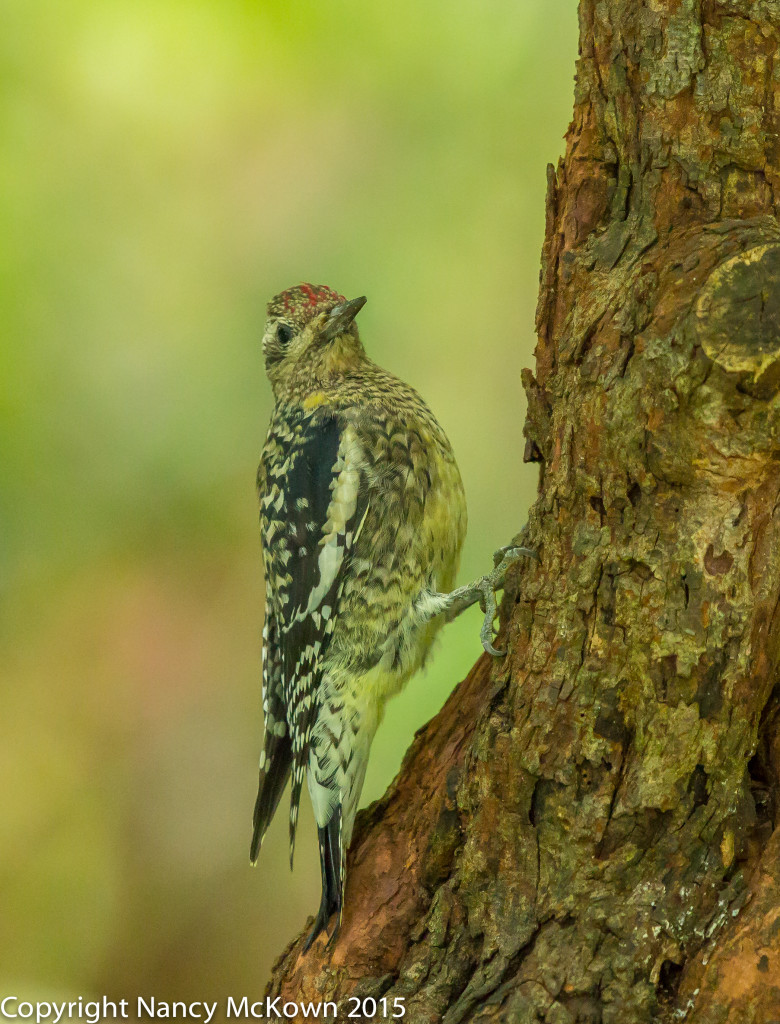
Everybody has heard of this bird. Its name has been used in cartoon comedy for decades. The first time I saw a live Yellow Bellied Sapsucker was last week, clinging with its large, sharp claws onto the crusty trunk of the red bud tree right outside my window.  I’m used to seeing lots of woodpeckers, most of which stick around all winter. But photographing this transient, so distinctly wood-peckerish with its shock absorbing thick-head, chisel bill, and oversized clinging 4 toed feet (zygodactyl – two toes forward, two toes back) was a treat.

Photo of Yellow Bellied Sapsucker
Yellow Bellied Sapsucker Woodpecker.
ISO3200; f/4; 1/500 Second.

Drummer of Tree Bark

Yellow-bellied Sap Suckers are long distance migrators whose plumage looks quite different from our resident woodpeckers. Sapsuckers are woodland cavity nesters whose stiff tail feathers act as a prop as they hop up and down on tree trunks and drum on the bark. Like most large and mucivorous woodpeckers, they excavate the tree bark for sweet sap. Once these neatly arranged shallow holes are drilled, they feed and re-feed at their dripping “sap wells”, using their brush-like tongues to suck up the sap.  A good part of their daily routine involves maintaining and protecting their oozing sap wells from other sap loving marauders.

Photo of Yellow Bellied Sapsucker
Yellow Bellied Sapsucker.
ISO5000; f/4; 1/500 Second

Insufficient Contrast and Light

My ISO readings soared as I photographed this Yellow-Bellied Sapsucker clinging to the shedding red bud tree trunk. Despite my exposure settings, (low shutter speed and wide open aperture, mostly), conditions were just too dark to get a decent ISO.

Even sophisticated autofocus systems can only do so much when insufficient contrast and light are available. In addition, too much noise (caused by high ISO) disrupts the edges of an image, making them lose clarity and detail. The noise reduction software in Lightroom helps, but the more you try to reduce the noise in post processing, the more sharpness suffers.

The Canon 5D Mark III DSLR camera has a well balanced 22.3MP sensor, but the lack of sharpness on these images is readily noticeable. The only real noise reduction advantage I had during this shoot was that I photographed this woodpecker at fairly close range, thus reducing the need to zoom in and crop.

Photo of Yellow Bellied Sapsucker
Yellow Bellied Sapsucker.
ISO4000; f/4.5; 1/500 Second

The Sensors of Tomorrow

Since I photograph birds in low light conditions so often, I take notice of the research about new DSLR sensors under development. A new and improved 120MP sensor working prototype was introduced at the 2015 Canon Expo. Good thing hard drive space is cheap because each exported raw image gobbles up 210MB. This incredible resolution means that you can keep zooming and cropping in post processing (on a video monitor with enhanced resolution) and still see only fine detail, not pixels. 

At this point in development, the 128MP sensor demands the brightest of light to achieve sharp resolution. The DSLR camera that housed this new sensor was fixed at ISO100.  Too bad.

See this post about the advantages and limitations of the 50MP sensor Canon introduced this year on the Canon 5DS.

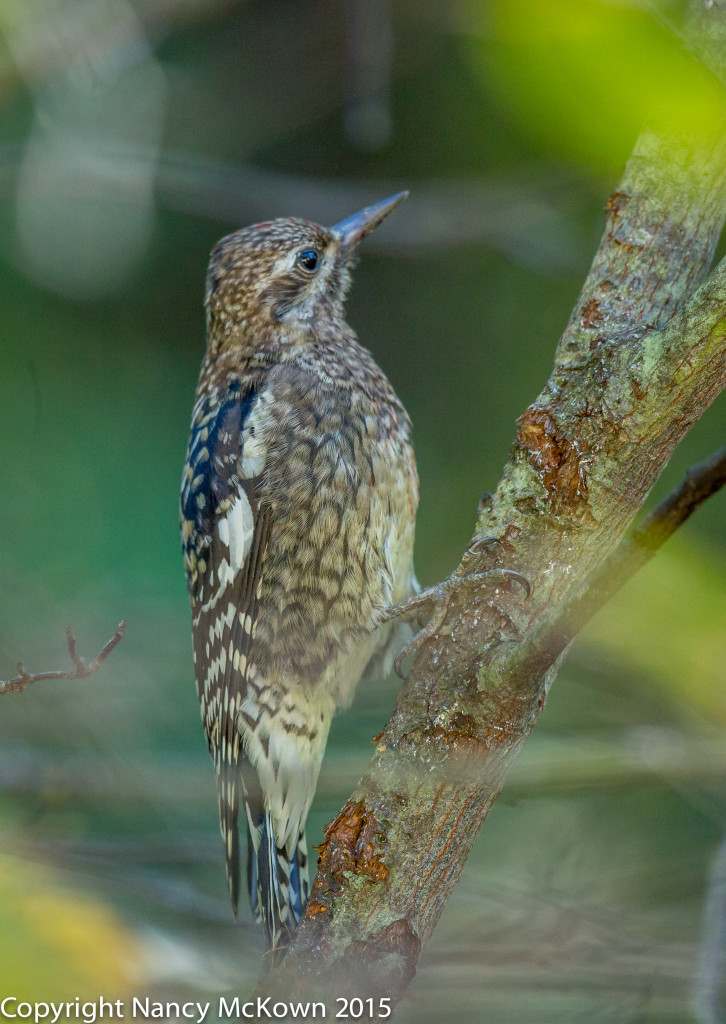
Addendum:  To my surprise, the Yellow Bellied Sapsucker came back the next day.  The light was better, so the ISO was considerably reduced.  (See photo below.)

Yellowed Belled Sapsucker
Yellow Bellied Sapsucker, in Better Light.
ISO1600; f/4.5; 1/500 Second