Monthly Archives: June 2016

Photographing a Veery Thrush – Understanding Burst Modes

Photographing A Veery Thrush

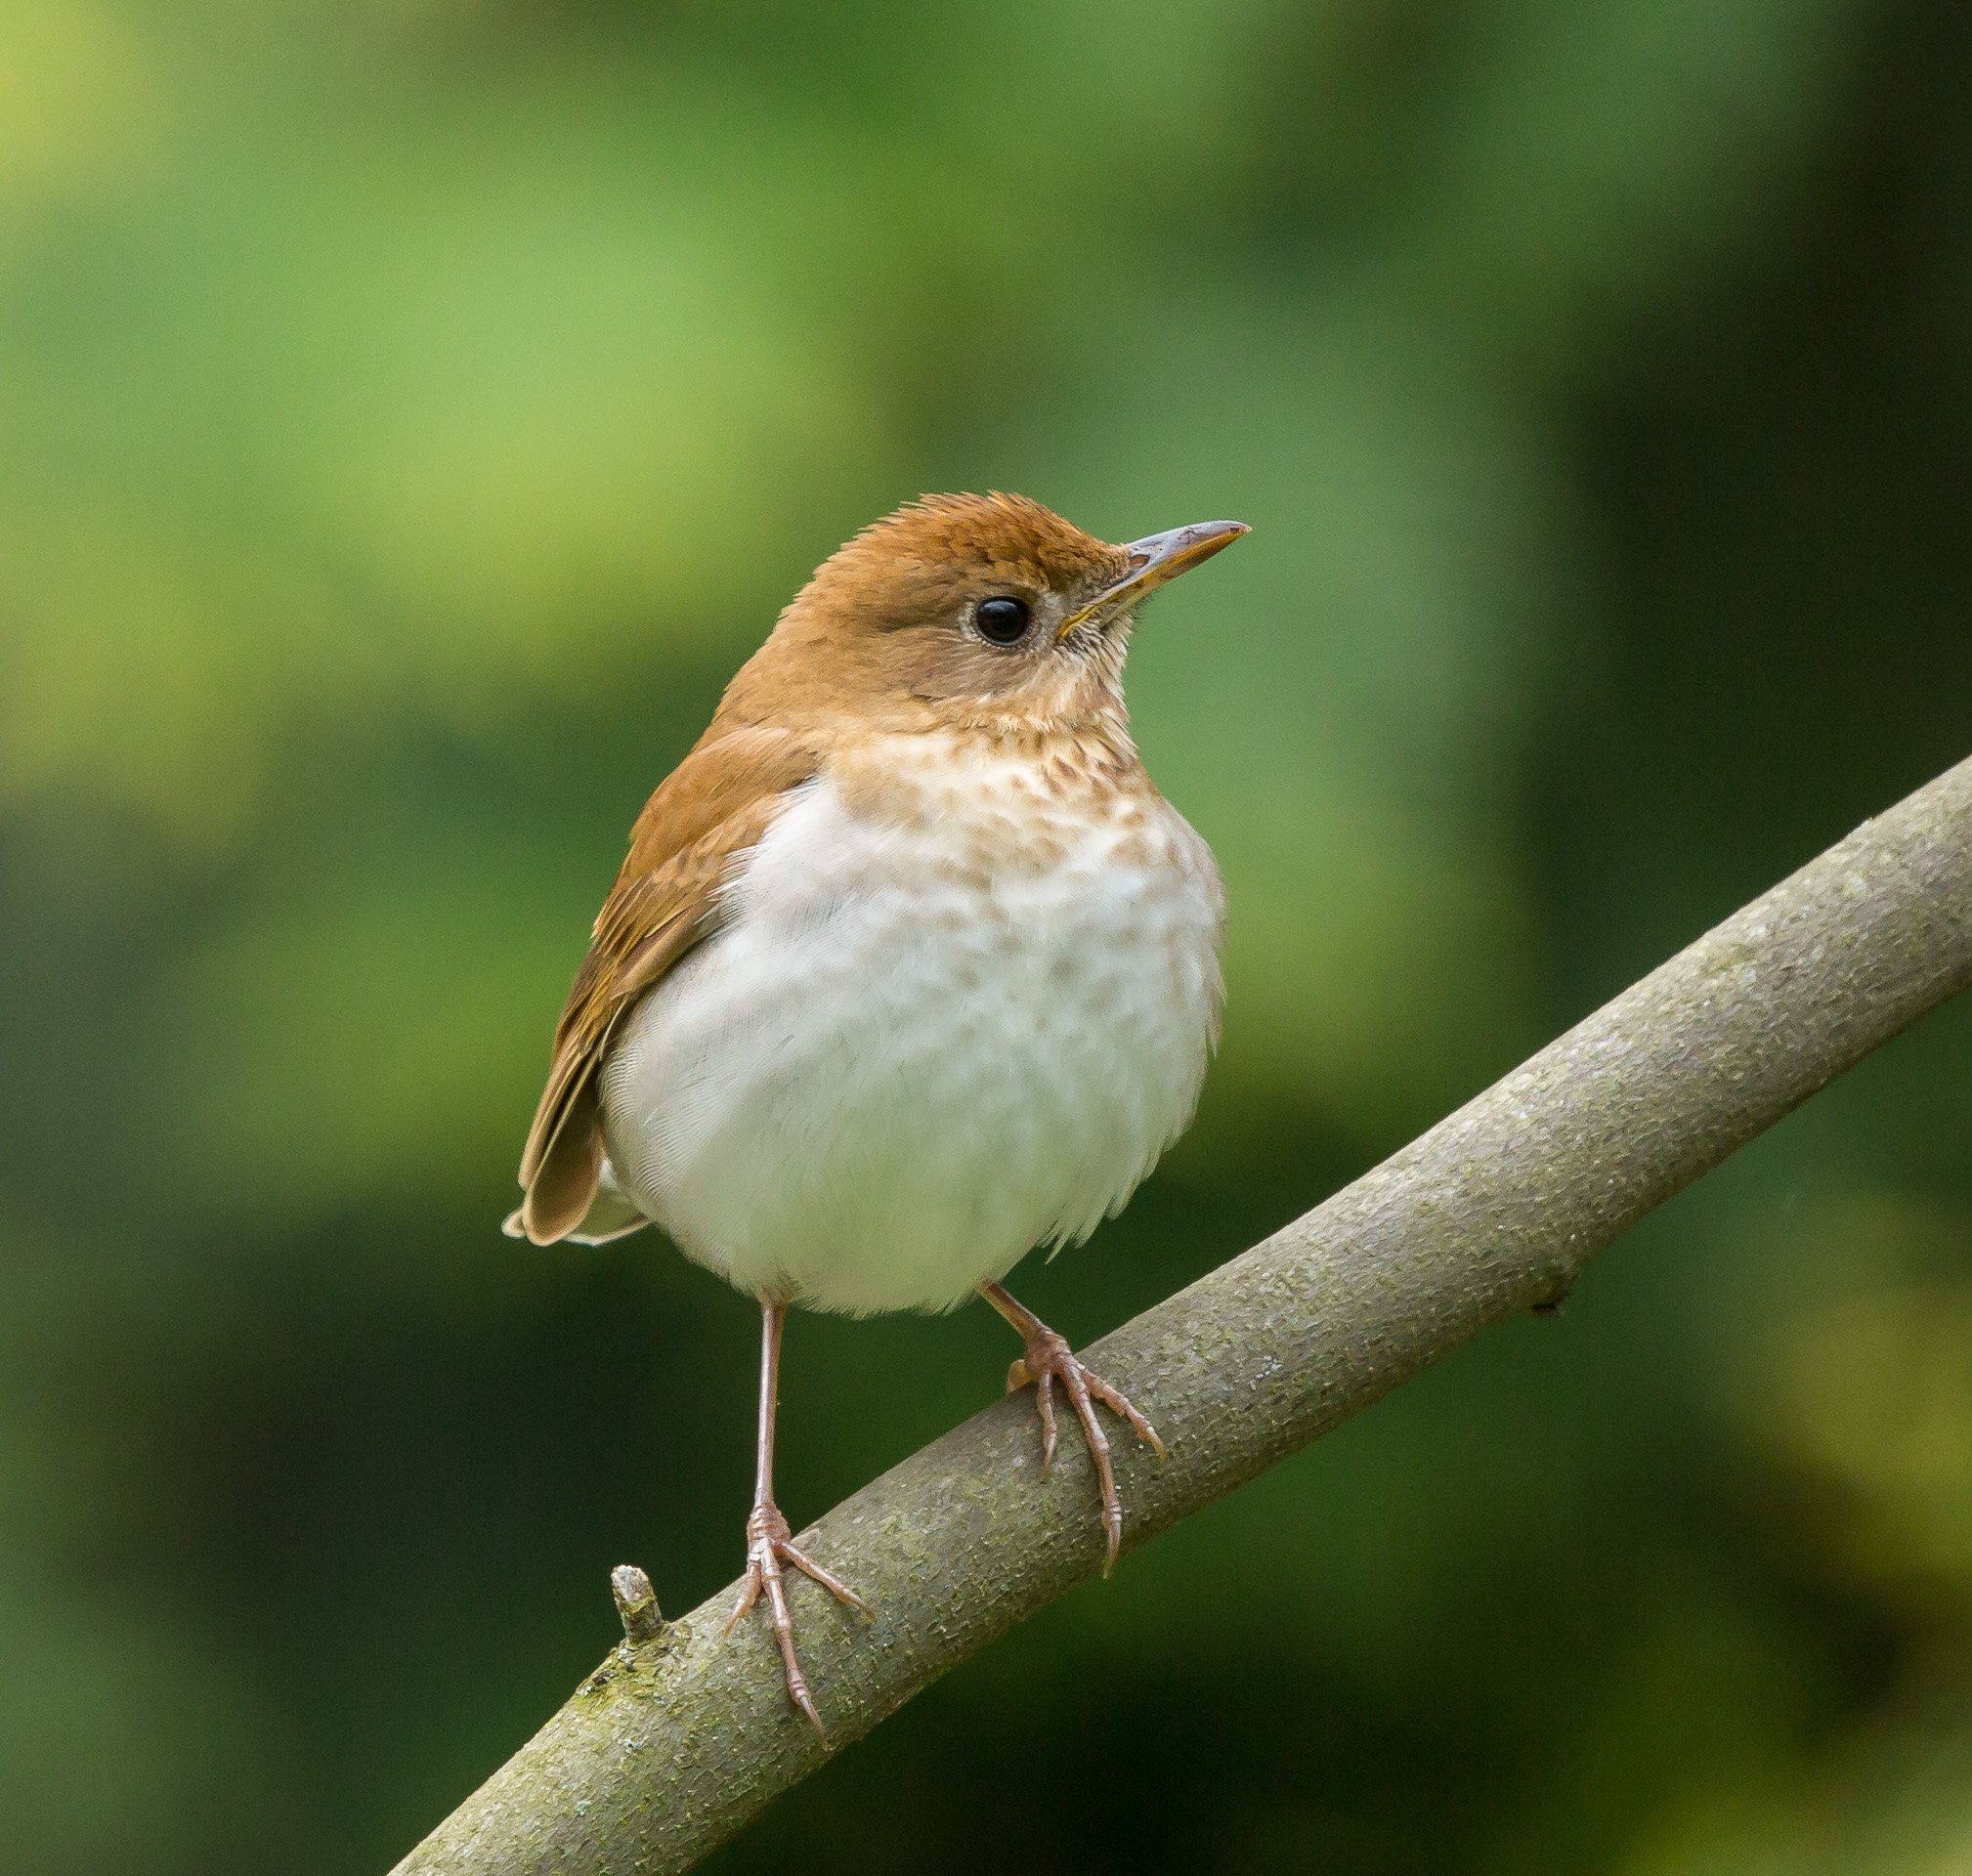
I was very pleased to spot this Veery Thrush in our yard, if only momentarily, because this species is a rather infrequent visitor here. They forage like Robins, on the ground flipping over leaf debris to uncover insects and worms underneath. According to E-bird, Veery Thrushes spend their winters only in Central and Southern Brazil and nest throughout Michigan, in the Northern US, and Southern Canada. This was my first photographic encounter, and it was made to order.

This handsome, cinnamon brown thrush first appeared on a branch near our dining room window. I hurried to the library door, then abruptly changed my pace and posture so that I was tiptoeing slowly and ducking down so as not to startle him as I made my way to the camera. (NOTE: I did this despite every instinct inside urging me to hurry before he flew off.) Once I reached the camera, all I had to do is point, lock focus and burst away.

Photo of Veery Thrush
Veery Thrush
ISO1600; f/7.1; 1/640 Second

What is Bursting?

The FPS (Frames per Second) is the speed at which the camera shutter mechanism can take uninterrupted shots. The Burst Rate specifies how many uninterrupted shots the shutter mechanism can discharge without slowing down.

FPS and Bursting are all about how fast and how many- and that means that DSLR cameras must have fast processing power and design logistics calculated to eliminate bottlenecks.

Advantages of Bursting

  • Bursting can be useful and fun..and for the most part, it’s FREE.
  • In bird photography, you just don’t know how long your subject will stay put.  Bursting allows you to capture many images in seconds.
  • Bursting is essential to record a sequence and tell a story – during a period that is most likely to be a brief and rare opportunity.
Veery Thrush
Veery Thrush
ISO800; f/7.1; 1/500 Second

Some Things to Consider when Bursting

  • Inherent mechanical limitation of camera’s shutter device. (NOTE: My cameras’  shutters are rated at 150,000 actuations.)
  • Data processing speed of camera’s processor.
  • Within one burst, no adjustments can be made to aperture and shutter settings.  (As you can see in the notes below the photos, the shutter speeds are different for the photos….. which means that these photos were taken in separate bursting sessions.)
  • Continuous bursts will capture a lot of identical photos- unless the action is really fast.
  • Max burst and FPS touted by camera manufacturer will slow if your shutter is set to a slower speed.
  • If you’ve got 2 memory cards installed and/or are writing to 2 memory cards, processing will slow down.
  • If your camera is set to RAW; processing will take longer to move through the much larger files.
  • If the camera stops, it has most likely reached a bottleneck due to an overload of files, or does not have enough battery power to proceed.
  • Slower memory cards with limited read/write speeds will create bottlenecks.
  • A half charged battery will slow down processing…. and the battery will drain quickly if bursting continues.
  • Whenever a camera has to re-meter and/or re-focus, bursting slows down. (In Canon cameras, AlServo auto focus will slow down fps- especially if it must keep trying to lock focus.)
  • The hidden cost with bursting: The photographer must devote lots of time in post processing to review all those images.
  • Bursting often places the photographer in “auto mode”, where the discipline to capture outstanding bird images may be put on hold.
  • Ultimately the burst will stop… no matter the sophistication of the camera.

Choices – How Fast?  How Quiet?

Assuming a bird photographer has a DSLR camera designed to burst and then move data through fast, there are also choices about what burst mode is best for bird photography. You can choose between High Speed Continuous and Low Speed Continuous burst mode…. or really slow down and choose Silent High Speed Continuous or Silent Low Speed Continuous burst mode.

I use to think that the louder shutter slapping sound would scare away birds, so I always set the camera to Silent Continuous burst mode. I don’t do that anymore because the silent modes are not noiseless. When set to Silent HS continuous or Silent LS continuous, the striking sound is a muffled slap..definitely more diminished, but you and the birds will most certainly hear it.

When to Use Bursting

When I first spot a bird, I always assume that the encounter will be fleeting.  My camera is usually set to Low Speed Continuous Burst Mode, just in case I need it. Once I lock focus on a bird, I press and hold the shutter down and hear that machine-gun staccato burst from my shutter mechanism. If the bird does not fly away, I am more judicious as to how much I use bursting.

Depending on the scenario, the bird photographer must decide. Will I end up with more usable bird images with or without the camera set to burst mode?
Photographing a Henslow Sparrow In His Element

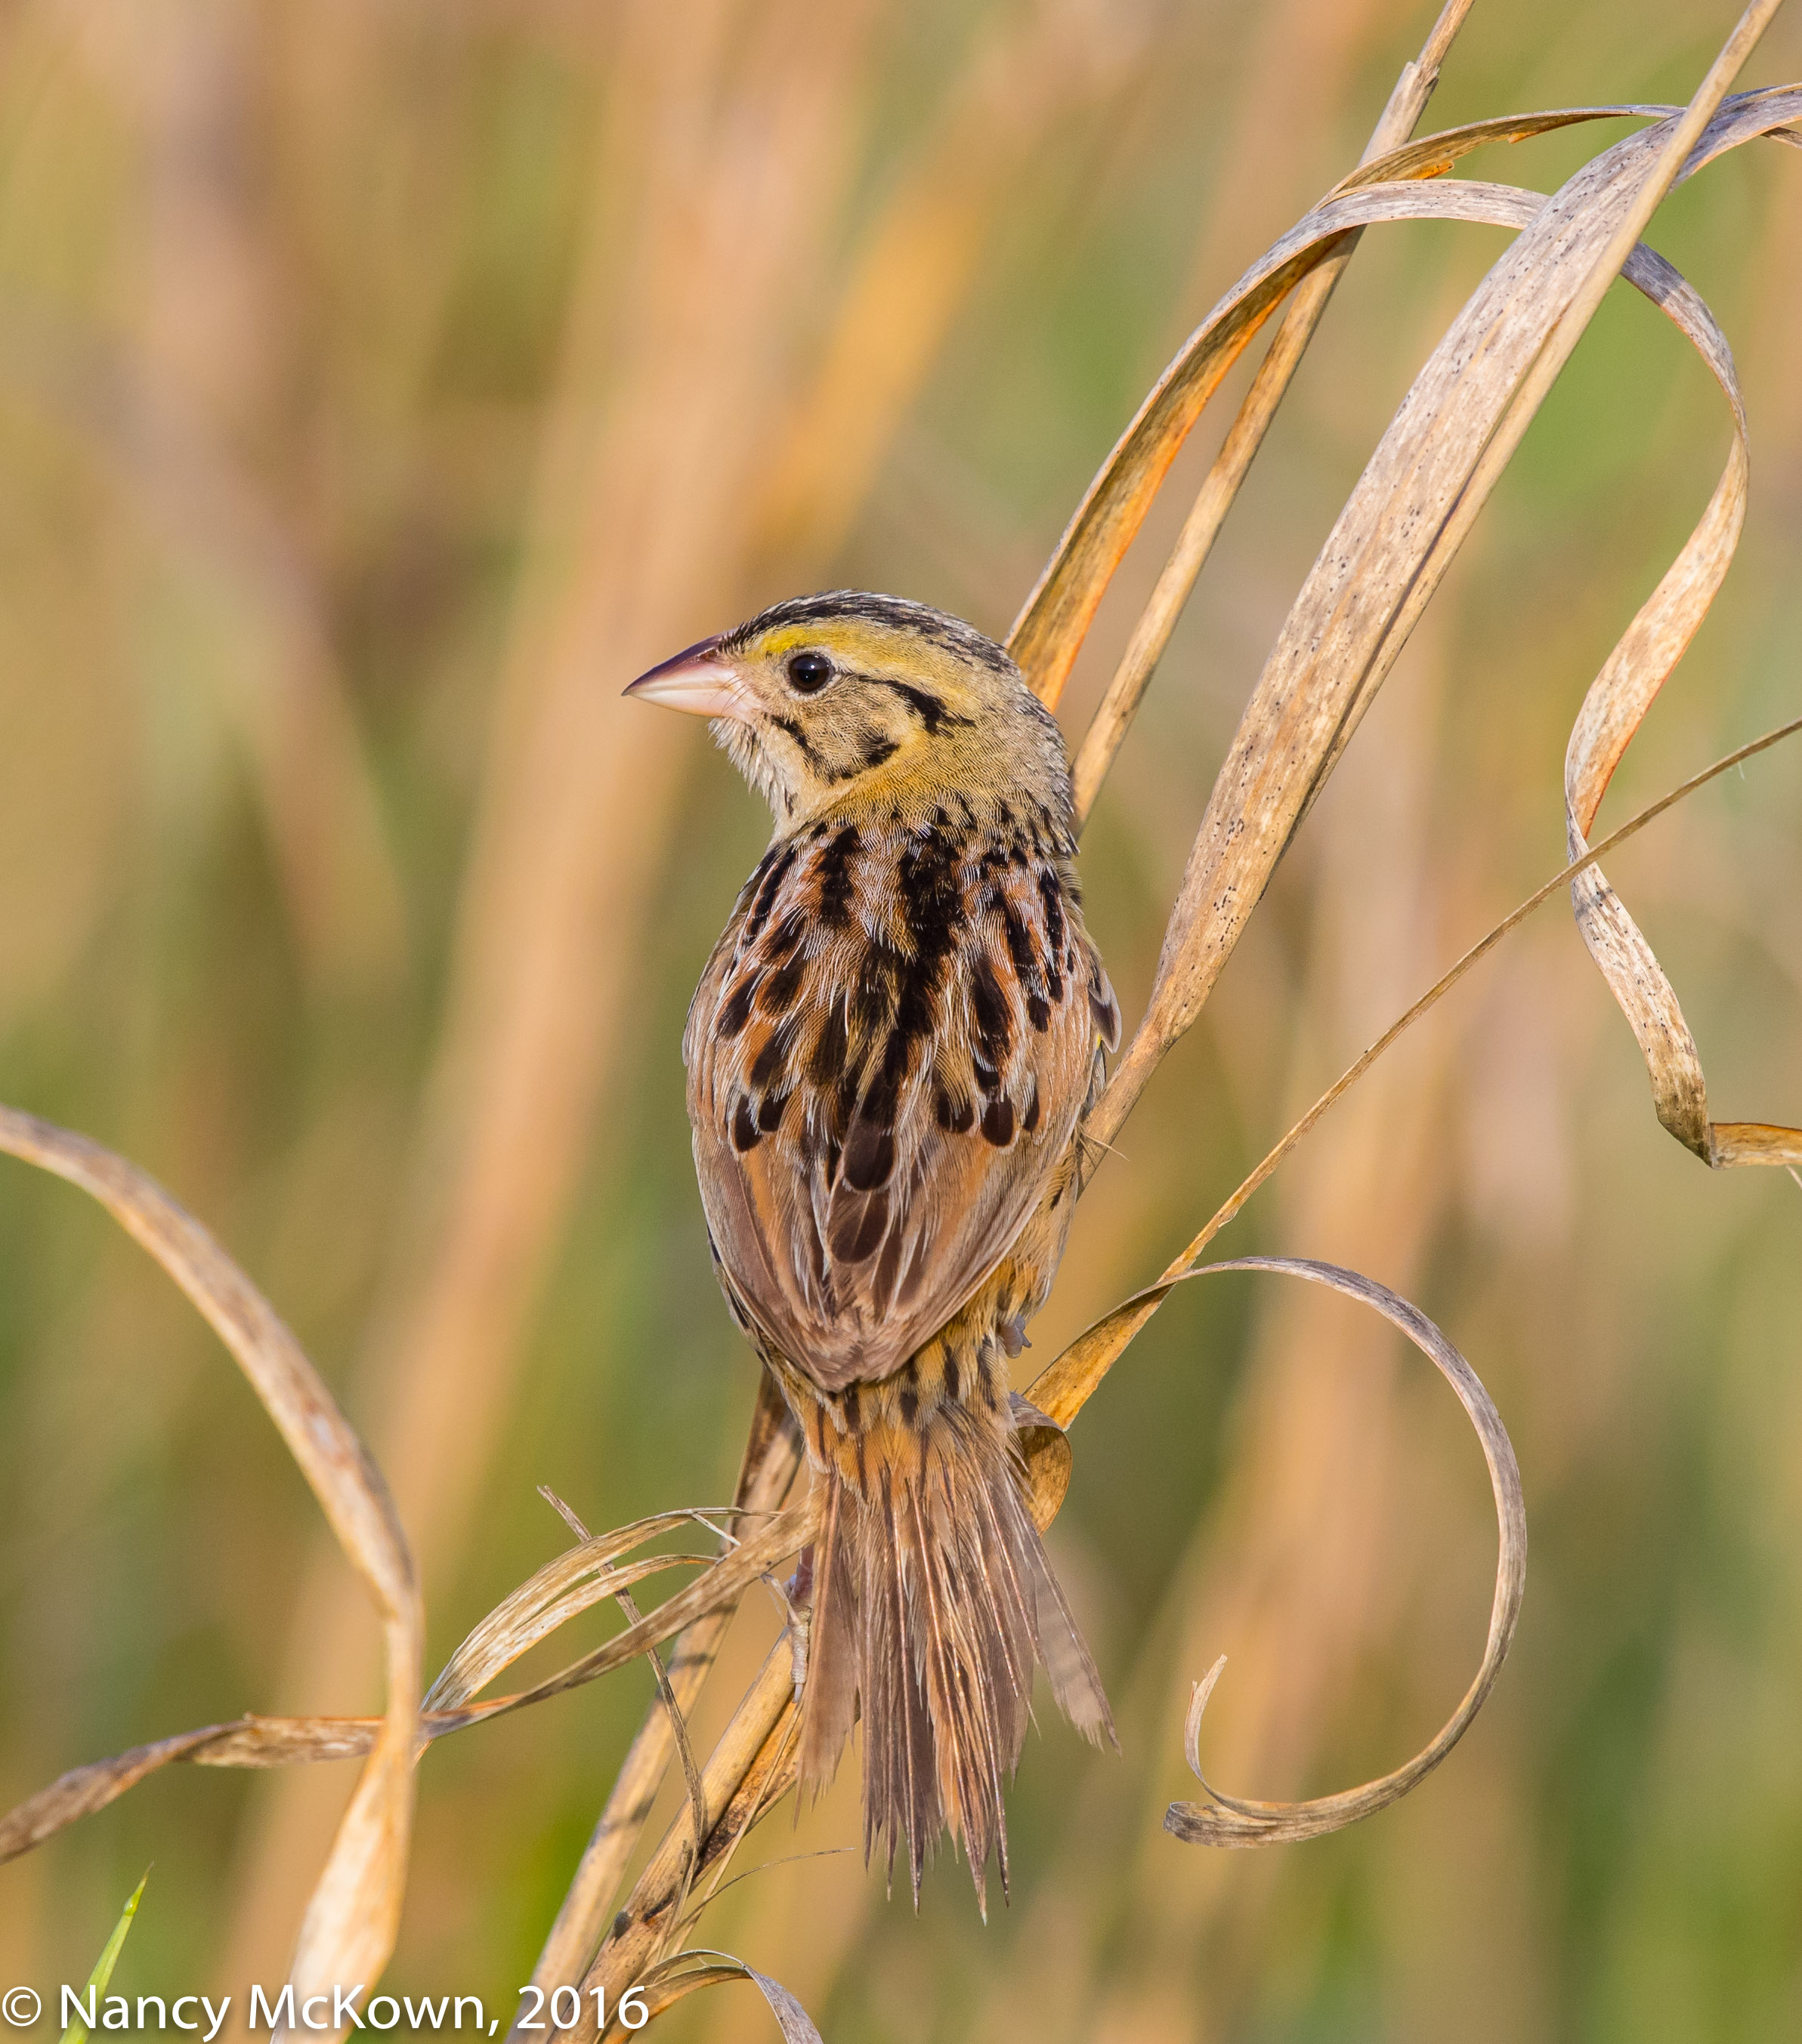
Photographing a Henslow Sparrow

We arrived at 7:00 am – long past the late May sunrise. Dew drops on the long gold and green grasses sparkled in the morning sunlight. Stinking of bug repellent, we parked the cars on the side of the road, grabbed our camera gear and followed our friend down and up through the wet ditch, then trekked onward through the fields toward the grasslands where he had spotted a couple Henslow Sparrows. Careful to stay on the field path so as not to disturb the nests in the grasses, I set up my camera, 500mm lens with 1.4 extender.

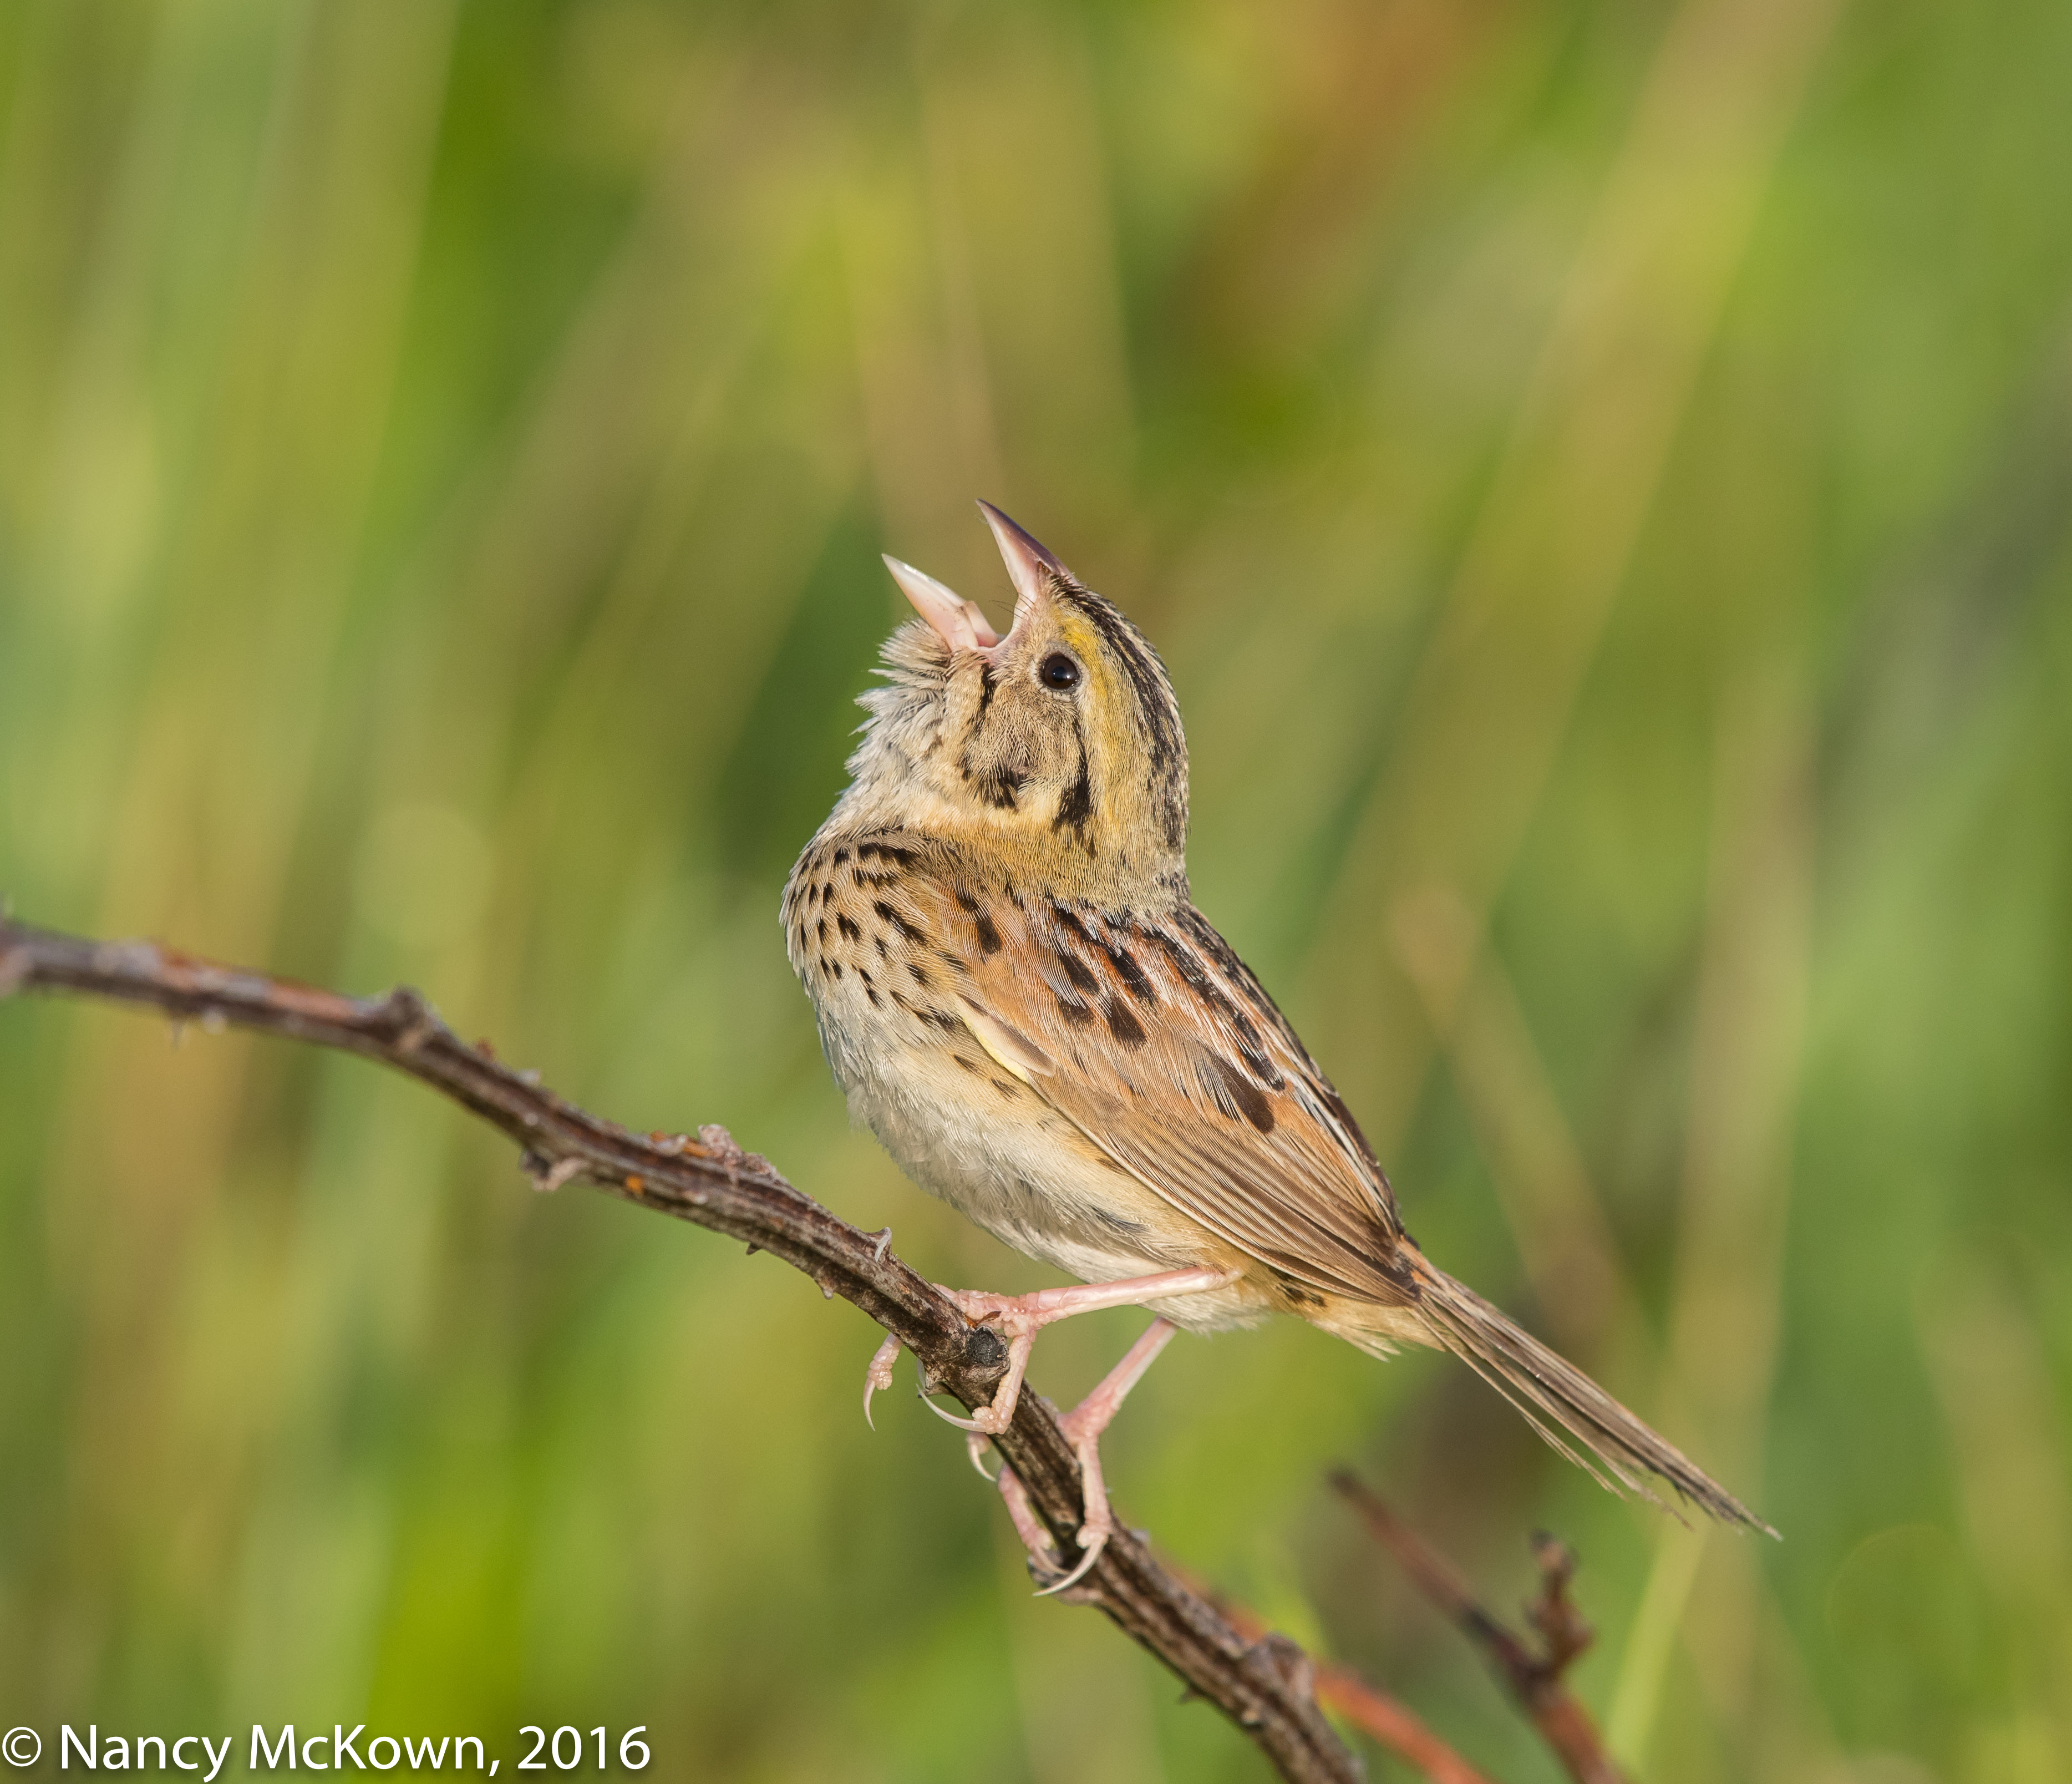
Photo of Henslow Sparrow
Henslow Sparrow.
ISO800; f/9; 1/1000 Second

NOTE: I had thought my Rolly cart would be useful to haul camera equipment on this trek, but after learning about the saturated fields and deep ditches, I was convinced otherwise. Note #2: Cradled in my arms, the camera gear stayed dry, but my cotton jeans were soaking wet minutes into this adventure. I really need to get those multi pocketed, bug resistant, quick drying nylon trail pants.

Photo of Henslow Sparrow
Henslow Sparrow
ISO800; f/9; 1/800 Second

Two Extroverted Henslows

The Henslow is a strikingly handsome sparrow. His back and breast feathers sport black teardrop shaped patterns atop a background of chestnut brown. His heavy beak protrudes prominently on his large, somewhat flat head. Thick black lines accenting his dark eyes blaze across his yellow face– with one black stripe extending down the center of his face and onto his upper beak. His uneven, straggly tail feathers fanned out when he perched.

According to my birding manual, the Henslow Sparrow lurks unseen in the tangled grasses and often slips away undetected if an intruder appears. This was not our experience.  We saw at least two extroverted and spunky males in the distant grasses, each carving out a smallish territory and boldly flying from leaf to branch to defend it. We heard their lusty songs before we parked, and they sang vigorously atop grasses and raspberry stalks the whole time we photographed them.

Beauty Enhanced in Its Element

So often in bird photography, the image background, though pertinent because it is part of the bird’s natural environment, is unmanageable, distracting, overbearing or sadly detrimental to the overall artistic layout of the image. This is especially true in warbler habitats.

A Ready Made Flawless Bokeh

A grassy field in early morning is different. If the field is full of tall and wild golden grasses and the sun is low in the sky (and you make sure that the skyline is not in the viewfinder) it’s hard not to create a fabulous Bokeh infused with soft and seamless shades of glowing gold.

Light and Wind

Bright light is essential. If the morning sun is heavily filtered, you won’t see the background vibrancy in your images. A spirited wind buffeting the grasses adds more dimension because the background blur becomes more curvy. Wind swept grasses fashion their own animated, artful flow that express themselves in complex, undulating seamless patterns once the shutter is released.

A soft and gentle breeze can change instantaneously to a vigorous surge and compromise sharp focus. I had to be watchful of my exposure settings. NOTE: Instead of being displaced by the wind, little songbirds are generally agile enough to to balance their weight, go with the flow, and hold on.

Adjusting Camera Position

Framing an authentic and beautiful image background was not a problem in the wind blown grassy fields where these Henslow Sparrows nest. The whole time we were there, I could easily move the camera and tripod, enabling me to not only better track the sparrows’ movements, but also recompose the scene. I was able to change out the green and gold background colors and the lines and curves of the grasses and branches around which the sparrows perched. NOTE: Repositioning the camera also helps when the photographer wants to adjust exposure settings, avoid lens flare, or take advantage of different types of directional lighting. The freedom to frequently recompose the scene during a bird photography shoot is uncommon, but can produce a collection of vibrant image backgrounds.

Photo of Henslow Sparrow
Henslow Sparrow
ISO1000; f/9; 1/1000 Second

On the Decline

Everything came together that morning- creating perfect conditions in which to photograph this lovely Sparrow. Sadly, Federal and State agencies report that the Henslow Sparrows are hard to find and their numbers are on the decline due to the loss and/or fragmentation of their breeding habitat; open field prairie filled with dense grassland. More information on the Henslow can be found at this link.

Photographing the Black Throated Blue Warbler – Spring Migration Has Past

A Peaceful Morning on the Deck

It’s mid morning in early June; the sunlight is heavily filtered in our yard. I catch the sweet scent of Locust flowers on the breeze and hear the soft droning of honey bees as they feast on the nectar rich Locust blossoms high above. As I set up the camera I think about how the birds must be feasting up there as well.

Chipmunks are everywhere this spring, fashioning their homes within the confines of the Sassafras and Locust logs densely stacked between tree trunks. They pause every few steps to check around for predators as they forage for food dropped below the feeders. Lots of impromptu and playful chasing going on. 

On my deck, delicate single web threads join trees and furniture and sway with the soft wind. I can barely feel these silk gossamers as I move about with my camera equipment and disrupt their tenuous holds. These lines of gauze belong to the tiniest of spiders-and warblers seek them out.

Photo of Black Throated Blue Warbler
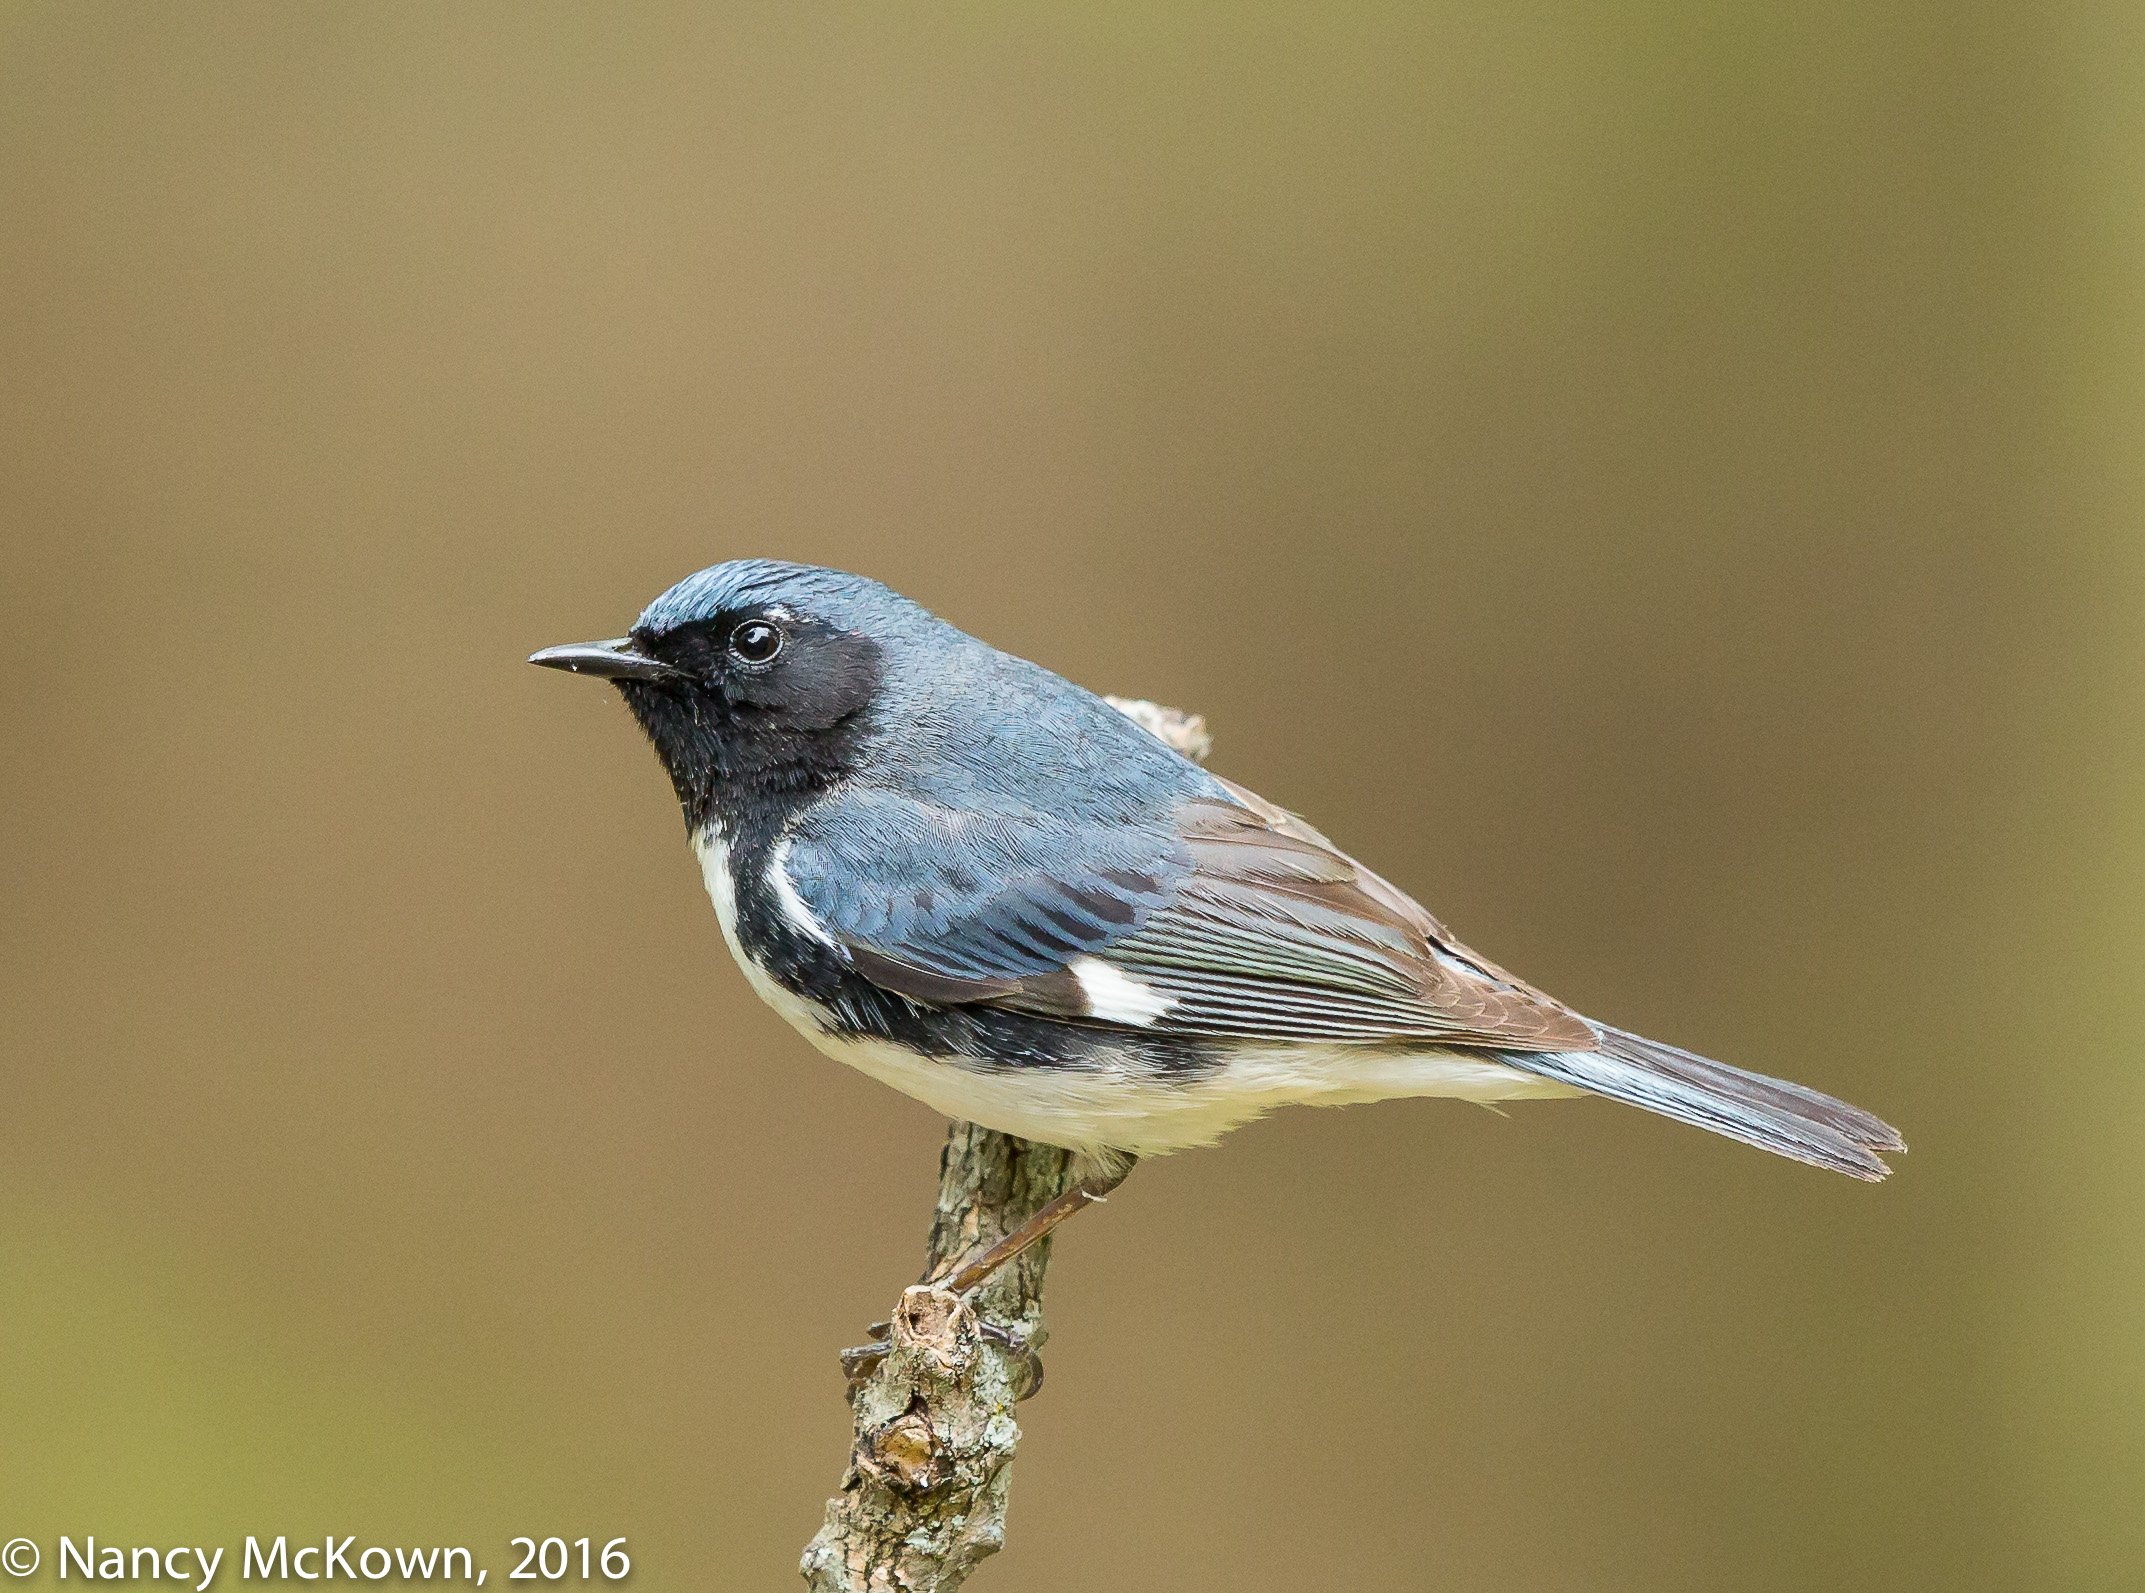
Black throated Blue Warbler
ISO1250; f/5.6; 1/400 Second

Photographing a Black Throated Blue Warbler

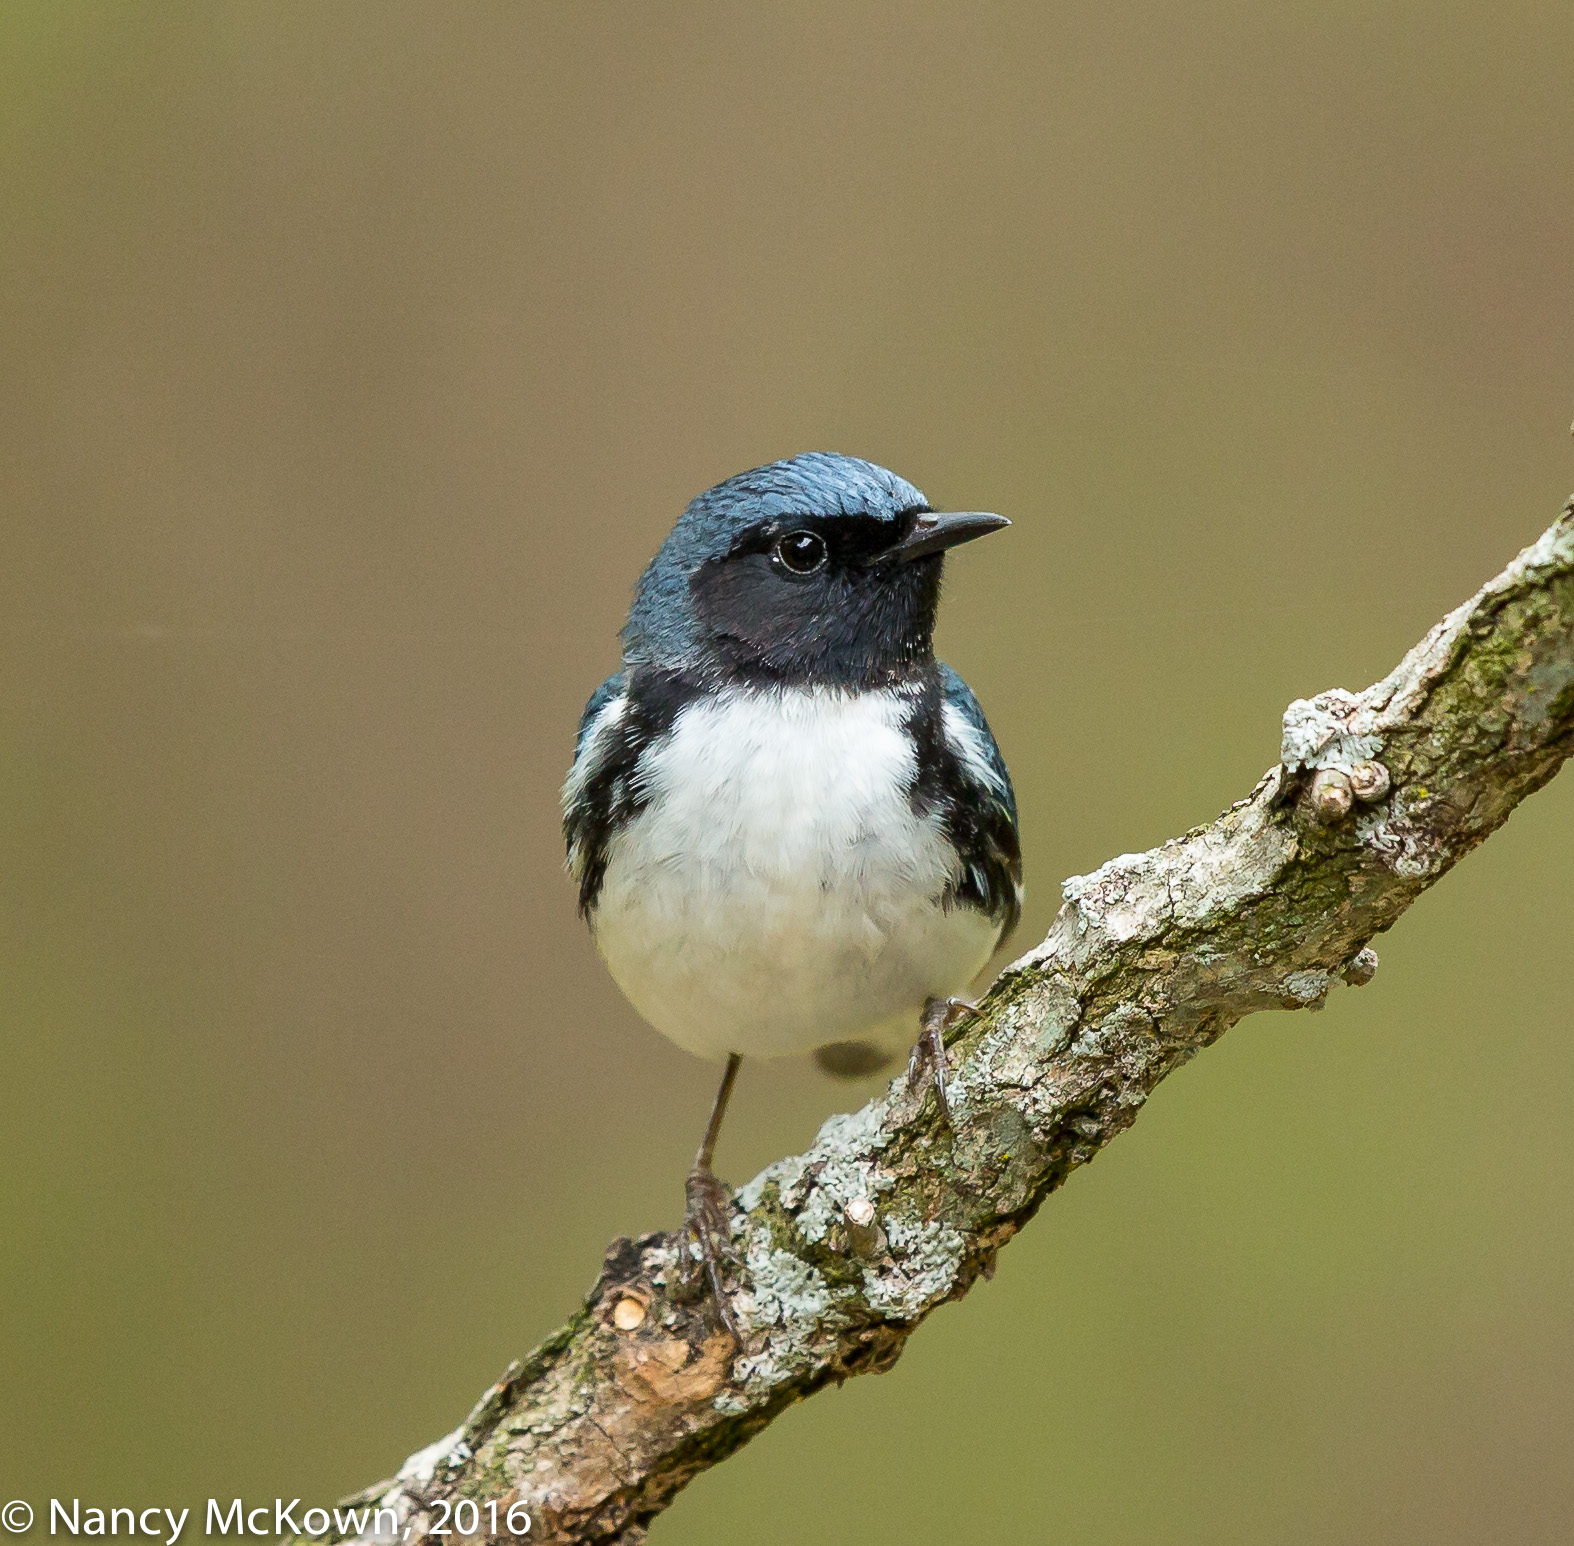
This Black Throated Blue Warbler did not seem especially shy- or perhaps he was just desperately thirsty from his long migration journey north. In any case, he came in close to the fountain for a drink, heedless of the camera and me.

The perch he chose was perfect….. at least 10 feet between the woodsy background and the bird. Because of the low light, I opened up the aperture and shot at a relatively slow (for birds) shutter speed. The bokeh, brown tinged with green, with no seams and no visible outlines of the tree trunks and brush in the background, complements the ragged, lichen draped perch and the bird’s plumage.

Black Throated Blue Warblers nest in the Blue Ridge Mountain range and also in Northeastern United States and Eastern Canada. They are known to seek out vast tracks of forests for their nesting grounds, so it is likely that they made their homes in SouthWest MI long ago. Come fall, they will migrate south to the Gulf States and the Caribbean.

The male Black Throated Blue Warbler keeps his distinctive blue and black plumage year round. The female mostly blends, like a lot of other female warblers. I photographed the female Black Throated Warbler last fall with her dull olive plumage and subtle white lines above the eyes.

Photo of Black Throated Blue Warbler
Black Throated Blue Warbler.
ISO1000; f/6; 1/400 Second

A Slow Migration Season

This spring, a total of six warbler species stopped to rest in our yard and within the camera’s view. None came so boldly as this Black Throated Blue Warbler.

The migration season for warblers is past. During most of April and May, my cameras and I have been at the ready. I’ve watched the leaves mature and reach out to take their share of the available light. This Spring, we’ve had very little success photographing migrators, despite our warbler friendly yard filled with thicketed and overgrown brush. I know millions of birds are coming through just as they’ve done for millennia, I’m just not seeing them. Jealously, I note that lots of luckier bird photographers are posting splendidly colorful finds. All I can do is continue my search and hope my luck gets better come Fall migration.

I’ve updated my Spring 2016 migration Flickr page. Looking over my past images, it seems I have more luck photographing warblers during Fall Migration. Another adventure to look forward to!

Photographing Cape May Warblers and Customized Shooting Modes

Photographing A Cape May Warbler

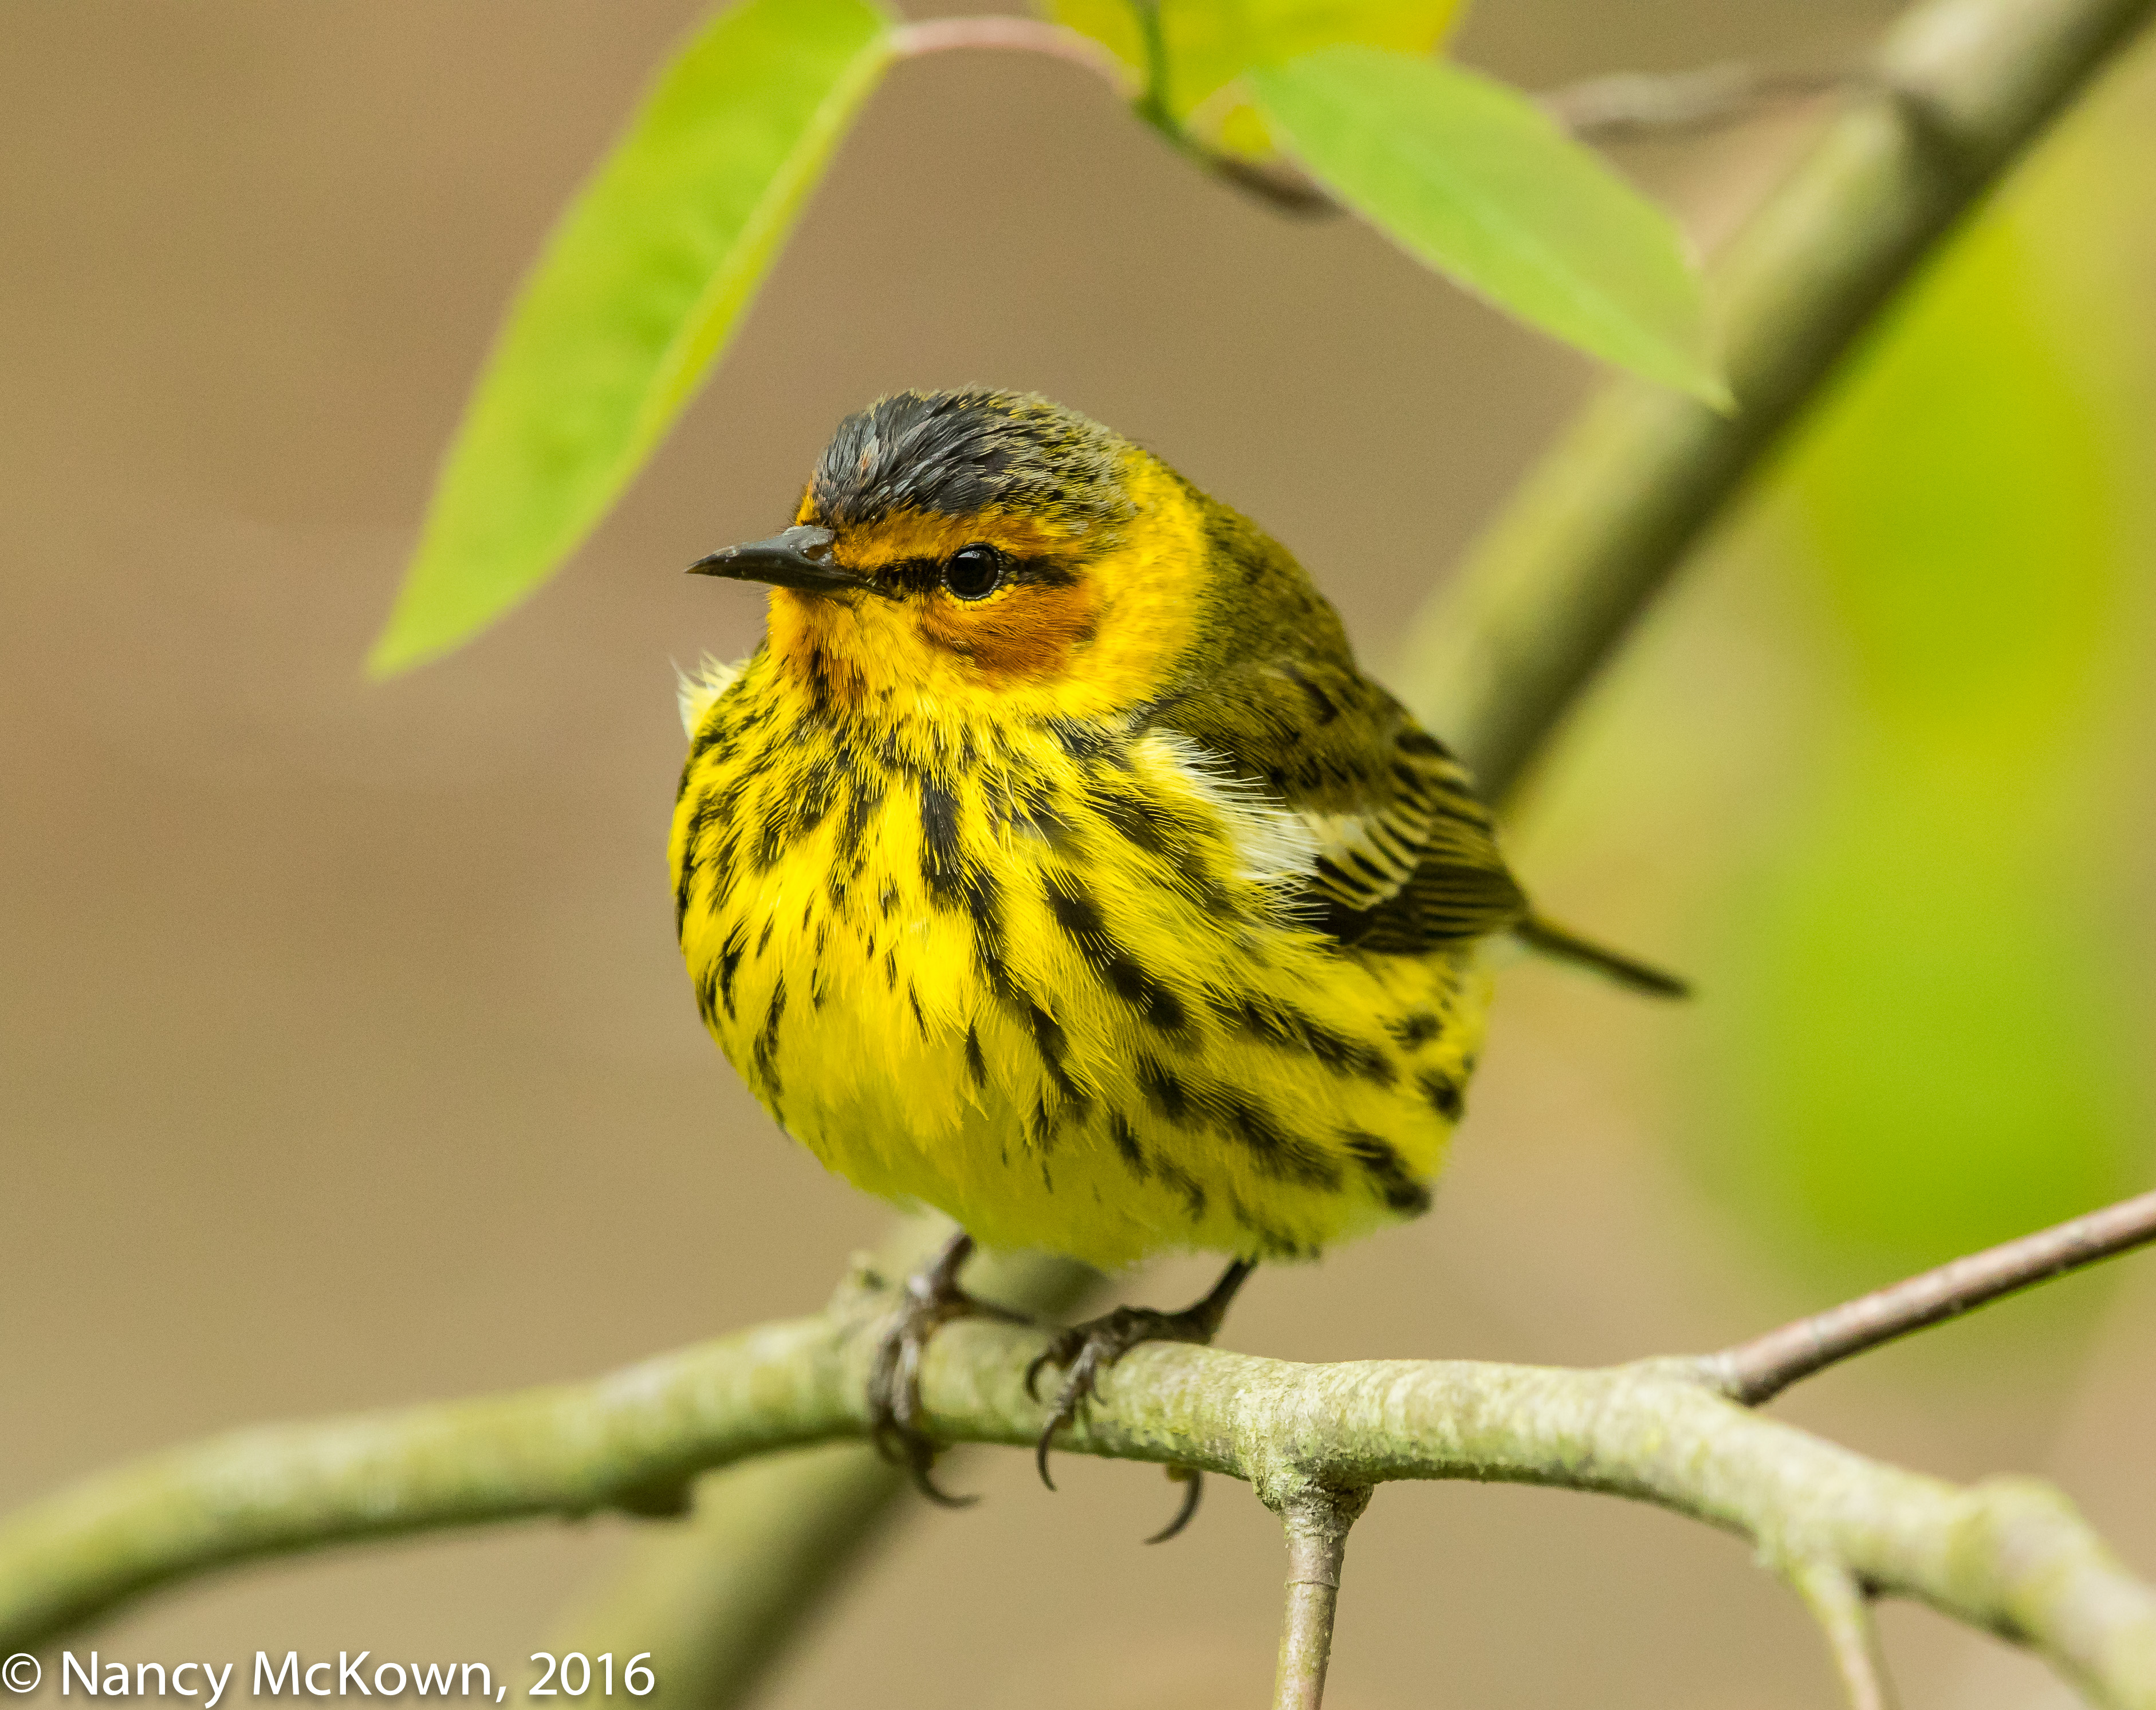
In Spring, migrating warblers are eye candy, most especially the males. This Cape May Warbler with his prominent chestnut cheek patches and brightly streaked head and chest perched right outside my (closed) window. He did not appear frightened by me or the camera, so much so that I considered opening the window. After a minute or so, he bolted for more satisfying territory, but not before I was able to get off a few through-the-glass-window shots.

Cape May Warblers winter in tropical climates (S. Florida, Caribbean, West Indies and Mexico) where they are known to feast on nectar collected with their curled and semi tubular tongues. They migrate long distances to breed in Northern U.S .and the Canadian woods where their preferred food is spruce budworms. In SW Michigan, we see only a few of them in the Spring and Fall.

Photo of Cape May Warbler
Cape May Warbler
ISO1600; f/6.3; 1/640 Second.
Through the Glass Window shot

User Settings

Whether I plan to drive to a birding location or am surprised by a warbler outside my window,  it’s relatively easy for me to make sure that all settings for both my cameras are properly adjusted at what I consider to be optimal for the intended shooting location. This not so short checklist of settings includes: white balance, max auto iso, one shot or continuous shooting mode, metering mode, live view, video, exposure compensation, file format, aperture, shutter speed, ISO, minimum and maximum ISO/Shutter settings, image size, picture style, autofocus modes, autofocus point selection, P, Tv, Av or M shooting mode, etc. (Whew!)

Both of my cameras see a lot of action in different locations, consequently I have to be able to make setting adjustments as quickly as possible to accommodate different environments.

Photo of Cape May Warbler
Cape May Warbler, Male.
Through the Glass Window shot.
ISO1600; f/6.3; 1/640 Second

Instant Recall

This Cape May Warbler departed as fast as he came. As is often the case, there was no time to even think about complex camera configurations. The knowledge and experience stored in my brain is not necessarily instantaneously retrievable, especially in the heat of an exciting bird sighting. I will more than likely miss some action if I take my eyes off the bird  to try to remember how to adjust something like the autofocus point selection.

Custom Shooting Modes

Modern DSLR cameras have storage and instant recall functions called “custom shooting modes” into which you can register or preset preferred settings and functions. (NOTE: The camera’s memory cards are not used for this task.) When you set up custom shooting modes, the camera saves to memory your favorite camera settings which are then retrievable with a flick of a switch. The camera’s long term memory will hold your preferences until you change them.

I use all three of the customized shooting modes that are available to me on my Canon cameras.  C1 and C2 are used for my birding adventures and C3 for family/people photography. These presets allow me to confidently operate “on-the-fly”.

Easy Setup

Custom Shooting Modes help make prepping for bird photography simplier. Canon menu systems provide a very straightforward process to activate custom shooting modes, and best of all, you don’t have to start from scratch to configure your first C mode. Just set the camera as you usually do right before you go out in the field. Then register these settings quickly in the menu by going to “custom shooting mode” and then the “tools” tab.  Assign a C1, C2 or C3 designation, then OK, the SET.  Other more in-depth options are available if you wish to customize further, like: 1) clear your settings whenever you want; 2) program new settings over the old; or 3) enable “Change Auto Update Set” to permanently retain new additions to a group.

Store What You Know

It’s fun to experiment with the range of options available in sophisticated DSLR cameras, but it’s best to set up your custom shooting modes in a thoughtful, non-rushed way.  These presets are not a place to store hardly ever needed, adventurous stuff that will not be useful in the heat of the moment and will soon be forgotten, or worse, accidentally triggered. Take the time to think about what you want and need for different bird photography scenarios and then make them available instantly by flicking on the custom shooting modes C1, C2, or C3 on the camera’s mode dial.

Presetting your custom shooting modes into the camera before going on your bird photography adventure is all about anticipating what might happen – and then being ready when it does.

Photographing a Male Scarlet Tanager; My Nemesis No More

Photographing a Male Scarlet Tanager

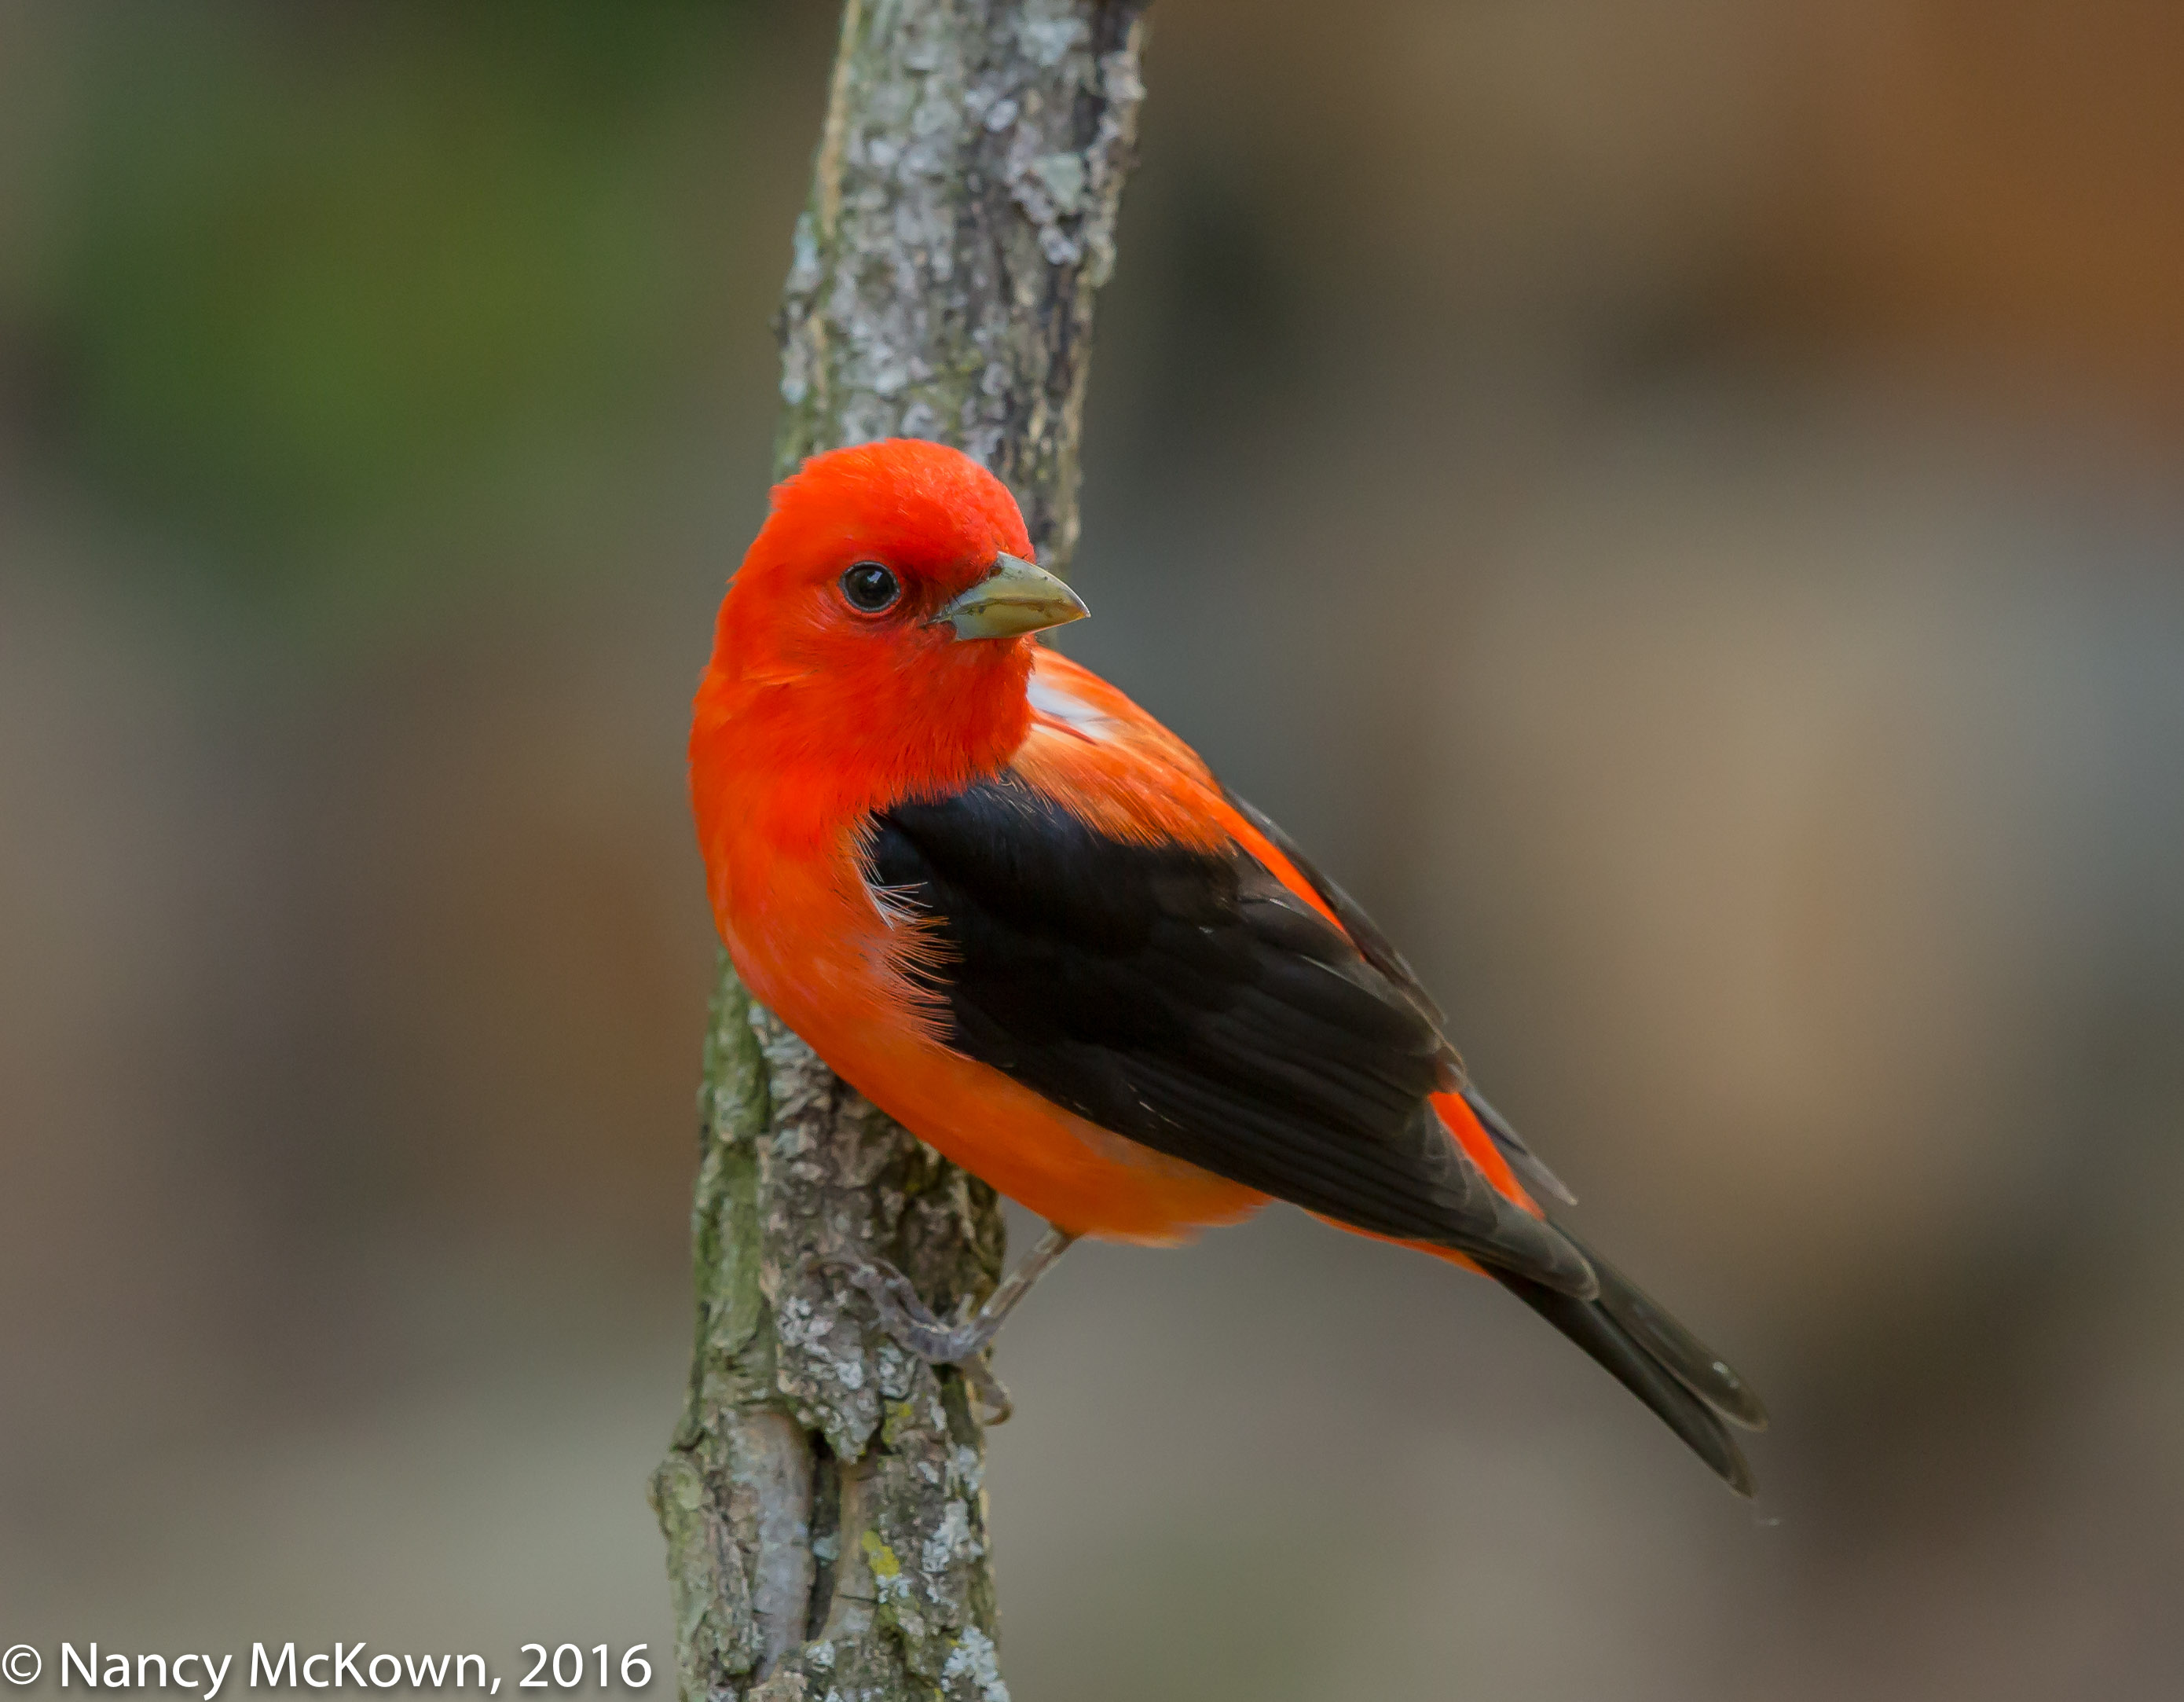
Not long ago, I complained that I only was able to find and photograph distant and sky high female Scarlet Tanagers. Now I am thrilled to report that a male Scarlet Tanager came into our yard and perched on an isolated limb at camera level close to our fountain.  It was a heavily clouded morning, so the ISO for these images shot right up, but regardless, I was ready.  Well, mostly ready.

Photo of Scarlet Tanager
Scarlet Tanager
ISO2000; f/6.3; 1/400 Second

Not Quite Ready

The Scarlet Tanager’s plumage startled me at first. Lustrous and exotic, the radiant red feathers covering most of his body contrasted strongly with his pitch black wings.

When I’m out in the field with my camera, I’m usually the one who does the startling. However, at that juncture in bird photography time…in that short space between stimulus and response when I am ordinarily able to quickly react, I was instead dumbfounded, mouth hanging open, and experiencing one of those I-can’t-believe-this-bird-is-right-in-front-of-my-camera moments. Luckily something snapped inside me and I was able to rally all my forces to take a couple photos before this astonishing bird flew away.

Photo of Male Scarlet Tanager
Male Scarlet Tanager.
ISO3200; f/6.3; 1/400 Second

Whew!

I’ll have to come up with a new nemesis now, possibly the ever illusive Prothonotary Warbler.