


Photographing A Cape May Warbler
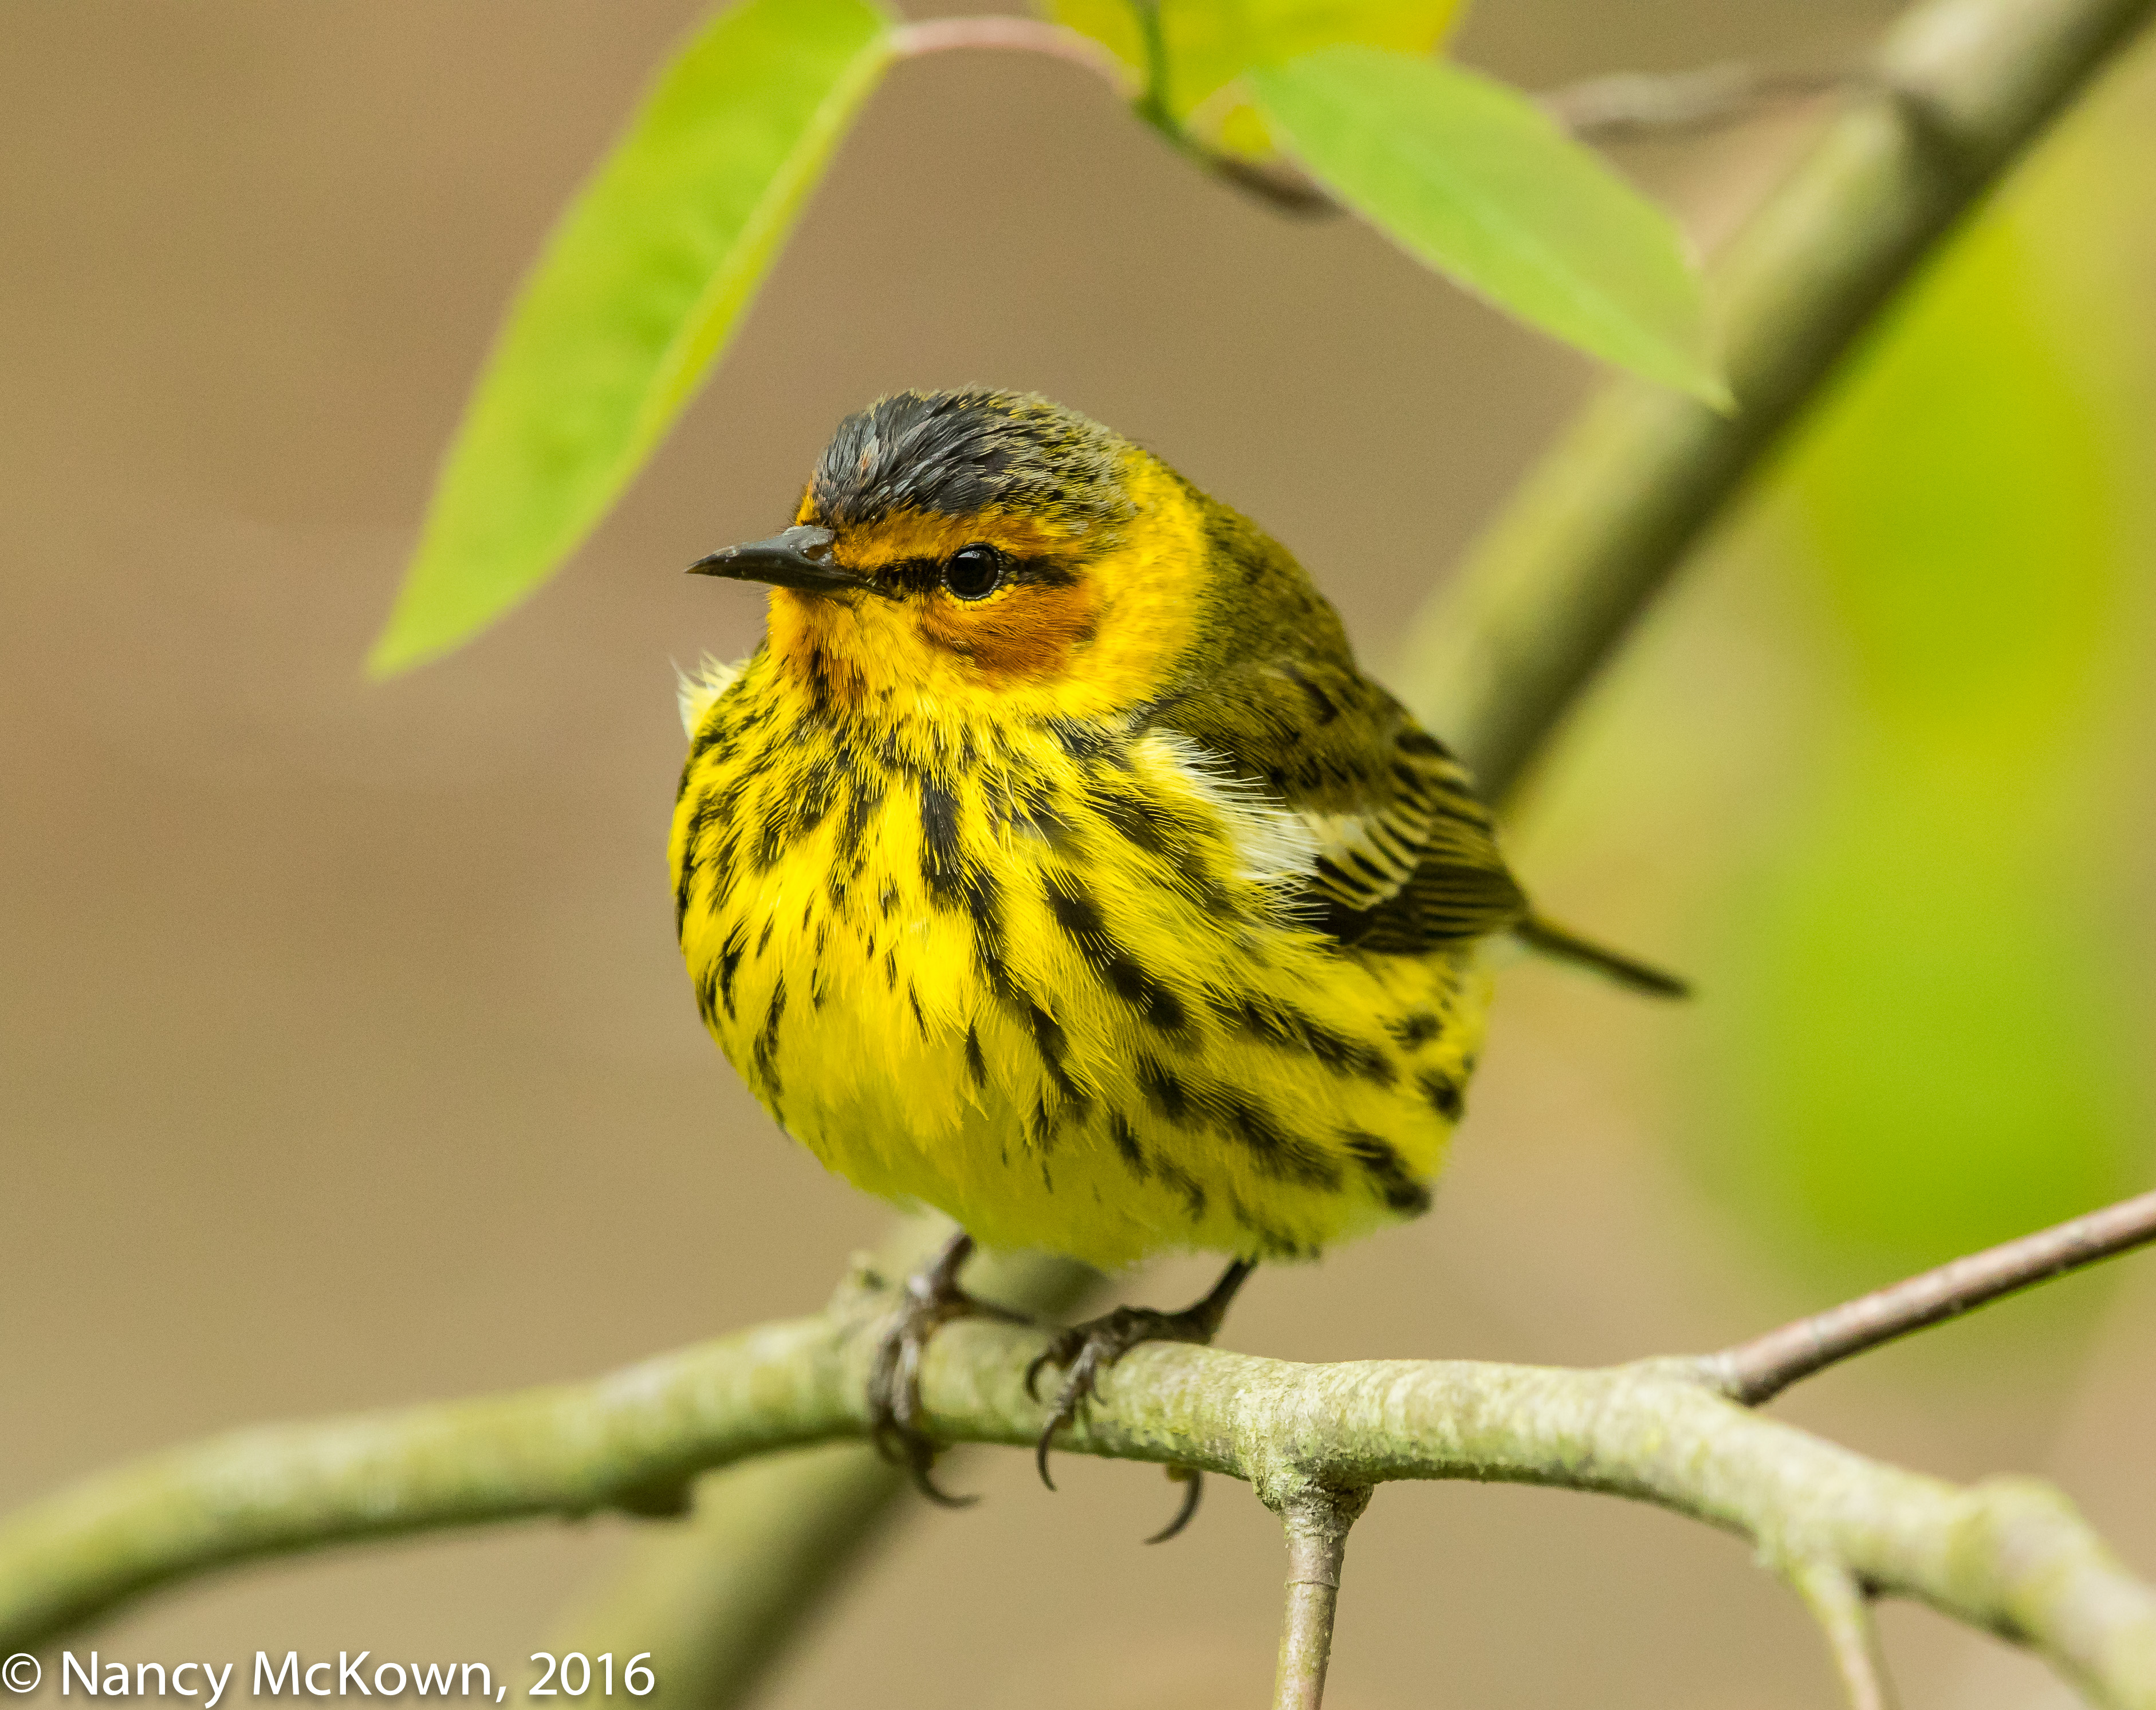
In Spring, migrating warblers are eye candy, most especially the males. This Cape May Warbler with his prominent chestnut cheek patches and brightly streaked head and chest perched right outside my (closed) window. He did not appear frightened by me or the camera, so much so that I considered opening the window. After a minute or so, he bolted for more satisfying territory, but not before I was able to get off a few through-the-glass-window shots.
Cape May Warblers winter in tropical climates (S. Florida, Caribbean, West Indies and Mexico) where they are known to feast on nectar collected with their curled and semi tubular tongues. They migrate long distances to breed in Northern U.S .and the Canadian woods where their preferred food is spruce budworms. In SW Michigan, we see only a few of them in the Spring and Fall.
ISO1600; f/6.3; 1/640 Second.
Through the Glass Window shot
User Settings
Whether I plan to drive to a birding location or am surprised by a warbler outside my window, it’s relatively easy for me to make sure that all settings for both my cameras are properly adjusted at what I consider to be optimal for the intended shooting location. This not so short checklist of settings includes: white balance, max auto iso, one shot or continuous shooting mode, metering mode, live view, video, exposure compensation, file format, aperture, shutter speed, ISO, minimum and maximum ISO/Shutter settings, image size, picture style, autofocus modes, autofocus point selection, P, Tv, Av or M shooting mode, etc. (Whew!)
Both of my cameras see a lot of action in different locations, consequently I have to be able to make setting adjustments as quickly as possible to accommodate different environments.

Through the Glass Window shot.
ISO1600; f/6.3; 1/640 Second
Instant Recall
This Cape May Warbler departed as fast as he came. As is often the case, there was no time to even think about complex camera configurations. The knowledge and experience stored in my brain is not necessarily instantaneously retrievable, especially in the heat of an exciting bird sighting. I will more than likely miss some action if I take my eyes off the bird to try to remember how to adjust something like the autofocus point selection.
Custom Shooting Modes
Modern DSLR cameras have storage and instant recall functions called “custom shooting modes” into which you can register or preset preferred settings and functions. (NOTE: The camera’s memory cards are not used for this task.) When you set up custom shooting modes, the camera saves to memory your favorite camera settings which are then retrievable with a flick of a switch. The camera’s long term memory will hold your preferences until you change them.
I use all three of the customized shooting modes that are available to me on my Canon cameras. C1 and C2 are used for my birding adventures and C3 for family/people photography. These presets allow me to confidently operate “on-the-fly”.
Easy Setup
Custom Shooting Modes help make prepping for bird photography simplier. Canon menu systems provide a very straightforward process to activate custom shooting modes, and best of all, you don’t have to start from scratch to configure your first C mode. Just set the camera as you usually do right before you go out in the field. Then register these settings quickly in the menu by going to “custom shooting mode” and then the “tools” tab. Assign a C1, C2 or C3 designation, then OK, the SET. Other more in-depth options are available if you wish to customize further, like: 1) clear your settings whenever you want; 2) program new settings over the old; or 3) enable “Change Auto Update Set” to permanently retain new additions to a group.
Store What You Know
It’s fun to experiment with the range of options available in sophisticated DSLR cameras, but it’s best to set up your custom shooting modes in a thoughtful, non-rushed way. These presets are not a place to store hardly ever needed, adventurous stuff that will not be useful in the heat of the moment and will soon be forgotten, or worse, accidentally triggered. Take the time to think about what you want and need for different bird photography scenarios and then make them available instantly by flicking on the custom shooting modes C1, C2, or C3 on the camera’s mode dial.
Presetting your custom shooting modes into the camera before going on your bird photography adventure is all about anticipating what might happen – and then being ready when it does.