


Photographing Chipping Sparrows
Chipping Sparrows nest in our yard each summer. They are bold and persistent warbler size sparrows, especially when ground foraging in the yard or at the feeder. During the Spring plumage cycle, the male sports a bright rust cap and a lot of distinguished looking gray, black and brown on his body and long notched tail. Except for the size, Chipping Sparrows look similar to American Tree Sparrows and Clay Colored Sparrows.
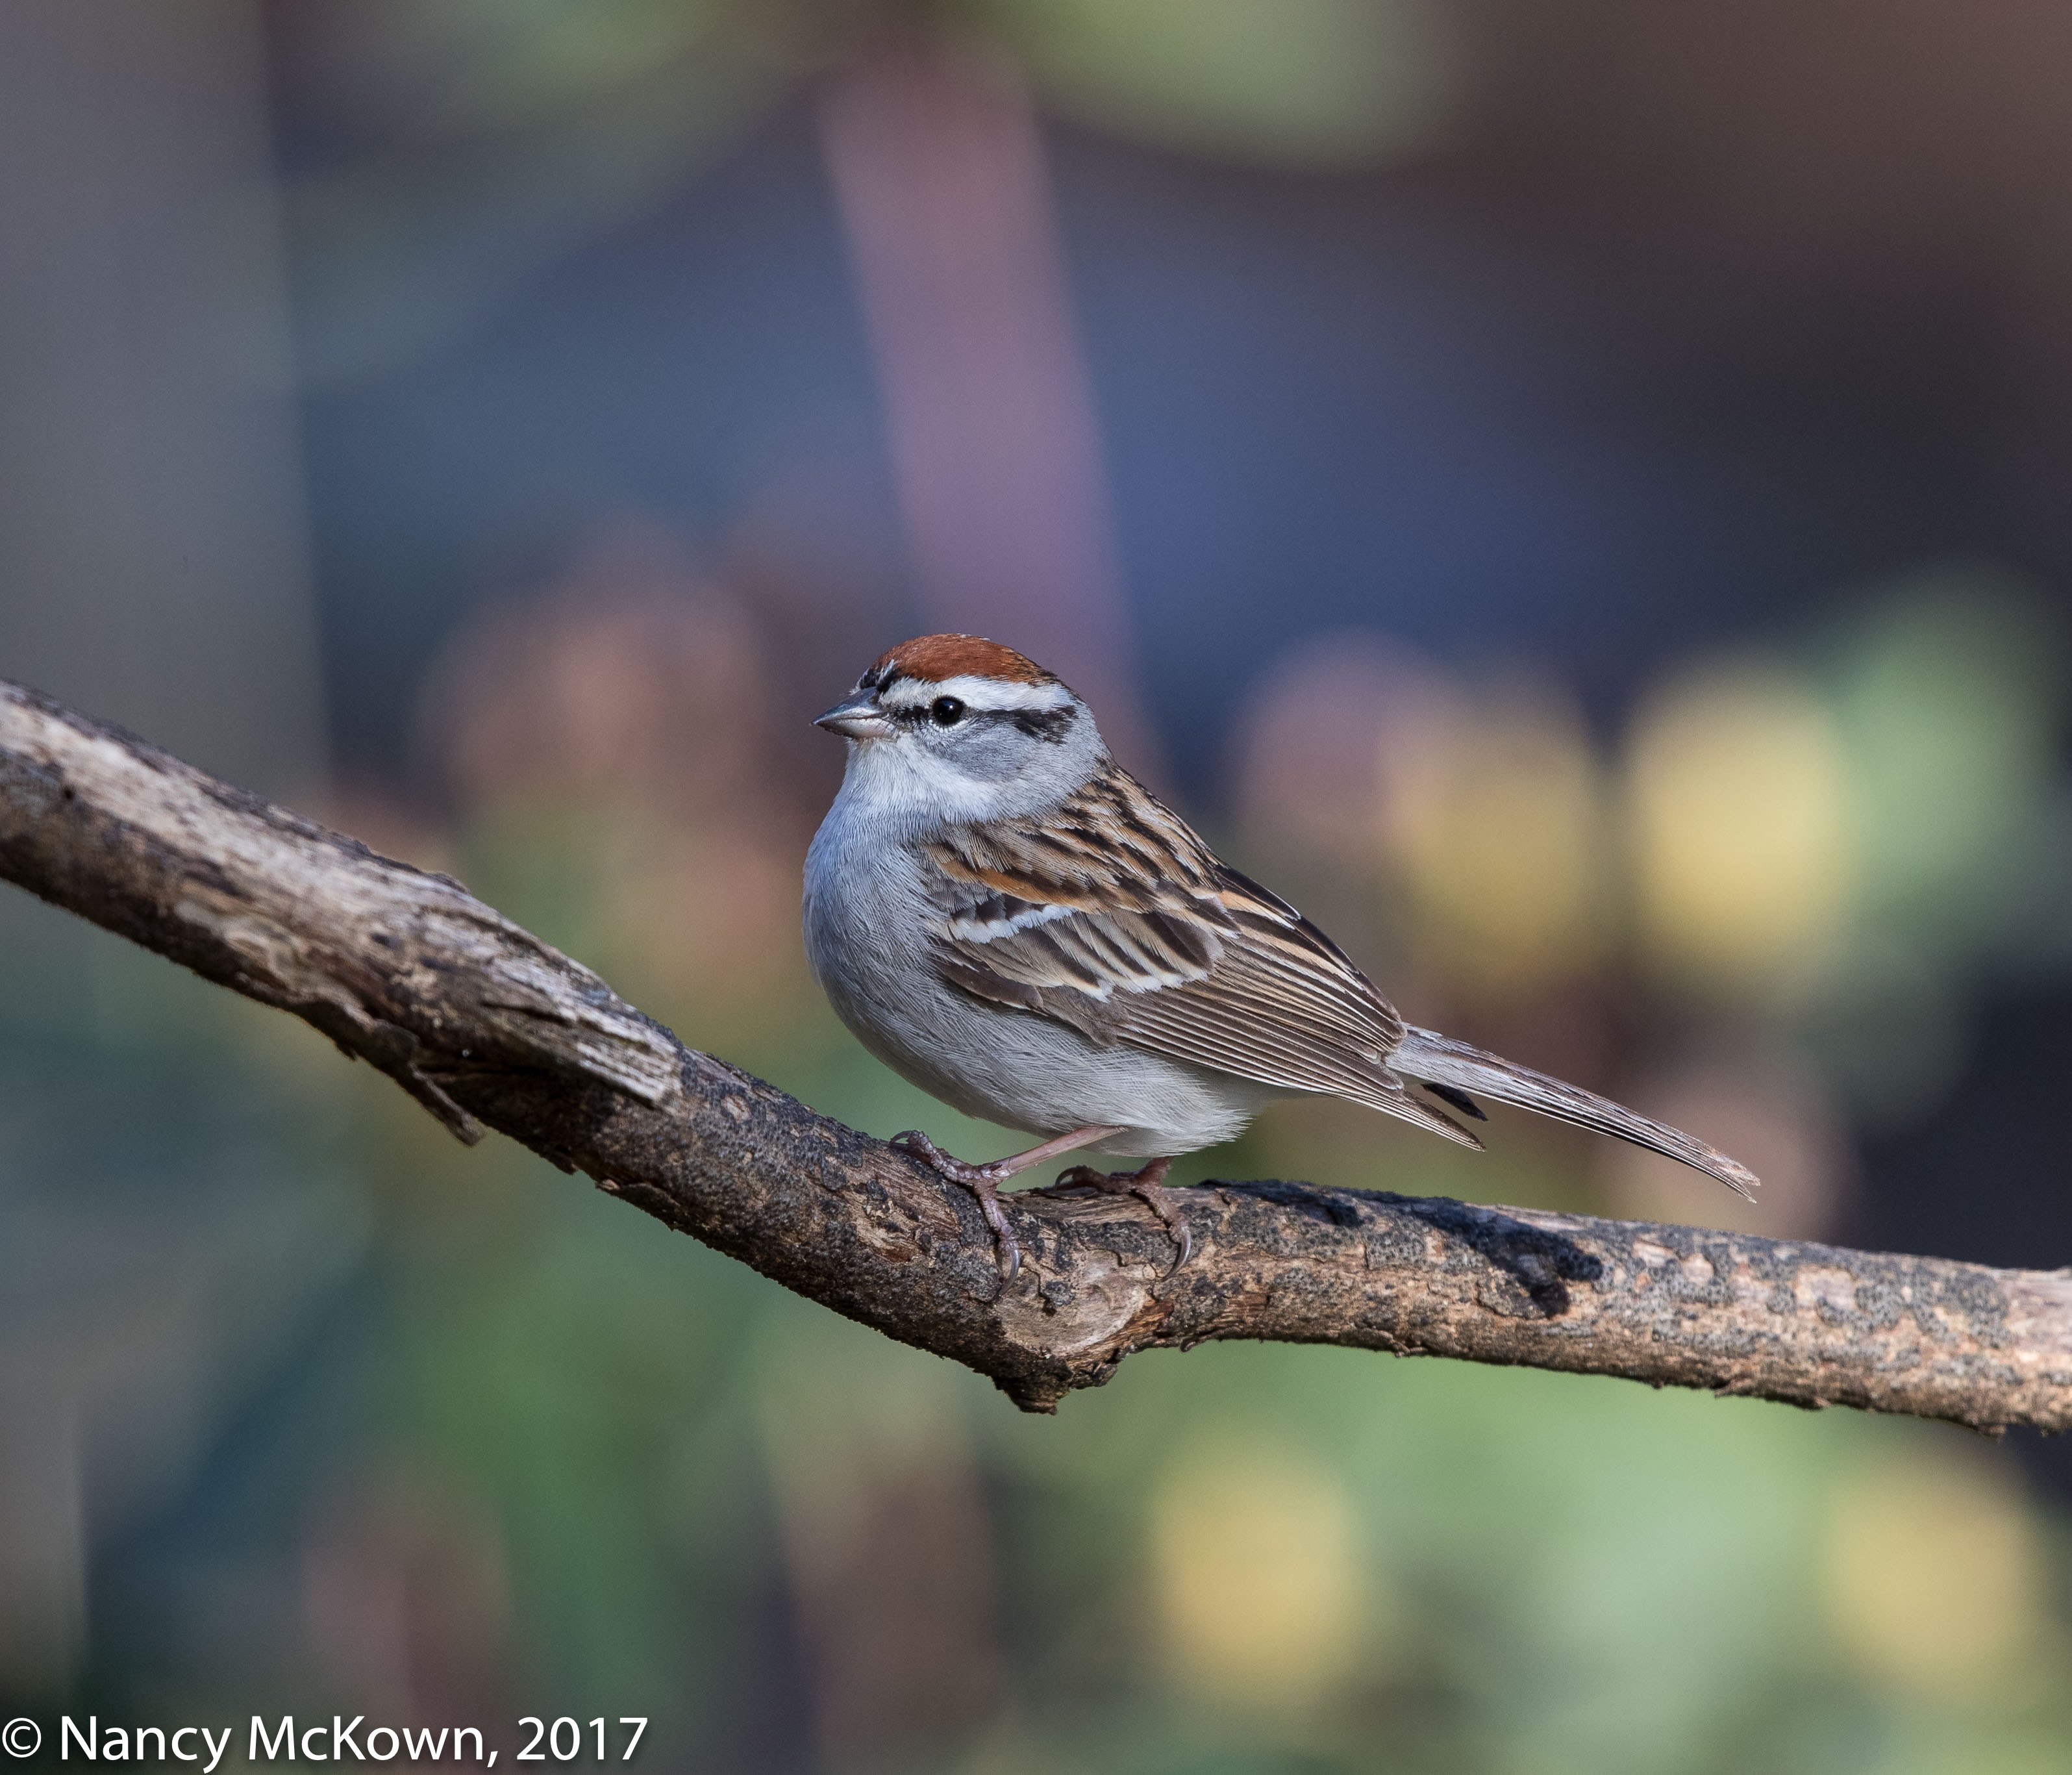
A Variety of Background Tones
Reflecting Back Through the Lens.
ISO800 f/8; 1/400 Second
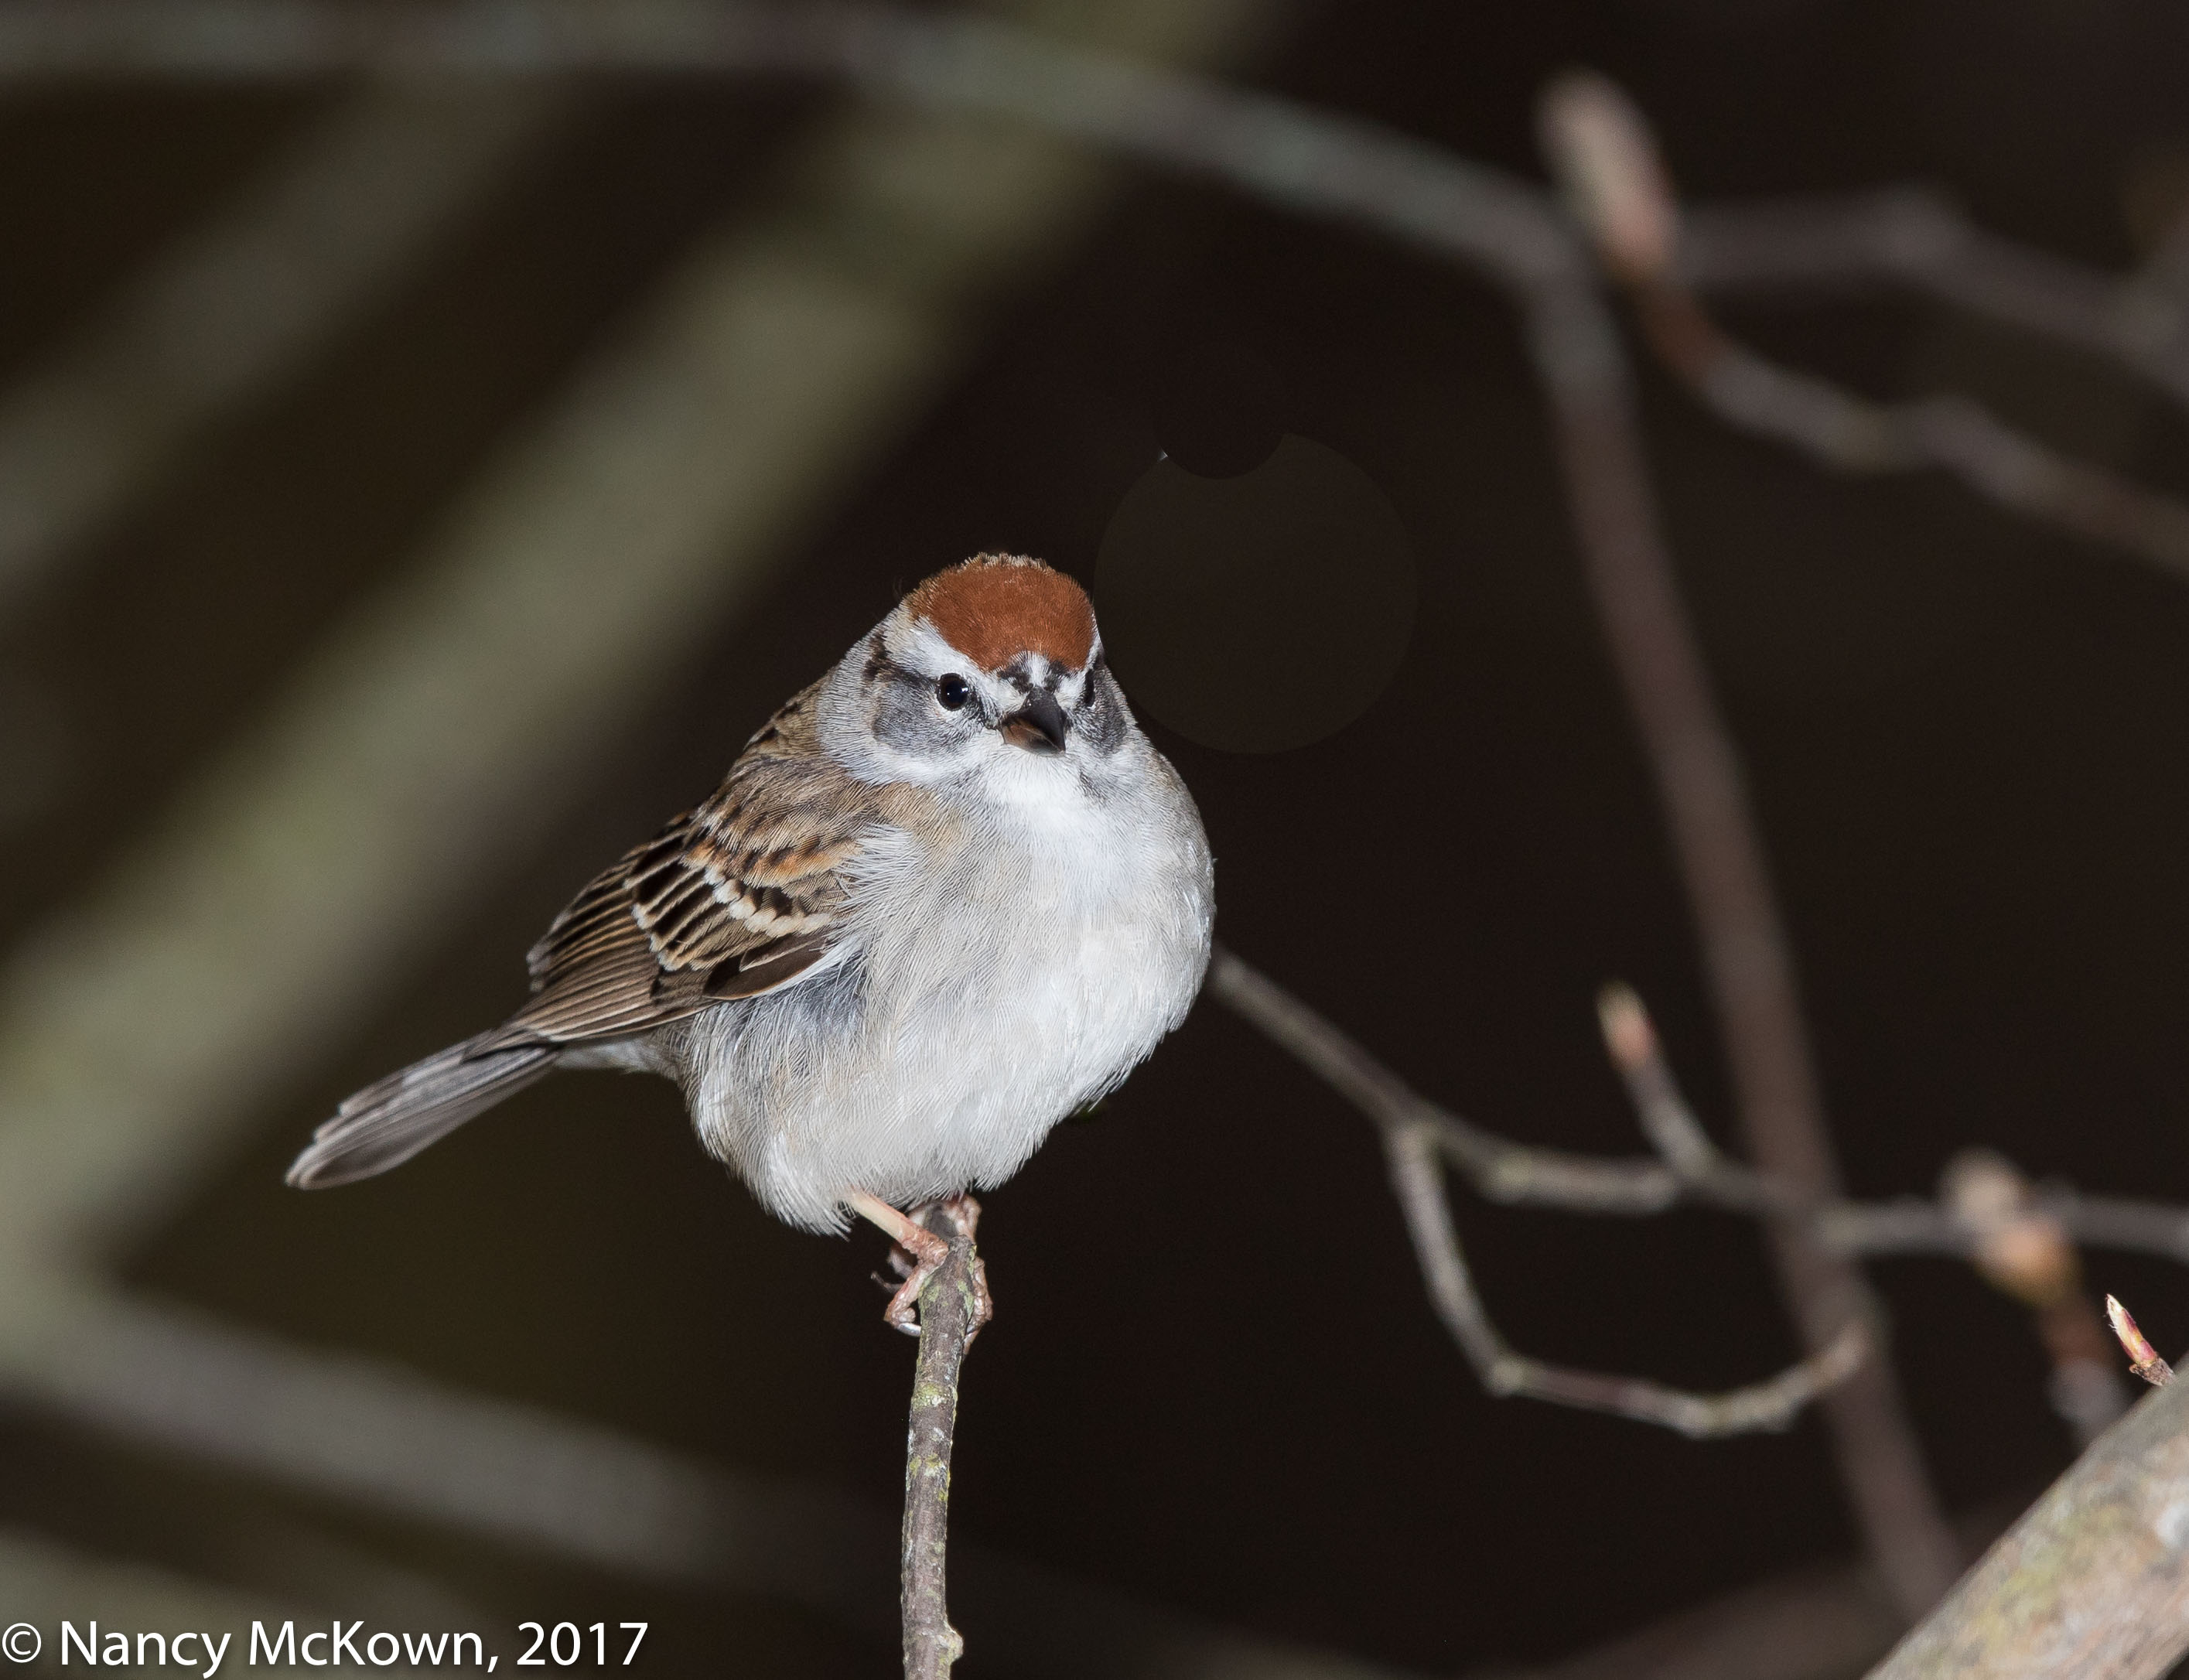
Chipping Sparrows are common in our wooded yard. They don’t spook easily while foraging and that gives me time to experiment with the camera. These three photos were taken in different settings, with different backgrounds and at different times of day in order to better understand how the camera’s light meter discerns light.
Computerized Metering
For most photographers, “perfect” exposure depends on how effectively the camera’s light meter analyzes the scene. When I’m out in the field, my go-to metering mode is Evaluative, a “smart” system with a multi-level internal light metering system.
The Light Coming Through The Lens
Internal light meters, regardless of the meter mode set, will not read the light falling upon the subject and its surroundings, but only the light reflecting off of them and back through the lens. A black iridescent Crow is not going to reflect back as much light as a Snowy White Egret. A brown tree lined background is not going to reflect the same light as a highly reflective mix of spring colors.
Conditions affecting the light’s direction, intensity, absorption and bouncability also impact how light travels through the lens. Attach a flash and a whole new level of light meter E-TTL analysis kicks in, gauging the ambient light reflected off of the subject and calculating how much flash is needed to maintain exposure parameters. (NOTE: To read about the physics of how light travels and reflects off an object, visit this link.)
NOTE: You don’t often see bird photographers carrying around hand-held or separately mounted light meters. These exterior meters calculate the amount of light falling on the scene….the “incident” light, not the light reflected back through the lens (TTL).

An Even, Brown Colored Background
ISO500; f/8; 1/400 Second
Light Meter Calculations
Modern in-camera light meters do more than just average the light reflecting back through the lens. The camera’s micro computer divides the scene and separately analyzes each zone. It then weighs the focus point placement, reflectivity, color, distance, and lots of other variables. Too many dark or light tones reflecting back without the balancing act of middle gray shades will throw off your meter and result in overexposed or underexposed images.
(NOTE: The histogram is a reliable way to see how the light meter is balancing the light coming into the lens.)
Restricting the Metering Area
Metering modes tell the camera system WHERE in the scene to meter the reflected light. If you change the metering mode from evaluative (total scene) to partial (approx 6-10% of the area) or spot (approx 2.5% or less of the area), the light meter will narrow the area it takes into account when metering and possibly use different algorithms to read the reflected light. No matter the size of the area being metered, if the subject and/or its surroundings are bouncing back wildly unbalanced light through the lens, your exposure will most likely not be calculated correctly.
Spot Meter Off of Middle Gray Tones
It’s helpful to understand how best to override the light meter when it is handicapped by confusing incoming data. A well known strategy: Try spot metering off middle gray tones that you know won’t confuse the meter (like grass down by your feet) and then set exposure based on those readings. If your camera is set to Manual (M) Mode, set exposure parameters and then recompose, making sure that Auto ISO is not engaged. If you prefer to use one of the auto modes (Av, Tv, P, A), have the camera take the exposure readings of the grass by your feet, lock down exposure settings using auto exposure lock and then recompose the scene.
with Flash Enhancement
to Lower ISO and Better Light the Subject.
ISO400; f/9; 1/250 Second
If the photographer is not quite happy with the results of these fixes, she can fine tune with Automatic Exposure Compensation (AEC–Right is Bright) to help balance the light meter reading. If you know your light and use the histogram as your guide, you can probably make an educated guess and get it right. (NOTE: Sometimes knowing your light is not enough – you must know your camera. AEC tends to be variable – depending on the DSLR in use.)
Know Your Light
After years of being a photographer, I like to think I know my light without the help of an in-camera light meter. Still, I rely on the meter all the time. It helps to understand how this highly complex meter system thinks and how to work with it to produce images that are exposed to your liking.
Perky little fellow. I like all three backgrounds, but I’ll bet you have your favorite