Monthly Archives: June 2017

Photographing Rose Breasted Grosbeaks – Masking in Post Processing

Photographing Rose Breasted Grosbeaks

It’s quite a treat to be able to photograph a species of bird throughout the spring and summer seasons. At least six pairs of barrel chested Rose Breasted Grosbeaks nest in or near our yard each year. They arrive in late April/early May around the same time as the Baltimore Orioles. Most are bold individuals, rarely willing to wait in line at the feeders or the suet. The fledglings start following their parents to the free food in mid-June- lots of them all at once. (NOTE: My bird books note that Rose Breasted Grosbeaks produce only one clutch per season.) The females of this species look quite plain compared with the males and can be mistaken for a large female Purple Finch..until you get a look at their size and sturdiness at close range. Rose Breasted Grosbeaks head south for Central and S. American while it’s still warm….. in early September.

Male Rose Breasted Grosbeak
Male Rose Breasted Grosbeak in Spring Finery. Looks Young,
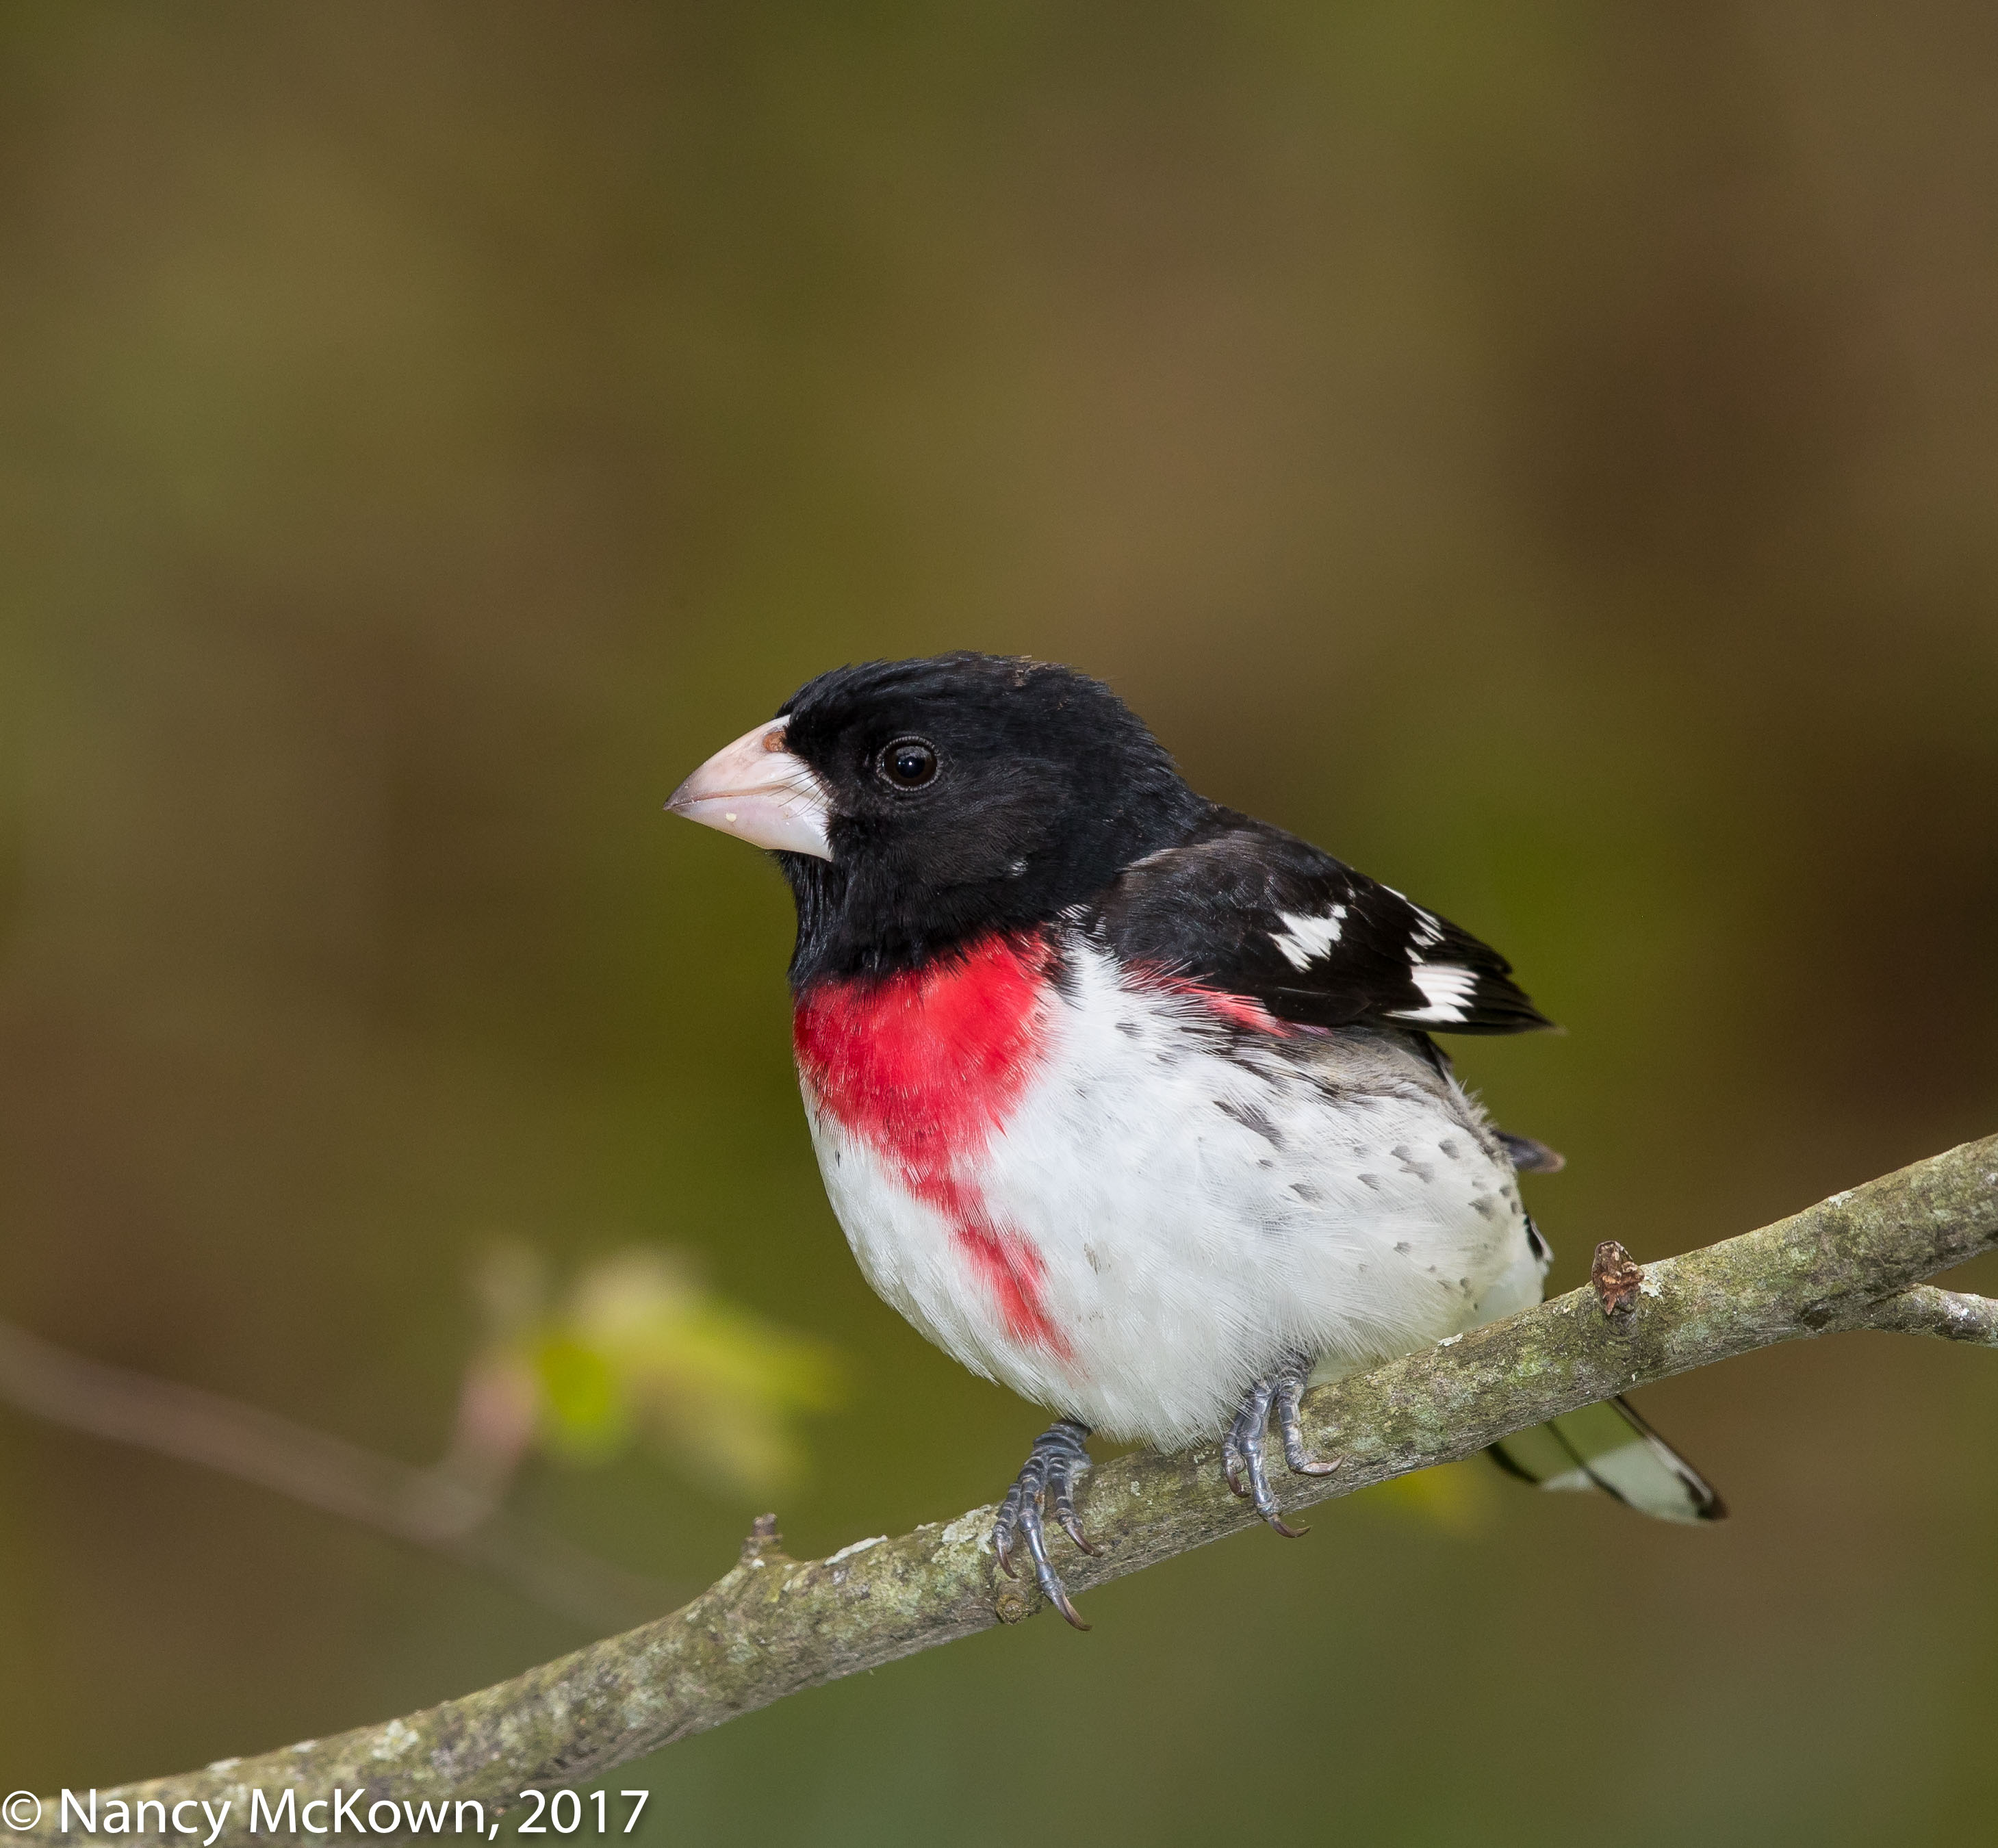
Perhaps a first year Male.
ISO 400; f/9; 1/250 Second

Masking in Post Processing

Anybody who spends a lot of time reviewing images and examining them for detail and sharpness is bound to (over time) develop a more discriminating eye. With my newest camera, the Canon 1D X Mark II, I find there is less need in post processing to use the Lightroom sliders that impact sharpening, clarity, vibrance, highlighting, saturation, shadows, and noise reduction. Once in a while though, I like to experiment with the sharpening sliders, especially the one labeled “masking”.

When I first started loading my images into Lightroom, I never really paid much attention to how the process of masking affected my images. I knew that this Lightroom post processing slider was not intended to fix out of focus photos…. I knew procedurally that I had to hold down the option key while I moved the slider to the right…. and that I was to stop moving the slider when the pebbly background looked completely black.

Female Rose Breasted Grosbeak
Young Female Rose Breasted Grosbeak
(or, with that splash of color, is it a young male?)
ISO400; f/10; 1/250 Second

Post processing is very time consuming and not especially fun. It’s best to know the what and why of those procedures before spending time on them.

A few thoughts about the process and benefits of masking:

  • When in Lightroom’s Masking view….. while you are holding down the option key (or alt key with PC) with one hand and moving the sliding bar with your mouse, you will see only a grey scale overlay of your image. In this mode, you can observe that the areas in white will be sharpened and the areas in black will remain unsharpened. No distracting colors are observable.
  • When the slider is set to 0, everything looks white so the entirety of the image gets the same amount of sharpening, as specified in the 3 sliders directly above the masking slider (amount, radius, detail).
  • When the masking slider is set to 100, only the strongest whitest edges of the image get sharpened. (You can see these edges when you hold down the alt or option key while moving the slider.)
  • How do I know how much masking to use? As you move the slider toward 100, watch how the graininess in and around your subject and in the background slowly turn SOLIDLY dark. At the point where you see the graininess disappear and only a black background remains, you stop moving the masking slider. Lightroom will then apply sharpening only to the white areas… and leave the dark areas unsharpened.
  • It’s important not to go overboard with any of the sharpening tools in Lightroom. Over sharpening brings out more noise, zigzag lines and/or unnatural looking borders around your subject.
  • Sharpening your subject and not the other parts of the image helps to make it stand out more.
Male Rose Breasted Grosbeak
Rose Breasted Grosbeak
A Flash of the Rose-Red Feathers Under His Wing.
The Enormous Bill Still Stands Out.
ISO400; f/9; 1/250 Second

NOTE: It is important to note that the detail quality improvements brought about though the process of masking will likely not knock-the-socks-off the typical fan of bird photography. In fact, I have learned NOT to expect people who are not photographers to notice or care.

Photographing Cedar Waxwings Attracted To The Serviceberry

Positioning The Camera

It’s a cold rainy summer morning….so dark I keep thinking I have my sunglasses on. I’ve cranked open the library windows and faced the camera toward the Serviceberry tree. My rig is positioned farther from the windows than usual because if it wasn’t, the 500mm lens would be too close to focus on the nearest berry branches. (NOTE: Minimum focusing distance =  12.4′ or 145.7″). The portable heater is resting on a book to insure that the floor under which it sits does not vibrate the camera. I positioned the lens to capture (as the bird’s background) a multilayered forest of feathery ferns huddling just beyond the Serviceberry tree. The f/9 aperture setting will transform a few of those individual fronds into lush, polished buttery green swirls.

Photo of Cedar Waxwing
Cedar Waxwing
Silky Back Feathers with
Wing Feather Tips Dipped in Red
ISO400; f/9; 1/250 Second

Photographing Two Cedar Waxwings

Birds constantly forage, even in the wettest and coldest of conditions. The bolder, familiar frugivores in our yard (Jays, Catbirds, Robins, Titmice, Nuthatch, Woodpeckers, Finches, many of them tending to their fledglings) swarm the Serviceberry tree, acrobatically maneuvering to pluck the ripe berries at the ends of the branches.

I can see Cedar Waxwings in the distance. They are cautious, watching me, coming in a little closer and then doubling back for safer grounds. They are better at waiting and watching than I am- and I’m pretty good.

Cedar Waxwings are nomadic birds and thus do not establish territories. This species is highly social and travels in cooperative flocks – moving often from one place to another and settling down for a short time during breeding season to build nests and raise young. The only way I can reliably find and photograph these fruit eating birds is to look for trees and shrubs that bear small fruits- huckleberry, serviceberry, juniper, hawthorn, cedar, honeysuckle and winterberry. Assuming the fruit is ripe, there’s a good chance that Cedar Waxwings will be found voraciously eating the berries until the bushes are bare.

Photo of Cedar Waxwings
Male Feeding Female Cedar Waxwing
The Male Offers the Female a Green Berry.
ISO400; f/9; 1/250 Second

Flash Limitations

The cedar paths beyond the Serviceberry tree are obstructed with thick foliage, so much so that I no longer can see through the woods to the houses beyond. The only trees that aren’t completely fleshed out are the high in the sky Locust trees. The ostrich ferns have unfurled, no longer reaching. It’s very difficult to get a clear line of sight into the understory trees or through the woods beyond. It’s best to be patient, wait and hope that the birds will perch closer to the camera.

The woodlands in the background are darker than the foreground…almost 2 stops darker. I set the camera to spot metering so E-TTL II is better able to read the light and emit the appropriate amount of flash if the bird happens to be farther off. I have the Beam Concentrating Fresnel attached to concentrate the light beam so it can travel greater distances. (NOTE: This is an essential piece of equipment if you want a flash blast that better fits the angle of view of a long lens. However, a flash extender will not be able to project enough light to the smaller distant birds if they are perched more than 25 feet from the camera.)

Berry Eating Birds

If you want to attract and photograph birds into your yard, plant Serviceberry Trees. If that’s not possible, just search out the locations of the wild berry bushes around you and do a little research to determine when the berries will be ripe. You won’t be disappointed.

Photographing A Thirsty American Redstart Warbler at the Fountain

Photographing An American Redstart Warbler

It’s been partially sunny with cool refreshing winds for 5 days now and the forecast predicts much the same for the next three days. Tree canopy above the house is fully leafed out. Petals from the tops of the blooming locust trees float into the house onto the carpet. Plants are looking dry and droopy. The few mosquitos I encounter are sluggish.

Squirrels and chipmunks scurry along the cedar mulch paths to the fountain to get a drink from the water flowing down. Titmice and Robins pay me no mind as they bathe and drink from the bubbler. This Spring, a pair of American Redstart Warblers have returned to nest in our yard. The male, adorned in his spring finery, visits the fountain often.

Male American Redstart
Male American Redstart Warbler
He’s Shaking and Fanning His Feathers
To Dry them Before He Goes In for
Another Dip. ISO1600; f/9; 1/250 Second

High in the Treetops

Here on ground level, the only warblers we have noticed are the Redstarts. My bird books confirm that 43 wood warblers species nest in MI… most of them arboreal.  An arboreal bird is defined as: “A type of bird that relies on trees and dense foliage, spending much of its life in trees and rarely either descending to the ground or otherwise leaving the cover of the canopy.”

A wide diversity of highly specialized birds and other creatures live in this upper layer habitat created from the crowns of trees. This obscured community rarely needs to venture down to a ground level water source. They drink from the near billions of lighter-than-air floating water droplets carried in the fog and intercepted by tree leaves.

Is it too much to hope that other species of warblers actually live high in our tree canopy and that they might one day come down?

Hope Springs Eternal

I set up my camera, 500mm lens, 1.4 tele extender, and bracketed flash on to the tripod inside the house (with one tripod leg outside on the step of the deck). Sunlight on the deck slowly transitions, uneven and patchy, as the morning sun rises in the sky. I set the focus limiter switch on the lens barrel to restrict the len’s autofocus to 3.7m-10 m.

Male Redstart Warbler
American Redstart Warbler
Luxuriating in the Fountain.
ISO1250; f/7.1; 1/250 Second

ISO Settings With Flash

I keep my Canon camera in Manual (M) mode, but set the flashgun to Auto. E-TTL II will compensate as the exposure parameters change with the shifting light. I play around with the ISO settings, raising it to brighten the background. If I leave the camera’s ISO setting in auto mode, the camera automatically sets  ISO to 400 when a flash is attached and activated. (NOTE: There are times when the flash can not recycle fast enough to keep up with the shudder action. If Auto ISO is set, the ISO will rise to compensate and correct exposure when the flash does not fire. If I set the ISO to a specific value, the camera will be in complete manual mode and will not override the aperture, shutter, and  ISO set by the photographer.  In this instance, the camera will still take the shot, but the images will be underexposed.)

Working on Glare Control

Mid day rolls in. The sun is casting glare and shadow and the blinkies are flashing through the viewfinder. I can feel the hot sun on my face as it clears the trees and bears down on the house. The brim of my hat does a good job blocking the sun from my eyes, but whenever I try to place my eye on the eyecup, the hat pushes back on my head, moving the camera and tripod. The hat comes off.

Instead of packing up, I consider inserting the circular polarizer into the lens. Then, possibly I could effectively boost color and contrast in an otherwise washed out scene. The reduction of light with the polarizer inserted sends the ISO soaring. For birds I can only lower the shutter speed so much….so I turn on the flash with extender again. I rotate the polarizer to get the maximum reflection reduction, but the resulting images shone on the LCD screen come back full of glare. The polarizer can not eliminate the glare caused by the elevated flash gun. That beam probably needs its own polarizing sheet. Too much hassle for such a beautiful day. I power down the camera and flash and put everything away.

Photographing a Magnolia Warbler — Battery Maintenance

Spring Bird Vigil

It’s Spring migration time again. My eyes are continually scanning the outdoors for birds newly arriving or just passing through. I know that I must be missing most of them. If they do venture down to rest and replenish, the vast majority are hidden in the foliage or high in the trees or off in somebody else’s yard. The number of transients that come within my purview–at a time when my camera and I are ready –seems minuscule compared to the billions of birds on the move.

My mind was elsewhere as I swapped out the spent batteries in my Canon 1 DX Mark II camera and set up the camera near the deck. I had spent much of the day behind the viewfinder photographing the familiar birds when a stunning male Magnolia Warbler appeared right in front of my lens. I got off one shot, then nothing. The camera went dead.

Photo of Male Magnolia Warbler
Magnolia Warbler, male.
ISO400; f/8; 1/250 Second
With Flash Enhancement

No Power

Ack!!!  No power!  And no swappable moment…. the warbler was gone.  I had just changed the battery pack in the morning and couldn’t have taken more than 100 shots during the day. Why did it fail?  It is true that Canon new flagship…the 1 DX Mark II is power hungry, but the newly designed battery pack is supposed to be up to the task. The specs boast that battery pack (less than a year old) will provide up to 1210 shots per charge, optimally. (Battery life for Video = approx 1-1/2 hrs). I do have power hungry functions engaged (flash, focus points, IS, Al Servo auto focus, etc.), but nothing unusual for bird photography.

Frustrated, I swapped out the dead battery with another recharged battery pack and scrolled down to battery info in the menu system. In big red letters at the bottom of the screen it read: Calibration is recommended when charging battery next time.

Battery Calibration

Batteries don’t stay young. Battery calibration is the process of maximizing electrical storage capacity and insuring that batteries hold their charge. It also resets the gauge of the battery freshness indicator to better match the actual power remaining in the battery.

The solution to fast draining batteries is to attach the exhausted battery to the charger and press the calibration/performance button. The charger will go through a calibration procedure which fully discharges any power left in the battery. It then fully recharges it. If you try to calibrate a charged battery, the depleting process takes much longer.

Over the next two days, I re-calibrated both lithium ion batteries. The recharge performance indicator in the camera menu now shows that they both can adequately retain a charge.

It costs $169.00 for a new battery for my camera. From now on, I will pay more attention to battery maintenance.