


Photographing a Pileated Woodpecker
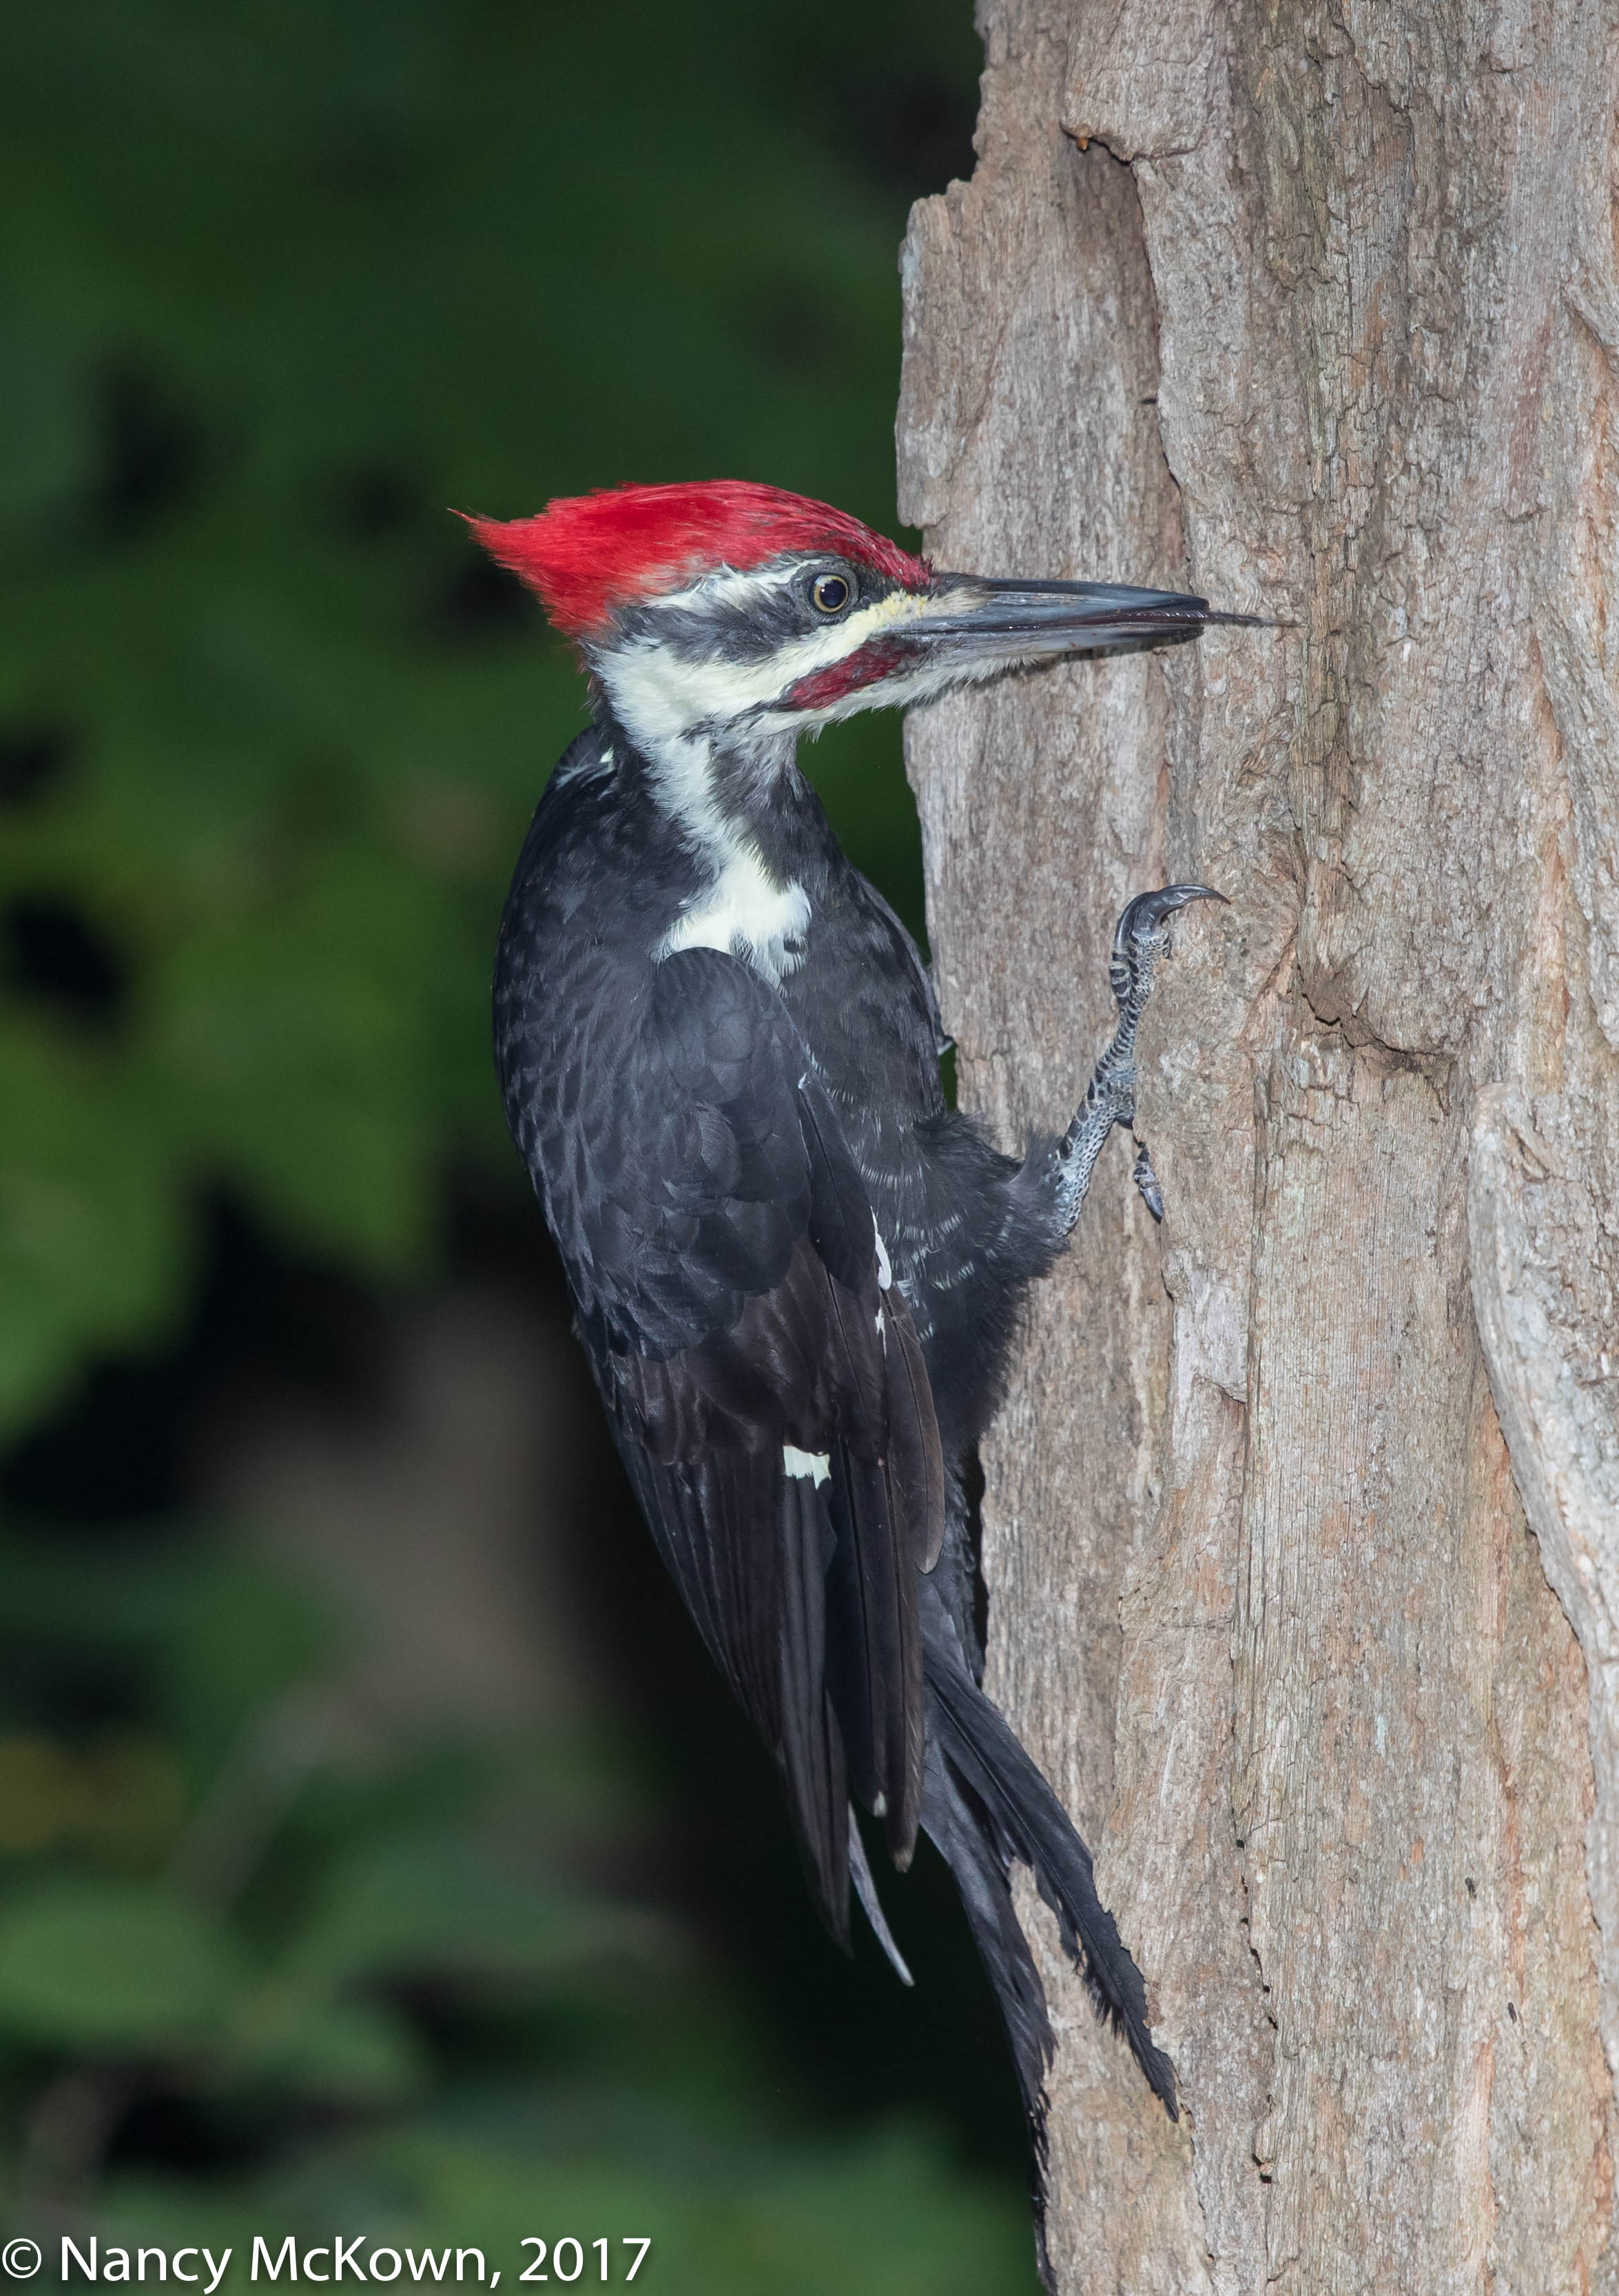
Pileated Woodpeckers are year-long residents in SW Michigan, but rarely have I had the pleasure of photographing one. These woodpeckers are startlingly large (the size of a crow) for a forest dwelling bird, and spend much of their time excavating high-in-the-sky trees to forage for carpenter ants and beetle larvae. Pileated Woodpeckers are primary cavity excavators (PCE) who tunnel broad and deep to shape a deadwood cubbyhole in which to raise their young. Once abandoned by the woodpeckers, SNAG dependent birds and mammals move in.
I love that conspicuous Woody Woodpecker-ish red crest atop his head and I get goosebumps when I hear the wild whinnying calls of these dashing and pre historic looking birds reverberating high above us. Pileated Woodpeckers are known to be very skittish around people. Most often by the time I see one, he has already spotted me and is headed the other way, giving me only belly or tail feather shots. This individual (see below) is obviously a male, as indicated by the mustache-like red patch of feathers on his cheek.
A Little Too Much Flash.
ISO800; f/8; 1/250 Second
Patience Pays Off
It was early evening with patchy light covering the foreground off the deck. The meter calculated the woodsy background at approximately 2 stops darker. I heard the Pileated Woodpecker before I saw him…something probing, prying, hammering and clawing behind the thick trunk (of a live Maple tree); and then some rustling, possibly from him hopping around on the ground amongst the wide reaching hosta leaves.
I quickly reset the len’s focusing range to 4.5m to infinity. The focusing mechanism was noisily hunting in and out, trying to pinpoint something within the darkness on which to focus. (NOTE: The Canon 500 mm 4.0L II IS USM telephoto lens has 3 specific options from which to choose a working distance or focusing range. A focus limiter switch on the lens barrel allows you to choose from 3 distance ranges: 4.5m to 10m, 10m to infinity, or 4.5m to infinity. )
It took a long 5 minutes before this Pileated Woodpecker showed himself, emerging slowly around the bend of the tree trunk. The lens immediately locked focus. As he began circling the Maple, he ignored the camera, intent on pounding the tree bark and lapping up insects with that long, sticky tongue. I pressed the shutter, set to silent, continuous shooting and held it just long enough to burst 3 shots.
(NOTE: When I first spot a bird, I always assume that the encounter will be fleeting. My camera is usually set to silent Low Speed Continuous Burst Mode, just in case I need it to capture some action. When using flash, there is no choice but to slow down to allow the flash to recycle.)
Slowly Moving Around the Tree Trunk and into View. Flash Worked,
Very little boosting needed in Post.
ISO800; f/8; 1/250 Second
Manual Mode Without Auto ISO
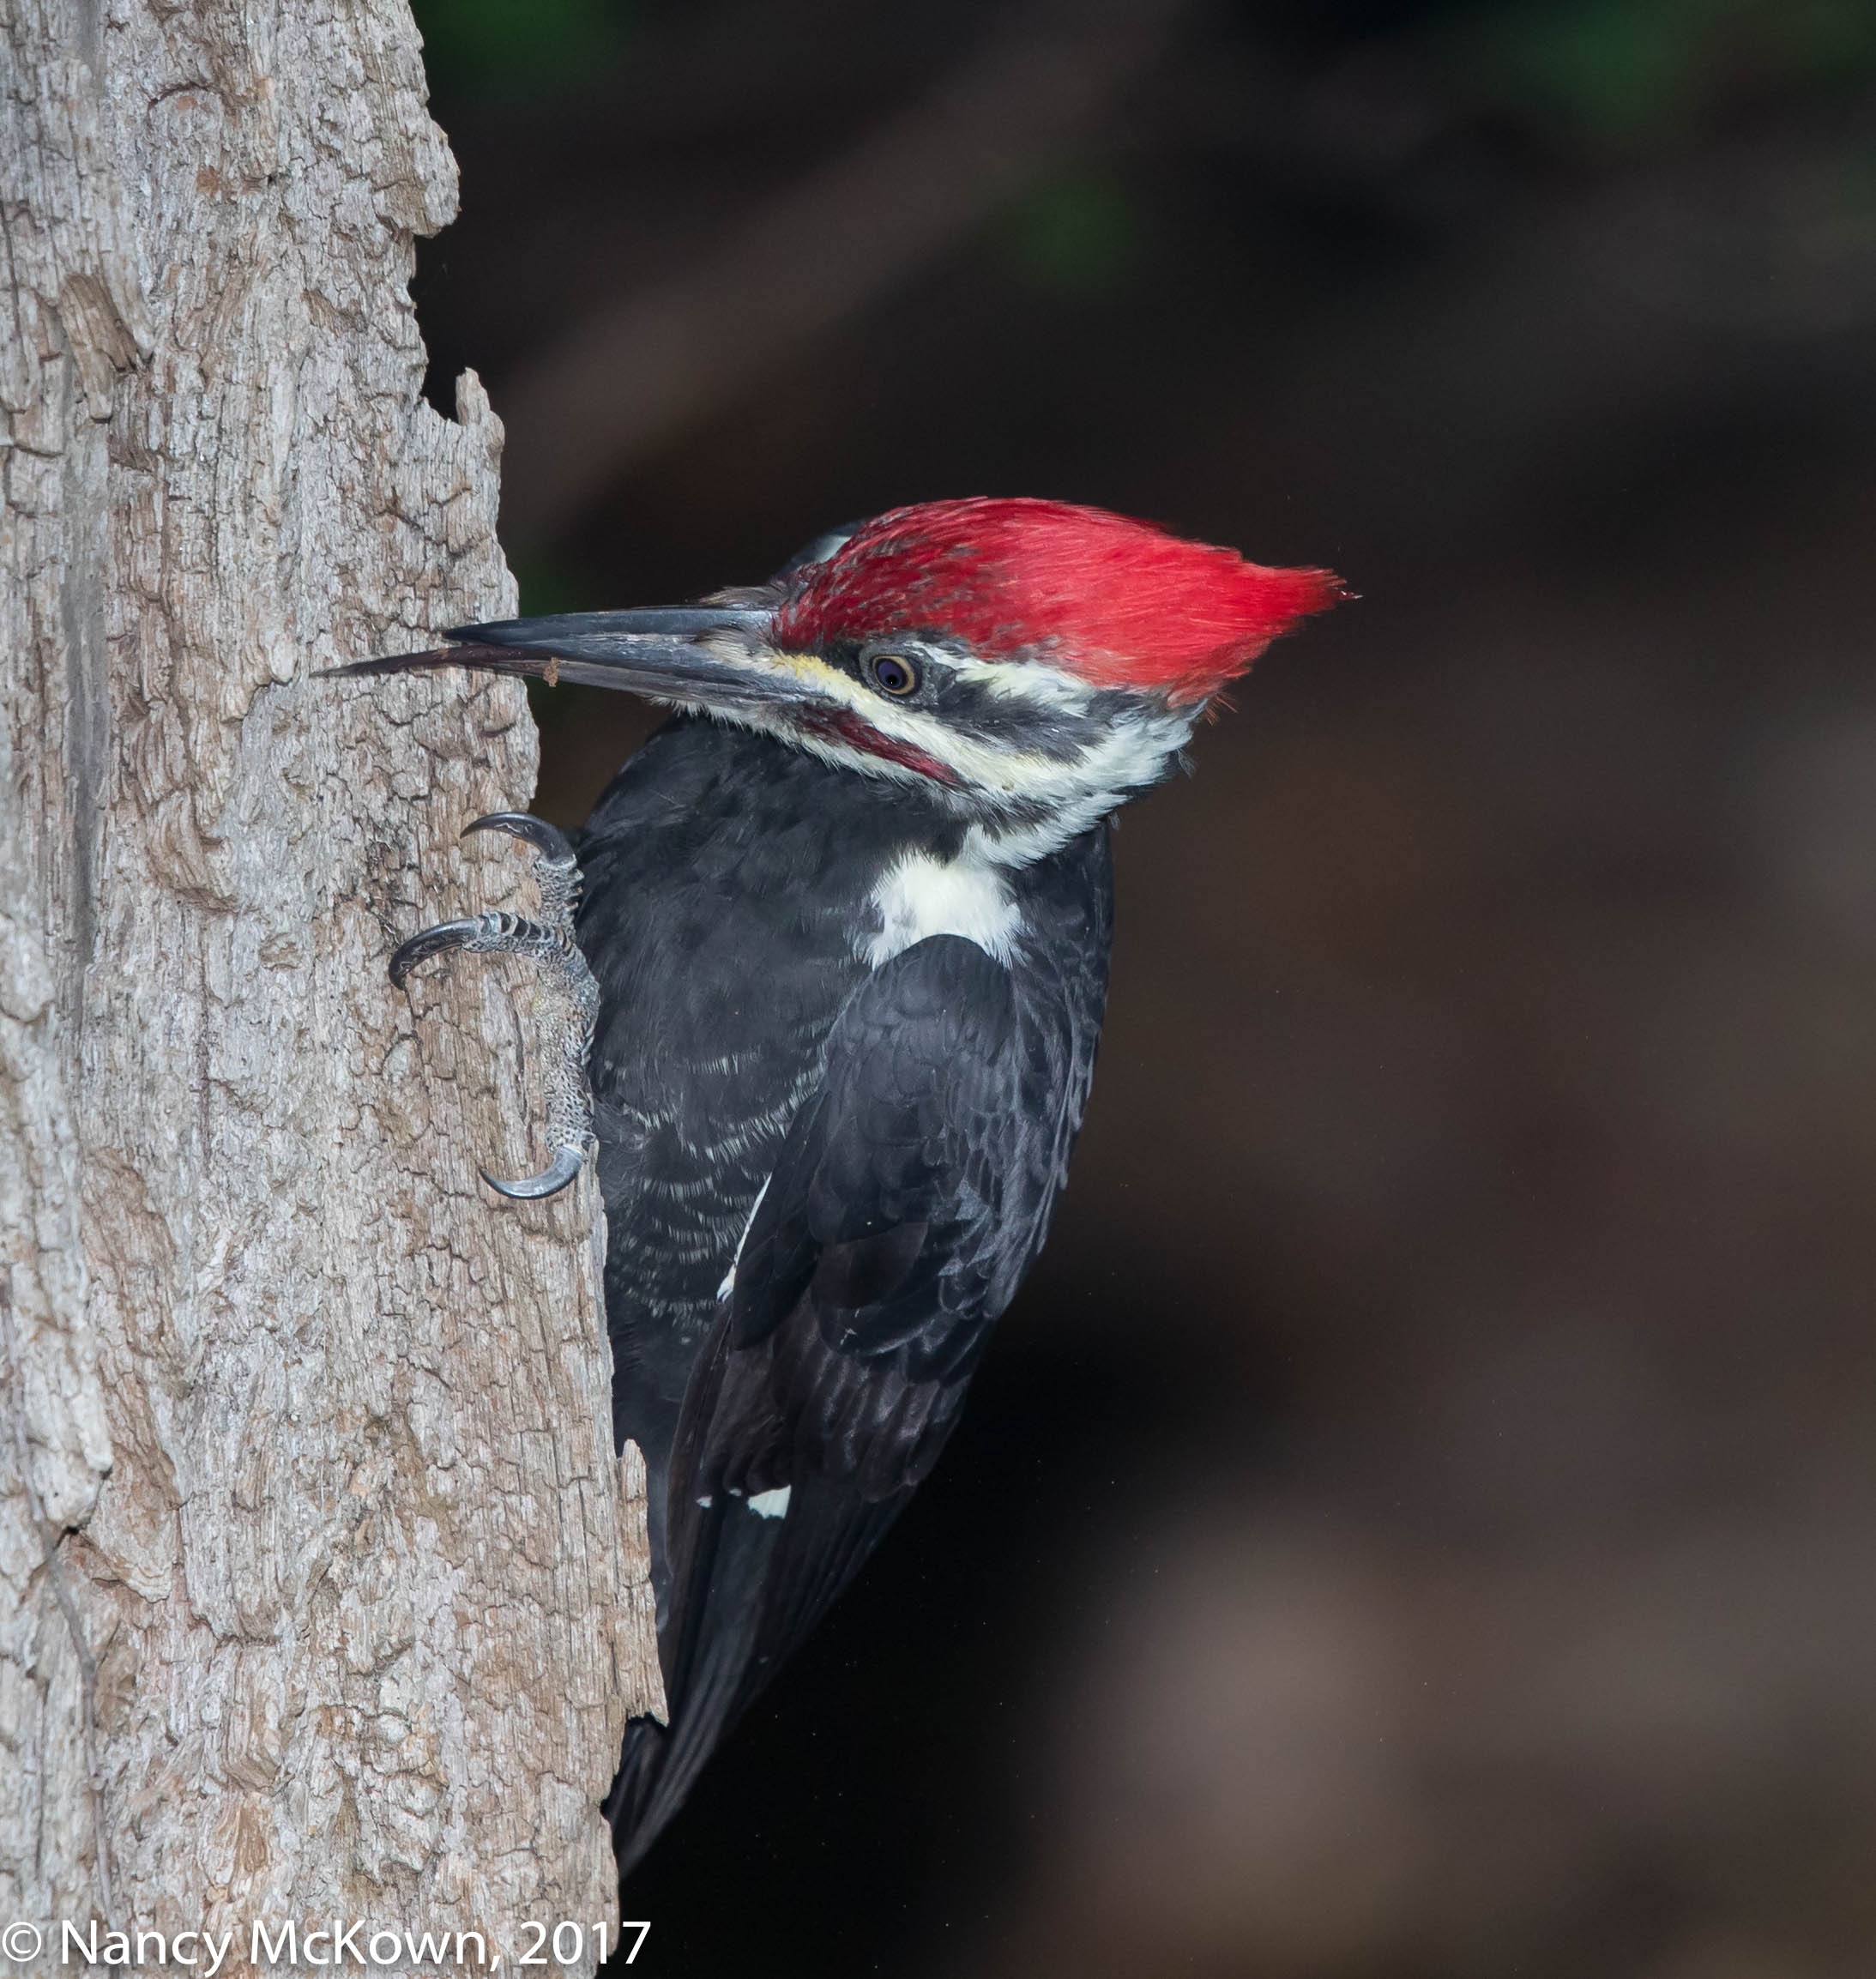
The flash did not fire in the 3rd photo of this sequence…causing a 3-stop underexposed image…no doubt because there was no time for the flash gun to refresh. See photo below.
Note: The ISO on all of these images was set to a relatively low ISO800. Generally, when I set exposure parameters for flash use, I leave the ISO at “Auto”. When the flash fires, Auto = ISO400. If the flash does not fire, Auto ISO will automatically readjust the exposure parameters for the scene. Since ISO was set to ISO800 during this shoot, the camera was in total manual mode. The ISO exposure parameters did not auto adjust and the image was underexposed.
Flash Did Not Have Time to Fully Recharge.
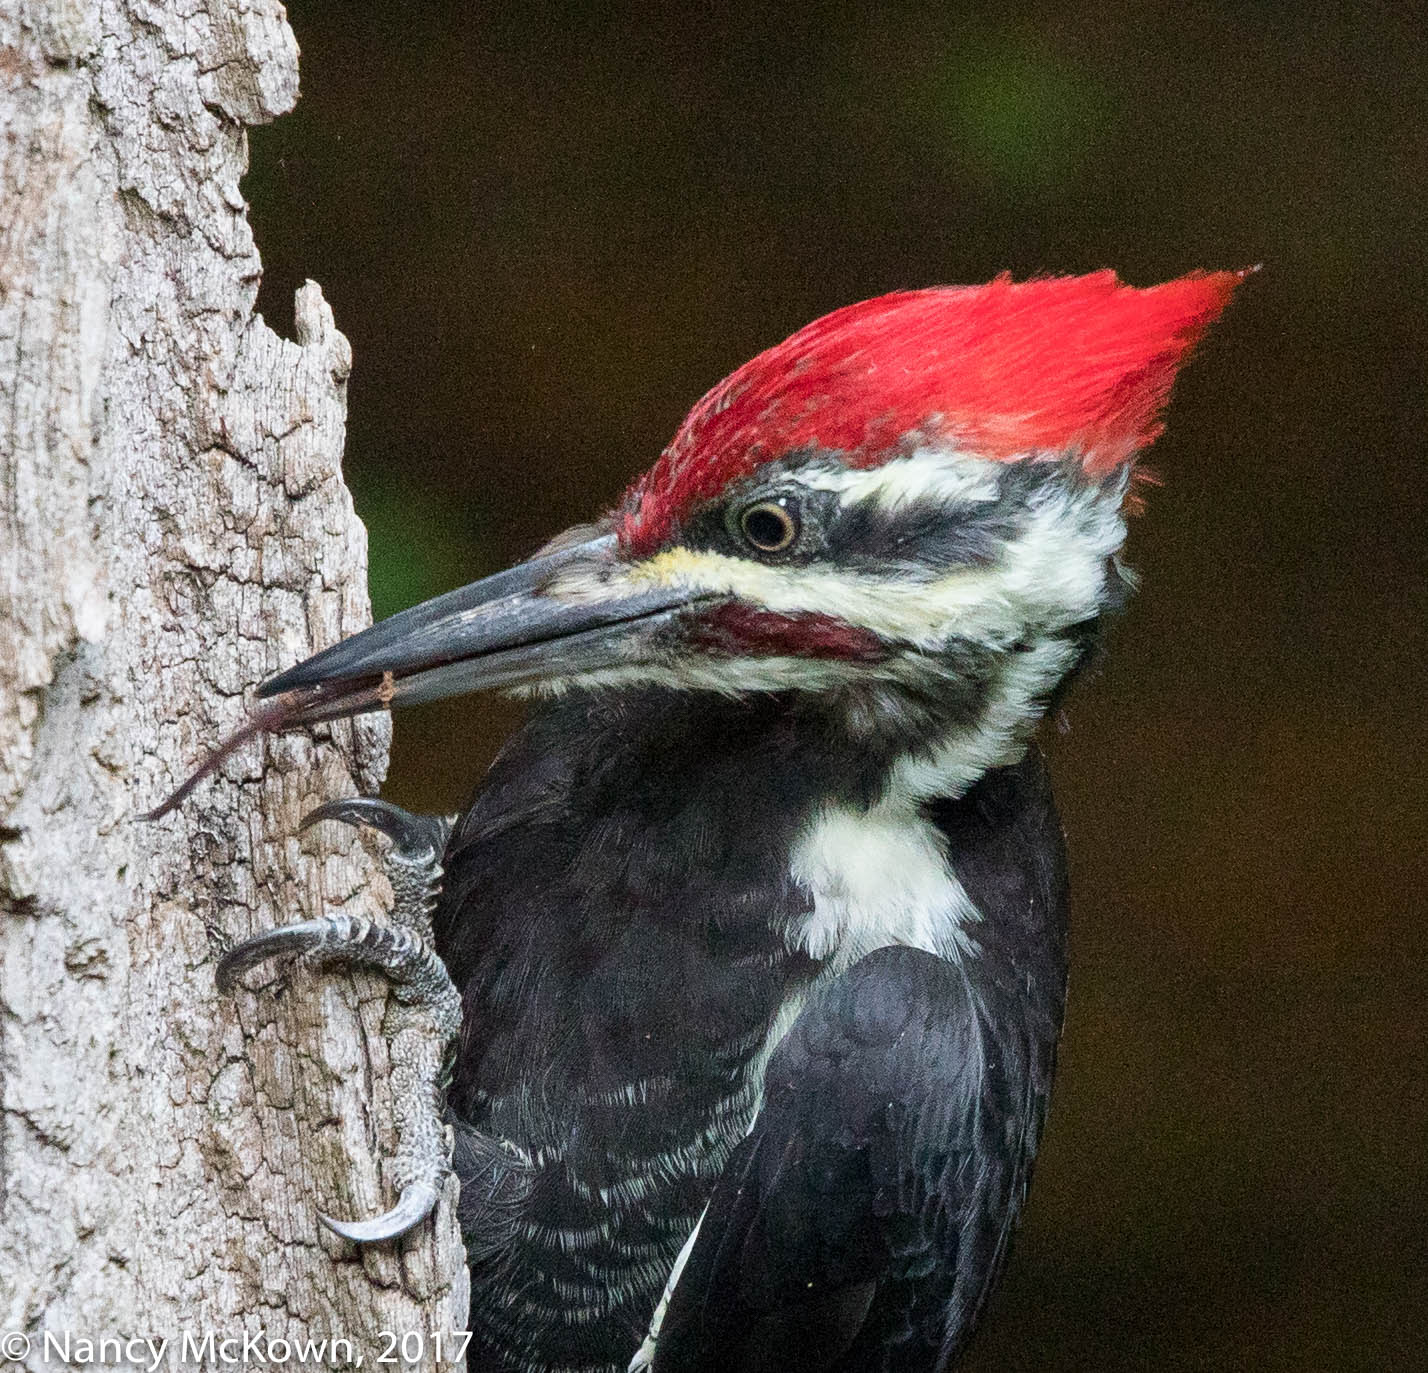
Boosted Exposure in Post Processing +3.06
Creating Noise on Bird and background.
ISO800; f/8; 1/250 Second
Fixing Underexposure Problems in Lightroom
It’s relatively easy to remedy underexposure in Lightroom by fine tuning the Brightness, Highlights, Shadows and Contrast sliders until you get the look you want. In the severely underexposed image shown directly above, I had to boost exposure +3.06 in Lightroom. I used as much of the noise reduction slider as I dared and that helped to soften the gritty look. You can see in the last image (especially if you enlarge and compare the images) that the bird’s crest lacks feather detail and the dark background looks as though it has a grainy image lustre coating applied. Evenly distributed background noise is prevalent, even though: 1) I was shooting in RAW; 2) Used a low ISO; and 3) Applied noise reduction in post. Even with my camera’s high end sensor, there was not enough data in the darkest portions of the image, forcing Lightroom to insert a good amount of amplified pixelated noise in those areas.
The image above looks OK, especially when I don’t enlarge and examine it carefully. Would the image have been as noisy if exposure parameters had been correct “in-camera” (with an auto-adjusted and sky high ISO) as opposed to a post processed exposure adjustment? I don’t think so. Dramatically pushing up those exposure sliders in post processing to achieve the right exposure balance can seriously harm the “look” of low and high ISO images. In general, getting exposure right in camera instead of relying on post processing to correct your exposure mistakes will give the grain a more consistent look, and create more pleasing images.
Cool pictures, Nancy.
he’s a beauty Nanc!