


Trusting the Camera’s Autofocus
For a long time, I did not dare to venture into the confusing maze of menus that controls auto focusing on modern DSLR cameras. I was too comfortable with the Single Point AutoFocus, thus limiting the multi-point focusing functions of the camera and using only one, center based AF point. Keeping a moving bird’s head or body contained in just one focus point is not easy, especially if the bird is bouncing in and out of the frame and you are in the limited panning environment of a vehicle. I used single point autofocus so much because I felt I could trust my bird tracking and panning abilities more than the camera’s technology to react fast and lock focus on target. That’s a mistake in bird photography.
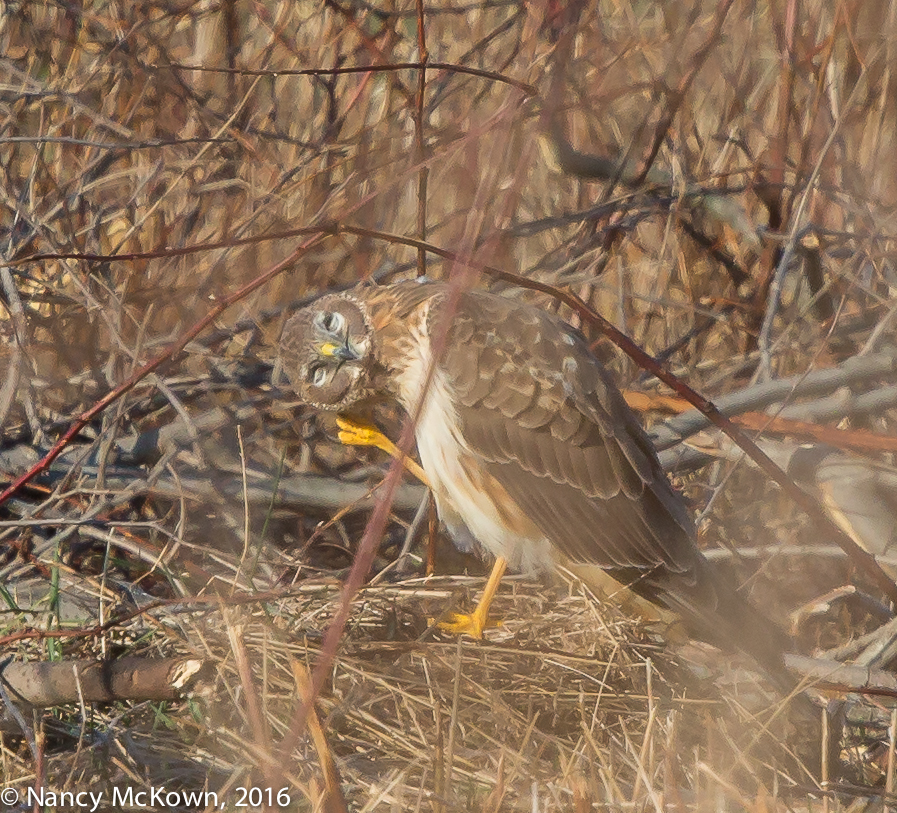
on the Ground and Tightly Surrounded by Foliage.
ISO 800; f/9; 1/1600 Second
Auto Focus Compromised From the Start
For this shoot, autofocus was compromised from the start. The Northern Harrier was embraced within tightly packed brambles and grasses. His plumage blended well with the foreground and background – so much so that there was not a lot of contrasting color to separate the surroundings from the target and help the auto focusing mechanism lock focus. Worst of all, the bird was NOT anywhere near to filling the frame.
NOTE: The distance between the bird and the lens alone was enough for me to pass up the shot. However, this bird just happened to be a Northern Harrier, a handsome and unfamiliar raptor, so I had to go for it.
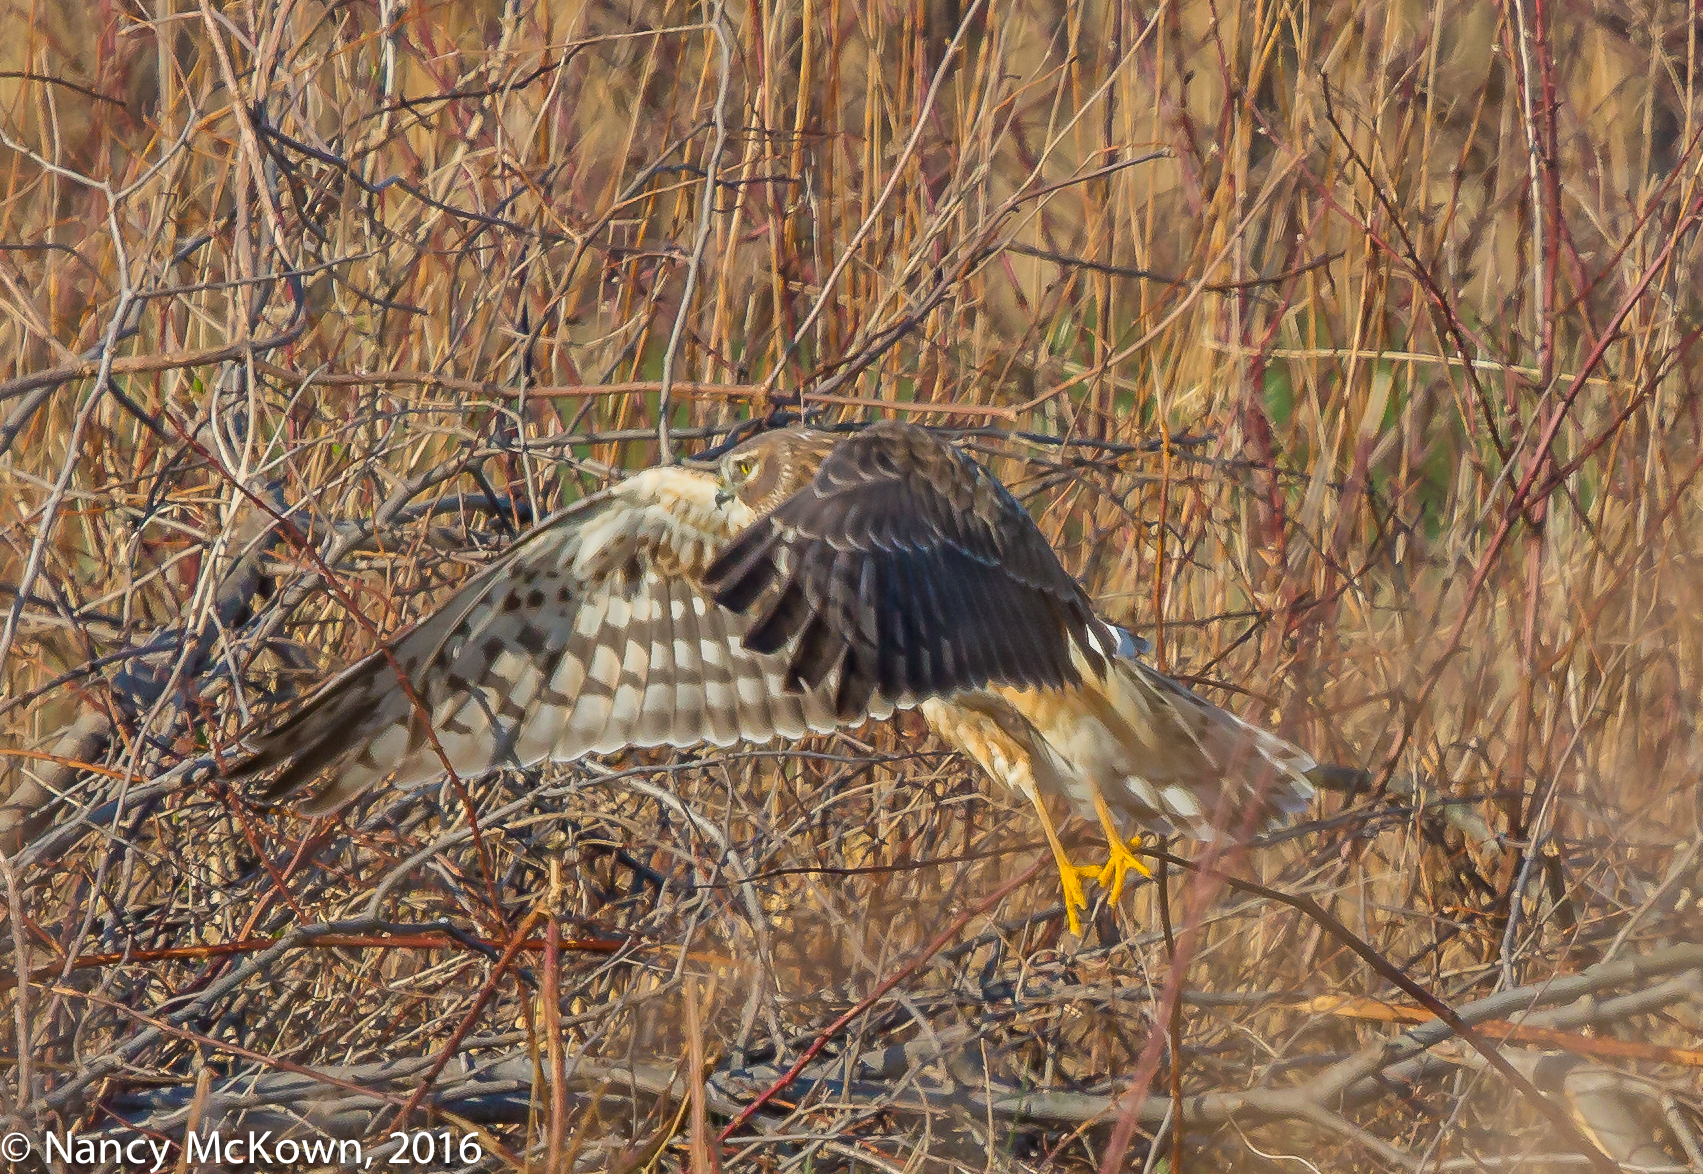
Extreme Enlargement
ISO800; f/9; 1/1600 Second
Check AutoFocus Settings
For a long time, I assumed that if the images I took looked decidedly out of focus, it was because I somehow mishandled the camera. I also wondered if perhaps my expensive 500mm lens needed to be re-calibrated or sent to Canon Service to bring it back to factory specifications. Auto focus can go wrong for a lot of reasons, both camera/lens related and user error, but one of the first things photographers should check is the autofocus settings within the camera menu system.
Different Focusing Scenarios
Canon DSLR cameras offer 6 different auto focusing choices. You must choose one option from the six (6) “case scenarios” that you think best fits the focusing challenges you will be faced with in the field. You then customize that one chosen scenario by deciding how intensely you want the following three (3) focusing functions to respond: a) Tracking Sensitivity, b) Accelerating and De-accelerating tracking; and c) Auto-Focus Point Auto Switching.
My Auto Focus Settings
I have set and re-set these functions many times on both my cameras. I have erred on the side of restricting the cameras too much for most of the bird photography challenges I encounter.
I have had the most success when my cameras are set to the Case #2 scenario. The Canon manual defines Case #2 Auto Focusing as: “The camera will try to continue focusing the subject even if an obstacle enters the AF points or if the subject strays from the AF points. Effective when there may be an obstacle blocking the subject or when you do not want to focus the background.”
Once you match a case scenario to the conditions in the field, the camera’s auto focus system will be able to evaluate the scene and automatically adjust focus so much faster than the photographer can do manually.
Within the Case #2 Focusing Scenario, I have adjusted the “behaviors” of Case #2 as follows:
Tracking Sensitivity
As I track the bird in this mode, the tracking sensitivity is programmed to stay with the original subject (set at -1). Intruding obstacles (like blowing grasses, other birds, tree trunks, irate DNR officers) do not distract focusing from the primary target. (NOTE: If you do want the camera to track focus on anything that intervenes with your target, set it to +1 or +2 .)
Accelerating and De-Accelerating Tracking
It’s almost impossible to predict where, when and how fast the bird will fly off. I set the accelerating and de-accelerating tracking to immediately respond to the movement of the bird. Mine is set to -1.
Auto Focus Point Auto Switching
Having multiple points to help keep track of your subject is very advantageous. What is even better in fast and unpredictable situations is when the camera is programmed to follow the action and immediately switch as needed to activate the best auto focus points within the range of the viewfinder. Mine is set to +1
Activate Auto Focus Points
Once you engage the lightning fast, predictive auto focusing system that best fits your birding environment, don’t constrain it by setting the camera to use only one focusing point within the auto focus area selection options. You can be cautious and use the more limited zone focusing or let loose and activate the entire focus point system. (On Canon’s more modern cameras, 61 autofocus points are available.)
Then, once your autofocus settings match your bird photography scenario, it’s just a matter of watching and waiting; and hoping that the bird will take off sooner rather than later because of your aching back and neck.
NOTE: Canon 5 D Mark III cameras allow you to quickly switch between Zone AF and 61 point automatic selection AF. See this link and for more information.