Photo of Sandhill Crane in Flight

Best Times to Photograph Wild Birds

Wild Bird Migration Patterns and Timelines

Happy New Year Everyone.

This photo of a sandhill crane in flight was taken just before Christmas. Earlier this week, I went back to the site where I took this shot to see if the sandhill cranes were still there. They were not. I then took quick trips to several other locations where the sandhill cranes like to feed. Nothing. So, I’m assuming that the last couple weeks of terrible ice, wind, snow, low temperatures and power outages convinced the SW Michigan sandhill cranes to start their migration south.

Photograph of Sandhill Crane
Sandhill Crane in Flight. A December Exit from the Cold Michigan Winter
ISO 500; f/7.1; 1/3200 second

Different Migratory Schedules for Different Birds

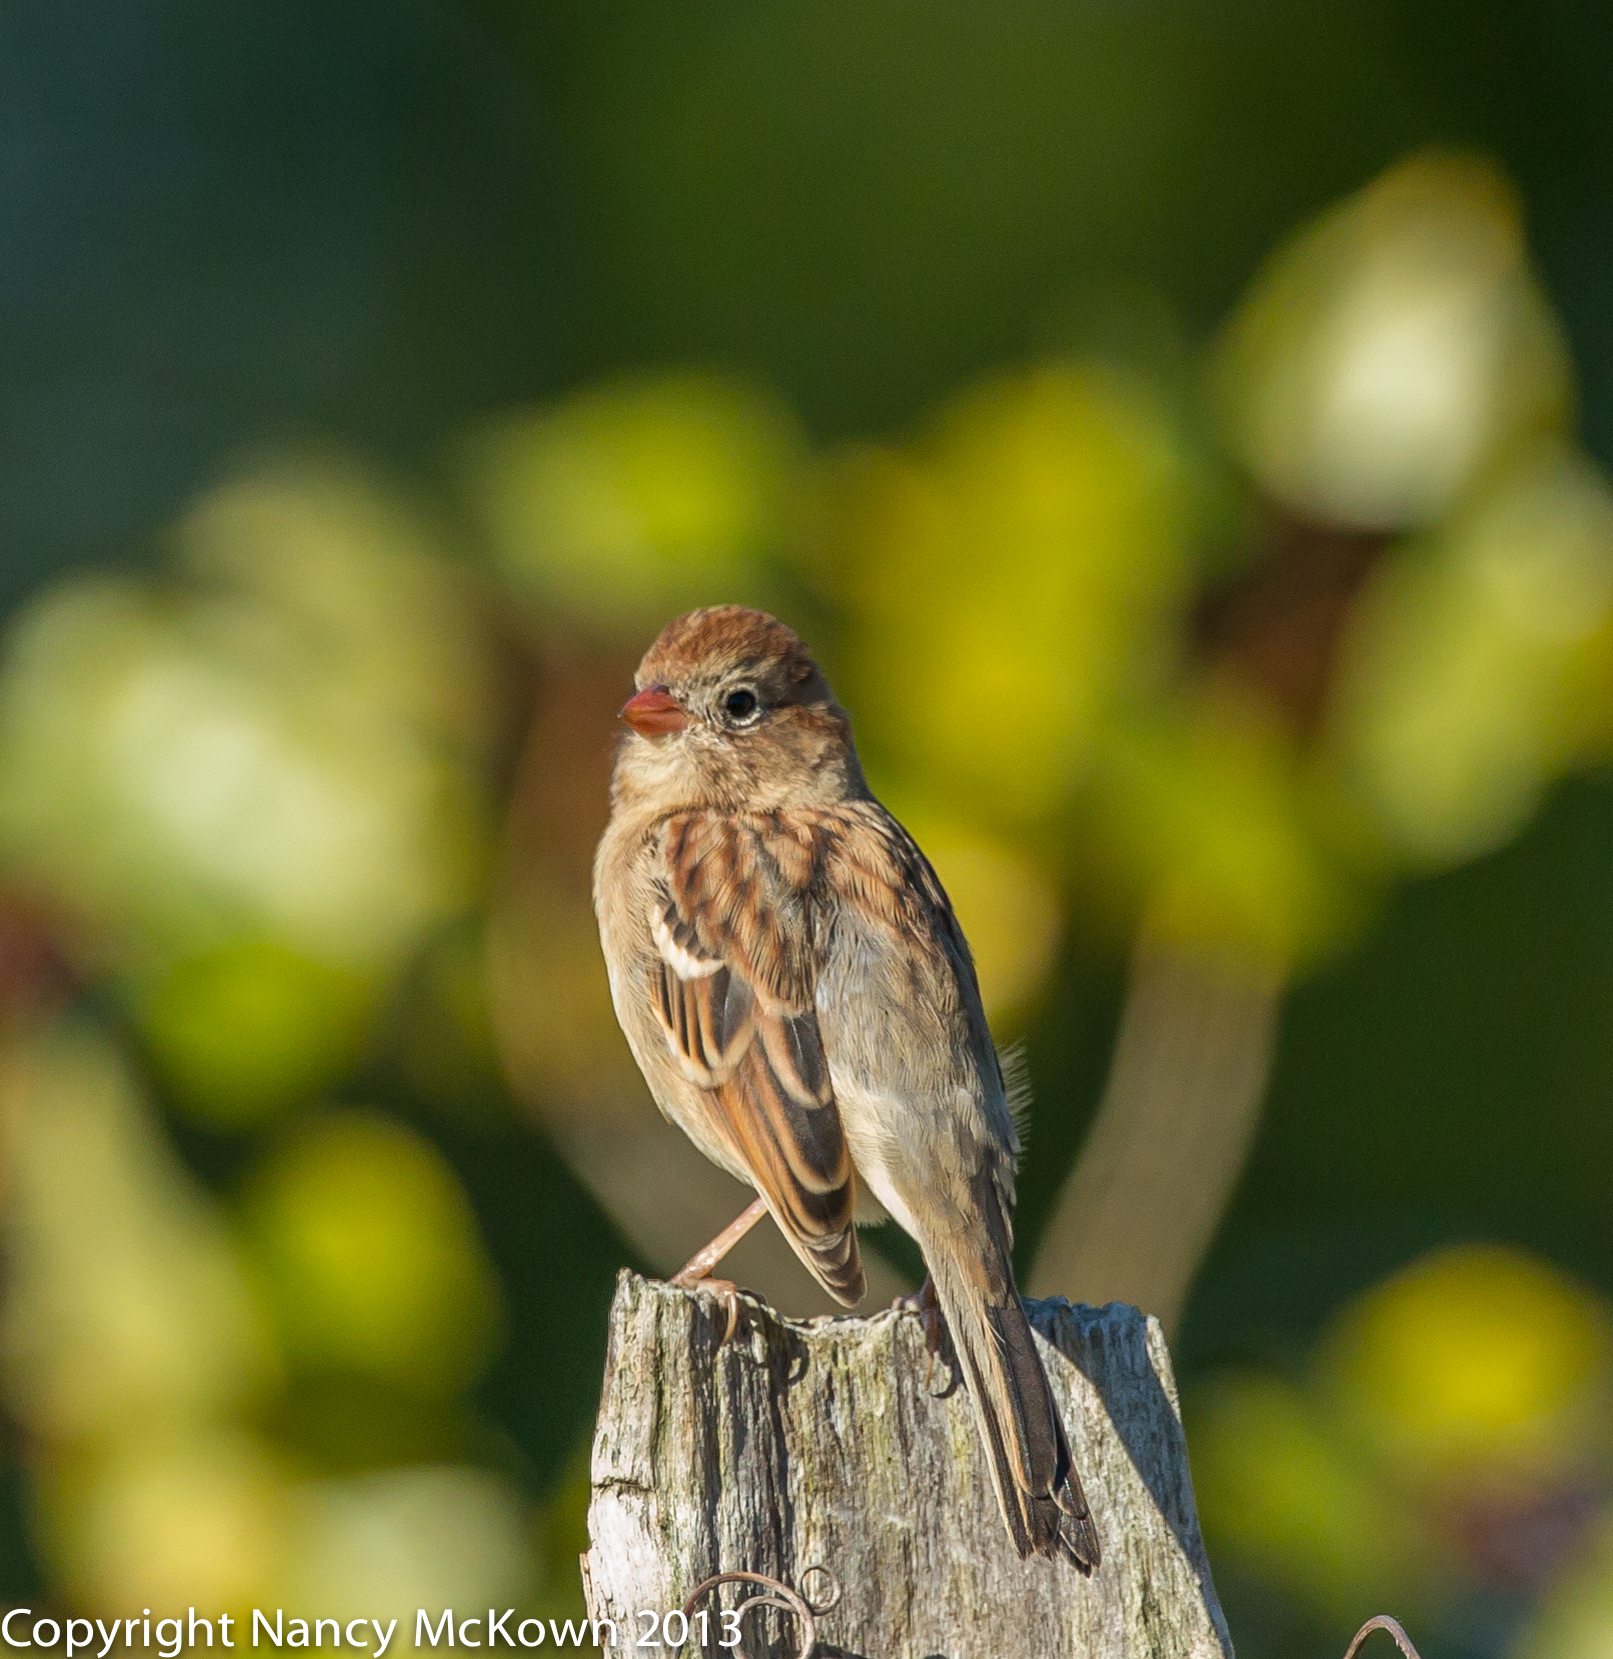
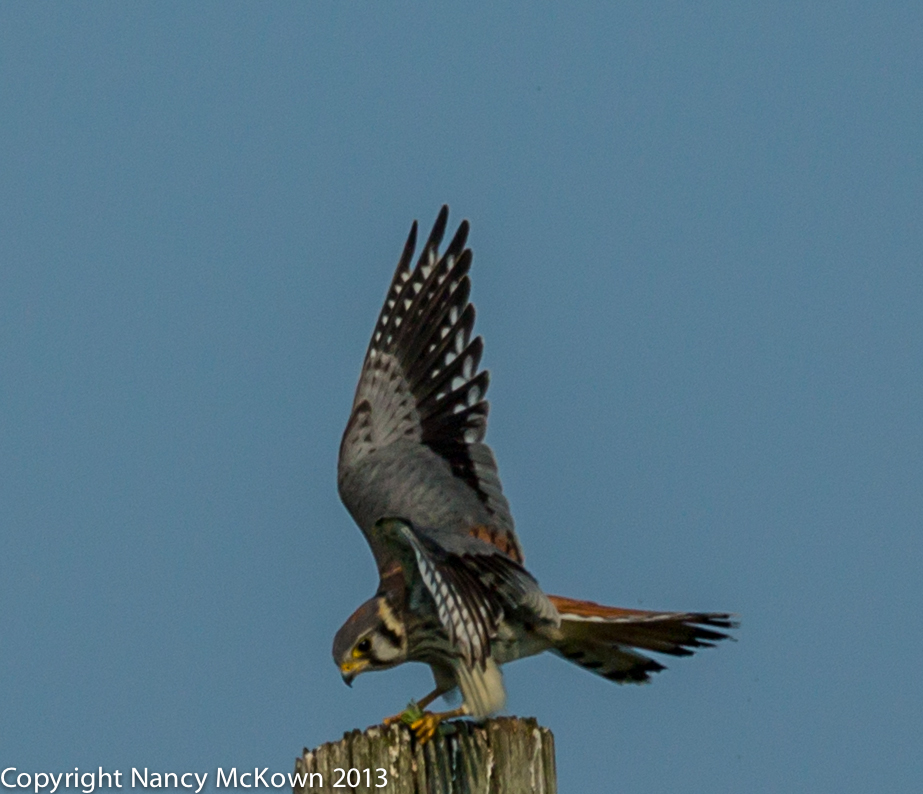
Different species of birds have different migration patterns and timelines that are predictable. My New Year’s resolution this year is to start building a bird journal listing the best times for peak spring migrations for the birds who visit southwest Michigan. No doubt, this journal will have to be revised from year to year, given weather, temperature drops, light, and rates at which the snow melts. My calculations will also have to take into consideration the amount of food /prey available as my selected passerines come through. And, of course, climate change, disease and habitat destruction impact migration numbers too.

Photographing Wild Birds At Peak Times

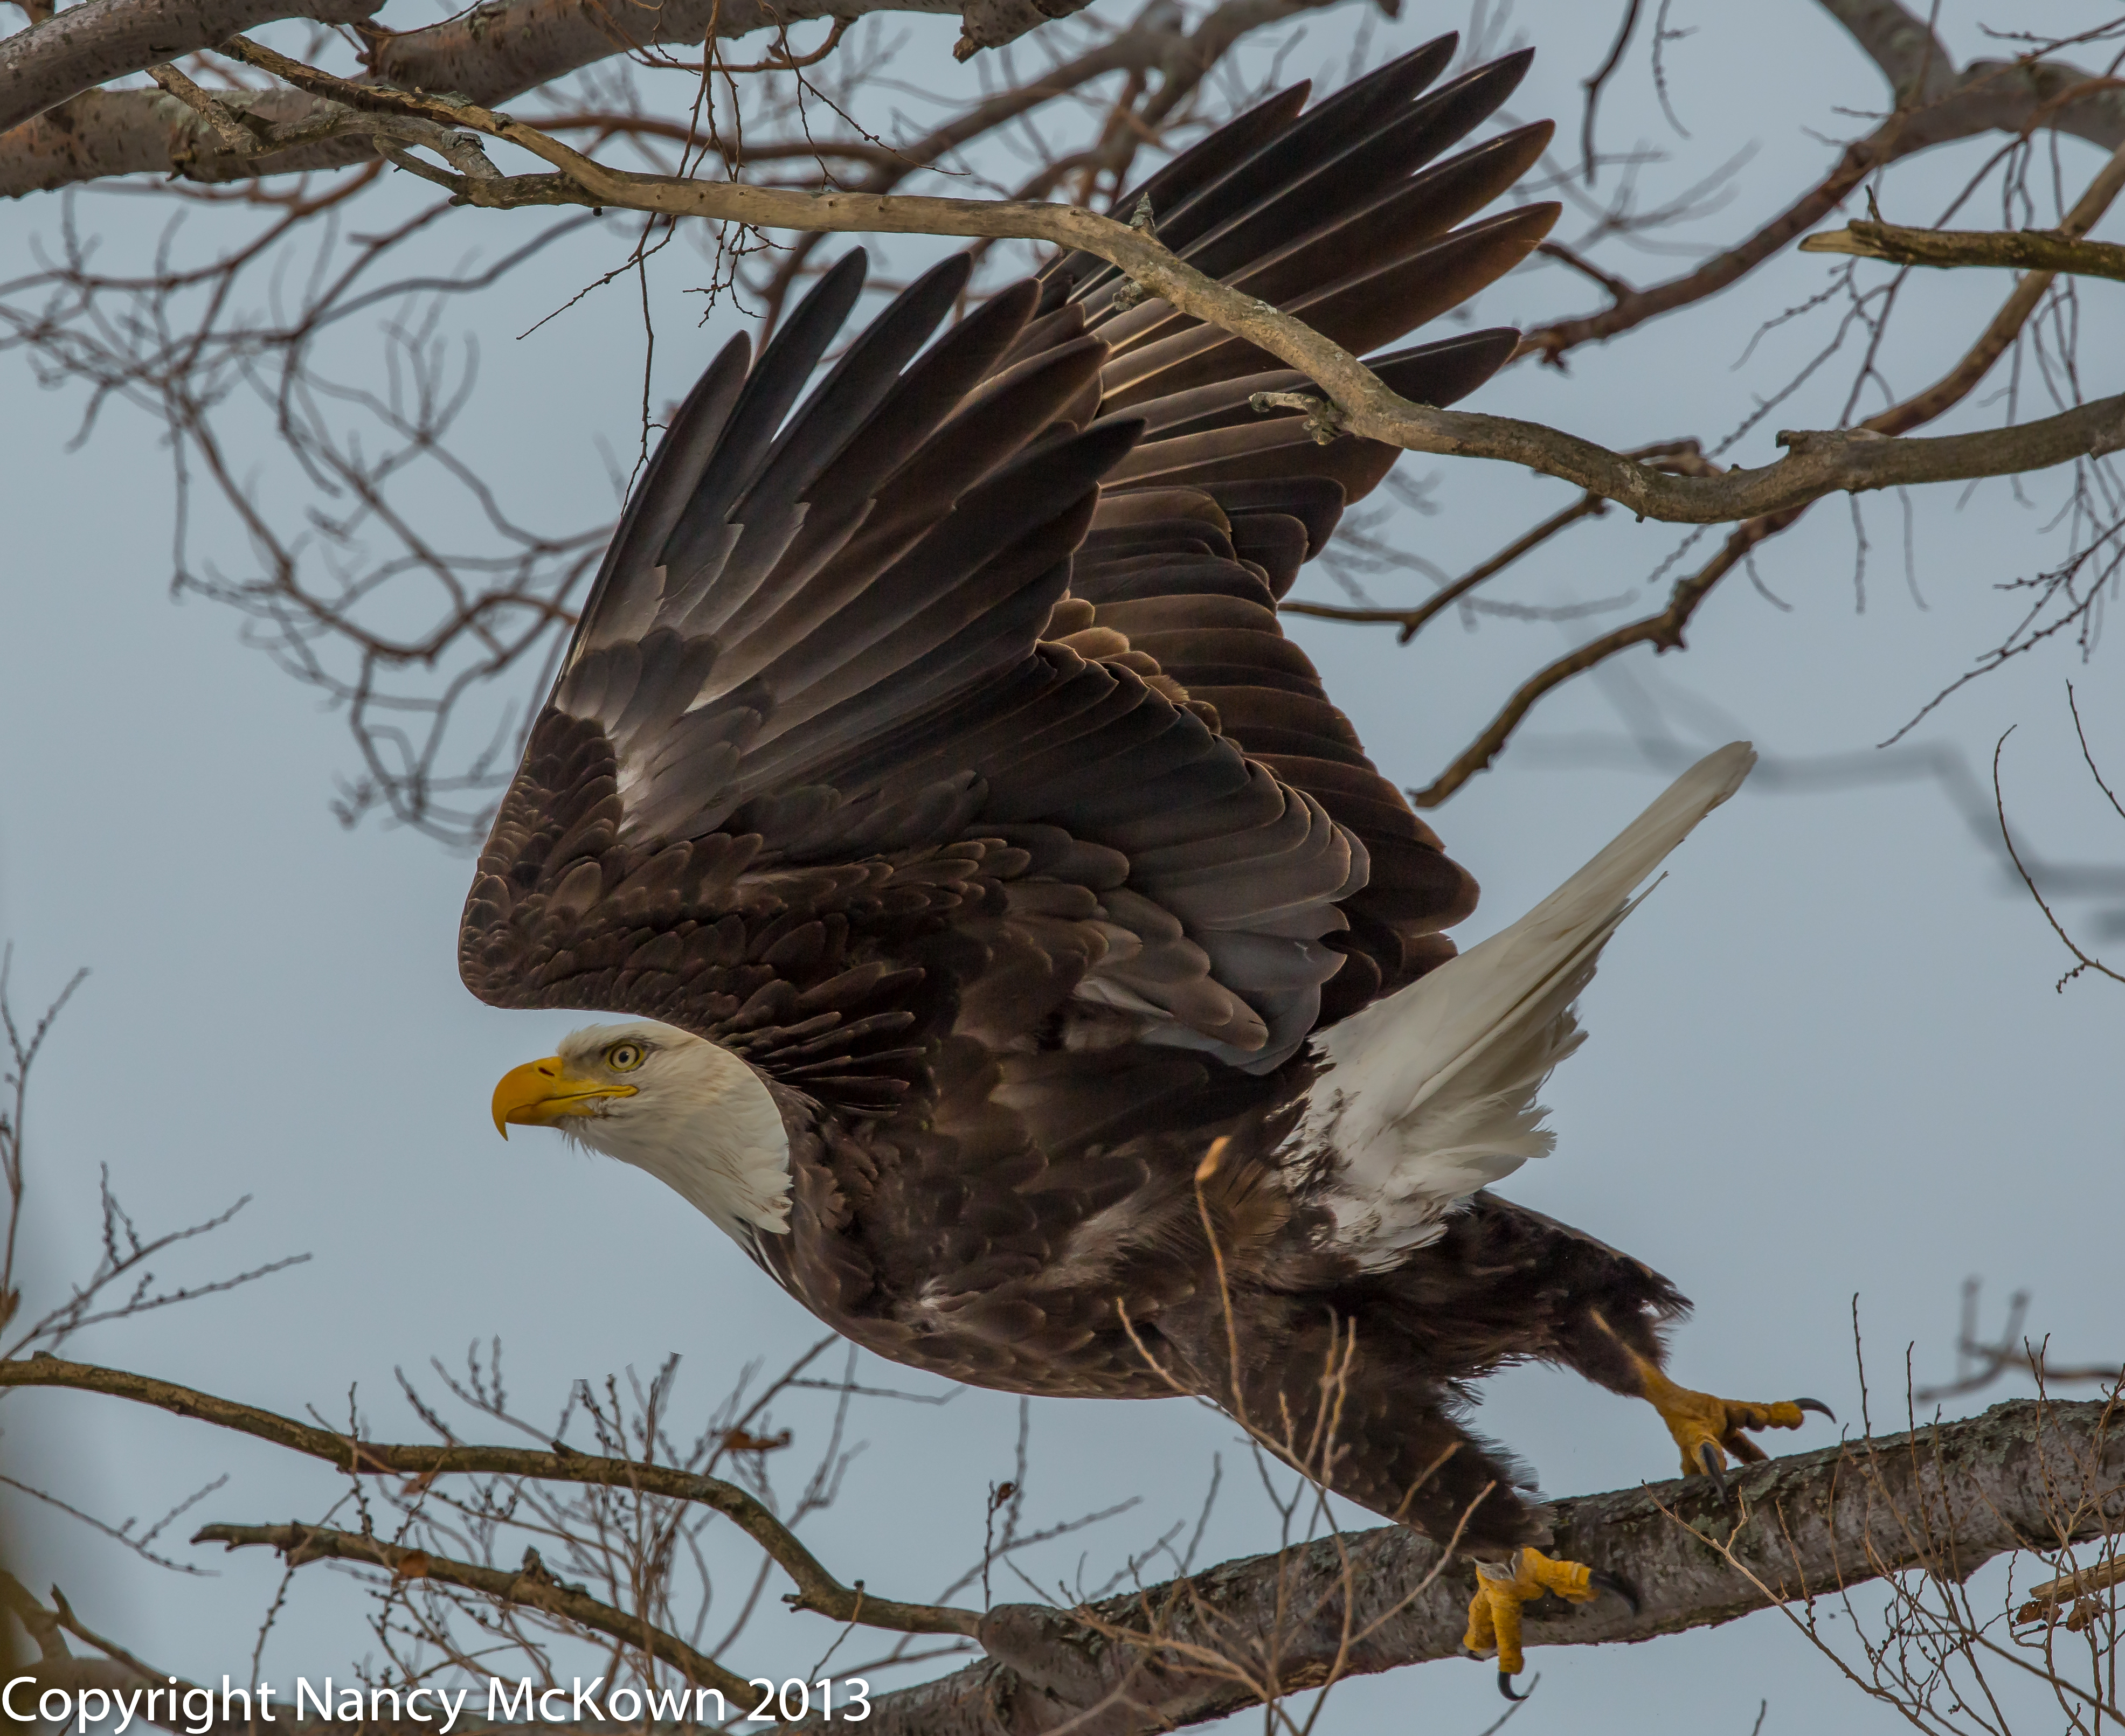
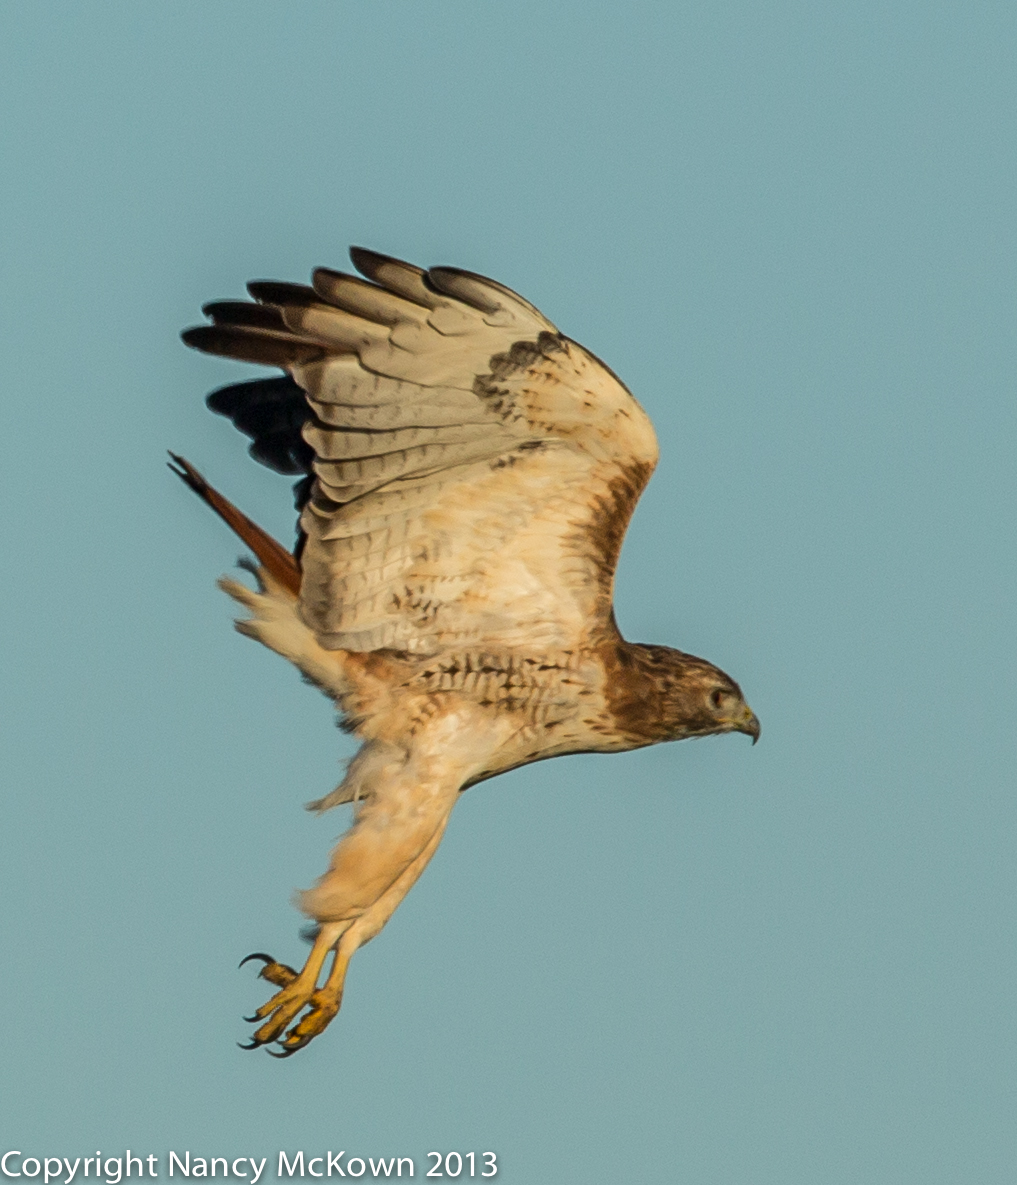
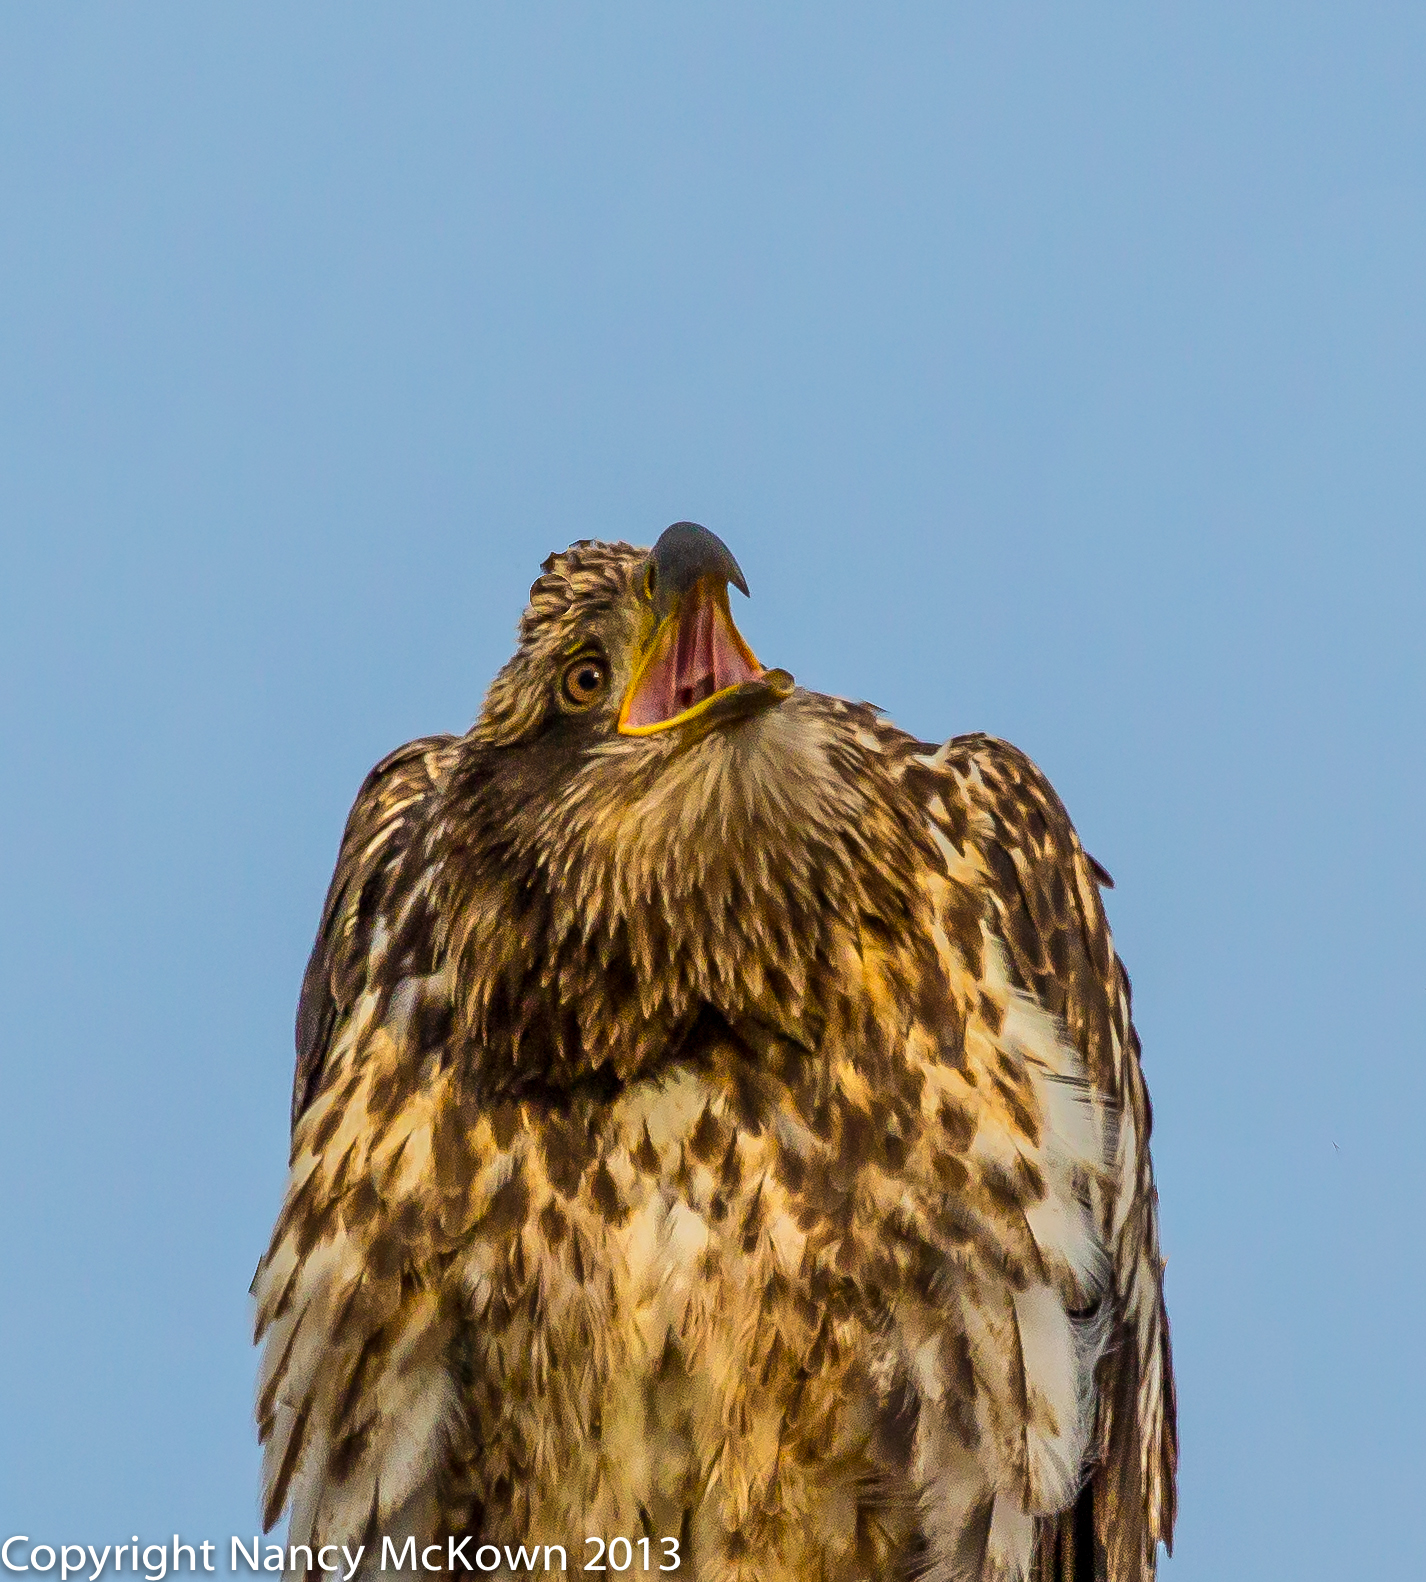
My goal is to be more productive in photographing birds at times when they are most active (fighting, mating, hunting, chick rearing, protecting, playing) and decked out in their best plumage.

Help From The Birding Community

I’m sure I’ll need help. There are lots of watchful, organized birders out there with loads of experience and serious study under their belts. The DNR and local raptor centers are always eager to help. These experts know when, where and how to look for newly arrived migratory birds. Many of them post their journals, charts and other resources on the web. Here is one example of a site that offers a wealth of migratory data sorted by states.

I look forward to this journaling challenge, and I will share my thoughts and observations when it looks like my journal might be helpful to other birders and photographers.

Wishing everyone fun and productive bird adventures in 2014.


Photo of Adult Bald Eagle

Merry Christmas to My Fellow Bird Lovers and Photographers

An Unexpected Christmas Surprise

Just a few days ago, I was lucky enough to photograph this beautiful adult bald eagle perched on a tree branch near my home. Coming across this majestic wild raptor with my camera at hand was a thrill.

Merry Christmas to all my fellow bird lovers and photographers out there. Sharing my photographic adventures with you is a privilege I look forward to every week.

Thank you for taking the time to read my blog.

Photograph of Adult Bald Eagle
My Christmas Surprise. An Adult Bald Eagle Stretching and Preening in a Tree Near my House.
ISO 500; f/7.1; 1/2000 second


Photograph of Bald Eagle
Close up of Adult Bald Eagle About to Take Off
ISO 400; f/7.1; 1/2000 Second


Photo of Red Tailed Hawk Gaining Altitude

Tracking Red Tailed Hawks In Flight Using a Gimbal Tripod Head

Tripod Head Upgrades

When I upgraded to my current 300mm, 2.8 lens, I just assumed that my current tripod head was sufficient to sturdily hold my lens and camera on my tripod. It wasn’t until I attached my camera, new 300 mm lens, and 2x extender onto my tripod and joystick head that I realized that my camera perch was too wobbly for comfort.

These days, photographers do not mount their DSLR’s directly onto a tripod. The tripod serves to make the camera stable, but the tripod head and plate are what allow the secure hold of the equipment, quick attach and release capability and the smooth panning movement photographers must have when photographing birds out in the field.

The original tripod head that was not up to the task of managing my new long lens was called a “joystick” head. I had always been pleased with this head because it allowed me to safely swivel the camera and lens in a 180 degree circle. The joystick head still works fine when the camera is attached to a medium or short focal length lens. It is just not designed to securely hold my heavy 300mm lens.

Photographers’ Equipment – Weight Considerations

Load capacity for my joystick head is rated at 5.5 pounds. A little quick arithmetic.

  • 4.5 pounds -Canon DSLR camera without lens
  • 5.2 pounds -300 mm 2.8 lens

Clearly, it was time to purchase something more suitable to support the weight of my bird photography camera and lens on my tripod.

Gimbal Heads For Photographing Wildlife

After much research, I finally decided that a “Gimbal” head would be the best tool to hold my camera securely and allow for quick and easy maneuvering of heavy lenses.

What I like about my new Gimbal tripod head:

  • Allows for tracking birds fast – both vertically and horizontally.
  • Quick release capability
  • Stays put when I’m not moving it – amazingly agile for cumbersome camera/lens equipment.
  • Holds up to 11 pounds… 15 lbs if necessary.

Getting Out of the Car to Photograph

Birds are easier to photograph when the photographer is in a car. Not only is it more comfortable for the photographer, but many birds are acclimated to vehicles and consequently less fearful of what’s going on inside the vehicle.

In order to test out this the new tripod head, I had to get out of the car, choose a good location, and setup the equipment. The Gimbal head has different tightening knobs for horizontal and vertical movement and it takes some practice to be able to turn the right knob as needed to track birds quickly.

While I’m clumsily setting up and getting use to the new Gimbal, I can see that the birds are not comfortable with all the commotion I’m making and are either flying away or thinking about flying away.

Tracking Red Tailed Hawks in Flight

Over several days, I tracked these red tailed hawks with the new Gimbal tripod head attached to my tripod. Below is a photo of a red tailed hawk watching me haul the equipment out of the car and setup the camera on the tripod. He is definitely looking kind of worried- so I tried to hurry, knowing he was about to take off.

Photo of Red Tailed Hawk
Red Tailed Hawk Looking Pretty Worried As I Struggle to Set Up the Gimbal Tripod Head
ISO 250; f/7.1; 1/1600 Second

And there he goes…..

Photo of Red Tailed Hawk at Liftoff
Red Tail Hawk on Lift Off. He Waited Just Long Enough For Me to
Shoot this Photo Using the Gimbal Tripod Head
ISO 400; f/7.1; 1/2500 second


Wind Hovering Hawk

On another day, in another location, I saw another Red Tailed Hawk facing into the wind and hovering without flapping over the Lake Michigan dune. He is clearly looking for a meal below in the dune brush. This hawk remained relatively stationary in very high winds, long enough for me to set up the equipment and practice with the Gimbal head.

Photo of Red Tailed Hawk Hovering in High Wind
Red Tailed Hawk Wind Hovering.
ISO 2000; f/7.1; 1/3200 Second

Below is a photo of a different hawk (presumably- altho maybe not), on a different day, different location, but with that same wary look. This time he can’t resist looking at me as I pan his flight with the Gimbal tripod head.

Photo of Red Tailed Hawk in Flight
Red Tailed Hawk in Flight – Looking At My Camera
ISO640; f/5.6; 1/3200 Second

First Impressions of the Gimbal Head

I found it a little disappointing that the Gimbal head will not track precisely at an angle, so if a bird is rising in the sky or coming down, the tracking is not as easy as the joystick head. I also haven’t been able to position the camera in portrait mode on this Gimbal head… at least not so far.

I finally figured out that I can position the vertical and horizontal knobs on the Gimbal so there’s just a little tension in each. This allows me to quickly swivel the camera up, down, left or right because the tension is tight enough so the camera doesn’t move without me directing it, but is still loose enough for me to track movement without additional knob adjustment.

Overall, I think this new Gimbal will be a valuable tool once I get use to it. The camera and lens feel much sturdier, and I’m less worried that my equipment will come crashing down due to too much weight.

Photo of Field Sparrow

The Benefits of Wild Bird Photography – Observing Field Sparrows

Thoughts About Photographing Sparrows

I’ve observed the behaviors and attributes of many types of sparrows while out in the field. I use to think that sparrows were nothing special, mostly familiar, common and plain. I thought one sparrow looked pretty much the same as every other sparrow. I was wrong.

Taking the time to watch and photograph birds in their natural environment has altered my perspective about what’s important. I’m more watchful and aware and perhaps more engaged in the natural world, its challenges and mysteries, at least as they relate to birding.

How to ID Sparrows

It’s easy to get confused when identifying sparrows because the differences between them are quite subtle. Since there are more than 3 dozen kinds of sparrows in North America, not to mention differences between males and females and immature birds, I use a web resource that helps me separate out the subtleties between the different species. It’s called, “What’s That Sparrow”, Part of the “Great Backyard Bird Count” project, at this website.

The Field Sparrow

The field sparrow is common, but lovely and melodic. It’s a small sparrow, with a cute little white eye ring, a pink/orange bill, forked tail, and lustrous feathers in shades of cream, brown and gray.

Photo of Field Sparrow
Field Sparrow
ISO 1000; f/7.1; 1/1600 Second


Photo of a Field Sparrow
Chirping Field Sparrow
IS0 800; f/7.1; 1/1250 Second

Unexpected Memory Disk Failure

You would think that all these feelings of inner peace, calm and tranquility brought on by the practice of photography would linger long past the nature experience and make me a better, more worth while human being.

Apparently not.

My camera’s memory disk failed – after spending 3 hours in the field and loading it with sparrow images. I was not a happy photographer.

Memory Disk File Maintenance

Photographers should know that the camera’s compact flash memory cards will eventually fail… it’s just a matter of when.

Before I go out into the field, I make sure I have clean memory disks loaded in the camera. (NOTE: My camera has slots for 2 memory disks.) The previous day, after I downloaded my images to my computer, I erased and formatted the memory disk while it was still in the memory card reader attached to the computer.

This action apparently caused a problem later when I was in the field and the camera attempted to save the images. The files were corrupted. The memory card with all my bird photographs of the day was inaccessible.

Use the Camera to Erase Files and Format your Memory Card

Erasing the camera’s memory card with my computer’s operating system instead of using my camera erase/format utility is a bad idea because of operating system compatibility issues. It’s safer to utilize the camera’s operating system to do file maintenance rather than using the Windows OS or the Mac OS.

The corrupted data on my memory card was most probably caused by 2 or more image files trying to occupy the same space on the disk. However, it could also have been a virus, malware, power failure, a unexpected system shutdown, bad drive sector, faulty memory card, etc.

So, there are lots of issues that can lead to frustration and possible disaster. During a shoot, I often do a quick check of the display to make sure the camera can access the image files. If I discover a problem, I change out that memory card pronto.

Image Rescue Software

Luckily, most of the corrupted files on my memory disk were able to be recovered and restored with corrupted data recovery software. Image rescue software is usually included when you buy your memory card. If not, free software tools to retrieve corrupted jpeg and raw files are widely available on the web.

After the images were recovered, I threw away that unreliable memory card.

All is Not Calm and Peaceful for Wild Birds

Ever out in a field full of active, chirping sparrows and getting great shots, and then suddenly, dead silence?

It’s kind of eery when everyone but you disappears. At first, I thought that the birds left because of some movement I made manipulating the camera in my car. But then I see him.

Photo of a Cooper's Hawk
Cooper’s Hawk, Lurking in the Trees, Hunting Smaller Birds.
ISO 1240; f7.1; 1/1000 Second

A Cooper’s Hawk was after the same field sparrows that I was photographing.

A good reminder that all is not calm and peaceful for Field Sparrows.

Photo of Immature Bald Eagle

Photographing A Bald Eagle Harassed By Crows

Photographing a Bald Eagle Harassed By Crows

When I see bald eagles, they are usually soaring high on the thermals or perching stoically on a branch. I have never seen these birds animated or agitated. Until now.

Crows are like sentries, constantly on guard protecting their territory. If I see them in the sky circling and cawing loudly, I know that there’s an eagle or other raptor nearby. This young eagle was reacting to seven or eight crows that were “mobbing” him in an effort to chase him out of their territory. Pretty fierce looking!

The crows appeared to be working in teams, one group of crows squawking and harassing from a close (but safe?) distance, the other group of crows dive bombing the eagle from the opposite side.

Photo of Juvenile Bald Eagle
Juvenile Bald Eagle Squawking at Harassing Crows
ISO 800; f/6.3; 1/3200 Second

Two problems surfaced during this shoot, both unavoidable. It’s been my experience that both problems are not uncommon for bird photographers.

Problem #1

Is There Time to Change the Lens?

I always like to get as close as I can to the bird I’m photographing because the farther the distance, the more sharpness suffers. Most of the time, my problem is that the bird is too far away. When I came across this juvenile bald eagle, he was perched above my head, but within good reach of the 2x extender attached to my 300mm lens.

In fact, he was a little too close. The image filled more than 50% of my viewfinder, impossible for me to get  the eagle and the crows in the same shot. Shooting from my car window, with my lens pointing up, I had very little flexibility to frame the shots.

If the viewfinder is too full – too stuffed – the resulting photo will look like it. If you’re in a car and can’t risk moving back, should you take the time to change the lens configuration, or just go on shooting?

Quick Decisions Necessary When Photographing Birds

I use the following guidelines to determine if there is time to swap out (or swap in) a different lens or extender:

  • Does the bird appear to be unperturbed with your presence?
  • Are there any other people around who may raise the bird’s level of anxiety?
  • Are there any harassing or predatory birds around that may cause your subject to fly off?
  • Is the photographer parked in a safe spot on the road?

Poof!  He’s Gone

There were 3 or 4 people walking on the road watching the scene. Loud, harassing crows were everywhere. Consequently, I felt compelled to use the lens and extender at hand and take advantage of the short window of time that the bird would remain photographable. I reasoned that it was better NOT to risk missing the shots. It turned out that there was no time. The bird was gone in less than 3 minutes.

Two Available Cameras Would Be Nice

The best (and most expensive) solution to solving the bird to camera distance problem is to have a second camera and lens available. That’s right, bring along 2 heavy, full frame, professional cameras equipped with different lenses on every shoot. Then, when you see a bird you want to photograph, you eyeball the distance and quickly grab the camera/lens that would work the best. You have to decide whether the two camera solution is a necessity, a convenience, or just overkill.  (BTW, I would love to have 2 cameras available to me.)

Problem #2

Unsightly Background Debris in Photographs

During this shoot, the eagle’s behavior was compelling, but he was surrounded with branches that seem to grow out of his head and shoulders. Given that my lens was pointing up, I’m not sure I could have eliminated much of this background debris by moving to a different spot. Plus, I would be risking a disturbance. Not much to be done, except pass up the shot. Rarely am I willing to do that.

As you can see, I was able to do some post processing repair to eliminate the unsightly branches on all but the last photo.

Photo of Immature Bald Eagle
Juvenile Bald Eagle Warning Mobbing Crows to Back Off.
Unsightly Branches in the Background Were Cleaned Up with Lightroom 5
ISO 800, f/6.3, 1/3200 Second

Adult bald eagles have bright yellow eyes; the younger the eagle, the more brown the eyes. Judging by the deep brown color of this eagle’s eyes, he is probably quite young.

Photo of Juvenile Bald Eagle
Juvenile Bald Eagle
Post Processing Branch Removal was Possible on This Shot
ISO 800; f/6.3; 1/3200 Second

The job of post processing debris removal in photography is not one that I’m good at. Lightroom 5 has some advanced tools to help with this chore.  I plan to spend a lot of time this winter getting more proficient at this task.

Photo of Juvenile Bald Eagle
Juvenile Bald Eagle Right Before TakeOff.
Way Too Much Branch Debris to Clean Up
Note that the Band on the Right Foot is Now Visible- See Closeup Below
ISO 1250; f/7.1; 1/3200 Second

Banded Immature Eagle

The photo directly above and the close-up photo below show that this young bird was banded. Bird banding is a way to study the movement and survival of birds. Federal agencies in US and Canada coordinate these activities. NOTE:  The close-up below reminds me of Rhodan’s claw in an old monster movie.

Photograph of Banded Foot of Immature Bald Eagle
Extreme Close up of the Banded Foot of an Immature Bald Eagle

One Crow Too Many

One day, one harassing crow too many will cause an eagle to snap, and that eagle will go after the crows with a vengeance. I hope I’m there with my camera to capture the action.


Photo of Wild Turkey

Photographing Michigan Wild Turkeys

Photographing Wild Turkeys – Watch The Ground Lines

Wild Turkeys are one of the easiest of the large birds to photograph. They are the biggest game birds (by weight) in Michigan. I see them often strutting around our yard and peering through our basement windows. (Looking to see if we have heat? hot water? cable?).

These wild, jumbo birds are also unafraid to fly up and plop themselves atop the platform bird feeders, spewing bird seed everywhere when they land and take off. I have to admit that seeing the large body of a wild turkey precariously balanced on a small feeder space intended for chickadees and titmice is an unexpected sight….ridiculous looking and out of place. “Like a Flamingo in the Cage of a Canary”.  Probably make a good picture.

Be Aware of Ground Lines When Composing a Photograph

I was in my car when these wild turkeys came into view. I had to react quickly to get the shots, and discovered afterwards that I was not holding the camera as straight as I could have.

A very simple but often overlooked image composition problem is crooked ground lines. Straight natural lines like ground lines help organize an image for the viewer and thus add to its appeal.

Whether you are hand holding your camera or using a tripod, it’s an easy task to find the ground lines through your viewfinder and let them be your guide to positioning your camera.

Ways to Keep the Camera Level

There are a few things you can do to help keep the camera level.

  • Take notice and straighten the ground lines by lining them up to the sides of the viewfinder.
  • Use the composition grid display – horizontal and vertical etched lines (and sometimes diagonal lines) that can be set on most DSLR cameras.
  • If you are using a tripod, level the camera by checking the bubble level. This is especially important if your tripod is not on level ground or all the legs are not extended equally.
  • If the ground lines are not straight after you take the photo, make adjustments in post processing by lining them up with a ruler tool.

Post Processing Fixes of Horizontal Lines

In each of the two photos below, there were two ground lines. I had to adjust one or the other in post processing. In the first shot, I leveled out the ground line in the background. This caused the foreground to tilt down, making it look like the turkey was heading downhill and creating the illusion of movement in the scene.

In the second shot, I leveled the grass ground line in the foreground and left the lines in the background to slope downward. This adjustment helped viewers to focused on the turkey’s head and neck.

Photo of Wild Turkey
Michigan Wild Turkey
Ground Line in Background Leveled
ISO 3200, f/5.6, 1/1250 Second


Photo of Wild Turkey
Wild Turkey Taking a Look Around
Ground Line in Foreground Leveled Out in Post Processing
ISO 2500, f/5.6, 1/1250 Second


Photo of Wild Turkey
Wild Turkey Gingerly Crossing a Waterlogged Ditch. The Branch Serves As My Ground Line.
ISO 12800!, f/6.3; 1/1250 Second

In the photo above, I used the branch as my guide to straighten the camera before I photographed the scene.

Image Composition is a Visual Language

I don’t consider myself knowledgable about art and design. It’s a visual language and I am definitely not proficient. I recently purchased an ebook that helps me better understand design principles, especially when it comes to nature photography. This guide helps me understand why I like what I like and how to better frame my photographs so they have more visual appeal. I highly recommend this ebook: Natural Design: Image Design for Nature Photographers, by Gloria Hopkins.

Waiting Until Spring

As with most birds, Spring is a fun time to photograph wild turkeys because the males are all puffed up and strutting around, doing their little turkey trot to attract the females. This coming Spring, I hope to photograph their mating behavior and elaborate plumage.

Until then, I wish you a very Happy Turkey Day.

American Kestrel

Photographing American Kestrels in Flight

The Smallest Raptor in North America

When I saw my first American Kestrel, I was enthralled. Beautiful and graceful little hawks, no bigger than mourning doves, but quick and ferocious.  A kestrel can be distinguished from other falcons by the two black, vertical lines on both sides of its face.

Foliage Background and Wingtip Clarity

My goal for this shoot was to photograph kestrels in flight with a melt-away foliage background. While blue sky is certainly prettier than gray or white, a solid color background is often less interesting than foliage or dramatic, multi-colored skies.

One of my challenges was to freeze movement on the flying kestrel, not just in head and body, but clear up to the wingtips. That meant getting close, using a fast shutter and hoping the sun would provide strong, ambient light. NOTE:  See blog post about bokeh here.

Birds in Flight, Flying Low

Avoiding the sky and the horizon line in the background of a flying bird took planning and some luck. The kestrels had to be flying rather low.

The opportunity presented itself when I saw two kestrels hunting for grasshoppers in a cut field, flying down to the ground to snatch a grasshopper and then up again to a low branch to devour it.

The background was a soft gold from cut corn stalks with some green, leafy tree branches. The sun was behind me and to my right. Nothing in the background was too busy or distracting. (Busy backgrounds could cause the camera’s autofocus to continually search back and forth in an effort to lock focus on the subject, preventing the photographer from successfully pressing the shutter. For more information on focus, see this Post.)

Moving Closer to Photograph Kestrels

Kestrels are very cautious and usually fly off if they see a human lurking about. I started photographing the kestrels from the car, but the distance between the camera and bird was too great to get a decent shot. I eventually got out of my car with my camera and tripod and moved about slowly, letting them get use to me, hoping they would not leave. I kept moving closer, slowly, about 10 steps at a time, at an angle, never coming right at them. Each time I move 10 steps, I stopped, took more shots, and moved closer again.

They were watchful, but tolerated me, until I passed some hidden but forbidden barrier. And they were gone.

Photo of a Female American Kestrel in Flight
American Kestrel in Flight – Female – Bringing A Grasshopper With Her.
ISO 1250; f/6.3; 1/4000 second
Photo of Female Kestrel in Flight
Kestrel in Flight – in Hot Pursuit of Grasshopper
ISO 800; f/5.6; 1/4000 Second

Photo of Female American Kestrel in Flight
Female American Kestrel with Grasshopper Dinner
ISO 1000; f/5.6; 1/4000 second
Photo of an American Kestrel
Male American Kestrel With A Grasshopper in His Talons. My Best Shot For the Day
ISO 1000; f/6.3; 1/4000 Second

Ambient Light Was Not Strong

Southwest Michigan is not blessed with a lot of sunny days. I did not have the light I needed to keep a fast shutter and low ISO. I ended up shooting with higher ISO than I wanted, and further away than I had hoped, and thus sacrificed tack sharp clarity.

Getting Closer to Photograph Birds

I did, however, accomplish my goals of photographing kestrels with an interesting background and freezing the action to the wing tips.

As with most shoots, I would have liked to get closer to the birds. Clearly, I’m too conspicuous, despite my attempts to move slowly and blend. It might be time to look into buying a bird blind.


Photo of Red Breasted Nuthatch

Photographing Nuthatches in Autumn

Capturing Autumn Foliage

I recently received a beautiful bird feeder from a dear friend, just in time for me to work on incorporating this year’s stunning Autumn foliage as a background in my bird photographs.

We feed the birds. The feeders we have in our yard are mostly squirrel proof, table top feeders with aluminum baffles intended to keep the squirrels off. We also put out squirrel-proof hanging feeders, made of plastic and aluminum, that hold tons of birdseed and are weight adjustable for small song birds. They are also chew proof, dishwasher safe, and warranteed forever. Both types are useful, stand up to the weather, and do a modest job of keeping away the squirrels and raccoons.

Why not photograph birds from these feeders?  Because, despite all of their attributes, these feeders are devoid of charm and consequently add nothing to the art of bird photography. With this gift, I now have a bird feeder that adds something special to a bird photograph.

Photographing Birds That Frequent Feeders

For this shoot, I decided to focus my camera on the white breasted nuthatch and the red breasted nuthatch.

Feeder birds reliably come to the feeders. They are fearless in that they really don’t care if a camera, tripod and photographer are near the feeder, as long as they are provided with plenty of food. I was able to set up the scene by hanging a beautiful bird feeder in a place that guaranteed:  1) optimal light, 2) close proximity,  3) a vibrant Autumn-colored backdrop, and 4) my comfort.      😎

Managing Bokeh

The vibrant fall colors were stunning in our front yard this year. I set up my tripod fairly close to my new feeder. The sun was at my back and the new feeder and the best color in our yard was in front of me. I strategically placed the feeder a good distance from the back drop so I could better manage the bokeh. In addition, I broke off most of the little, pointy twigs that I saw through my viewfinder and removed any debris on the trees that would detract from the scene I was trying to create. I could see that the bokeh was going to be beautiful even before I took the first shot. See this post for more on camera settings for optimal backgrounds.

The Birds Will Come

It was just minutes before the usual feeder birds (nuthatches, chickadees, and titmice) got use to me sitting on my stool behind my camera and came to the feeder. The birds that frequent our feeders know me for the most part, but are still watchful, especially when it comes time to refill the feeders.

Photo of Red Breasted Nuthatch
Red Breasted Nuthatch
ISO 2000; f/7.1; 1/2500 Second
Photograph of Red Breasted Nuthatch
Typical Feeding Behavior For Red Breasted Nuthatches – Grab and Go
ISO 5000; f/7.1; 1/2000 Second

Two Kinds of Nuthatches

Before this photo shoot, I had not noticed that two kinds of nuthatches visit our feeders – the red breasted nuthatch and the white breasted nuthatch. The red-breasted is smaller with a chestnut colored breast and a black line of feathers running through both eyes and stretching to the bird’s shoulders. We see fewer of these nuthatches at the feeders during the winter months because they often migrate. The white breasted nuthatch is a larger bird with a black strip on top of his head. White breasted nuthatches can be seen all winter long.

Both types of nuthatches move fast and furious. They are interesting to observe because, when they are feeding and otherwise flitting about, they don’t seem to care which end is up.

Photo of White Breasted Nuthatch
White Breasted Nuthatch – Fall Colors May Be Vibrant, But Plumage is Quite Faded This Time of Year
ISO 1600; f/7.1; 1/2000 Second

The beautiful autumn colors are glorious and really dominate the photos. The birds’ feathers are quite muted or molted this time of year.

Below, I’ve included a photo of the white breasted nuthatch with its spring plumage.

Photo of White Breasted Nuthatch
White Breasted Nuthatch- Taken with Bright Spring Plumage
ISO 1000; f/2.8; 1/1600 Second

Thank you, Margi!

The nuthatches and I are very grateful for this beautiful outdoor bird feeder.  I plan to keep it full of seed all winter long.

Photo of Merlin Falcon

Photographing Merlin Falcons – Equipment Malfunction

My First Merlin Falcon Sighting

Merlin Falcons are elusive and generally a rare sighting for bird photographers in Michigan. These birds are listed as “threatened” on the State Of MI endangered lists. Previous to this encounter, I’ve only seen other photographers’ photos of Merlin falcons.

So, I was delighted and very excited when, from my car, I saw two Merlins sitting pretty on tree branches overhanging the road.

Photo of Merlin Falcon
Merlin Falcon on its Migratory Path Going South Along the Shores of Lake Michigan
ISO 500; f/7.1; 1/2500 Second

I grabbed the camera that had been resting on the passenger seat and positioned it atop a neck pillow that I had hurriedly place on the car door window ledge. I powered it up and pointed it toward the falcons. Nothing. The camera would not autofocus; the shutter would not release. On the display, was a message: Err 01: Lens to Body Communication Error.

Aaack!  Not now!

Faulty Lens to Camera Body Communication

A faulty lens to body communication error (01) is one of the most common errors with Canon DSLRs. It means that the contacts and/or the mounts between the lens and the camera or the extender and the camera are not communicating.

This error might have had something to do with how I was handling my camera and lens.

I have a 300 mm f2.8 lens that weighs more than my DSLR camera. When I am out photographing birds from my car, the camera is usually resting on the seat next to me. When I see a bird I want to photograph, I get excited and tend to grab the camera however is fastest. From a weight distribution perspective, that really isn’t a good idea.

Undue Stress on Camera Mounts

Undue stress on the mounting mechanism can be associated with two behaviors:

  1. The angle at which the camera is laid to rest.
  2. How the camera and lens are picked up.

If you pick up the camera first, and let the weight of the heavy lens hang off the camera mounts, you may get a 01 error because of undue stress or misalignment on the mounts and the contacts. Big lenses come with straps and strap holders securely fastened to the lens, not the camera. They also come equipped with tripod mounts that can be used as a handle to grab the lens and camera.Both the lens strap and the tripod mount are smart, quick ways to pick up heavy camera equipment.

So, when you’re out in the field, in your car, take a moment to think about how you laid your camera/lens to rest, and how you will pick it up to get ready to shoot. Rest the camera strategically on the car seat so that 1) the heavy lens does not put undue stress on the camera mounts, and 2) the camera is positioned to grab safely and quickly.

A Quick Fix for the Canon Err 01

Luckily, I was able to quickly fix the error by detaching the 300 mm lens. This simple procedure involves twisting the lens off while holding down the lens release button. Then I re-attached it. Communicating was restored and the camera operated normally.  And, the merlin had not flown away.

Photo of Merlin Falcon

Merlin Falcons Migrating South

The two merlin falcons were on Lakeshore Drive in Saugatuck Twp., most likely following the Lake Michigan shoreline on their migration journey south. Both had cream and brown feathers, probably females or juveniles. Neither bird seemed fearful, despite all the commotion in the car, and they stayed perched on the tree limb for a good 10 minutes. A godsend for an easily excitable photographer like me.

Photo of Merlin Falcon
Merlin Falcon, Acting Like She Might Take Off, But She Did Not.
ISO 500; f7.1; 1/2500 Second

Both of the birds were perched on a dead tree and both made multiple gestures indicating they might be taking off in flight, but they did not. Sadly, when they did take off, they flew away from the camera.

Photo of Merlin Falcon
Both Birds Held Up Their Talons For The Camera.
ISO 500; f/7.1; 1/2500 Second

Photographing Rarely Seen Birds

One of the best things about photographing birds is coming across a rarely sighted bird that is close enough and is not immediately flying off. The last thing you want to happen is have your equipment fail. I was lucky that my Err 01 error was easy to remedy.

I have always handled my photographic equipment gingerly, but now I will pay more attention to how the weight distribution impacts the connecting electronics.


Photo of Immature White Crowned Sparrow

Uncommonly Beautiful Sparrows and The Wonders of Digital Photography

A Trip Down Memory Lane

Go back to using film? Are You Kidding Me?!

I’ve owned an assortment of film based, single lens reflex film cameras; Pentax, Minolta, Nikon, and Canon. I don’t miss those days or those cameras at all.

The photographs of the white crowned sparrows and song sparrows below are good examples of wild bird images I simply could NOT have captured using film photography. These digital images represent the speed, convenience and quality that is possible with today’s digital sensors. Instant gratification, without the waste (of time, money, opportunity).

Photograph of an Immature White Crowned Sparrow
An Immature White Crowned Sparrow.
ISO 400; f/7.1; 1/1250 Second

The Old Days of Film Photography

Here are just a few things I remember about the bad old days of film photography.

  1. Much of the time, it took so long for the quality labs to receive and then develop the images and ship them back to me, that I forgot what I photographed.
  2. If I photographed something I thought was exciting, when I finally did see the developed image, I was usually disappointed. With film photography, it was not possible in one setting to check the image, make adjustments and re-shoot.
  3. I remember choosing and purchasing a film for its light sensitivity (ISO), and making sure that I manually set the correct ISO on the camera, and then wasting half of the roll because the light changed and I needed to put in another roll of film with a different light sensitivity. It was either that, or carry around 2 or 3 SLR cameras loaded with different speed film.
  4. I remember choosing between print and slide film, and wishing I had chosen whatever I did not have in the camera.
  5. I remember threading the film very carefully and then snapping the back shut and manually cranking the roll of film forward, hoping the threading didn’t jam and waste the shots and the film.
  6. I remember that I had no viable plan for long term organization, storage and backup. I now have a bunch of  faded and curled nature photos in some corner of my basement, some loose, some in albums. All forgotten.
  7. I was just thrilled when I bought a film camera that advanced the film automatically once it was loaded and automatically set the ISO. That was considered progress back then.
Photo of Mature White Crowned Sparrow
Mature White Crowned Sparrow
ISO 640; f/7.1; 1/1600 Second

What’s Post Processing?

Unless you had access to a darkroom, there was no user post processing with film, only what the lab developed and sent back. For all practical purposes, you had no creative control after you rolled up the film and removed it from your camera. After a while, the developing wait time was not as long because the automatic processing machines took over in the Walmarts and the Targets, and your film was developed while you waited. In most cases, you sacrificed quality for a quick return of your images.

Note to Self

What a complainer I am!  Think what nature photographers had to deal with 100 years ago…. 150 years ago. OMG.

That acknowledged, I must continue.

Film Cameras Still Available

You can find those old film SLR cameras on ebay- $20-$30. I have an old Pentax film SLR sitting in my closet.

When digital cameras first came out, they could not compete because film images were so much better, especially when using the medium or large format cameras. But digital image quality has improved drastically (and is still improving) with digital sensor and software advances.

The Advantages of Film Photography

It is true that film does produce a different “look”, although modern post processing software can create that same look. Some photographers prefer using film over digital – and now pay a premium to buy and develop film. These devoted souls may want the quality that film can provide for wall size prints, and they may enjoy the nostalgic feel of a film camera.

Digital Photography is Truly Revolutionary

I will never go back to film cameras.  Never Never Never.

The resources that can be brought to bear using digital photography are truly revolutionary, for all levels and all ages of photographers, for all matter of uses. Most work fast and in very low light. As with most things, the image quality depends, in part, on how much you pay for your DSLR and lenses.

Simply put, film photography can not compete with the fast, easy, and free advantages that come with using digital cameras. Carrying a digital camera phone is second nature to almost everyone these days. Capturing memories is easy and convenient and the results can be instantly shared, organized, stored and backed up on the web. Digital photography makes blogging possible. And, if you want a hard copy, beautiful photo books worthy of coffee table display can be put together in minutes.

Finally, there is so much less waste and pollution from harmful and toxic chemicals because you don’t need to process the photos to view them.

Common Yet Amazing

The widespread accessibility and use of quality digital photography are as common and as amazing as these sparrows. (song sparrows below and white crowned sparrows above).

Young Song Sparrow Photographed on Top of a Corn Stalk
ISO 640 f/6.3; 1/2000 second.
It was a cold morning at the west end of the Allegan Forest (38 degrees) when I photographed this little Song Sparrow. I love the poofed up feathers – his effort to keep warm.
Photograph of Common Song Sparrow
Wet Song Sparrow Enduring a Very Cold Morning
ISO 400; f/6.3; 1/1250 Second

What’s to Come in Digital Photography?

I’d like my camera and long lenses to be lighter and smaller please.

Perhaps this request is not so far away.  See  this link.  It will take you to an article in “Photography Life” by photographer and writer, Nasim Mansurov‘s.  Nasim’s writing is relevant to this week’s blog posting in a couple ways.

  1. He is interested in exploring film photography, so he may have some powerful arguments about the pros of film photography, and
  2. He has done his research and is well informed about what the future might bring regarding digital imagery.

“Photography Life” is an excellent resource for photographers. I highly recommend it.