Photo of Eastern Phoebe

Photographing Eastern Phoebes

Photographing Eastern Phoebes at the Local Park

Eastern Phoebes are flycatchers found most often in semi-woody areas. They build cup shaped muddy, grassy nests in protected areas (like my porch). Despite the mess they make, I think they are beautiful song birds and love having them around.

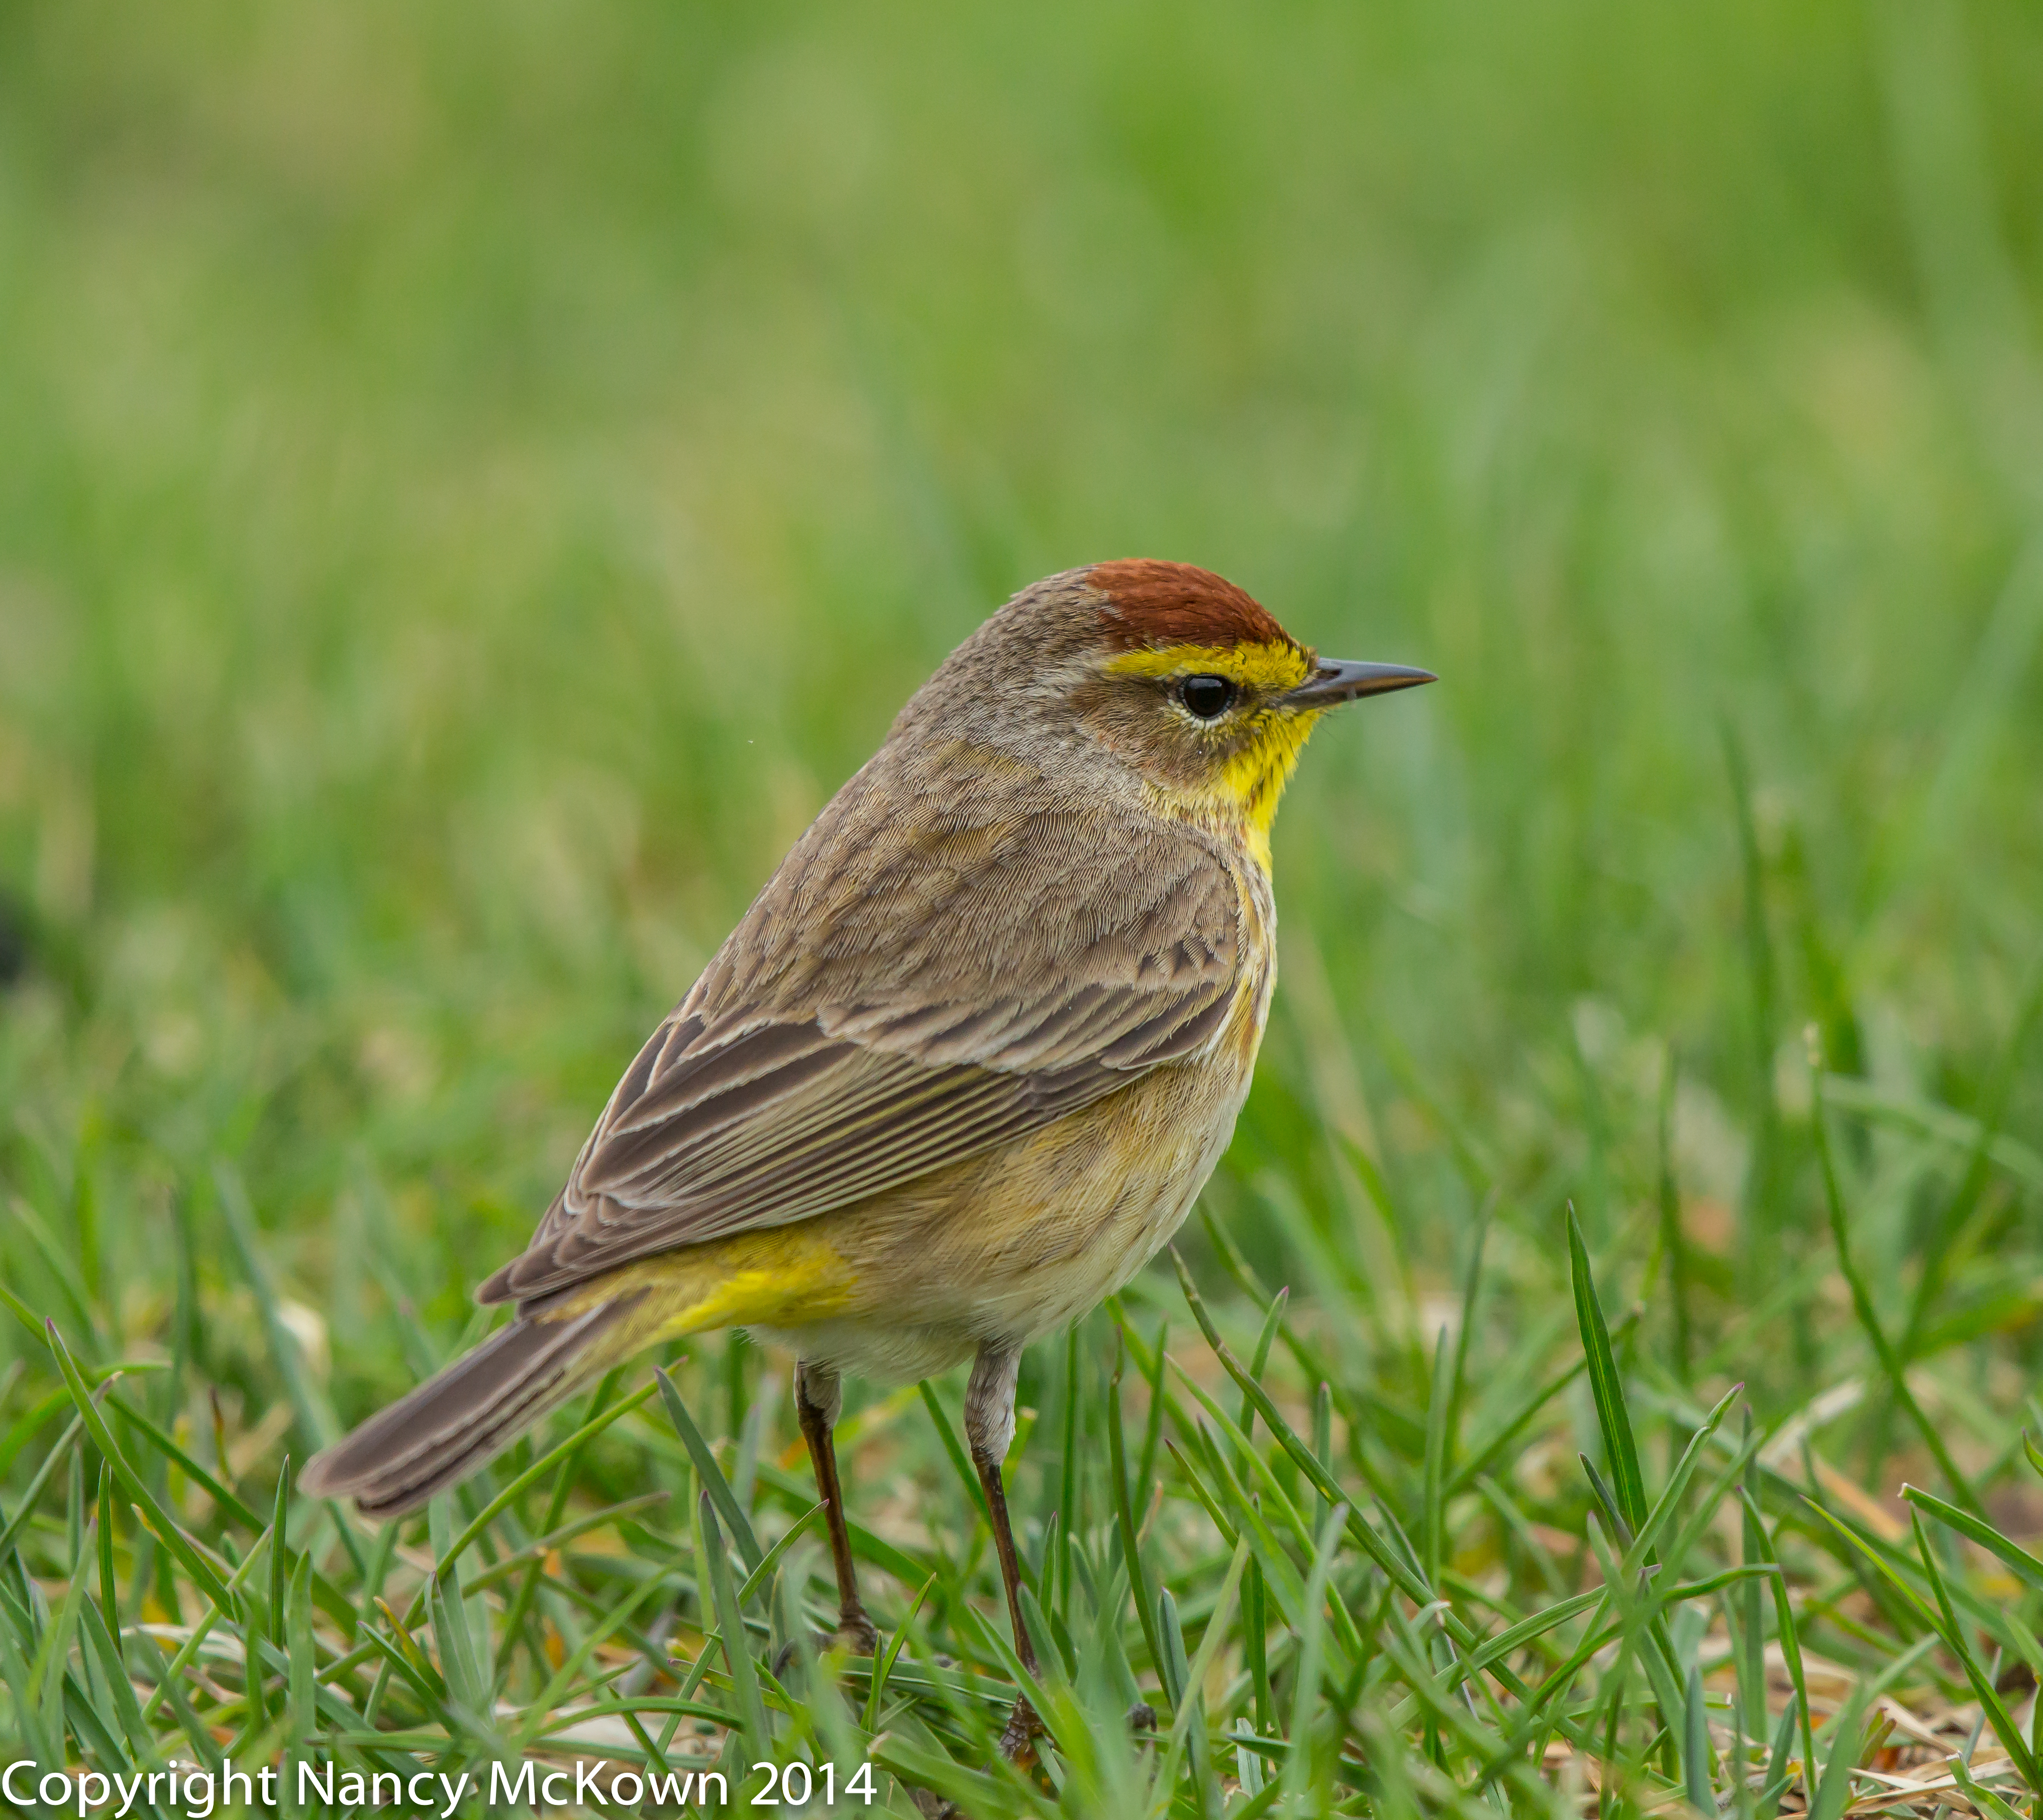
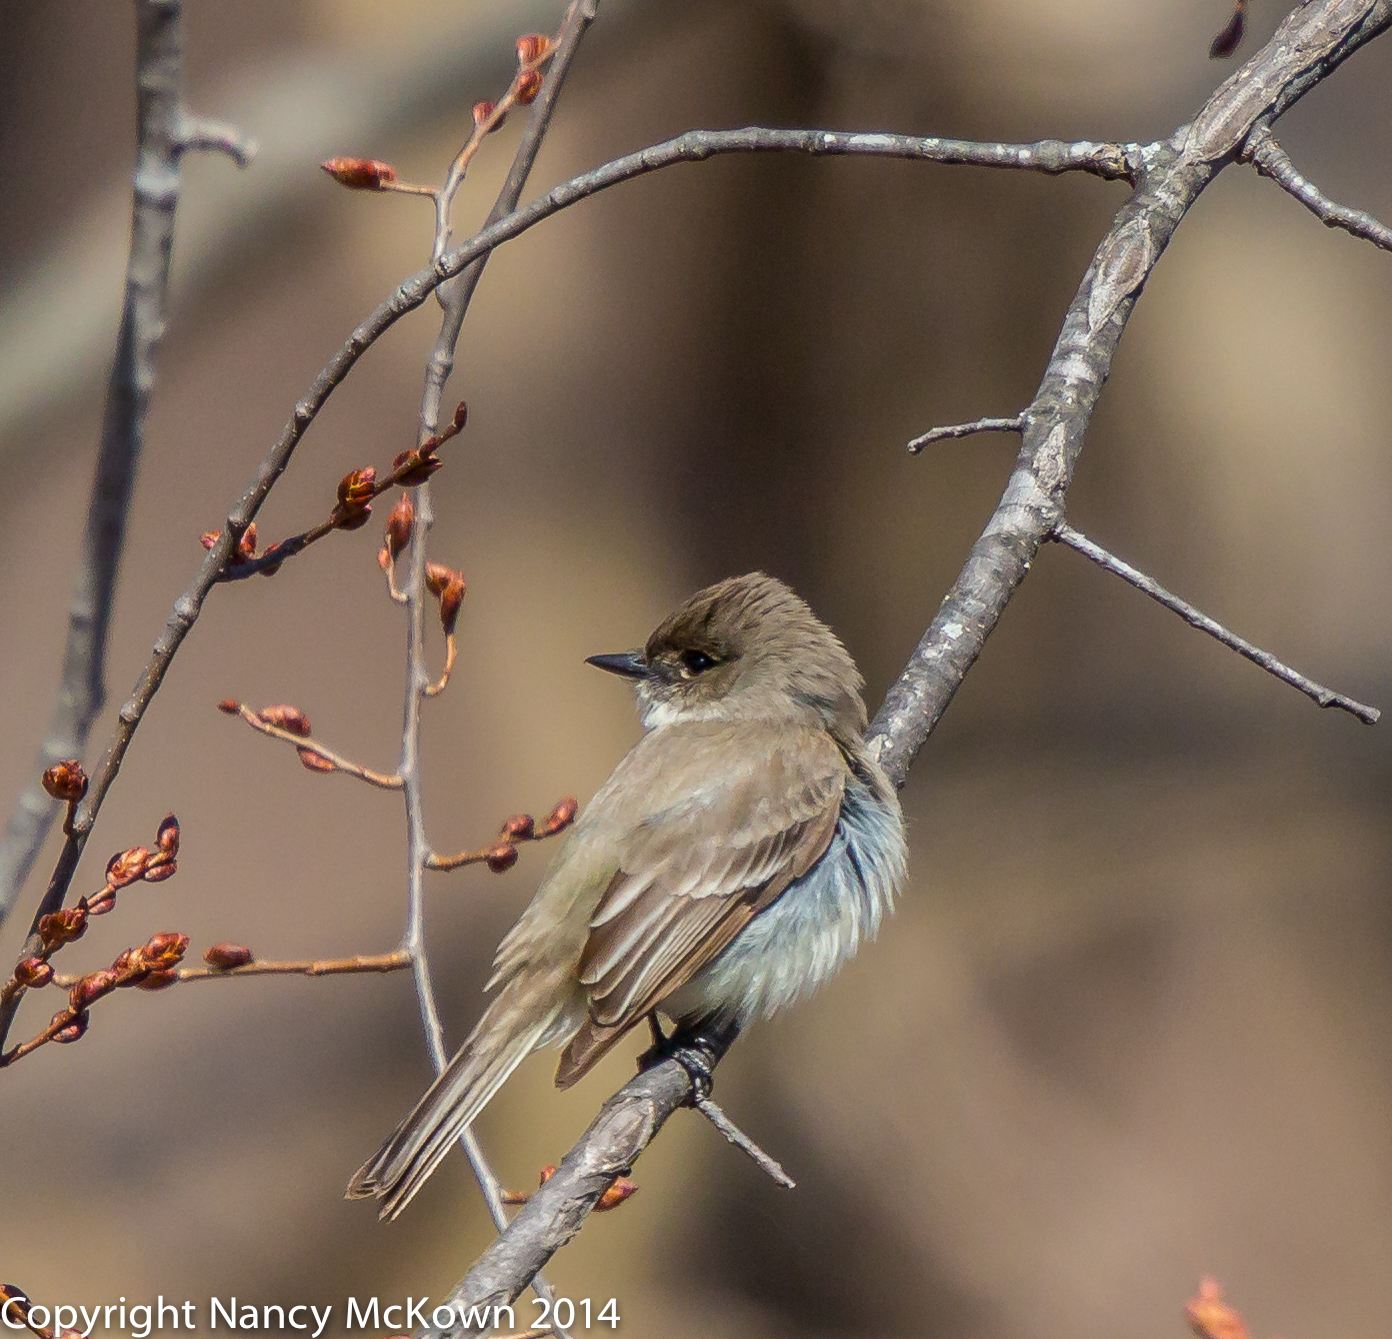
Phoebes do not visit the feeder, but are still rather easy to photograph because they often return to the same perch after diving down to the ground for insects. The subtle brown, gray, yellow and white coloring of their plumage is lovely.

One interesting note: The eastern phoebe is one of the many bird species often successfully parasitized by brown-headed cow birds. Cowbirds, known as brood parasites, do not raise their own young. Instead of chick rearing, they use their time to continually produce eggs, which they then lay in other birds’ nests.  For more information about how this survival strategy works for the brown headed cowbirds, and the toll it takes on the survival of eastern phoebes and other species, see this link.

Photo of Eastern Phoebe
Eastern Phoebe in a lovely pose.
ISO 640; f/8.0; 1/2000 Second

Tripod Support

I let my tripod do the heavy lifting when I photographed these eastern phoebes. The Manfrotto tripod I use is sturdy and provides steady support for my camera and long lenses. It’s collapsable, with three one-step fasteners on each leg for fast assembly and teardown. The center post (upon which the tripod head rests) also moves up and down, giving extra height when needed. With my gimble tripod head attached, maneuvering the camera and lens is a breeze. For more information about using the gimble head, see this post.

My only complaint about my tripod is its inability to get my camera situated close to the ground. The leg segments are a bit too long and do not spread out enough to lie flat. The center post can be removed, but the tripod still does not get down close enough to the ground. If I need to photograph from a low viewpoint, I find something, like my beanbag or other support on which to rest the camera.

Children Learning About Birds

I noticed a group of school children at the small park where I was photographing the eastern phoebes. They were exploring the pond, chasing the geese on the edge of the water, and following their teacher’s instructions to look to the sky, find a bird, and track its movements. The kids were doing their best to photograph the birds they saw, sharing 3 or 4 point and shoot digital cameras. The teacher had a tablet and was helping the children ID the birds they saw. Looked like great fun. Eventually, the students noticed my camera, tripod and me (in that order) and were delighted to learn that I was also watching and photographing unfamiliar birds.

Photo of Eastern Phoebe
Feathers Puffed Up to Keep Warm, the Eastern Phoebe returns to Michigan in March to Breed.
ISO 1000; f/8.0; 1/2000 Second

Birding Web Resources for Children

There was definitely less bird activity at the park after the kids showed up, but I still had a productive day and I enjoyed watching the kids explore. I had a chance to talk with the teacher about what she was trying to accomplish on this outing. She referred me to several web resources that help children to learn about birds. Of course, there’s nothing better than getting the kids out to observe first hand and think about the wonders around them.

Two birding web resources for children that that I think are worthwhile are:

#1) Citizen Science

#2) BioKids


Photo of Palm Warbler

Photographing Palm Warblers and Discovering Subspecies

Palm Warblers Passing Through Michigan

Just when I thought that most birds were done traveling through Michigan to their northern or western nesting grounds, I found and photographed another spring traveler. Western palm warblers migrate from their wintering grounds in the Caribbean and Southern United States to their breeding grounds in Canada.

Photo of Western Palm Warbler
Western Palm Warbler Feeding in the Grass.
ISO 1250; f/9.0; 1/2000 Second

Photographing Birds Without Clutter

I came across these rusty capped, tail wagging song birds at a local park. They seemed unconcerned with the human activity around them as they bobbed their tail feathers (to show off their yellow feathers under tail) and foraged for food in a wide open, grassy picnic area. I was photographing the palm warblers from above, with the lens resting on the car door. The lens had no problem locking down focus as they hopped and ran in the grass. No branch clutter and hidden hidey-holes were around to spoil my fun. The sight line was free and clear in case the birds decided to fly off.

Photo of Western Palm Warbler
Western Palm Warbler Darting To and Fro in the Short Grass Making it Relatively Easy to Lock Down Focus.
ISO 1600; f/9.0; 1/2500 second.


Photo of a Palm Warbler - Eastern Yellow SSP
Palm Warbler – Eastern Yellow Subspecies
ISO 320; f7.1; 1/1000 Second

Two Subspecies of Palm Warblers

Bird ID becomes even more complicated when you come across a bird you thought you could identify, but appears somehow different. Last September, 2013, I photographed the eastern yellow subspecies palm warbler in the Allegan State Game Area. (See above photo.) According to experts at WhatBird, this subspecies is not commonly found in SW Michigan. Both the eastern and the western subspecies sport (and pump) their bright yellow under tail feathers. The main difference between the two subspecies is that the breast plumage of the eastern yellow subspecies is more distinctly yellow. The western palm warbler is browner and has more pronounced streaking on the breast. (See photo below.)

Photo of Western Palm Warbler
Compare this Western Palm Warbler Breast Feathers with the Eastern Yellow Subspecies.
ISO 1600; f/9.0; 1/2500 Second

Subspecies Abound

A species of bird, like the palm warbler, can be divided into one or more subspecies if a group is distinct enough (to formally give them a name), but not so different as to be categorized as a different species of bird. Migration habits and geographic location are factors that impact the creation of subspecies. Size and coloration are the major characteristics that set subspecies apart. Over time, a subspecies may evolve enough to be classified as a new, distinct and genetically recognizable species of bird.

If you want to understand more about how subspecies develop, see this link.

E-Bird has tracked the fall and spring migration habits of both subspecies of the Palm Warbler, showing distinct timing and geographic movement patterns of the western palm warblers and the eastern yellow palm warblers. See this link to learn more.


Photo of Eastern Towhee

Photographing Eastern Towhees and Learning Bird ID Skills

WhatBird.com

Whenever I am lucky enough to photograph a new bird, I know that bird can be identified accurately within 5 minutes of uploading the photo to the Whatbird.com website. When I’m on the Whatbird.com site, the birding experts can make a definitive ID based on some very far away and blurry photos. They do this because they have long experience in the bird ID craft, and look for basic ID clues.

As much as I look forward to uploading newly found birds to this ID forum, I haven’t abdicated all responsibility for learning basic birding ID skills. To be a successful bird photographer, you have to learn about the who, what, where, and when of bird ID skills while out in the field.

Photograph of Eastern Towhee
Male Eastern Towhee Trying to Get His Balance
ISO 1600; f/6.3; 1/1250 Second

ID Process Built Into Merlin

I can’t possibly remember the names of every bird I come across, there are simply too many. Luckily, scientists who study birds have developed a bird ID process. This process involves observations of certain characteristics that will group birds and help lead to an ID. These characteristic include:  The size and shape of birds, color pattern of feathers, behavior, habitat, field markings and songs and calls.

Photo of Female Eastern Towhee
Female Eastern Towhee Foraging For Seeds On the Ground.
ISO 1250; f/8.0; 1/2000 Second

The Merlin Bird ID app, published by the Cornell Lab of Ornithology, incorporates this bird ID process to help the user identify birds. The app begins the process by querying the user with the following questions:

  • Where did you see the bird (current location)?
  • When did you see the bird (date) ?
  • What size was the bird (sparrow size, robin size, crow size, goose size?) ?
  • What were the main colors  (You choose from a palate of 9 colors)?
  • Where was the bird (feeder, lake, ground, tree, flying, etc)?

Then, based on your answers to these queries, the app quickly compiles a list of possible birds from which to make an ID. For each bird listed, the app provides ID photos (for male, female and juvenile), habitat map, ID description, and a link so you can listen to various songs and calls for each bird.

The more I use this app, the better I understand how critical these categories are for an accurate ID.

Take a Photo First

When I’m in the field and find a new bird, I don’t stop everything to check the Merlin Bird ID app. The birds just don’t hang around that long. I always take photos of new birds, no matter how far away or unappealing the scene. I need something to refer back to because my eyewitness ID skills are not that good, especially when committed to memory. The photos help me assign the bird ID criteria and identify it when I get home.

Eastern Towhee

There is a pair of eastern towhees in our yard.  Before I knew what they were, I made the following identification observations:

  • Male has black face, brown feathers and red eyes (colors)
  • Female is brown where male is black (colors)
  • Larger and chunkier than a sparrow, but same thick triangular bill (size comparison)
  • Rummages in the undergrowth for food (location)
  • Long tail points upward (size)
  • Not in Michigan in the winter (location)
Photo of Male Eastern Towhee
Male Eastern Towhee, Ground Feeding.
ISO 4000; f/8.0; 1/2000 Second

I was able to ID the Eastern Towhee very quickly using the Merlin app. I was surprised to learn that this bird is in the sparrow family. The towhee coloration is so different than the sparrows I have photographed. But, as I look over the ID criteria for sparrows, the towhee fits in that category.

The Merlin phone app is free and available for I-Phones and Droids. For more detailed information about the process of identifying birds, I recommend these two web resources:   a) Bird ID Tips and b) All About Birds.

Photo of Juvenile Eastern Towhee
Juvenile Eastern Towhee.
ISO 1000; f/8; 1/1000 second.


Male Red Breasted Merganser

Photographing the Red Breasted Merganser

My Favorite Duck to Photograph

This time of year, most species of male ducks sport their breeding plumage. Often, their feathers are full of glorious colors that shimmer in the sunlight. Perfect for eye popping photos.

One of my favorite duck species to photograph is the red breasted merganser. These diving ducks are just passing through southwest Michigan in the spring, so there’s only a short window of time to photograph them before they fly north to breed. Red breasted mergansers can be seen in almost every river and pond during the spring, diving and swimming under water and foraging for small insects, fish and other aquatic creatures.

Photo of Red Breasted Male Merganser
Red Breasted Male Merganser, Calling Attention to Himself.
ISO 500; f/8.0; 1/2500 Second

The Business of Courtship

Going through my shots of the red breasted merganser makes me laugh out loud. Even the goofy poses look charming, charismatic and lovable. The glossy plumage (color, patterns, and arrangement of feathers) on the red breasted merganser is nothing short of delightful, especially on the males. Mergansers have bright red “devil eyes” and long, thin, serrated red/orange bills. Their ragged head feathers, especially after a dive, point out every which way, producing comical and sometimes absurd poses. While his head feathers go boinnggg, this punk bird proceeds to take care of business. This time of year, he is in the business of courtship; showing off and letting the females know how strong and desirable he is.

Photo of Male Red Breasted Merganser
At first I Thought This Male was Caught in Barbed Wire,
But It’s Only Plant Debris He is Trying to Get Off His Back
ISO400; f/8.0; 1/2500 Second

Photo of Red Breasted Merganser, Male
Photo of the Spiky Head Feathers of the Male Red Breasted Merganser.
ISO 1000; f/9.0; 1/2500 Second

Photo of Female Red Breasted Merganser
The Female Red Breasted Merganser is Also Very Colorful.
ISO 800; f/7.1; 1/2500 Second

Eclipse Plumage

The plumage on most male ducks does not stay shiny and new all summer, but becomes quite drab as the summer progresses and breeding has ended. This drab look is called eclipse plumage and makes duck ID very challenging for me. Luckily, the experts at WhatBird.com are always able to help. More information on eclipse plumage is available at this link.

An Anthropocentric View

I can’t help but be endeared to this species of duck. Somehow, I can relate to their absurd looks. I know that I’m transferring human characteristics onto animals, but as I wrote in my introductory post, taking the time to notice the similarities in the looks and behaviors of humans and birds is gratifying on a personal level. And when I get a good photograph, well that’s the best of all.


Photo of Greater Yellow Legged Sandpiper

Photographing the Greater Yellow Legged Sandpiper

March and April Migratory Visitors

We’ve been birding almost exclusively in the western portion of the Allegan State Game Area this spring, hoping to find a wide assortment of migratory birds. We were not disappointed. The Todd Farm, a designated wildlife refuge in the game area, consists of fields, forests, ponds and prairie habitats that are maintained by the DNR. 136 bird species are known to nest in the Allegan SGA. Countless others that do not nest in Michigan use the wildlife refuge as a stopping point on their migratory journey. In early spring, the Allegan SGA is a welcoming place for migratory birds and bird photographers.

Photo of Greater Yellow Legged Sandpiper
Greater Yellow Legged Sandpiper Leaping Into His Liftoff.
ISO 800; f/9.0; 1/2000 Second

Sandpiper Passing Through

The Greater Yellow Legged Sandpiper is one breed of wading birds that stops to rest and replenish at the Allegan SGA’s many ponds. They breed in Alaska and Canada and winter along both the Atlantic and Pacific coasts and throughout Mexico and the Caribbean. Quite a long migration path.

Bursting to Capture Action

I am always pleased when I am able to photograph a bird lifting off into flight. It’s a rare capture, at least for me. Birds are unpredictable in their movements. When I sense that critical action is imminent, I hold down that shutter, continuously shooting in an effort to capture action at its peak. But then, the camera stops. Why?

It works like this. After the shutter is pressed, it takes only seconds before the file is transferred from the sensor to the holding buffer and then to the memory card. If multiple photos are taken in rapid succession, the pipeline between the sensor, holding buffer and memory card will soon reach capacity. The camera will then shut down temporarily until the memory card has time to load all the data from the buffer.

Photographers should be aware of the “burst rate” of their cameras, or how many frames per second the camera can successfully shoot in rapid succession. The burst rate of your camera depends primarily on 3 things.

Factors that Affect Burst Rate of Your Camera

  • The processing power of your camera. (Modern DSLR cameras are sophisticated computers – and a faster processor costs more money.)
  • File size (how much data is transferring). If you set your camera to shoot and then store large RAW files, or RAW files and JPG files simultaneously, it will not take long to overload the camera. The burst rate on my camera is 6-7 RAW images. After that, it will shut down temporarily to give the storage process time to catch up.
  • Writing speed of your memory cards as data is being transferred in the camera.

Overall, you will get more shots in and possibly avoid a camera shutdown if you configure the camera to take smaller size RAW files or JPG files and if you buy high quality memory cards with faster writing speeds.

Photo of Greater Yellow Legged Sandpiper
Greater Yellow Legged Sandpiper, Foraging In Shallow Water
ISO 800; f/8.0; 1/2000 Second

Birds Migrating Through the Allegan SGA

Besides the Greater Yellow Legged Sandpiper, we’ve seen and sometimes photographed the following migratory birds just passing through the Allegan State Game Area, bound for their nesting grounds.

  • Northern Shrike  (Nesting grounds in the Canadian Tundra)
  • Snow Bunting  (Nesting grounds in the Canadian Tundra)
  • Horned Lark  (Nesting grounds in Northwest U.S)
  • Lapland Longspur  (Nesting grounds in the Canadian Tundra)
  • Rough Legged Hawk (Nesting grounds in the Canadian Tundra)
  • Northern Shoveler  (Nesting grounds in Western US and Western Canada and Alaska)
  • Bufflehead  (Nesting grounds in Canada)
  • Common GoldenEye  (Nesting grounds in UP, Alaska and Canada)
  • Ringneck Duck (Nesting grounds in Canada and Alaska)
  • RedBreasted Merganser  (Nesting grounds in UP, Canada and Alaska)
  • Snowy Owls  (Nesting grounds in the Arctic Circle)
  • American Wigeon  (Nesting grounds in Canada and Alaska)
  • Brown Creeper  (Nesting grounds Northern MI, Canada and New England)

Hopefully we will be lucky enough to find and photograph more bird species this Spring as they pass through Michigan.


Photo of Red Winged Blackbird

Photographing the Red Winged Blackbird Using Exposure Lock

Photographing Red Winged Blackbirds

I love listening to the red winged blackbirds in early Spring. Their songs give me hope and remind me that beginnings keep happening.

Red Winged Blackbirds can be seen everywhere, contorting their little bodies atop swaying grasses, tree stumps and sign posts to produce a mating song that’s loud and clear. The males of this species use their insistent songs and displays to threaten rivals, attract females, and carve out territories. The bright red and yellow badges on their shoulders (like epaulets) stand out against their iridescent black bodies. Red Winged Blackbirds are hard to miss in the Spring.

Image Composition

It’s a habit of mine to look through the viewfinder and frame the bird’s head and eyes at or near the center. It feels comfortable to set the camera so that auto focus and metering are taken at the center points. After all, I want the birds in my photographs to stand out.

Photograph of Red Winged Blackbird
Male Red Winged Blackbird Hoping His Calls and Colors Will Attract a Female
ISO 2500; f/8.0; 1/2000 Second

But it’s not necessary for the bird to be the main feature of every photograph. You might want to spice up your bird photography occasionally by reframing the photo so your subject is not centered. Your eyes will still be drawn to the bird in the photo, but they will also take in other features that may add color and perspective.

Image composition is a visual language. (See more about image composition at this post.) It’s fun to experiment, especially if you think the larger scene with the bird over at the side or in the background is more provocative or tells a better story.

Red Winged BlackBird
Red Winged Blackbird About to Take Flight.
ISO 2000; f/8.0; 1/2500 Second

Reframe Your Image by Using Exposure Lock

Exposure Lock is a button on the back of the camera (labeled with an asterisk on the Canon) that allows the photographer to lock in the meter readings while the lens is comfortably centered on the subject. Once locked, you can move the camera anywhere to reframe the scene and take the photo with the previously locked in settings.

Photo of Red Winged Blackbird
Male Red Winged Blackbird Displaying the Bright Red Lined with Yellow Shoulder Pads. They Stake out Their Claims Amongst the Other Males Weeks Before the Females Arrive.
ISO 1000; f/9.0; 1/2000 second

NOTE: On Canon DSLRs, the exposure lock function can only be used when the camera is set to AV preferred, Tv preferred, or Program mode.

Quick Instructions to Lock Exposure and Recompose

Check that your camera is in AV, TV or Program Mode. I usually set the camera’s meter mode to spot metering or center metering and focus points to center area focus. (NOTE: For more information on spot metering, please visit this post.)

  1. Point the lens at your subject and half press the shutter button so the light meter in your camera can gauge the correct exposure reading of your subject. (NOTE:  On my camera, half pressing the shutter also locks in auto focus.)
  2. While still half pressing the shutter, press and hold the exposure lock button on the back of the camera.
  3. Re-position (recompose) the camera (while exposure readings are in lockdown) to reframe the scene so that your subject is not centered. (NOTE: This is meant to be a quick solution, so try not to fiddle with other settings on the camera while holding down the exposure lock, otherwise, you may disengage the exposure lock. On the Canon, the “*” should appear in the viewfinder if exposure lock is still engaged.
  4. Take the shot. Once you release the shutter, the exposure lock should disengage from the previously saved settings.

Other Ways to Move Your Subject Off Center

One of the things I love about the art of photography is that there are so many ways to accomplish the same task. Of course, you can choose to take comfort by using the same equipment and the same go-to procedures. You can even let your camera’s computer do the thinking by putting it in Full Auto mode.

But where’s the fun in that?

Here is a quick list of other strategies you can use to move your subject off center.

  • Reframe the shot in post processing.
  • Set your camera’s focus points so the lens is focusing on the subject on the left or right, top or bottom…. but not focusing at center. (NOTE: While most DSLR cameras give you lots of options to move the focus points around, most cameras do not allow you to set the metering points off center.)
  • Use M mode and set your exposure settings individually. They won’t change as you move the camera, so no need to lock down.

The Female Red Winged Blackbird

One last thing. The experts at WhatBird.com helped me identify the bird pictured below to be an adult female red winged blackbird. As you can see, the females are neither black nor red winged, though there is a touch of red on the shoulder. A pretty bird. The coloring is much more subtle than the flashy males.

Photo of Female Red Winged Blackbird
Female Red Winged Blackbird. Quite a Different Look.
ISO 800; f/9.0; 1/2000 Second
Photo of Snow Bunting

Photographing Snow Buntings and Why Bird Photography is so COOL

Migratory Madness

It’s still fairly early in Spring, and we are seeing lots of bird species that have either not yet left their wintering grounds in Michigan or are just passing through to their ultimate nesting ground destination.  It seems that each bird has its own migratory story and it’s fun to discover from whence they came and where they are going.

Photograph of Snow Bunting
Snow Bunting Deciding to Linger, despite the photographer at his back.
I thought for sure he would take off, so I set a very fast shutter speed.
ISO 800; f/8.0; 1/3200 Second

Lingering Snow Bunting

Driving slowly down a country road, we came upon a lone male snow bunting, eating seeds on the ground. As birds go, he did not appear too nervous, though he kept a watchful eye on the car. I had never seen this bird before and could not ID him. I felt the anxiety rise inside me as I quickly and quietly set the camera on the car’s window ledge and pointed the lens toward him. Turns out that he didn’t mind posing. I got off 50 shots before he went on his way.

After consulting our resource books and the experts at WhatBird, we learned that this bird is an arctic snow bunting, wintering in Michigan and no doubt stocking up on his food reservoir before he takes off for northern Canada. According to my resources, this little guy should have left Michigan in March (females follows 2-3 weeks later) so we were lucky to see him still lingering in early April. Arctic snow buntings must have antifreeze in their blood. They are known to survive -55 degree temperatures.

Photograph of Male Snow Bunting
Male Snow Bunting, Stretching His Feathers, Looking Rather Relaxed, despite the Car and the Camera
ISO 250; f/9.0; 1/2000 Second

Why Bird Photograph is so COOL

This snow bunting encounter reminds me why the art of bird photography is so very satisfying. You never know what will transpire. Many factors impact your experience…light, luck, skill, equipment, weather, instinct, food, migration…. the list goes on and on. You learn about humility, patience, and perseverance. You struggle with uncertainty and complexity.  And somehow, it all comes together and you have a lovely and unexpected encounter. It is nothing short of exhilarating. And even after a very good day, somehow you know that the best is yet to come.

I hope you all enjoy your birding experiences this Spring. There’s lots out there to enjoy.


Photo of Tufted Titmouse

Photographing the Tufted Titmouse – Exposure Adjustments on the Fly

Easy to Photograph A Tufted Titmouse

The Tufted Titmouse is a little song bird who is prominently represented at the feeder year round. These nervous looking birds expend a lot of energy flying from branch to feeder, choosing one seed, and immediately flying back to branch cover. The titmouse then wrestles the seed out of the seed casing, holding it with its feet and whacking it with its beak. He then repeats this sequence by going back to the feeder to get another seed. His quick in and out strategy allows the titmouse to continue feeding even when the feeder food is being hogged by other species who are not willing to share.

Photo of Tufted Titmouse
Tufted Titmouse, A Lovely, Industrious Little Songbird and a
Regular Visitor to the Feeder.
My eye at the viewfinder, I adjust the exposure settings to ISO400; f/2.8; 1/800 Second

Exposure Adjustments On the Fly

Since it is so easy to photograph the tufted titmouse, I thought I would practice making exposure adjustments on the fly – that is, adjusting the aperture, shutter, and ISO without taking my eye away from the view finder.

Many times when I’m using M mode, I pre-set the aperture, shutter and (sometimes) the ISO before I go out in the field. Exposure conditions can change very quickly, sometimes during intense photographable action. If I take my eyes off the target and look at the dials to make the exposure adjustments, I waste precious moments and may miss a great shot.

Photo of Tufted Titmouse
Tufted Titmouse Awaiting A Chance at the Feeder.
Without Taking My Eyes Off the Prize, I Set Exposure Settings to
ISO 400; f/4.5; 1/500 Second

Don’t Miss the Shot

No matter what creative mode you choose  (Aperture Preferred, Shutter Preferred, Manual), a photographer should know how to quickly make exposure adjustments without moving her eyes and camera off the target. After all, you don’t need to look at the dials. You can see the exposure settings and lots of other information through the viewfinder, highlighted at the bottom of the screen. It’s a matter of training your fingers to quickly move to the shutter speed and aperture dials while watching the bottom of the screen to make sure the adjustments you make still give you the proper exposure.

Photo of Tufted Titmouse in Flight
Tufted Titmouse in Flight – Heading Back to the Branch with Seed From the Feeder.
Trying to Respond To Changing Scene By Making Exposure Adjustments with my
Hands While My Eye Is On the Viewfinder. Fast Action in Low Light.
ISO 2000; f/8.0; 1/4000 Second

Quick Review of Your Camera’s Viewfinder Data

The highlighted data that you see through the viewfinder doesn’t remain constant. Your creative mode selection (Manual, Aperture Preferred, Shutter Preferred, etc) determines what you see in the viewfinder. Also, as you move the camera, the light meter responds by adjusting the exposure settings to the changing light conditions.

There’s so much information!  Where do I start?

This is a mental exercise that requires you to train your eyes and your hands. First, find the exposure level indicator at the bottom of your view finder screen by pressing the shutter button half way. The exposure level indicator is the dial that shows what the light meter in your camera thinks exposure should be. The indicator is a graduated scale with a pointer and a “0” at the center. Get the pointer right under the “0” for optimal exposure. If it’s pointing in the positive range, you photo will be overexposed. If it’s pointing in the negative range, your photo will be underexposed.

Now find the aperture and shutter setting dials with your fingers while looking through the view finder.  Move your fingers to change settings without taking your eyes off the action. Check what those fingered adjustments did to the exposure level indicator.

Break Out of Your Routine

Your main goal is to track the action and keep your eye on the prize. Experimenting with different exposure settings without moving your eye from the viewfinder will take you out of your comfort zone for a while. And that’s a good thing for photographers.

Close up Photo of Rough Legged Hawk

Photographing Rough Legged Hawks in Flight

Limited Success on Bird Photography Expeditions

I’ve been in a rut lately. During my birding expeditions this winter, I haven’t got out of my car once. I’ve missed some good shots too due to the restrictive nature of my small car. You can only stretch a head, body and camera so much. Had I just grabbed my camera and got out of the car to position the camera for the shot, it would have been easier and I might have missed fewer shots. Instead I stayed in the car and contorted my head, arms and camera to reach my target from the open window – giving myself very little maneuverability and even less dignity.

For some reason, I was clinging to the notion that all birds would be less likely to bolt if I hid quietly with my camera inside my 3000 lb car. After all, getting out of the car can cause quite a commotion… powering down the car, grabbing the camera, door opening, door closing and then propping the camera up to shoot. And what if I get cold?

Photo of Young Rough Legged Hawk
I LOVE Being Able to Count the Feathers!! Young Rough Legged Hawk Passing Over me Multiple Times -No Doubt Checking out the Camera and Long Lens Pointing at Him. ISO 640; f/9.0;1/2500 Second

Get Out of Your Comfort Zone to Photograph Birds

Well, it took me awhile, but last week I concluded that photographing from within the car was not the best strategy to capture photos of the rough legged hawk. There were way too many missed shots, and those I did manage to get were all tail feathers. I had to try something different.

Often, photographers must give limited chase when photographing birds – and chasing a soaring bird can not be done on foot. They fly too far, too fast. To locate birds and keep up with them, you need a vehicle. My strategy on this early March morning was to use my car to look for these elusive hawks in the usual places. Once I spotted one within fairly close proximity, I would quickly park and get out of the car with my camera.

After driving up and down the country roads where I had missed so many shots, I spotted two “roughies”….. and they spotted me. Both raptors watched me get of my car with my camera and slowly walk toward them. It is true that these hawks were not about to let me come too close to their perching spot, by car or on foot. But, when they did lift off, they didn’t fly away from me. They doubled back and flew toward the camera. Showing no fear, both glided over me at a close range, and then circled back again to get another look. Their airborne confidence gave me the time and maneuverability I needed to lift that camera toward the sky and start shooting. (NOTE: I relied heavily on my len’s image stabilizer to steady the shot. See this post for more information on the importance of IS technology.) I could have never taken these in-flight shots of these beautiful raptors from within my car.

Photo of Rough Legged Hawk
Rough Legged Hawks are Arctic Hawks that Generally Leave their Wintering Grounds in April and head North to the Arctic Tundra. ISO 500; f/9.0; 1/2500 Second

Rough Legged Hawks Wintering in Michigan

Rough Legged Hawks (named because of their feathered legs- a cold climate adaptation) are arctic raptors that generally leave the Canadian tundra in late Fall and fly south to northern parts of the United States. For the most part, these rugged raptors are not to be found in the lower 48 states during the summer months.

Here’s a link to the eBird Tracking map showing the Rough Legged Hawk’s Migratory Pattern. From this map, it looks like they head south sometime in November, mostly to the northwestern parts of the United States, and then return back to their northern Canadian breeding grounds around April.

Photo of Male RoughLegged Hawk
Adult Male Rough Legged Hawk in Flight- Looking Back at Me as He Flies Away. The Detail in this Photo is Compromised Due to Distance, but I Still Like the Way He Looked at Me.
ISO 320; f/9.0; 1/3200 Second

Walking With My Camera

Spring is here. In Michigan, that means it’s still likely to be cold and frosty in the mornings, at least until June. Despite the cold weather, I plan to bundle up and spend much of my time walking with my camera and monopod on my shoulder, looking for a large variety of curious birds willing to venture within shooting distance of my camera. After all, it’s Spring. I’m hoping that the birds will be focused on other pursuits besides fleeing from me.


Photo of Pelicans in Flight

Photographing Birds On Water Using Automatic Exposure Bracketing

Photographing Birds On or Near Water

I spend a lot of time walking on the shoreline with my camera. Generally the birds keep their distance from intruders, but once in a while they fly or swim close enough to challenge my photography skills.

Choppy waters, glare, uneven lighting, and erratically moving birds all present different challenges for photographers. The merganser duck in the photo below kept bobbing and ducking under the water and then coming up quite a distance away from where he originally ducked under. The pelican flying low close to the surface of the water would continually circle and then dive in head first.

Whenever I am presented with unpredictable bird activity near or in choppy waters, I set the camera to Automatic Exposure Bracketing. The camera take several shots of the same scene instead of  just one, thus increasing my chances of getting the right exposure.

Photo of Merganser Duck
Merganser Duck Swimming. Seemingly Unaware of the Choppy Waters. Lots of Glare and Uneven Lighting
ISO 800; f/3.2; 1/2000 Second

Automatic Exposure Bracketing

Most DSLR cameras offer the option of AEB, Automatic Exposure Bracketing. At the very basic level, engaging AEB sets your camera to take 3 shots instead of 1 of the same scene, using different exposure values – in 1/3 or 1/2 stop increments.

DSLR cameras have highly sophisticated light meters, but  around water, when conditions are not average, they can give you the wrong exposure. The goal of setting your camera’s AEB is to increase your chances of nailing the exposure, especially in uneven lighting conditions or high contrast situations.

The easiest and most basic way to set AEB is to have the light meter choose a starting exposure, and then bracket that starting exposure. (NOTE:  The camera must be set for continuous shooting.) Once set, the camera will automatically take 2 extra shots, and include 1 shot underexposed and 1 shot overexposed.

Photo of Pelican in Flight
Pelican in Flight Over Choppy Waters. Set AEB to Different Shutter Speeds ISO 250; f/4.0; 1/3200 Second

Multiple Options Available When Using Automatic Exposure Bracketing

AEB is not just about setting the camera to take one shot over-exposing and one shot under-exposing from a pre-set starting point. You have more flexibility than that. If the lighting is such that you need only negative compensation (or positive compensation) you can set the camera’s bracketing settings to take 3 shots in the direction of the desired exposure values. For instance, if you think the light meter is incorrectly gauging the scene to be brighter than it is, set the AEB to take 3 shots in negative exposure range. Conversely, if you think that the light meter is incorrectly gauging the scene to be darker than it is, set the AEB to take 3 shots in the positive exposure range.

Many professional DSLR cameras allow the photographer to specify 2, 3, 5 or 7 exposures (instead of just 3) within the AEB set. Choosing the number of shots is usually on the menu where you choose the 1/2 or 1/3 exposure increment. Check your camera’s manual to learn how to get to this menu.

Getting the Best Exposure Value Before Post Processing

It is true that post processing software enables the photographer to fix most exposure adjustment problems. So why bother with AEB?  I use AEB because wild birds move unpredictably and fast. When shooting in uneven or problematic light, a primary concern is to preserve as many tonal values as possible on your image. Engaging the AEB function reduces the chances that your exposures will overshoot the right edge of the histogram, thereby losing critical detail data forever. (For more information on why  using the camera’s histogram is important, see Photographing Sandpipers on the Beach).

How Does the Camera Calculate AEB?

AEB sound complicated?  It’s not. One of the best web resources I’ve read on the functionality and use of AEB for Canon Cameras is available at this link: Guide to Auto Exposure Bracketing on Canon DSLR. The author is Jason Franke. I especially like the charts the author includes that precisely explain how the camera alters shutter speed or aperture to achieve AEB. Definitely worth a look.