Category Archives: Vireos

Photographing a Blue Headed Vireo – The Distance Factor

Photographing a Blue Headed Vireo

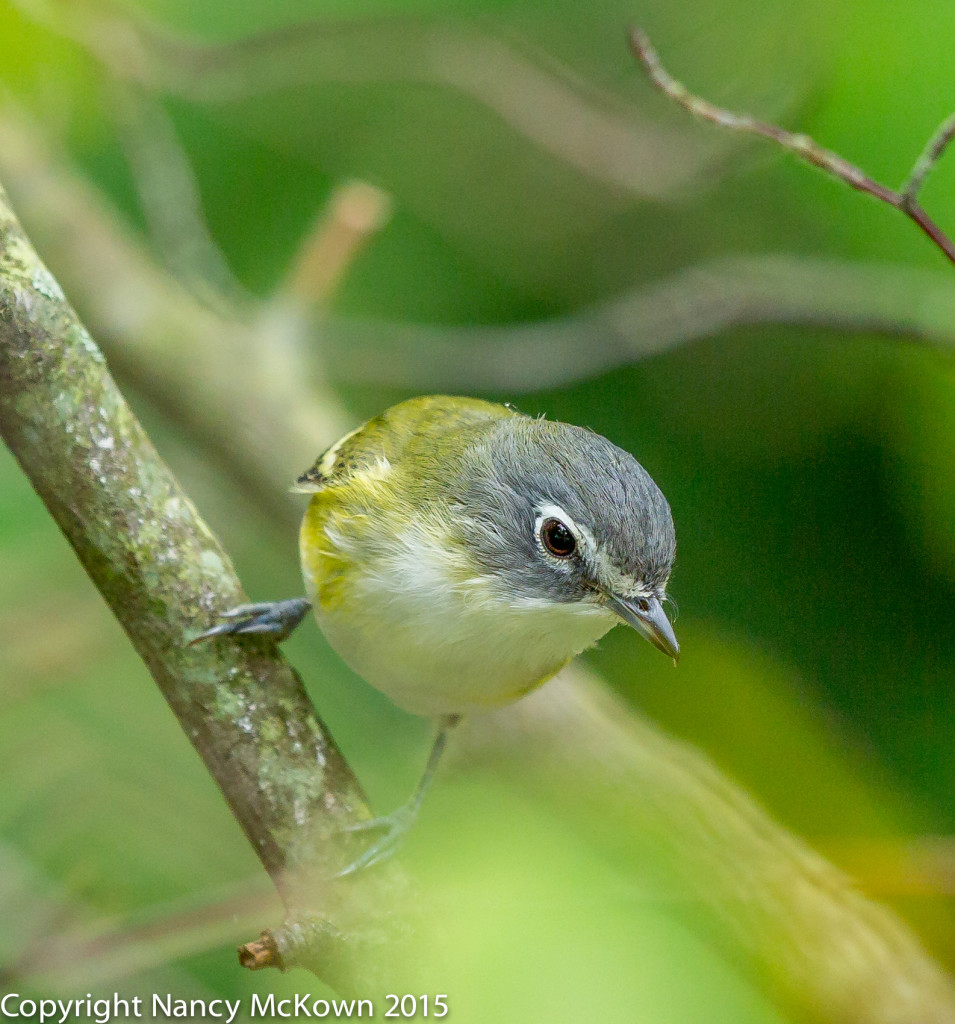
Blue Headed Vireos appear more gray than blue during Fall migration. What makes them unmistakable are those lavish white spectacles on that gray hood. It starts with a heavy but incomplete eye ring that extends down to its thick hooked beak and into the neck and breast areas. The colorful olive green with black yellow and white patterns on his back don’t quite cover up the flecks of gray that trickle down from his head.
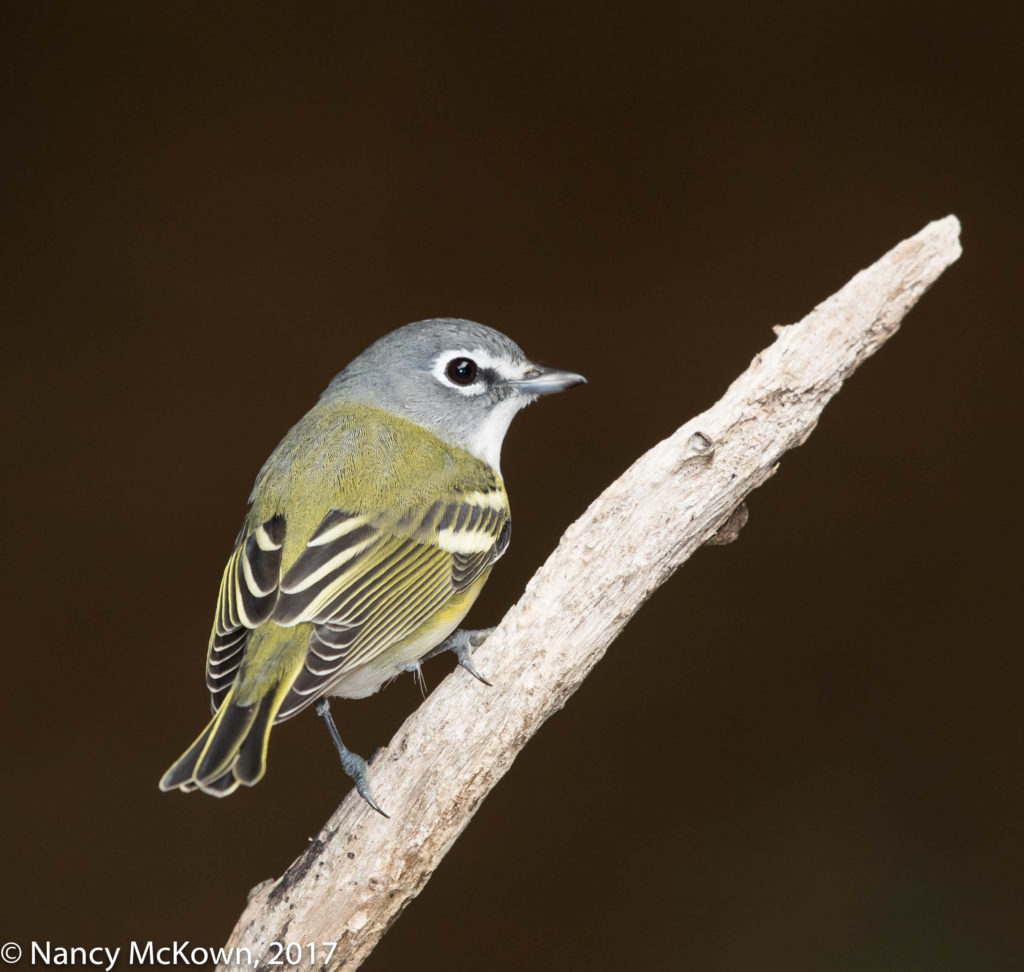
Photo of Blue Headed Vireo
Blue Headed Vireo
ISO400; f/8; 1/250 Second
Curious Enough to Pose patiently

Flash. Figuring Out This Essential Tool

Flash enhancement has proven to be an essential tool when photographing in my darkly lit woods, assuming I get it right. As I set up the flash for this shoot, I planned to selectively brighten the vireo’s face and body, while leaving the background dark. My exposure parameters worked well partly because this smallish bird was only 15-16 feet away – an excellent distance for the fresnel enhanced flash.

The Distance Factor

The flash is designed to work with the camera to gauge the ambient light reflecting off of the subject and calculate how much flash is needed to maintain exposure parameters. The flash sends a weak pre flash to determine the amount of flash needed- but if the subject is distant, that pre flash would most certainly fall off and be unable to send critical info back to the camera. So experimentation using flash exposure compensation (FEC) becomes necessary, assuming the bird sticks around. (NOTE: I could always boost underexposed images after the shoot in post processing. I rarely do this because I simply can not replicate the quality of brightening in post processing that I can achieve in camera, at least not without repercussions to the final image.)

At times, ETTLII Flash with fresnel extender delivers too much  light…depending on how close the lens is to the subject. This is because the blast from fresnel flash extenders are always head-on… and concentrated. It is not suppose to scatter in multiple directions, but instead narrow its angle of coverage and gain distance. Perch location is critical. (NOTE: The flash bracket is essential to raise the flash off of the hot shoe and over the axis of the lens, hopefully casting the unwanted shadows to places where they won’t be bothersome…like below or behind the subject.)
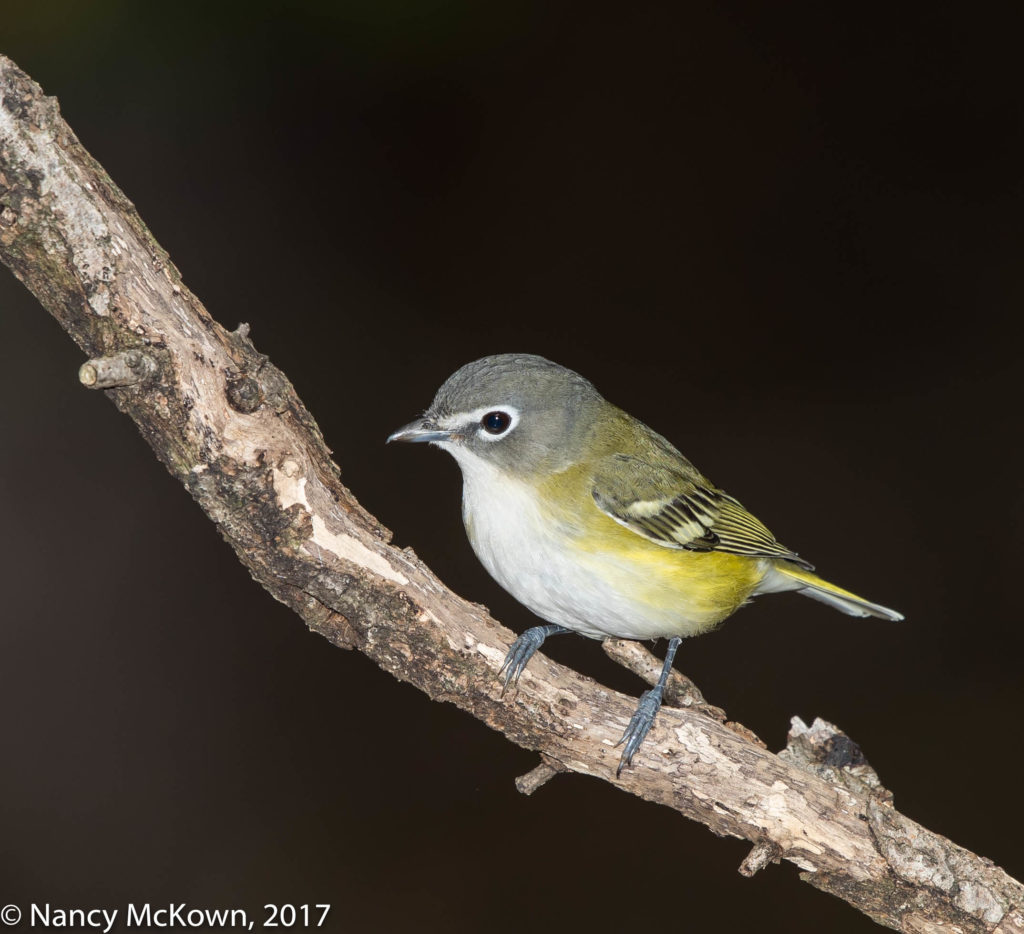
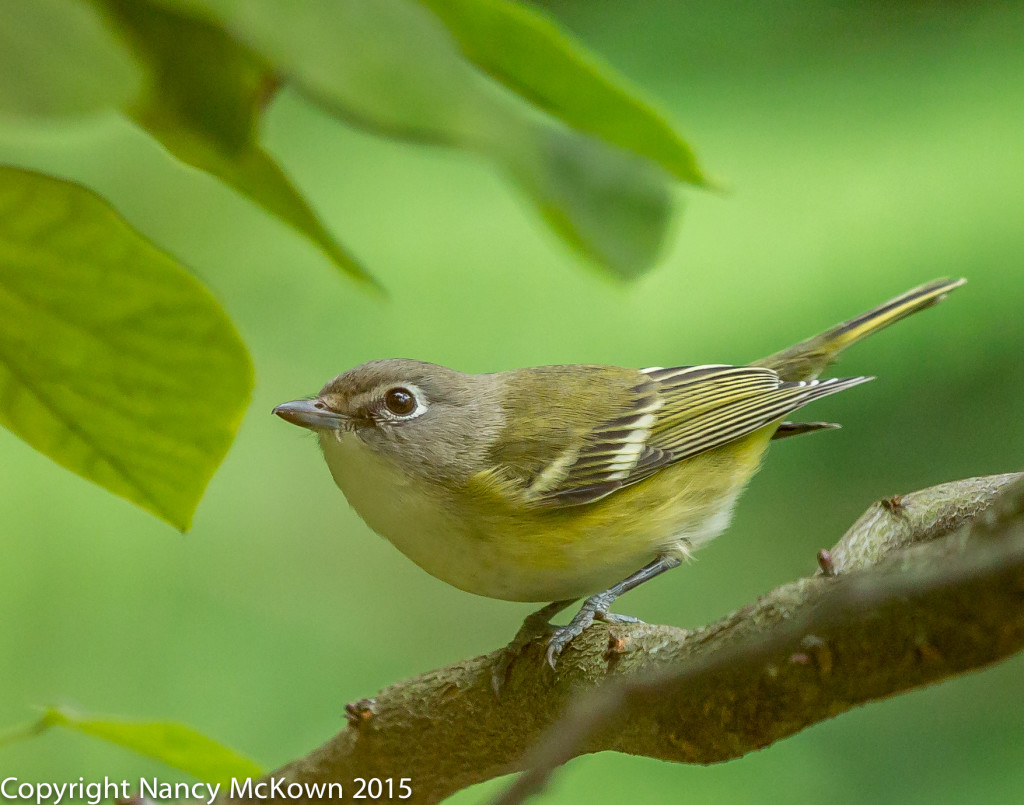
Photo of Blue Headed Vireo
Blue Headed Vireo.
More of a Frontal view.
ISO400; f/8; 1/250 Second

Computational Powerhouses

My dSLR camera and flash are designed to work together in the way of sophisticated computers. Trying to understand precisely how the camera and flash use their computational power to meter reflected light is beyond me…. especially since it is so difficult to predict what a Canon camera will do when Evaluative mode is engaged. This multi-level internal light metering system evaluates whatever fills the frame using algorithms covering a complex arrangement of variables including the parameters preset in the camera and information taken in through the lens. (NOTE: Conditions affecting the light’s direction, tone, intensity, absorption and bouncability will impact how light travels through the lens and is evaluated by the camera and flash. To read about the physics of how light travels and reflects off an object, visit this link.)

So much to think about! Overall, I find that given all these variables and the speed at which calculations must be made, the rate of light metering success is very good, despite the distance of the subject. When the camera, the flash and the photographer get it right, it’s a good day.
Photographing Yellow Throated Vireos – The Impact of Stray Light

Photographing a Yellow Throated Vireo

Lots of warblers coming through….. mostly drab coloring on the plumage. In most cases, I rarely get more than a glance. The camera’s lens is crucial to successfully examine colors and patterns.  Without it, I certainly couldn’t ID most migrators with any conviction.

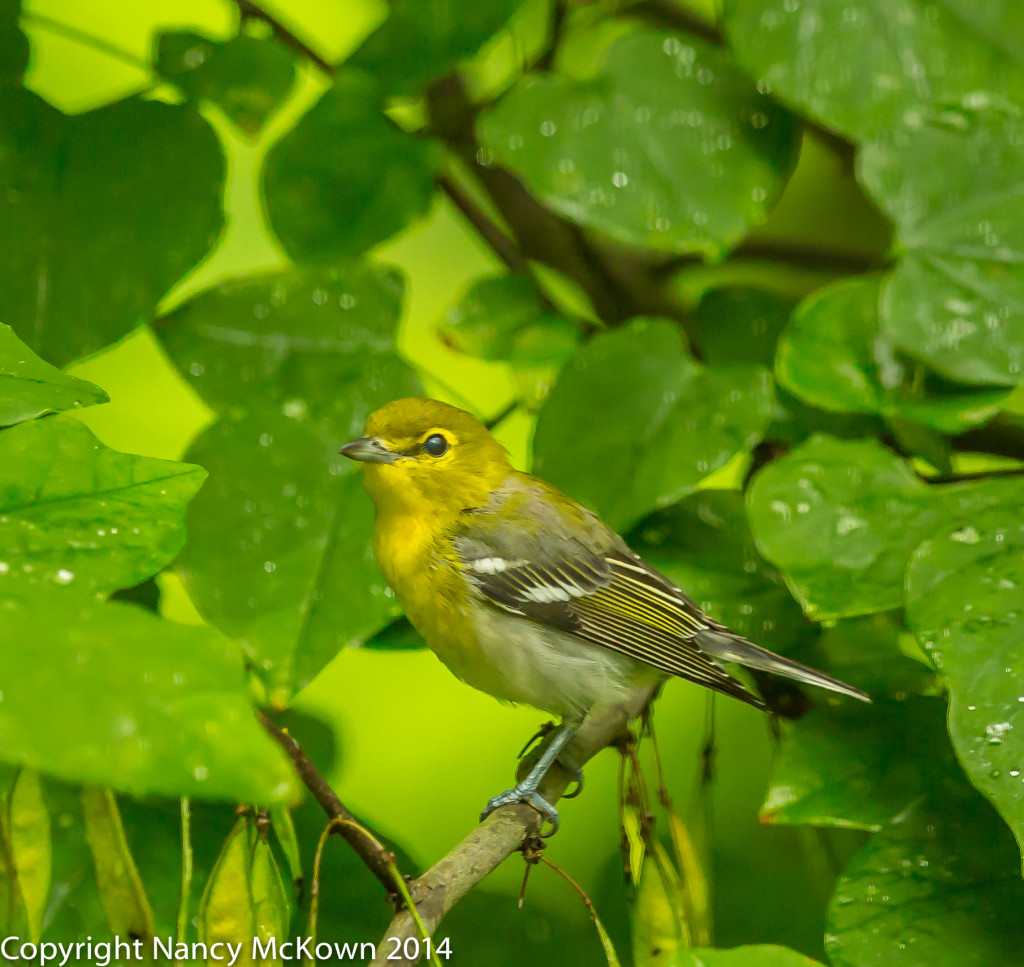
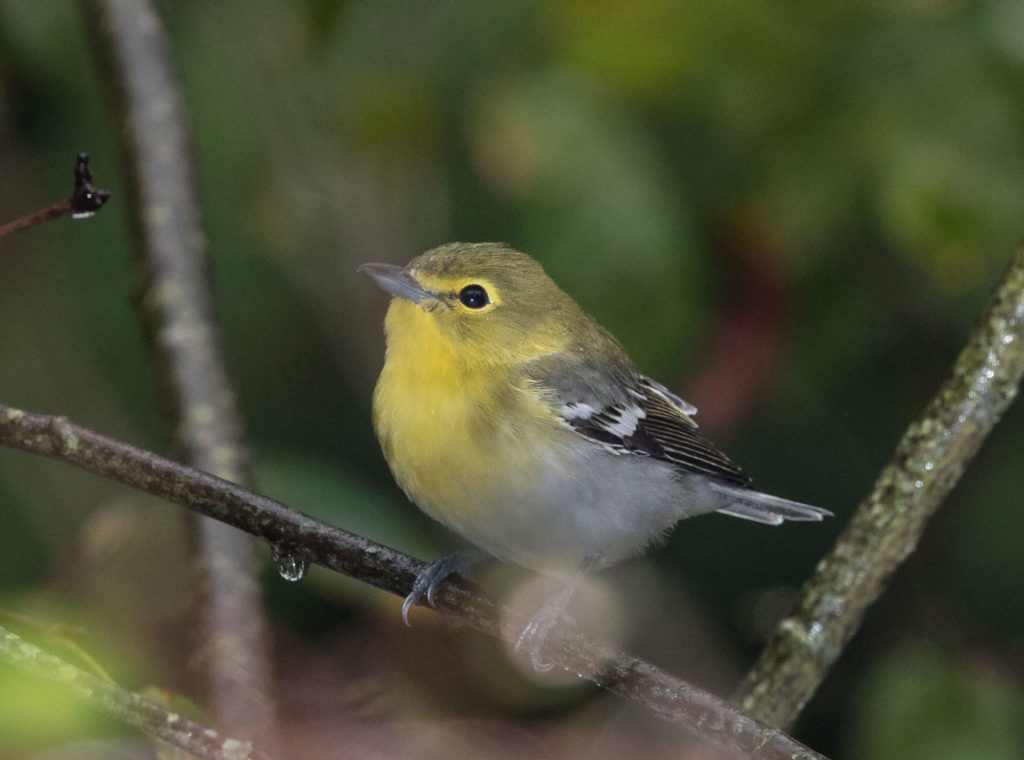
Based on this bird’s shape, size and elusive prowling behavior, I was pretty sure I had some kind of a warbler. Then I took a close look at the digital image…examining the size of her beak and her lemon yellow chest, throat and eye rings. Not a long, thin, pointy bill like a warbler, but thick; more like a Shrike with that large hook at the end. And what about those large bluish gray feet? Definitely not a warbler.

Photo of Yellow Throated Vireo
Yellow Throated Vireo.
Circular Orbs Obstructing Left Foot.
ISO800; f/8; 1/250 Second

Stray Light

The sky was dark and pouring rain when this little Yellow Throated Vireo plopped down on a nearby branch in front of the camera. Small, drenched service berry leaves in front of and around the bird prevented the lens from getting a clean shot.

Somehow, on 3 sequential images, the camera recorded foggy looking circular overlapping orbs on the foreground of the bird’s left foot and all across the bottom of the image. This despite low ambient light, E-TTLII flash, lens hood attached, and advanced optical design multi-coating technology on my 500mm Canon L lens.  OUCH!!

But Why?

  • It was a dark day. There was no background source of ambient light equal or stronger than the existing light on the subject.
  • The flash (with FEC set at -1/3) was doing most of the work.
  • No pieces of dust, debris or water droplets were on the camera’s front or rear lens elements. (NOTE: Dust on the front of the lens hardly ever impacts image quality.)

It looks like overexposed lens flare, possibly combined with an out-of-focus elliptical Serviceberry leaf in the foreground. I can only surmise that those wet leaves in front of the bird bounced the light back toward the lens, causing not only lens flare, but also spotty reduction in saturation and contrast. (NOTE: Long lenses are more likely to produce pronounced lens flare.)

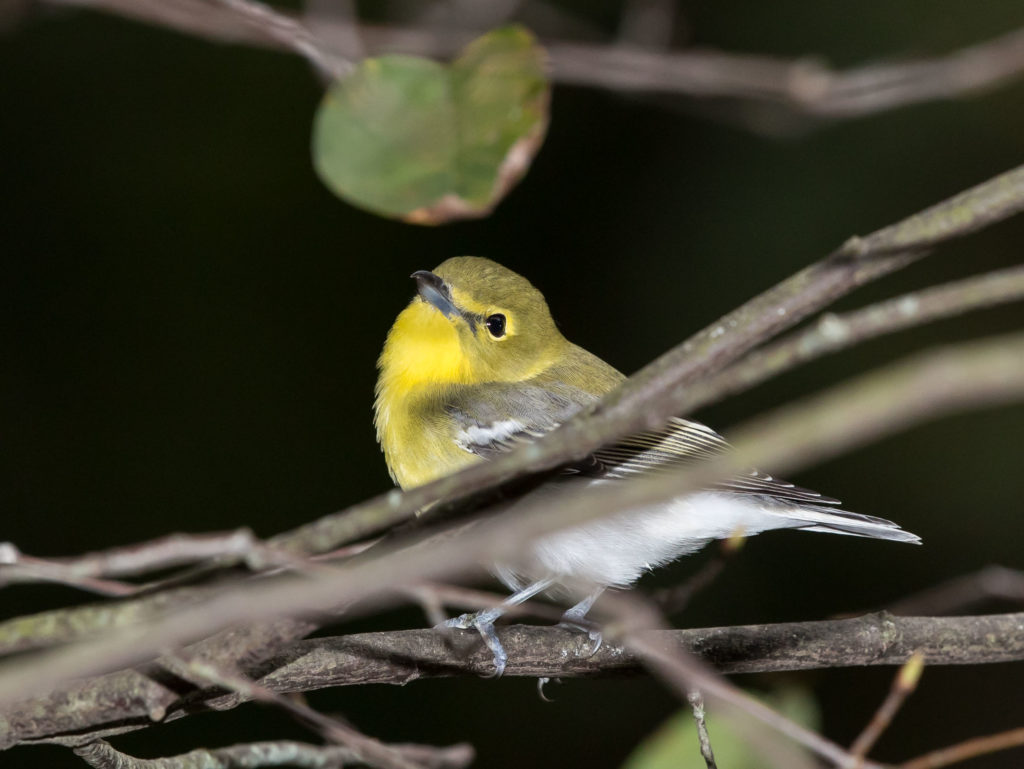
Yellow Throated Vireo
Thick Branches Obstructing Line of Sight,
But No Lens Flare.
ISO800; f/8; 1/250 Second

Unpredictable Lens Flare

Flare doesn’t require sun, just a light source. The light’s angle must have been just right to pass through multiple lens elements (and ultimately reach the sensor) and blast the images with little orbs. It all disappeared when the bird moved to a higher branch. I countered by moving the lens up, thus altering the angle of light. (See second photo.)

Flare and glare are unpredictable (for the most part) and can show up on digital images even when photographing on a dark day. In bird photography, I find these artifacts to be unattractive and distracting- an operator error which can be remedied if you notice it soon enough…. and the bird sticks around.

Photographing a Blue Headed Vireo and Thoughts About Fast Lenses

Exposure Tradeoffs

We all know the low light exposure conundrum. The more you open up the aperture, in any lens, but most especially in long telephoto lenses, the more shallow (to the point of being razor thin) your depth of field becomes. With bird photography, that means (depending on the pose) that much of the bird’s little body is simply NOT in focus.

When I’m out in the State Game Area in the early morning, there’s usually lots of glorious sunshine allowing me to tighten up the aperture to 8.0 or smaller. Here at home, light filters down on a sunny day to accommodate a comfortable aperture of f/5 (with low shutter speed –assuming there’s no wind– and relatively high ISOs). But when it’s cloudy and rainy, the aperture on my 500 mm f/4L II IS lens  is mostly wide open. I could swap out lenses and use my 300 mm lens (2.8 L wide open), but then I sacrifice amplification. I’d much rather have high noise in an image that does not need cropping/zooming in post processing.

Photo of Blue Headed Vireo
Headshot of Blue Headed Vireo.
Beak and Eyes are in Focus, But not Much Else.
ISO1000; f/4; 1/500 second.

What’s a “Fast” Lens?

Lenses on which the aperture opens wide and thus allows more light on the focal plane are referred to as “fast” lenses. The more that aperture can open to let in more light, the “faster” the lens. The more light transmitting through the lens, the more flexibility with exposure parameters the photographer has.

NOTE: In aperture speak, when you “stop down”, you are letting in less light…. making the aperture smaller (by moving to a larger number)– and consequently, getting a deeper depth of field. Remember: The f/ represents the size of the hole allowing light into the lens. The smaller the f number, the larger the aperture.

Shallow Depth of Field

When I was photographing this Blue Headed Vireo, I had the 500mm lens wide open to f/4. See photo above. The head and eyes of the vireo are sharp because those bird parts were within the in-focus DOF arena. Those bird parts that were too close or too far away from the sensor are blurred because at f/4 there are only a few millimeters on which to lock focus.

To get an idea of how thin your depth of field can be at wide open apertures, see this DOF calculator. And, of course, if you want this information readily available in the field, there are DOF calculator apps available for iPhones and Droids.

Entire Subject Parallel to the Sensor

In the photo below, shot at f/5, most of the bird’s body is parallel to the sensor, and consequently, overall sharpness is good.

Photo of Blue Headed Vireo
Blue Headed Vireo.
Another Day, A Little Brighter.
Aperture Stopped Down, Just a Touch.
ISO2000; f/5; 1/400 Second

A Good Telephoto Lens

High end prime (fixed) lenses are usually “faster” than zoom lenses. Faster lenses are usually larger, heavier (I usually prefer a tripod with fast 300mm+ lenses) and much more expensive because of the sophisticated optics and highly responsive autofocus and metering technology incorporated into these lenses. A good telephoto lens will always be distinguished by its largest aperture setting. On a cloudy day, that means a lot.

To read more about image sharpness, please press this link.

Photo of Red Eyed Vireo

Photographing the Red Eyed Vireo and Auto ISO

They Come, They Go

The Baltimore Orioles are gone. So are the Hummers, Red-winged Blackbirds, Robins and House Finches. I was so absorbed by the new and fun species coming through that I didn’t notice my summer avian neighbors departing.

Photo of Red Eyed Vireo
Red Eyed Vireo, Resting Long
Enough for Me to Make Exposure
Adjustments.
ISO1600; f/4.5; 1/500 Second

Photographing the Red Eyed Vireo

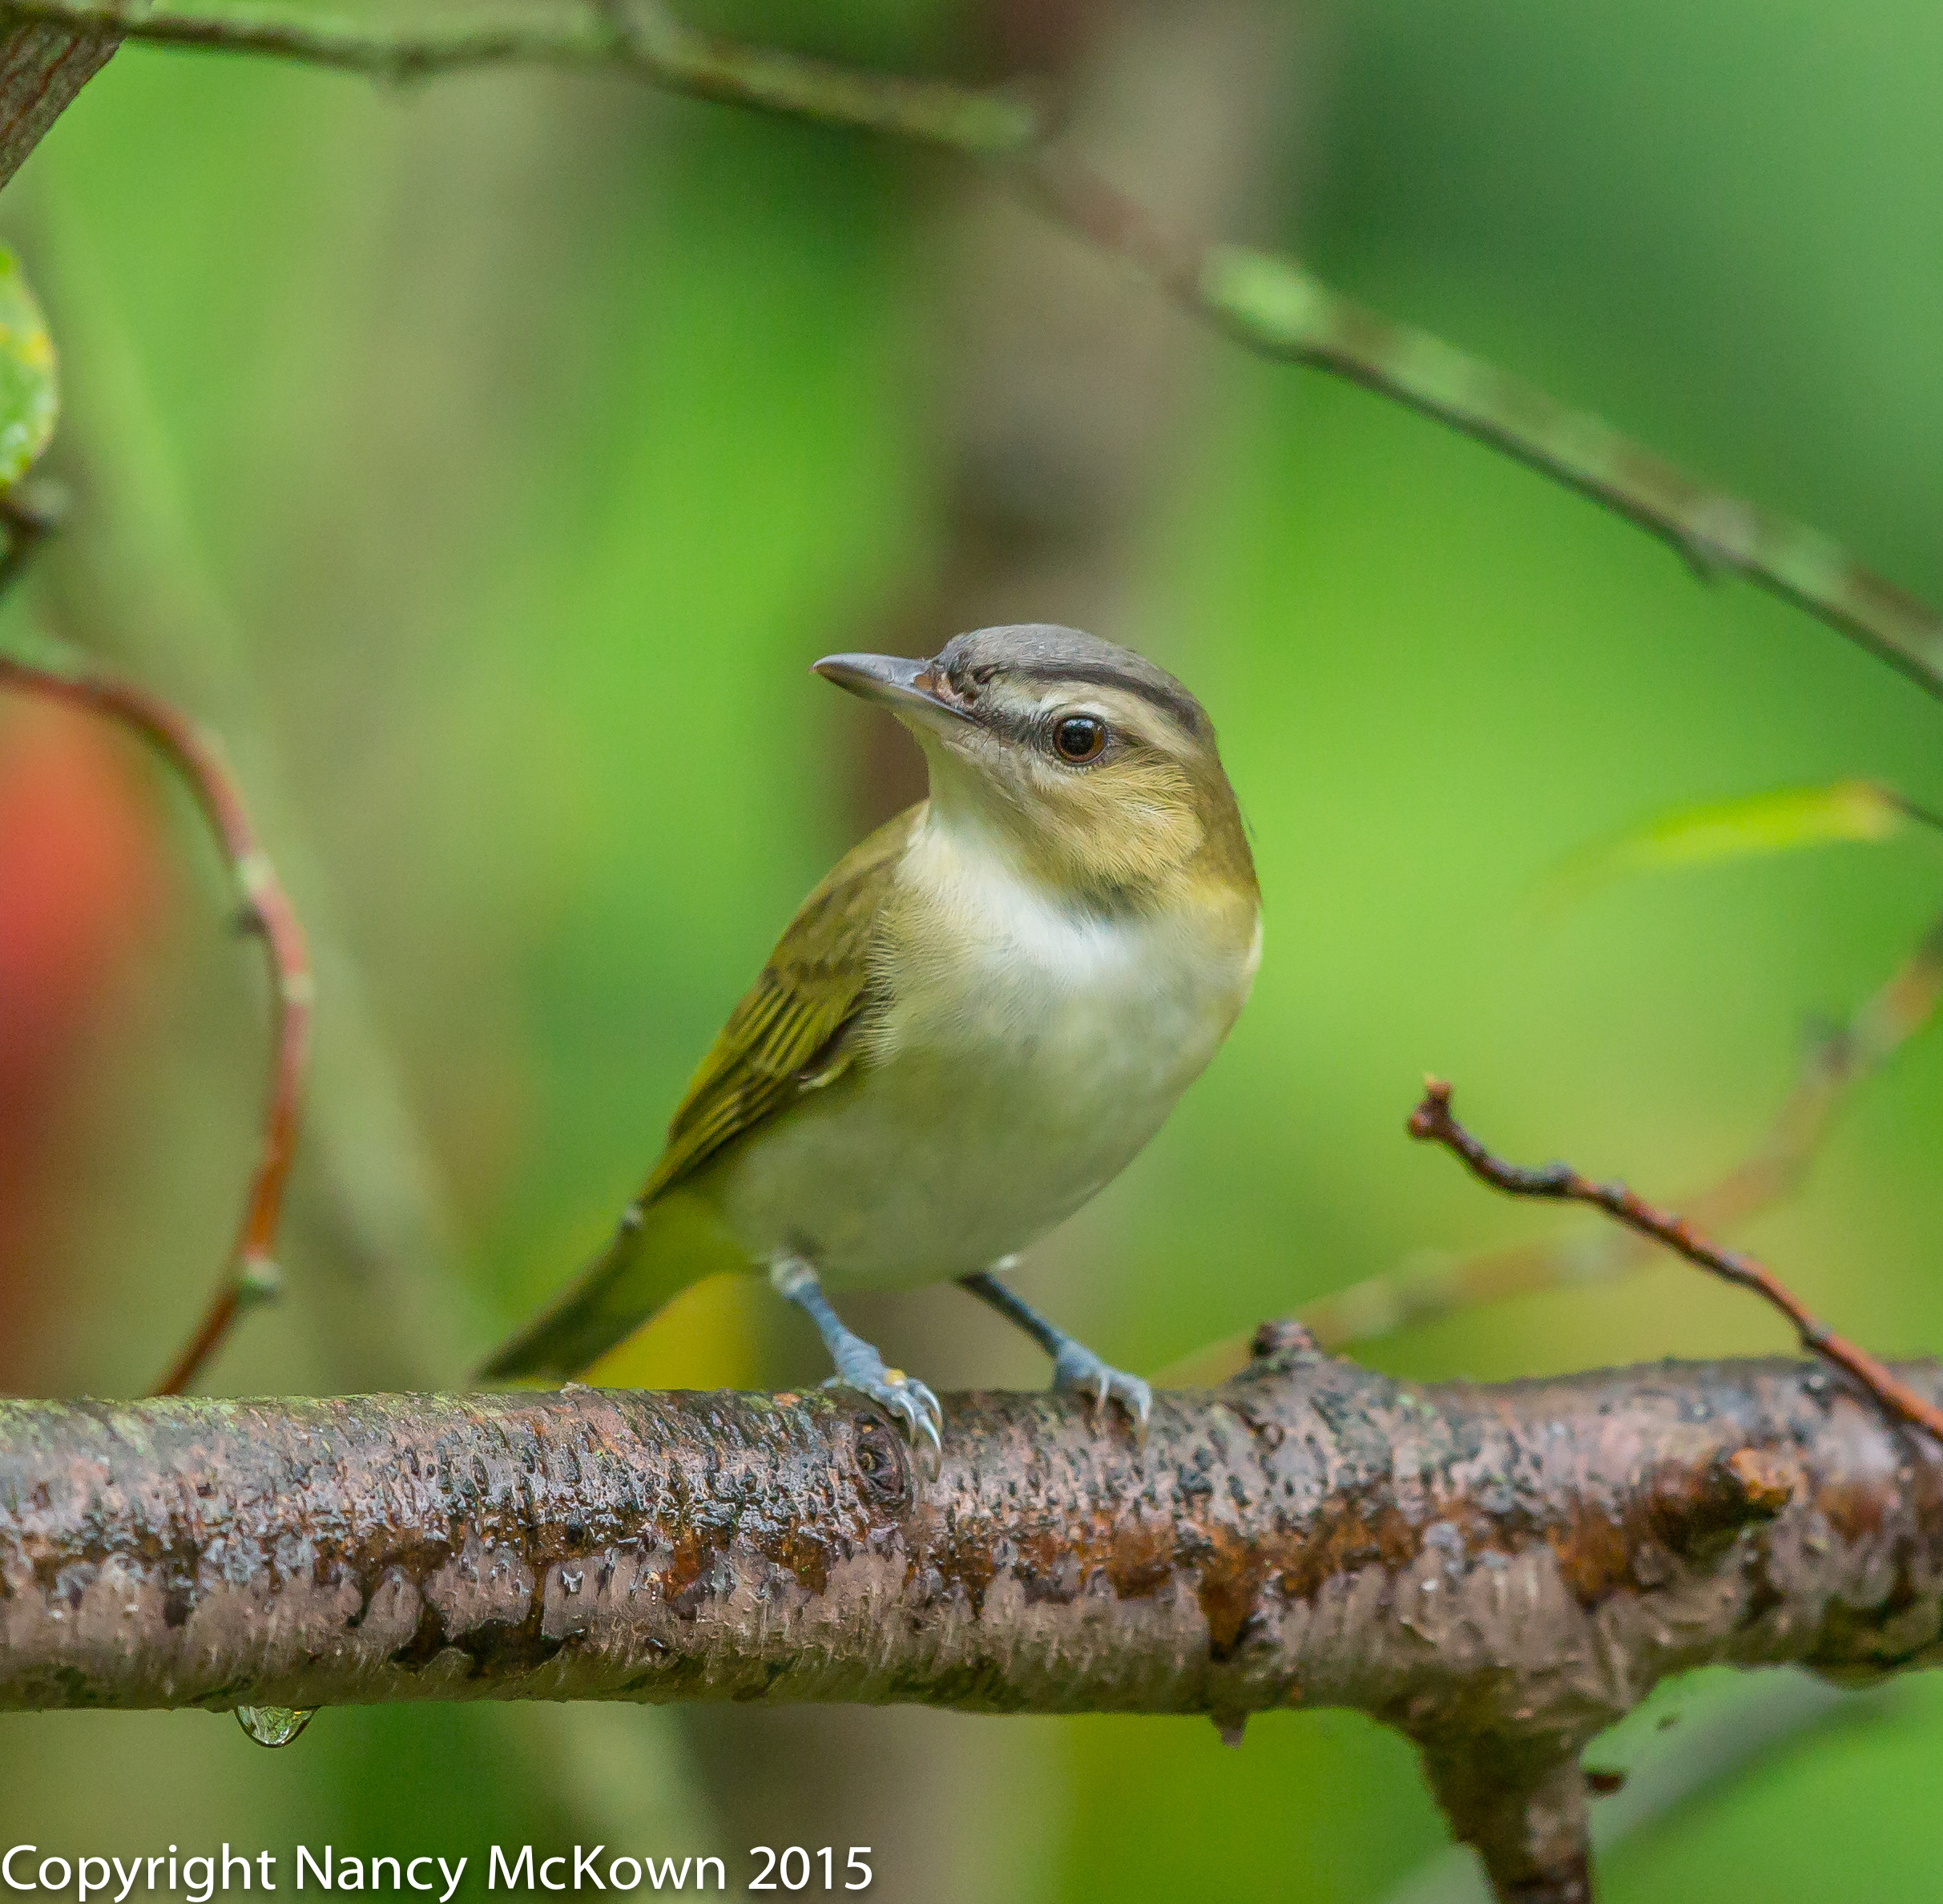
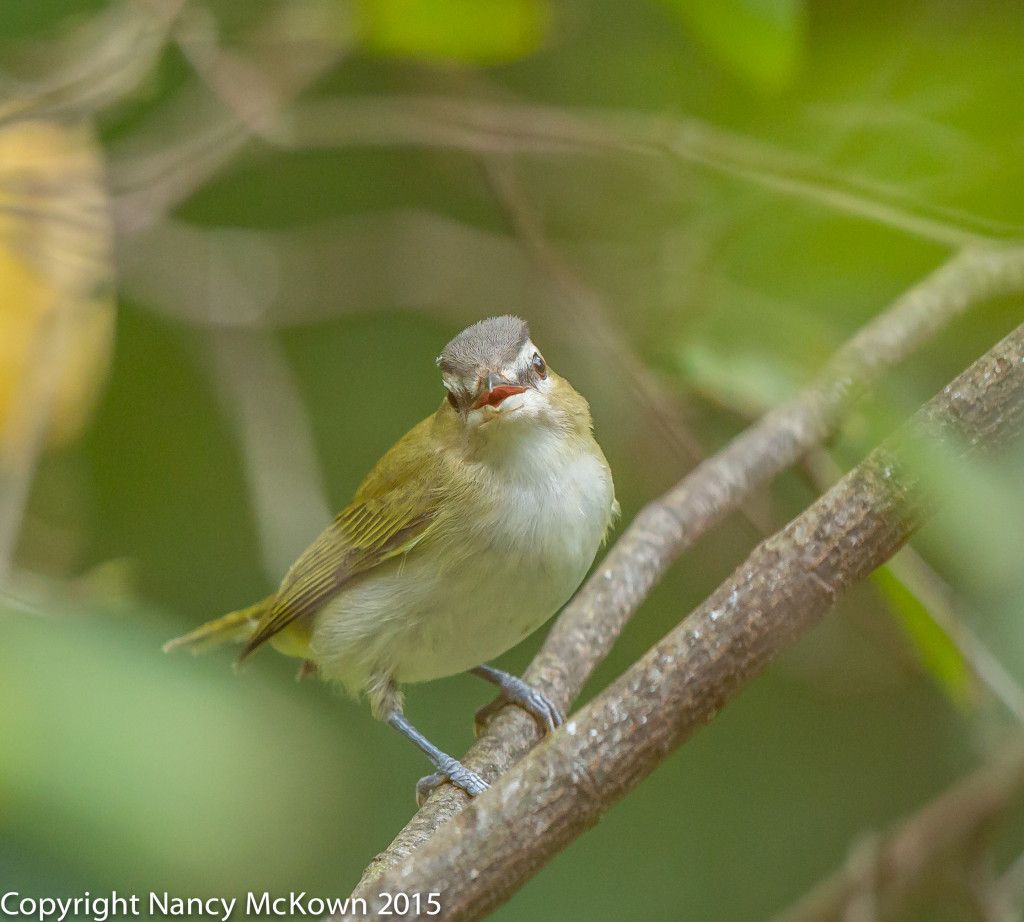
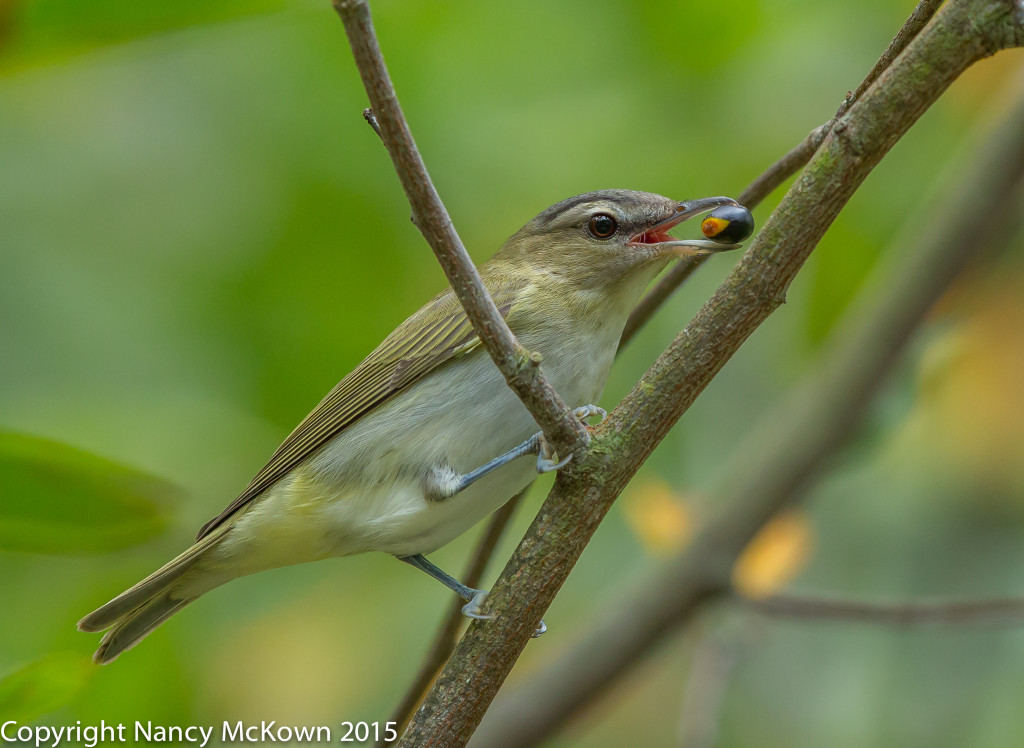
In the Spring and Fall, quite a few Vireos pass through on their migration path. At first I thought that this rather dull, olive colored Red Eyed Vireo was some kind of warbler, but upon closer inspection of his heavier beak, I knew he wasn’t. His most prominent features are the double white and black eyebrows, the lower black lines intersecting his eyes, and those ruby red irises. His foraging behavior is a little different too. It’s a more relaxed photo shoot because there is hardly any of the warbler-ish chaotic movement in and out of the foliage.

Photo of Red Eyed Vireo
Red Eyed Vireo,
Calling to the Photographer.
ISO2000; f/5; 1/500 Second

Auto ISO

If Web resources can be believed, lots of bird photographers consistently use the Auto ISO settings built into their modern DSLR cameras.  Auto ISO lets the camera’s computer automatically calculate (on the fly) the best ISO, given certain maximum and minimum parameters and the other exposure settings. It’s a valuable timesaver because the photographer can let the camera automatically respond to rapidly changing light levels.

For instance, if I’m shooting in “M” – Manual, with Auto ISO engaged, the camera’s computer is making one (ISO) exposure decision for me. (NOTE: It’s not really “Manual”, then, is it– see this post). If I’m shooting in Aperture Preferred or Shutter Preferred, with Auto ISO engaged, the camera is making two exposure decisions for me.

Photo of Red Eyed Vireo
Red Eyed Vireo. He Eventually Swallowed That Colorful Morsel (in the Protective Casing of a Gall?) ISO2000; f/5; 1/640 Second

The minimum and maximum ISO ranges that you can tolerate should be based on personal preferences and the noise reduction technology built into your camera’s sensor.

Spot Metering and Auto ISO

Auto ISO is my go to ISO setting when using Manual mode -even if lighting conditions are stable.

I had been using spot metering (along with Auto ISO) in my heavily shaded yard. Spot metering drastically reduces the size of the frame on which the camera calculates exposure. I thought this was a good exposure strategy because birds are tiny and like to hide in the shadows. However, metering these shadows with spot metering usually delivered a very dark exposure reading, causing the Auto ISO to skyrocket to unacceptable levels.

One strategy to keep AUTO ISO from rising too high is to set the camera to Evaluative Metering. The entire frame will then be used to read the light levels (including possible brighter areas away from where the bird is perched). Exposure may then brightened and cause the ISO reading (and consequent noise level on the image) to be reduced. (NOTE: Overall exposure adjustments can then be made in post processing.)

Read this post to learn more about how Evaluative Metering works.


Photo of Male American Redstart Warbler

Photographing a Wave of Migrating Birds

Not a Typical Birding Day

It’s mid August, plenty of summer weather ahead of us. As I observe my feeder, the usual visitors are stopping by for seeds….  chicadees, nuthatches, cardinals, titmice, the occasional downy woodpecker. Lovely as they are, I have more photographs of these species than I can count.

My husband and I are very watchful. We like to think that we know which species of birds have taken up residence in our yard. We are always hopeful that we will spot new visitors, but that doesn’t happen often in the summer.

During spring and fall migration periods, a lot of bird encounters are happenstance. On this particular day, within a span of 30 minutes, I encountered and photographed 6 newcomers perching in the trees and bushes around the feeder. It was exciting because we groom our yard to be inviting to a wide variety of bird species, and all that work was paying off.

Photo of female Blue Winged Warbler
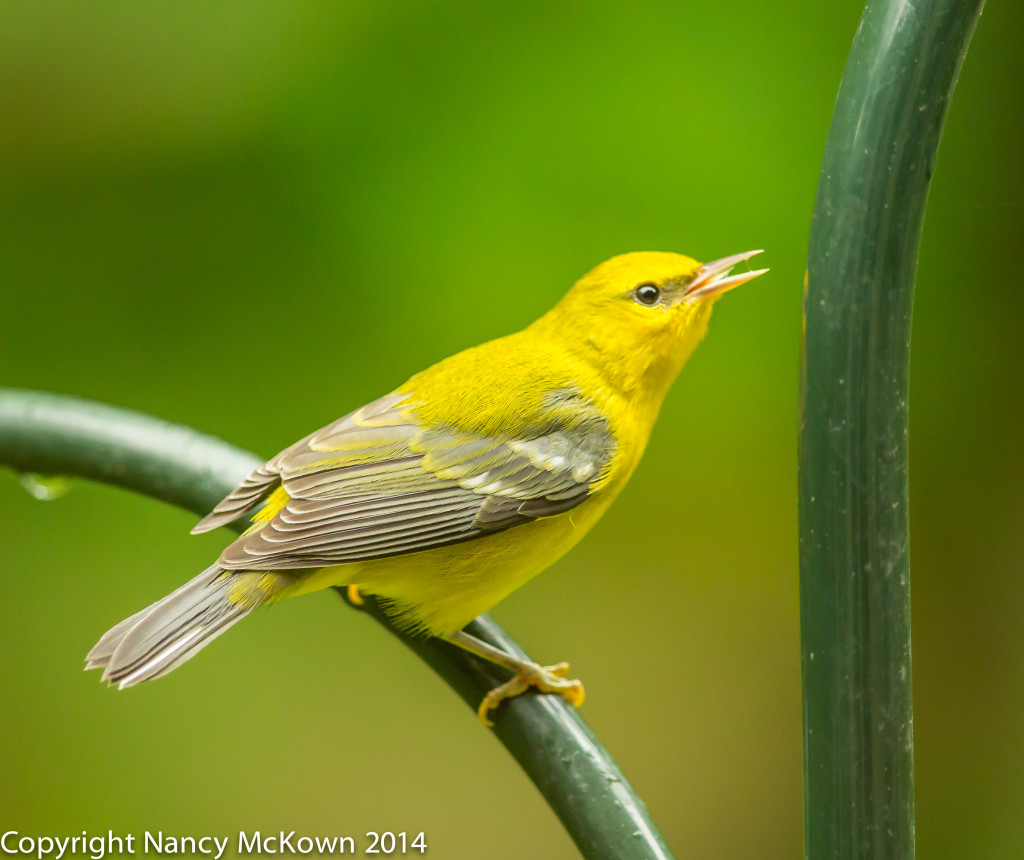
Female Blue Winged Warbler, shot through the window glass.
ISO 2500; f/3.5; 1/800 Second

Grab and Go Photography

We were inside the house when we spotted the first transient- a female blue winged warbler. I grabbed the camera and swapped out the 500mm for the 300mm lens. It was a rainy and dark day, so I had to choose a wide open aperture setting to get even a passable shot. Working quickly, I placed the tripod near the window, positioned my camera and took several shots of the warbler as she tentatively approached the feeder. I did not dare open my less than sparkling window, fearing that the commotion would cause her to fly off and vanish forever. Windows shut, I just followed her with the lens (attached to the gimbal head) as she hopped between feeder and foliage.

Photo of male American Redstart Warbler
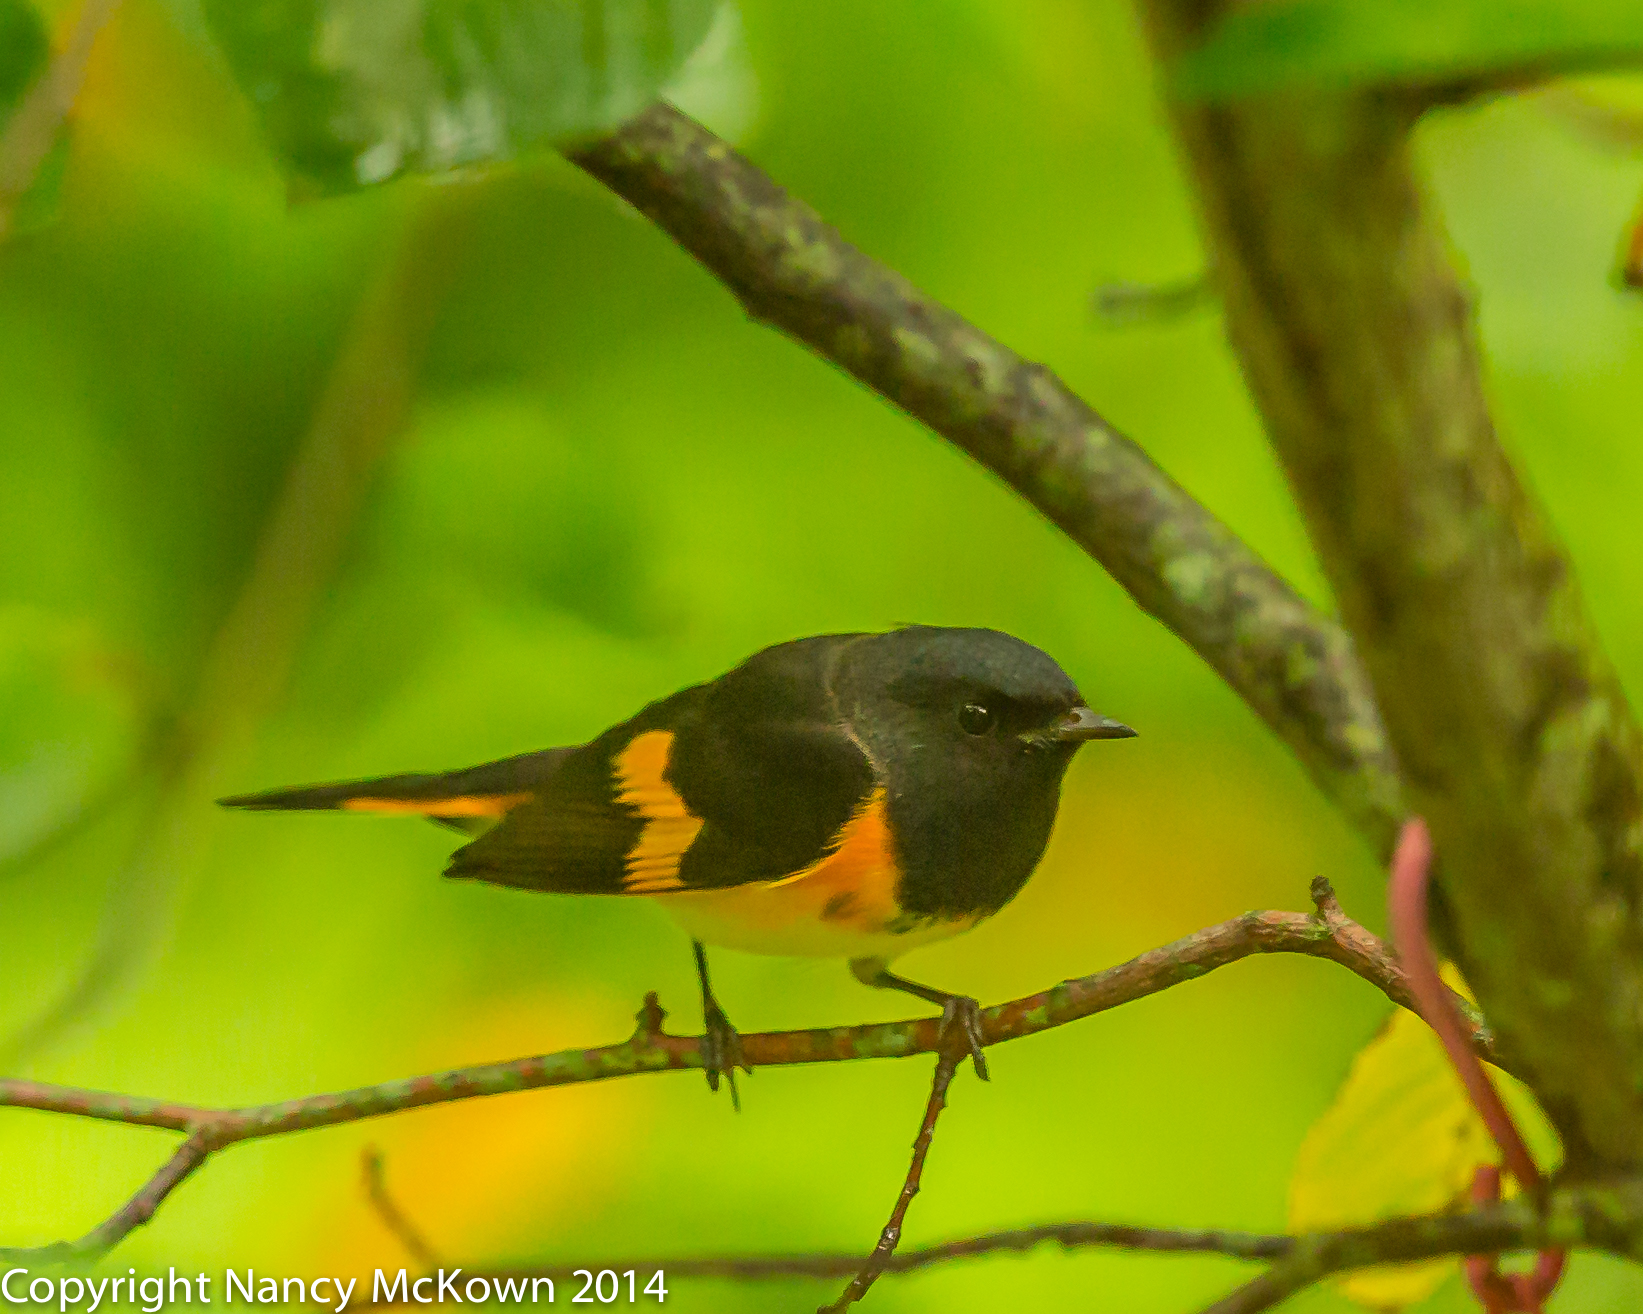
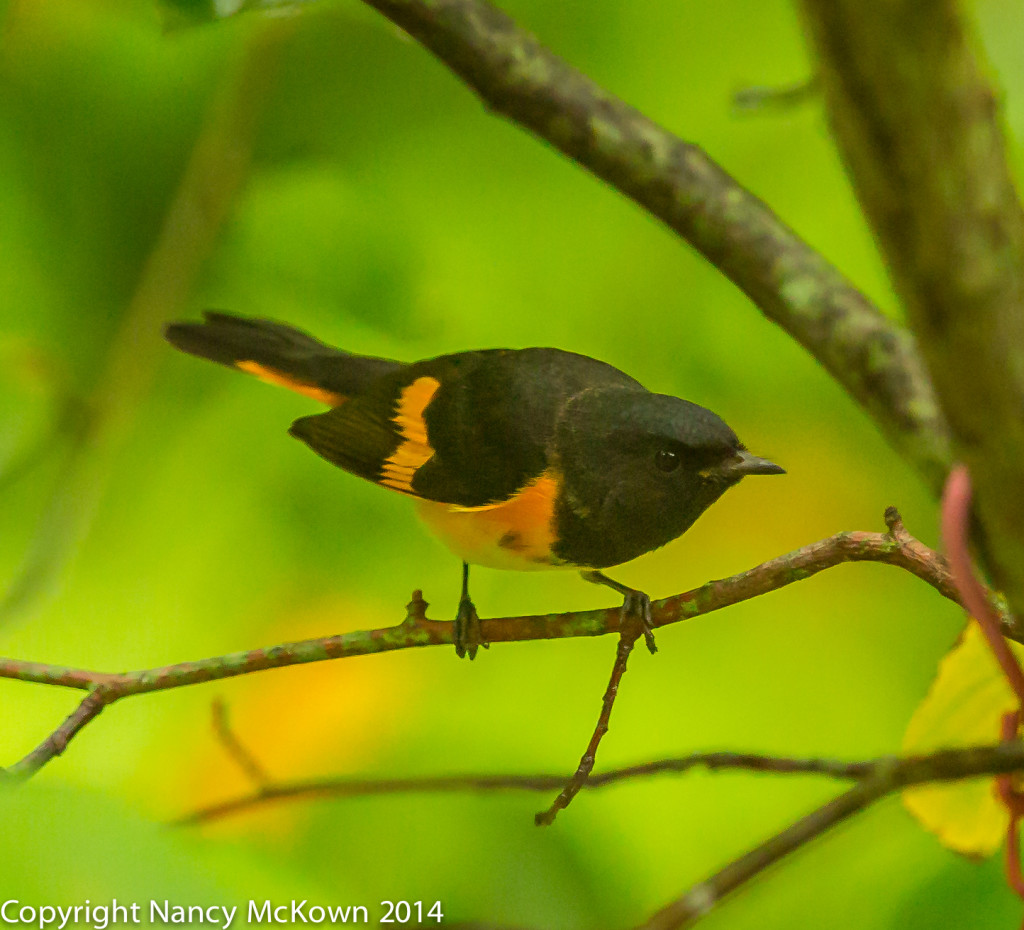
Male American Redstart Warbler.- Photo taken Through the Window Glass.
Perched within View for only a few seconds.
ISO 4000; f/3.5; 1/800 Second

New Birds Kept Arriving

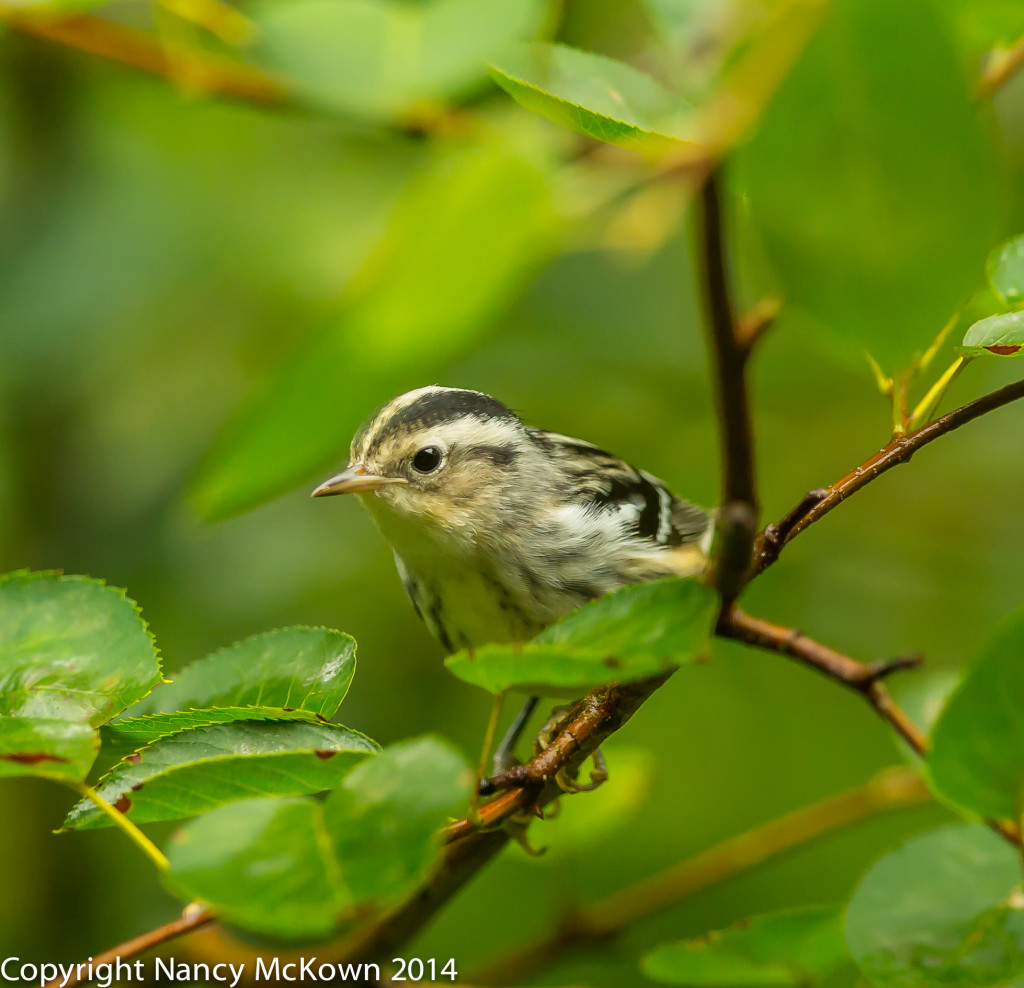
A new, beautiful warbler! I was practically giddy, but the best was yet to come. Within minutes, I was looking at a brightly colored orange and black warbler…. a male american redstart. He perched only seconds, long enough for me to focus and hold down that shutter button. In his wake, a yellow throated vireo landed on the same branch, staying only long enough to snatch a caterpillar. I lifted my eyes and spotted another newcomer tucked behind the leaves of an adjoining branch. I swiveled the gimbal and tried to position the lens to focus amist all the leaf clutter. The new bird hopped into view – a black and white warbler. I focused and was able to press the shutter only once before he jumped out of view. I scanned again and this time, a warbling vireo and a female american redstart graced my view. So much activity! I pointed my lens at anything that moved.

And then they were gone.

Photo of Yellow Breasted Vireo
Yellow Throated  Vireo, captured through the window glass.
ISO 2500; f/3.5; 1/800 Second
Photo of Black and White Warbler
Black and White Warbler, Taken through the Window Glass
ISO 1250; f/3.5; 1/800 Second
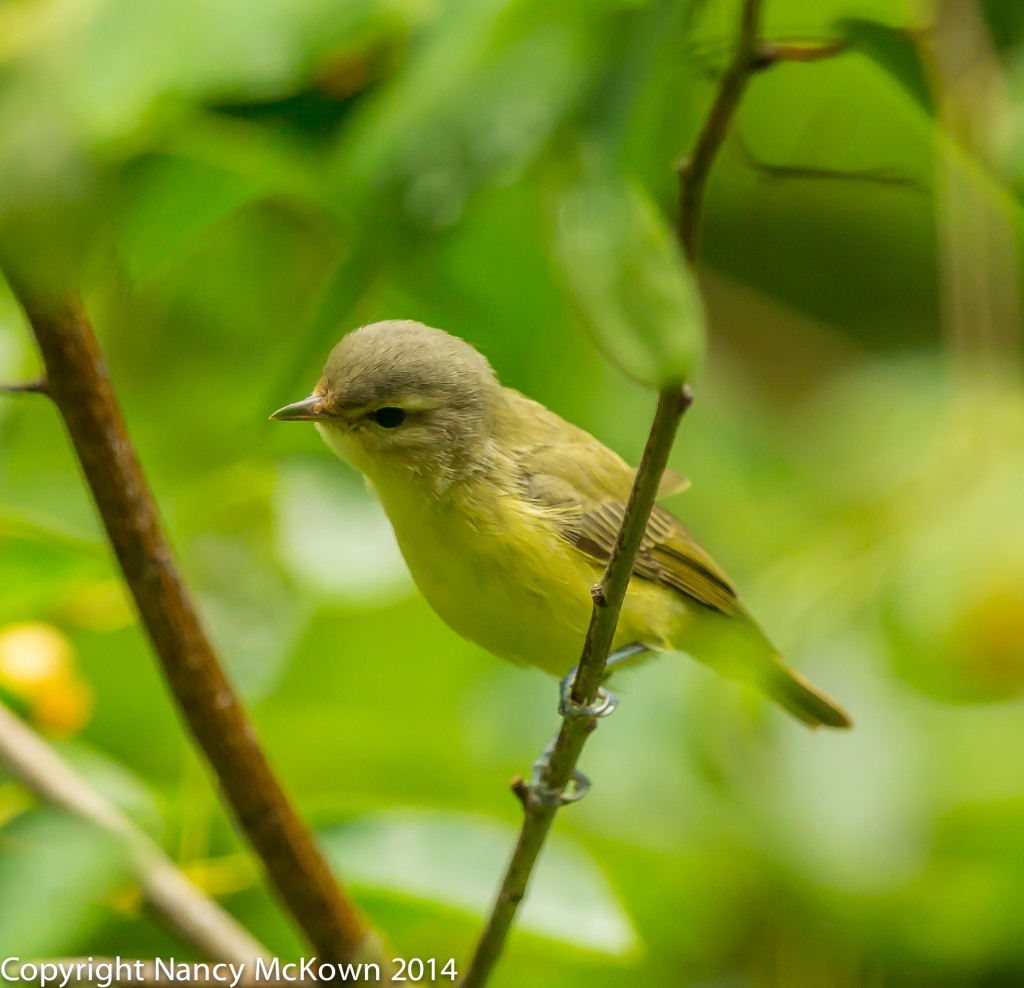
Photo of Warbling Vireo
Warbling Vireo, taken through the window glass.
ISO 1600; f/3.5; 1/800 Second
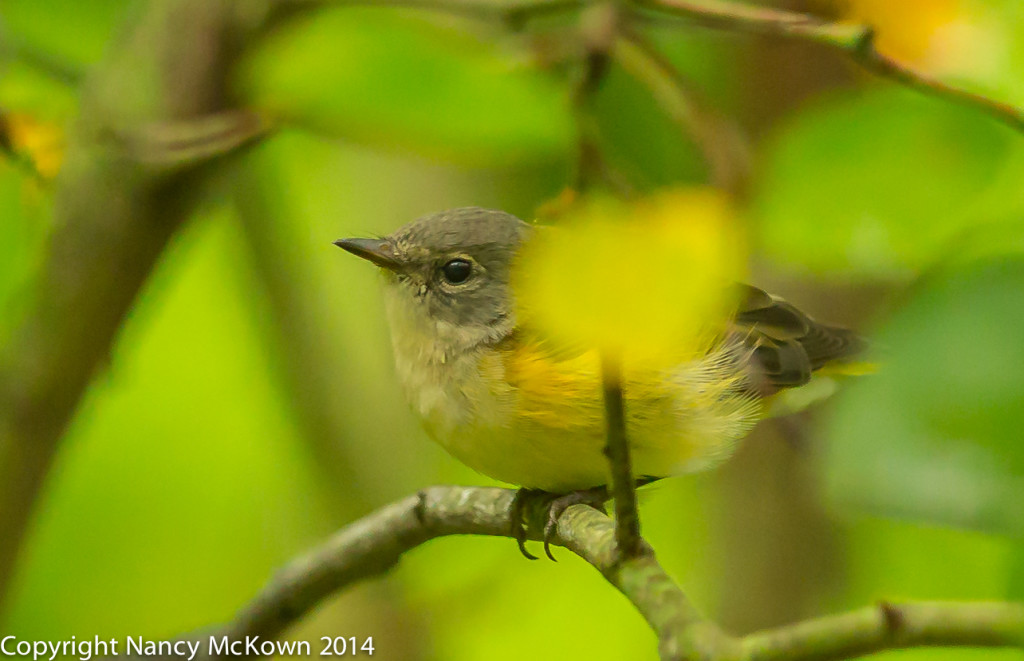
Photo of Female American Redstart Warbler
Female American Redstart Warbler. Photographed through the window glass.
ISO 2500; f/3.5; 1/800 Second

Bird Migration Marathons

While waiting by the window and hoping to see more new birds, I checked Sibley’s Field Guide. No telling exactly where they came from, but all 5 of these species nest in eastern North America, including southwest Michigan. If I had spotted one or two new species over the same amount of weeks, I might have thought that these birds were just being adventurous in a new territory and would return to their territories after their little sojourn. But 5 new species appearing in a span of 30 minutes is a spectacular show in our yard. One of the first waves of small bird migration must be upon us.

Champions of Endurance

How early in the summer does fall migration begin?

Some species (especially shorebirds) begin their migratory journeys as early as July. Many factors impact when birds commence their migratory journeys, how often they need to stop to rest and replenish, and ultimately, how successful they will be along the way. These include: starting location, light, weather, wind direction, temperature, available food along the way, distance to wintering grounds, and maturity of offspring.

Why did 5 different species descend at the same location and at the same time?

While mostly invisible to humans, billions of birds go through their migratory rituals twice a year. With these kinds of numbers, how can birders and bird photographers NOT notice multiple species of transient birds. Migrating birds travel together in waves and the waves pass through at different times. Many smaller and daylight feeding species (like the newly arriving vireos and warblers photographed here) fly at night and rest and replenish during the day.

Still Waiting and Hoping to See More New Birds

I’ve been sitting near my library windows all afternoon, camera at the ready, hoping to spot those same new birds again…. or maybe a wave of new ones that temporaily drop out from their long flight and grace us with their presence. So far only the usual residents are making an appearance. The mere size of fall migration pretty much guarantees that, if I keep a watchful eye, I am sure to see more transients visit our yard.

I am thinking about the best place in the yard to set up my blind so I don’t have to shoot through the window glass. Meanwhile, I’m going to wash my windows.

For more information about small bird migration patterns, press this link.

For more information about gimbal heads, press this link.

See this post for more information about our certified wildlife habitat.

UPDATES:

8-24-2014.  We saw 5 new warblers and 1 vireo pass through our yard.  I plan to upload all new migrating bird photos to an album in my flickr account. (See link below)  NOTE:  All photos taken through the window glass. In an effort to get better photos, I set up my equipment outdoors, but no newcomers approached. 
  • mourning warbler
  • chestnut-sided warbler
  • magnolia warbler
  • black throated green warbler
  • cape may warbler in fall plumage
  • red-eyed vireo
8-25-2014 Update  – 5 more new warblers in our yard today
  • ovenbird wood warbler
  • orange crown warbler
  • hooded warbler
  • canada warbler
  • blackburnian warbler
Identifications confirmed by the expert birders at Whatbird.com
https://www.flickr.com/photos/124694572@N03/sets/72157646466701167/
If you have photos of new migrating birds visiting your area this fall, I would love to see them. Please send me a link via the contact information on this blog.
Flycatcher

Photographing Hard to ID Flycatchers

Bird Photos Are Not Always Enough

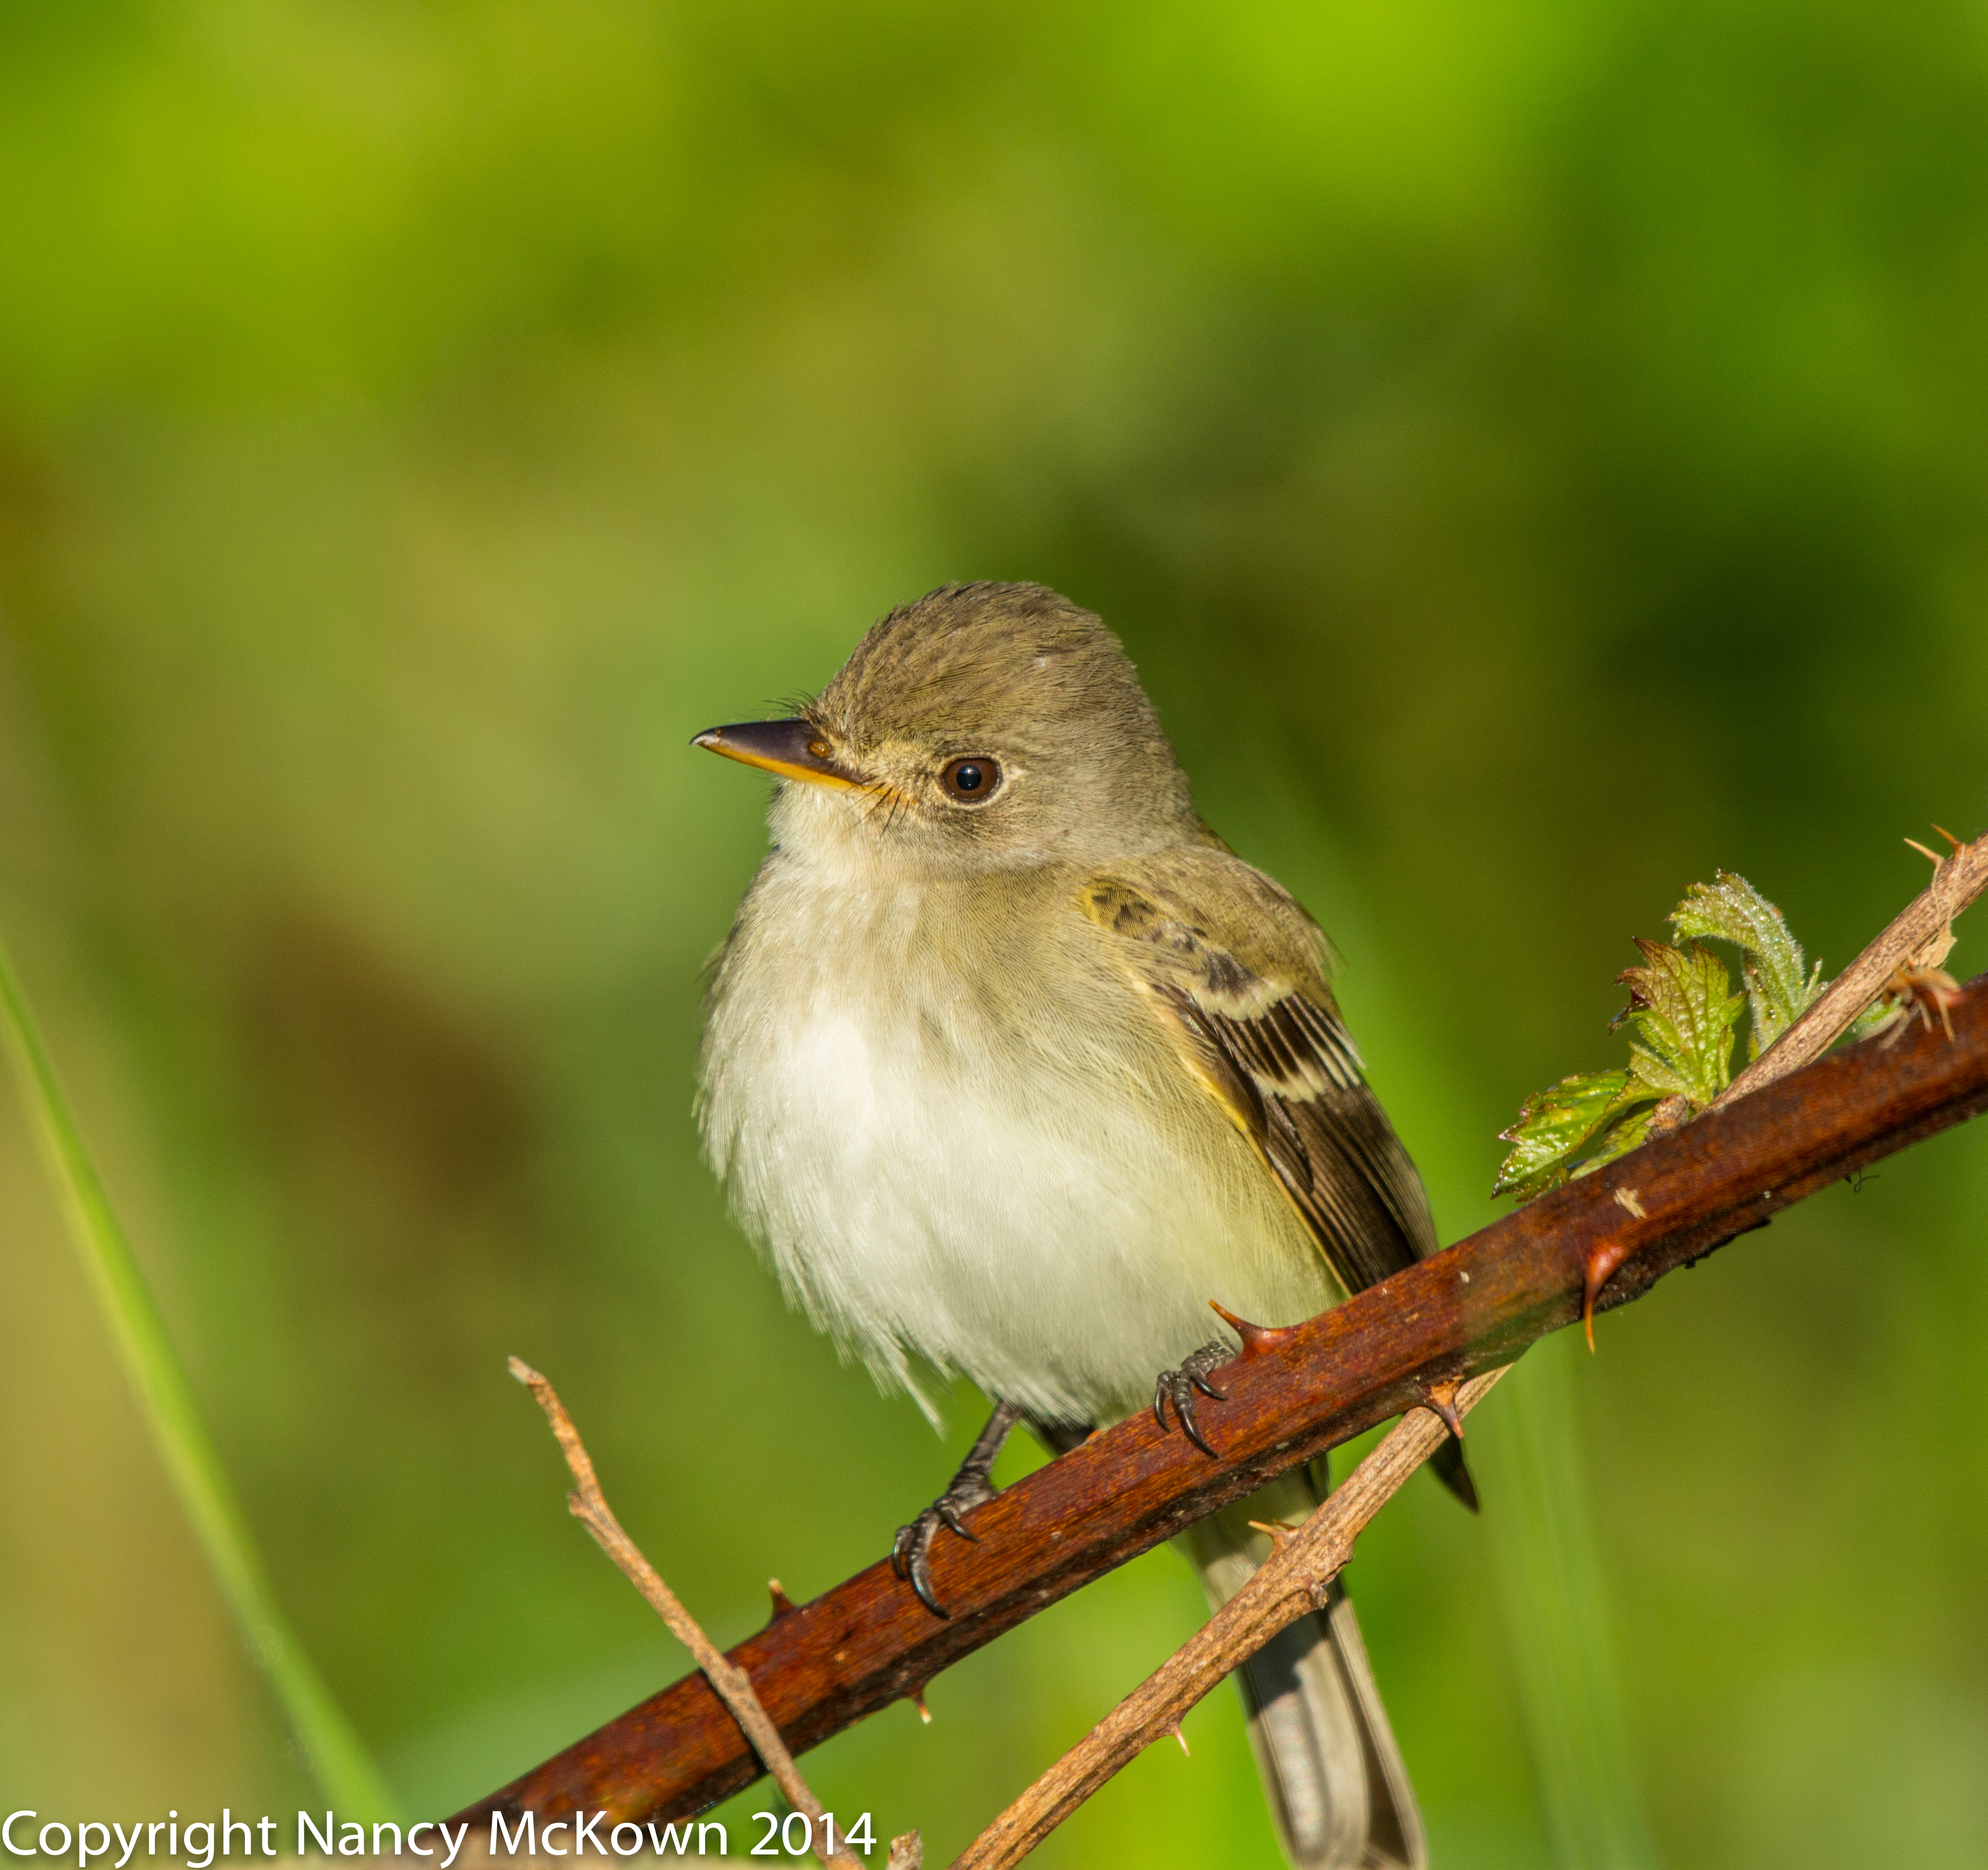
Last week, while roaming in the Allegan State Game Area, I photographed what I knew to be some species of flycatcher. To get a more precise ID, I uploaded the photo to WhatBird.com. The responses I got back from the experts at What Bird helped me understand how complex the identification for empidonax flycatchers can be. Clear photographs just aren’t enough for every ID.

Flycatcher Photo
Adler/Willow -aka Traills Flycatcher
ISO 640; f/9.0; 1/800 Second

ID Quandary on This Flycatcher

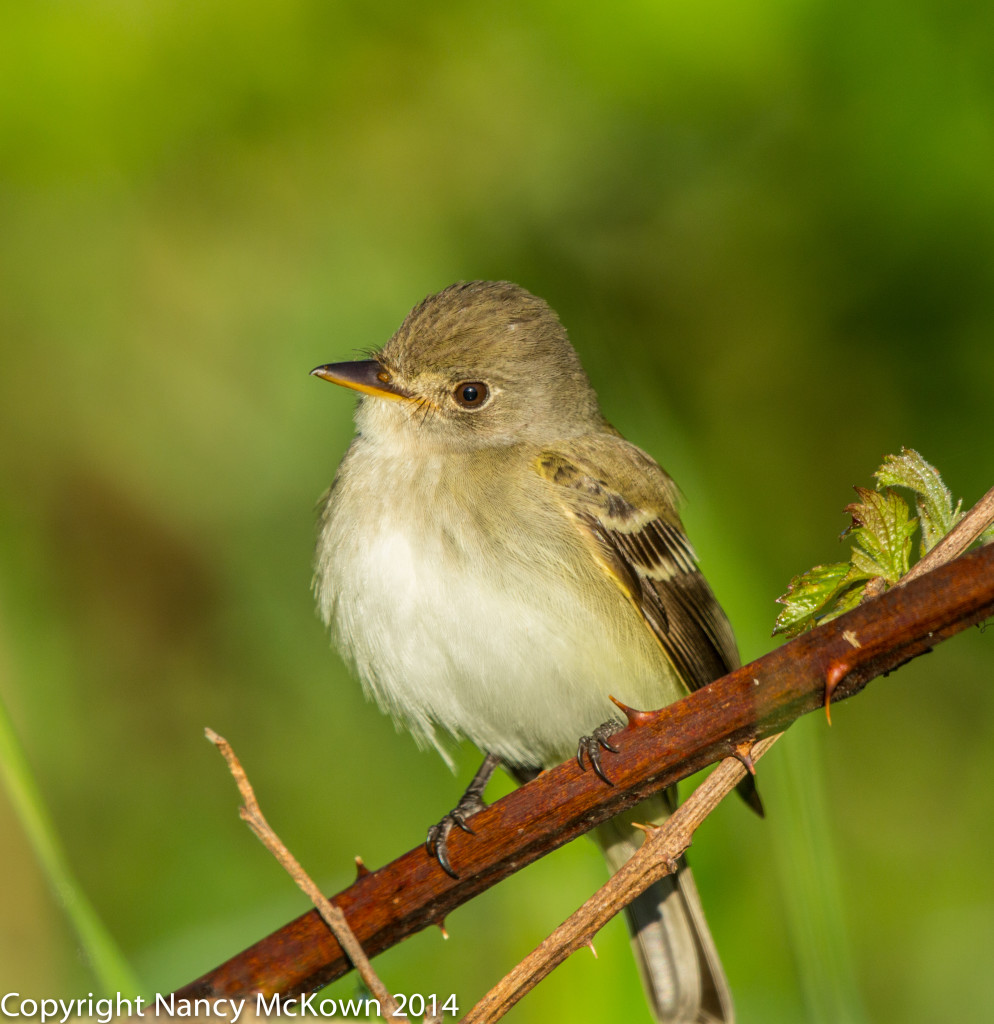
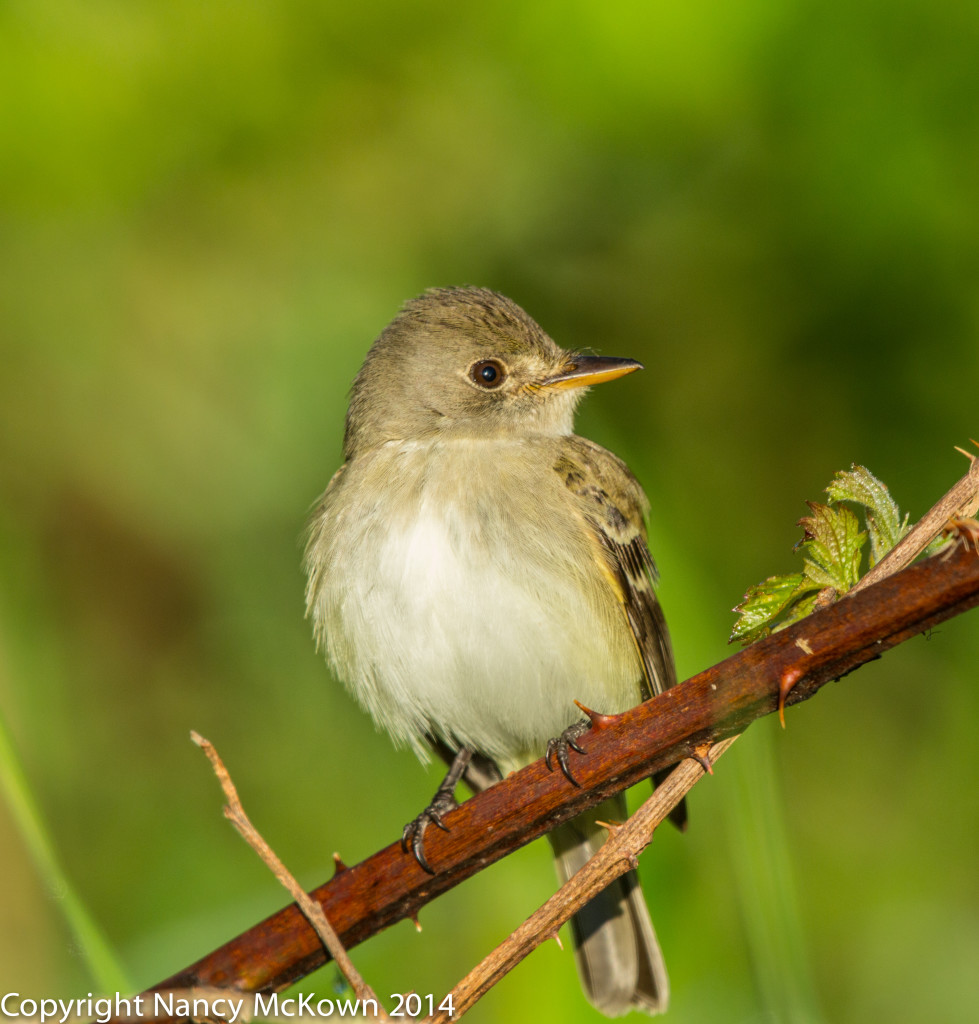
A little background: Back in the 70’s, the Alder flycatcher and the Willow flycatcher (once considered to be the same species of bird and named the Traills Flycatcher) were determined by researchers to be two separate species. One of the most definitive characteristic that separated them was the width of their eye ring. The Willow shows a less defined eye ring compared with the Alder’s more distinctive eye ring. To complicate matters, other Empid flycatchers, like the Least flycatcher, have similar ID characteristics to the Willow/Adler Flycatcher.

Even with the bird-in-hand, the experts agreed that empidonax flycatchers are very difficult to tell apart. The discussion on the WhatBird site was that this bird I photographed was either a Least Flycatcher or a Willow/Adler or Traills Flycatcher (Traills=the former name before they were pronounced 2 different species.)  Eventually, the consensus was that it was not a Least (due to the rather faint eye ring).

Pyle Guide

The bird ID discussion on this little flycatcher included a reference to “Pyle”. A quick web search identified Pyle as a technical birding ID guide, often used when precise reference information about plumage, age, sex, wing, tail, bill measurements, etc. of birds is needed. The Pyle guide (Identification Guide to North American Birds by author Peter Pyle)  is the authoritative source on Bird ID for researchers, bird banders, and bird ID experts. So much detail is included in Pyles that it is mostly useful when you have the bird-in-hand.

Not a Birding Field Guide

The purpose of the Pyle guide is to document complete, accurate and uniform ID criteria for ornithologists and other people engaged in bird research. After all, there has to be an authoritative reference guide for bird banders to use. Bird banding based on best guesses of well meaning birders would not have scientific value. This rather intimidating, over-the-top resource is certainly not targeted for bird photographers like me, nor is it a useful guide to take in the field with your binoculars.

Photo of Flycatcher
Adler/Willow aka Traills Flycatcher
ISO 640; f/9.0; 1/800 Second

Final Word on This ID

Birding expert Steve Tucker helped finalize this bird ID for me.  He wrote:

“With all the power vested in me by the Global Birder Ranking System, I pronounce your bird to be a Willow or Alder Flycatcher (in other words, Traill’s). Empids can certainly be variable, but I have never seen a Least with such a thin eyering.”

Steve’s excellent blog posting about hard to ID flycatchers, The Truth of Empidonax can be found at this link.

Will I Ever Get Better at Bird ID?

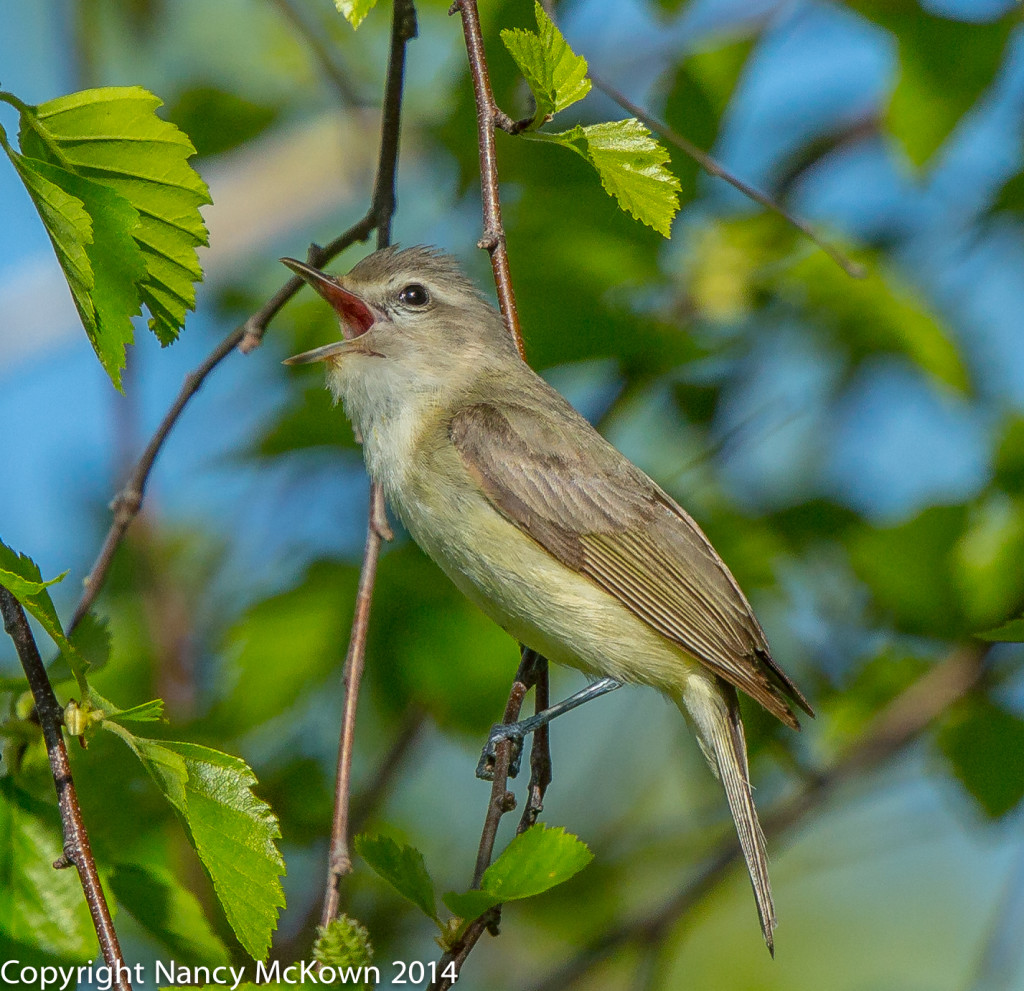
And…. just when I thought I was making progress with my bird ID skills, I discovered that what I thought was a flycatcher (who knows what kind) was, in fact, a Warbling Vireo. See Photo Below. WhatBird experts explained that the eyebrow plumage (known as the supercilium) starting at the beak and ending near the rear of the head is not a characteristic of flycatchers. In addition, the wing bars are different and the bill on the Warbling Vireo is not as broad across the base as the bill of a flycatcher.

It’s all about paying attention to the details.

Warbling Vireo
Warbling Vireo Singing His Heart Out. Most definitely
NOT a Flycatcher. Note the eyebrow plumage (known as the supercilium)
starting at the beak and ending near the rear of the head.
ISO 640; f/11; 1/1000 Second

Note to self:  Always check with the bird ID experts before posting a bird photo.