Photographing a House Wren
Every morning in the spring and summer, the bubbly songs of little House Wrens greet me in our front yard. Hard at work, they zip about in the understory trees and bushes to snatch small arthropods and take them back to feed their nestlings. Their almost constant, somewhat scolding songs help me find and track them with the lens.

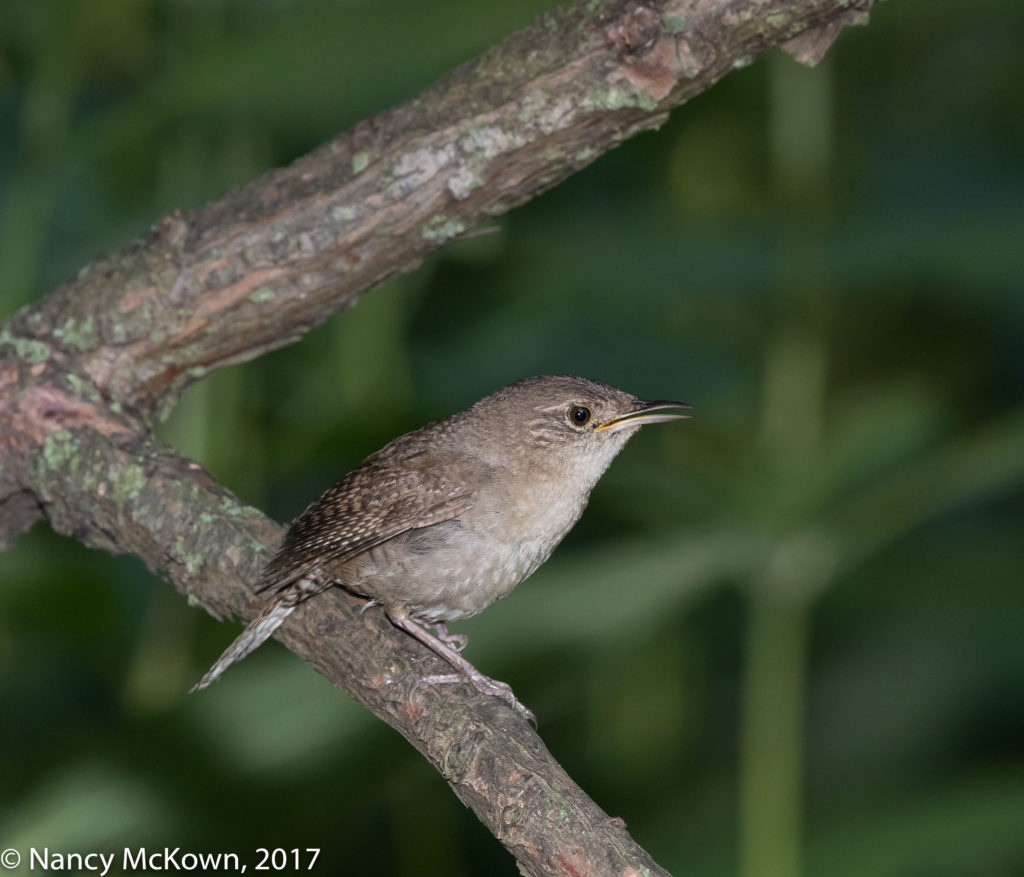
With Flash
Taken Earlier in the Morning.
ISO1000; f/9; 1/250 Second
Automatic Exposure Bracketing
It was coming upon mid-morning and way past the time when the summer sunlight was low and complementary. The light in our yard was contrasty, uneven, and patchy…the perfect formula to misdirect the camera’s light meter. Instead of packing up, I removed the flash gear and started playing with the Automatic Exposure Bracketing (AEB) menu.
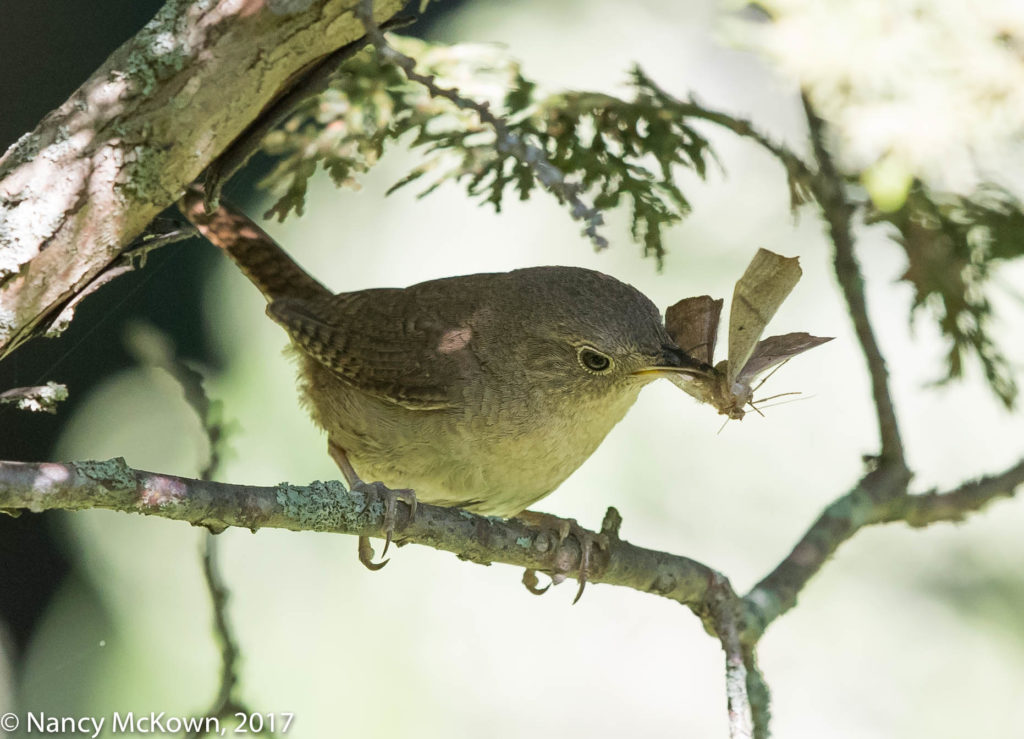
NOTE: There’s a big difference in the quality of light between the top photo (even, early morning light, with flash) and the bottom two photos (late morning, harsh light, no flash). I have to admit that it felt good to take the flash assembly off (flash bracket, telephoto flash modifier, off shoe flash cord and lithium battery pack). The camera foot and tripod head are better able to balance and maneuver the lens without the extra top heavy weight.

Without Flash- AEB -1
Unattractive Contrasty Light.
ISO1600; f/14; 1/800 Second
Thoughts on AEB
If you wish to improve the exposure balance in difficult lighting situations, then automatic exposure bracketing (AEB) can help. The camera’s automatic bracket functionality quickly and efficiently changes exposure parameters within a sequence of shots. Essentially it varies the degrees of brightness for each shot based on the designation you set in the menu. Your specifications can be programmed to use either broad or narrow image sequence sets. The camera will maintain the exact same metering while changing the exposure parameters.

Such Different Color Tones!
Light is Still Unappealing,
ISO1600; f/8; 1/800 Second
+1 Exposure Compensation
For instance, if you think the light meter is incorrectly gauging the scene to be brighter than it is, set the AEB to take 3 or more shots in negative exposure range. Conversely, if you think that the light meter is incorrectly gauging the scene to be darker than it is, set the AEB to take 3 or more shots in the positive exposure range.
AEB Procedures and Settings
- On some dSLR cameras, including mine, the photographer can use AEB with the camera set to Manual (M) mode and precisely control all exposure parameters independently. Since I most often vary only the shutter speed parameter during the AEB sequence, I use the shutter preferred semi-auto mode (TV) instead of Manual mode and choose a low and unchanging ISO setting. (NOTE: Not AutoISO). Lastly, I engage continuous shooting mode, otherwise the shutter will stop after the first shot and wait for me to continually press the button before it fulfills its AEB mission.
- In the semi auto modes… the camera will operate outside of optimal exposure limits to achieve the auto bracketing exposure parameters set. If minimum and maximum hard limits have been set up in the menu (ie…shutter should never be slower than 1/30 second), the camera might be forced to alter more than one exposure parameter (ISO and shutter) to achieve the bracketing sequence.
- On this shoot, I changed the AEB parameters quite a lot without thinking it through. At times, camera would not execute the AEB sequence (shutter speed as the variable), and take only one shot instead of the whole sequence of shots. I finally figured out that the number and variation in exposure parameters that I set up were just not possible to execute in AEB given limitations on the shutter preferred auto mode, the ambient light and the len’s max aperture settings.
- You can set the camera to discontinue AEB after each sequence….but re-engaging it every time is a hassle….. especially with a highly active bird like the House Wren. I left AEB set to “On” until I was done with the shoot.
Manual Bracketing
Bracketing can be done manually if you wish to be more precise in your exposure manipulation deliberations. This means that instead of setting up an automatic 2-3-5 or 7 AEB shot sequence in the camera’s menu, you dial in whatever exposure compensation you wish using the camera’s Manual mode and then take each differently exposed shot one at a time. (NOTE 1: Exposure Compensation Dial on the LCD panel will not work in complete Manual mode. NOTE 2: Birds are highly uncooperative during exposure manipulation.)
AEB Rarely Does the Trick in Bird Photography
Sometimes the balancing act that makes up AEB does not work because the exposure on one portion of the image causes problems in another part of the image. AEB sequencing will only produce many poorly exposed images.
NOTE: You can combine multiple images into one by using the High Dynamic Range (HDR) process.
When photographing birds there is no substitute for well balanced light. AEB can not fix poor lighting conditions, but it may help you balance exposure parameters to create a more usable photo. Overall, judging by the results, I would rather wait for good light.


I’ve been a month behind in seeing your photographs. I’ve missed some really great photos Nanc!