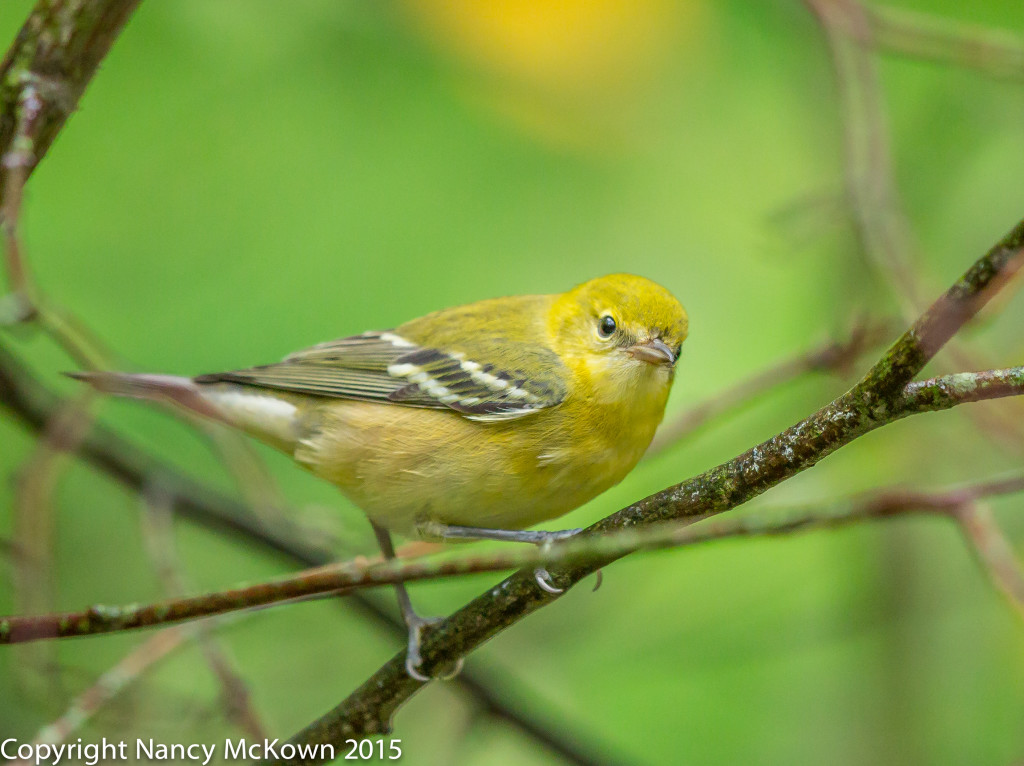
Tracking Warbler-ish Activity with the Camera
I can now quickly recognize warbler-like activity; the in and out pecking and skittering movement of something tiny and yellowish, ever so slightly dipping the branches of trees, ferns and bushes. I have to admit that I can recognize and name only a few warblers on sight. To my eye, the differences between most warbler species are subtle, especially when they are not in full Spring plumage.
I enjoy the luxury of experts, time, and my trusty camera and long telephoto lens. Warblers come and go so fast during migration, that I’ve come to rely on my camera to capture and preserve the “warblish” details that the experts find so revealing and I find so elusive.

Long lens
Pointing at Him.
ISO1600; f/4; 1/400 Second
Photographing the Bay Breasted Warbler
I was able to ID this female (or juvenile) Bay Breasted Warbler only after uploading a photo and consulting with the birding experts at WhatBird.com. The male Bay Breasted is unmistakable in the Spring with his black mask, dark gray streaking, and bright chestnut chin, head, breast and flanks. The males lose much of that colorful distinction and blend in appearance with other warblers sporting two white bars on the wings. The birders say that the black legs set Bay Breasted Warblers apart from the Blackpoll Warbler.

Legs and Feet.
ISO1600; f/4; 1/500 Second
Playing with Exposure
As you can see by the ISO readings on the photos above, I continue to photograph migrating warblers in my heavily shaded yard when the rains and hunger drive them down to the trees. Lately, I’ve been lucky because the birds have been perching on the serviceberries, low lying ferns, grasses and other less dense foliage outside my window. Even though the light is still dim on this greenery, the ISO gets a boost because those areas are more evenly lit.
Limit the Cap on Auto-ISO
I shoot in RAW almost exclusively, with the camera set to “M”, the manual setting. I set the shutter as low as I dare and open the aperture to get as much light as possible. The ISO is almost always set to “Auto”, and the ISO auto range is capped at 6400. (NOTE: If the ISO is capped at 6400, and the light is still inadequate for proper exposure with the manually set aperture and shutter speed, the shutter will still fire, and deliver an underexposed image.) Despite the very good full-size sensor in the Canon 5D Mark III, the noise is objectionably high on ISO settings above 6400, no matter how close I am to my subject. On dreary days, I miss a lot of shots with this ISO cap. Sadly, exposure choices are limited with low (natural) light photography.
Raw Format
RAW format takes more time, more patience and so much more hard drive space, but I find it worthwhile for bird photography. When the camera is set to RAW, images are not processed in the camera. Once you import them into the post processing software, you see exactly what the sensor captured.
It’s not hard to screw up exposure settings when a fabulous bird appears unexpectedly in front of the camera. Despite all my time in the field, excitement can still cause me to I forget to change some setting on the camera. With the camera set to RAW, little screw-ups like that rarely matter.
Histogram Magic
When I first import RAW images into Lightroom, they always look a little dark… a little dull. So, how do you know (technically) how much exposure to add in post processing? Check the histogram.
For Evenly Lit Images
Sure, you can eyeball it…but eyeballing hundreds of images can make your exposure dial trigger finger a little goofy. The histogram gives you a mechanically superior exposure. It’s simply an information graph mapping dark to light. Ideally, and assuming you have an evenly lit scene, you will see a bell curve. The best way to adjust correct exposure in post processing is to add exposure until the bell curve on the histogram peaks at the center of the chart.
Creative Choices
Having a technically well exposed image is not necessarily the goal in post processing. Go with your heart…. you may find that the image is more pleasing overall when you intentionally under or over expose your images.
One of these days, I will take the time to experiment more in post processing. I usually go with the natural look, but I do find appeal in skewing the light, the grain, the focus. It starts out by playing with the other color and filter presets that come with Lightroom.
To read more about RAW format, visit this link.
To read more about the Histogram, visit this link.


