Blue Heron

How to Photograph a Great Blue Heron – Part 1

A Must for Beautiful Bird Photography

Last week, I ordered a Canon EF 1.4x Extender III for my 300mm lens. The 1.4x increases the focal length of a lens by a factor of 1.4x, thereby increasing the focal length from a 300mm to a 420mm on my camera. I ordered it because there have been way too many times that my subjects are just too far away to capture.

One major rule in photography is to get as close as you can. Most birds are not going to cooperate. It’s true that continually showing up and being quiet and persistent goes a long way towards getting a good shot, but you will have more luck seeing the birds in the first place if you are farther away. That means a longer lens or extenders that allow you to get as close as possible to distant and challenging subjects.

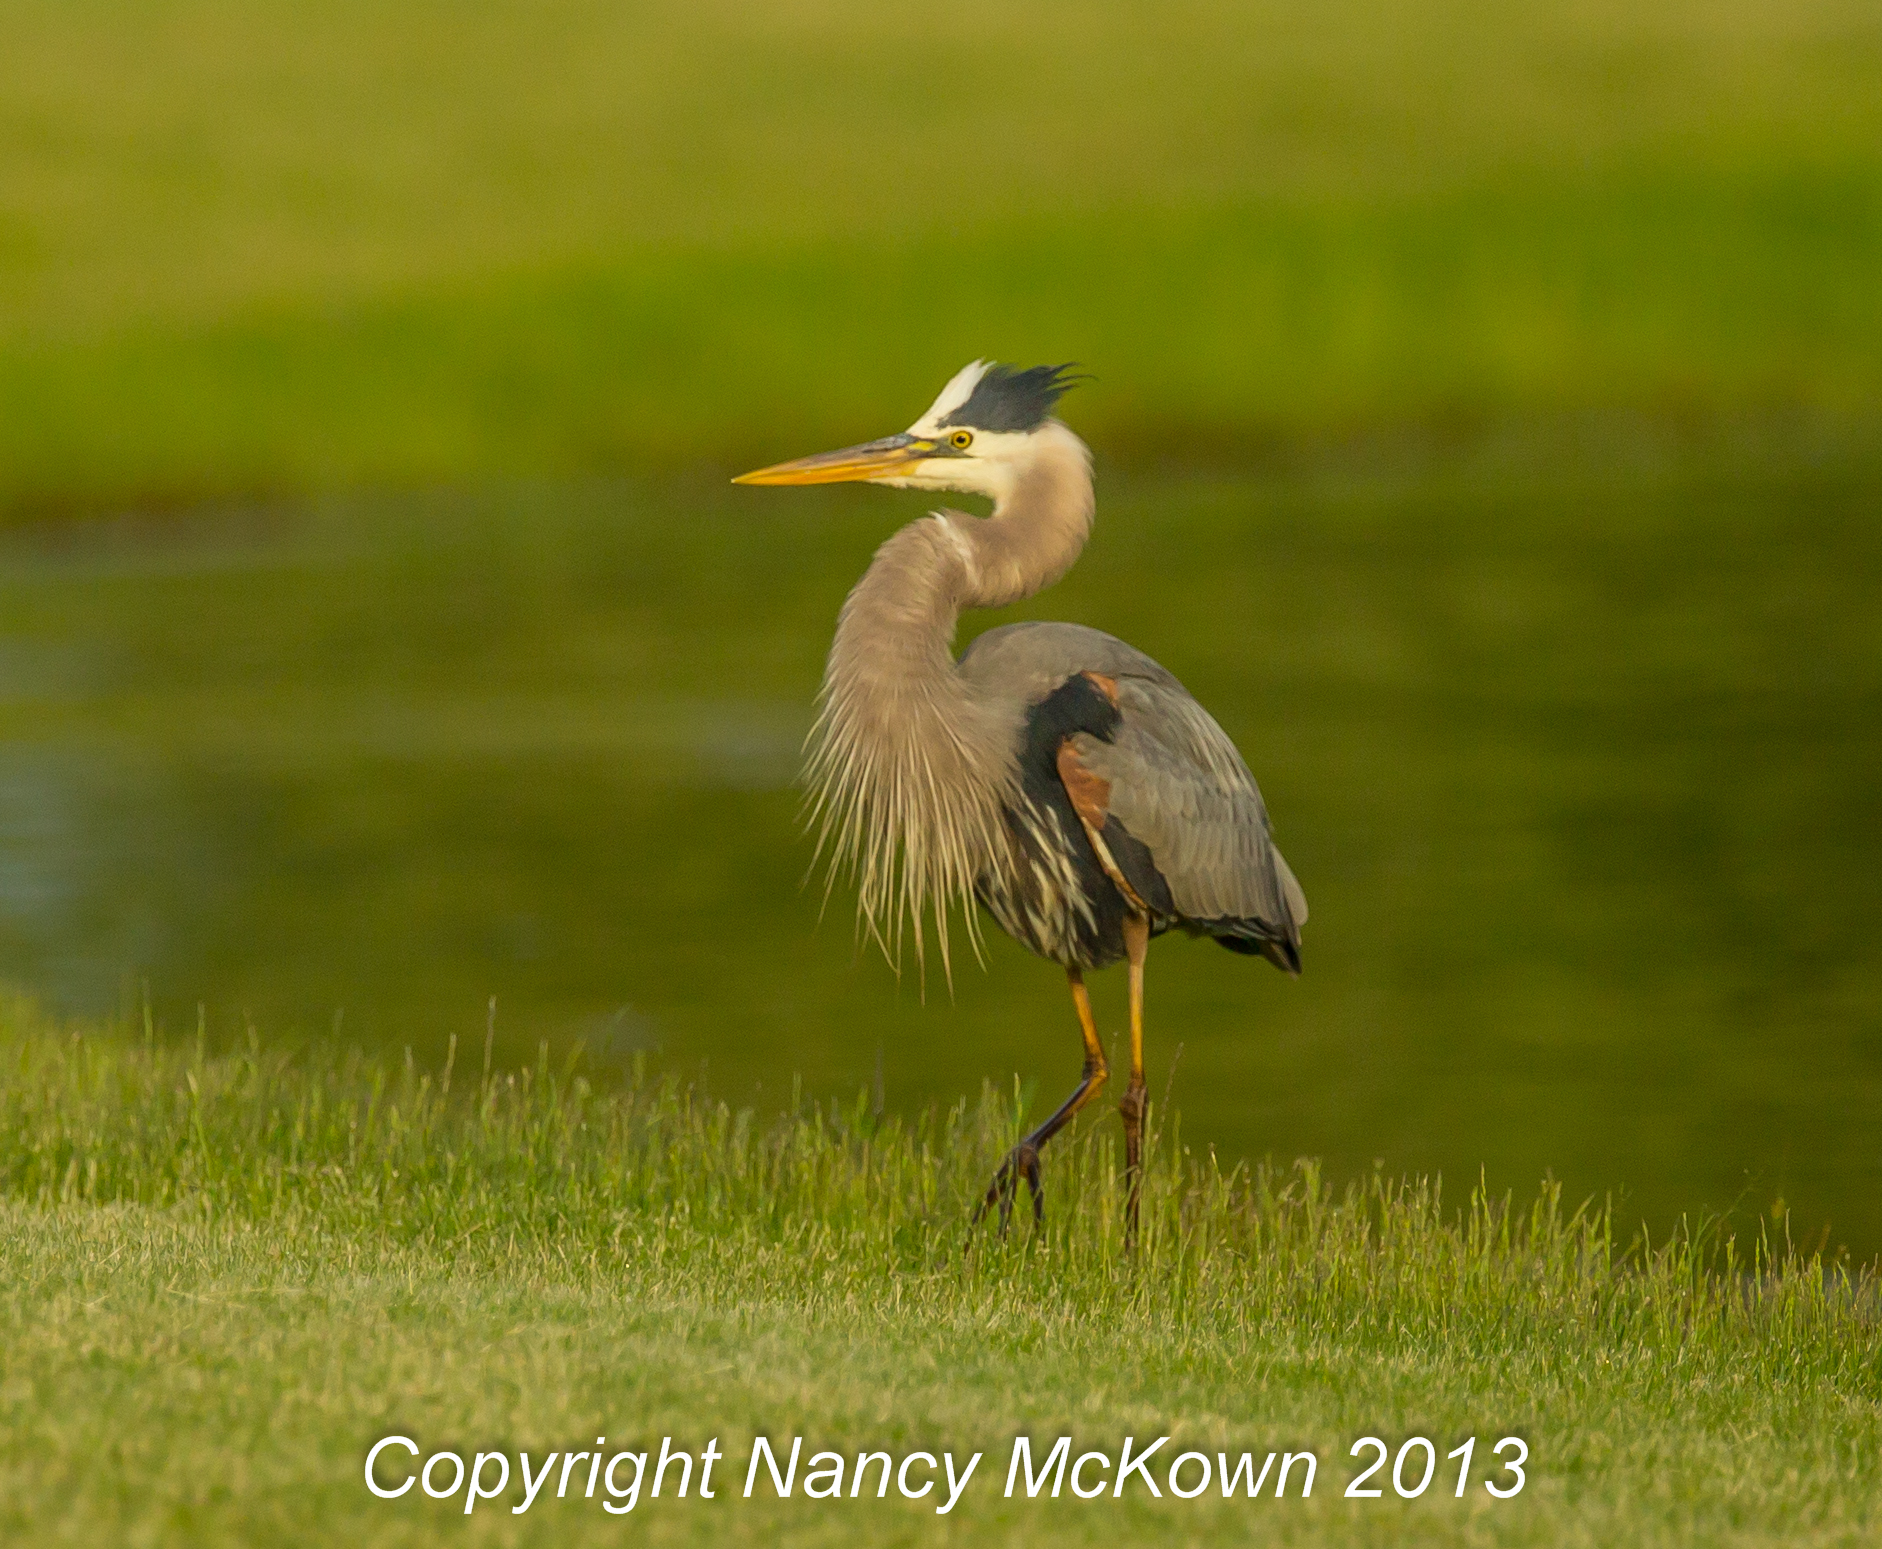
Photographing the Great Blue Heron

I was lucky. Around  7:30 am, I saw a Blue Heron fishing near a pond. I parked the car as close as I dared, powered down my window and stared.  So far, so good, he noticed my arrival, but wasn’t spooked. I thought the ruckus of me opening my car door and getting out with my camera would scare him away, so I set my camera, with 300mm lens and 1.4 extender, to rest on the unopened car door.

Having a resting area in your car upon which to lean the camera helps a lot with camera shake and tired arms and hands, especially with long lenses. Before I was ready to take photographs, I had a lot more fiddling to do with the focus, shutter speed, ISO, etc, but there simply was not enough time because I saw the heron dunk his head under water. This critical action would be finished in seconds, and I would miss the shots if I didn’t start pressing that shutter button right then.

For the first photo, before I was “ready”, the camera was set at shutter speed preferred, at 1/1600 second. That speed simply wasn’t fast enough for the first few critical shots of the Blue Heron dunking his head into the water and pulling up a blue gill. The first 6-8 shots were interesting, but blurred due to the intense action and the relatively slow shutter speed. Good focus was not achieved until I cranked it up to 1/2500/second. I was able to capture a blue gill trapped in the bird’s beak while the bird was making his way out of the water and onto the grass.

Photographing Blue Heron
Blue Heron exiting the Pond with Fish. Photo 1

Try Different Approaches When Photographing Birds

Success breeds success.  Right?  I nailed the Blue Heron catching a Blue Gill and I wanted more.  So I went out again to shoot the same bird, but differently.  Maybe get a little closer- try a different view at the same location, go out a little earlier – try different aperture and/or shutter setting – change how the camera locks focus. Do I dare try to get out of the car?

The Blue Heron is very shy.  Rarely will this bird let you successfully approach him, let alone set up photo equipment.  My kayaking friends tell me that they have had success getting pretty close by gliding toward the bird on a quiet pond. (Look for a future post about shooting birds in a boat.)  But Herons seem less wary of a parked car, radio off, very little movement inside.

Is there a clamp that works to hold your camera and lens steady- and allowing you to pivot the camera while shooting from the inside of a car?  Of course there is.  $36 bucks.  It’s only a clamp, you still have to attach the head unit from your tripod.

Most mornings, I arrived at the pond really early, but the heron did not.  It was almost 7:00 am by the time he arrived.  Not early early enough for the optimal light affects, but better than the 7:40 am time he arrived at my first shooting.

NOTE:  The quality of spring/summer light changes quickly and drastically as the sun rises.  With the sun low on the horizon, you can expect  more subtle details, lush landscape, more luminous golds, and more drama!

Faster Shutter Speed for Clearer Photographs of the Blue Heron Fishing

The Heron landed at the far end of the pond, so I started shooting, hoping he would walk toward me and fill more of my viewfinder.  The fishing heron can stand motionless for long periods of time and then strike lightning fast – so I was determined to shoot most of the time at 1/2500 second  (as opposed to 1/1600 second the last shooting) capture the action – aperture at 4.0  The ISO shot up to 1000-2000 with these settings – too high for my taste for a subject so far away, but what can you do – you have to trade the noise to stop action.

(NOTE:  This turned out to be too slow for the head dunks.. 1/2500 of a second stopped the action of the splashing water, but not the heron’s head.  Next time, I’m cranking the shutter speed even higher).

Coming in Closer for a Better Photograph

Blue Heron Skewering Fish
Blue Heron Skewering Fish Photo 2

The Heron mostly stalked, slowly and methodically, looking for fish in the pond. I was excited because he was stalking closer to me.  I played with the shutter speed and kept shooting, dialing it up and down – down as low as 1/800 second – to try to change the ISO, quality of bokeh, etc. Remember, you want to experiment with the camera settings, otherwise your photos all look the same.

Patience was rewarded with a photograph of a skewered fish on the Heron’s beak.

How to Eat Fish Live and Whole – Lessons from the Great Blue Heron

My husband said that the Blue Heron has to position the blue gill in his mouth so that the fish is head down before swallowing.  The spiny dorsal fin would rip up the Heron’s throat if he tried to swallow tail first. Positioning the flopping fish with his beak and tongue took a few minutes, but soon enough the fish – head first, whole and alive,was swallowed while I watched the progress of the neck bump as the fish slid down the inside of the Heron’s long neck.

Changing Camera Settings Quickly While Photographing the Blue Heron

What did I learn?  I need practice on changing shutter speed on the fly. My fingers know what to do, but I’m so excited about seeing the bird thru the lens that I don’t think about technical recalculations.   Also, maybe the blurriness is a consequence of me heavily depressing the shutter  – a remote shutter setup might be helpful here to avoid camera shake – although it takes the finger away from the camera and consequently changing the settings on the fly is not so convenient.

Zooming in to Photograph Wild Birds

It’s not just shutter speed that makes the better photo, but the distance between the bird and the camera. For tack sharp images, there’s no substitution for getting as close as possible to your subject.  The farther away your subject, the more you have to zoom (during post processing) in order to see the shot clearly.  The more you zoom, the more diluted the photo.

Digital images are made out of pixels/dots. You enlarge the dots when you zoom in because you are zooming in to a relatively small component of the photo.  I’ve included the pre-zoomed photos on the bottom of this post so you can see how much farther away the heron was in the first shot compared to the second shot. Photo 1 is certainly usable after zooming in post processing, but I would not print it bigger than 5×7. There is insufficient photo resolution to go any larger. Photo 2 could be enlarged to a 16×20 print, quite a bit larger.

Blue Heron Skewering Fish
Photo 2 Blue Heron Much Closer to the Camera
NO Zooming
Blue Heron Fishing
Photo 1. Blue Heron Photograph -No Zooming. Subject Much Farther from the Camera than Photo 2


Photo of Hummingbird Coming in for a Landing

How To Photograph Hummingbirds In Flight

Anticipating Bird Movement is Very Important When Photographing Birds

Anticipation is very important when shooting birds. (Shooting the unexpected is a whole different ball game – to be addressed later.) It requires that you research, watch, and think about bird habits, speeds, and likely territories.

You’re planning so you can calculate how best to aim your long lens in the approximate direction of where the birds might be.

Hummingbird Watching- Ready to DiveBomb Any Other Hummer Who Invades His Feeder

Hummingbirds are my target today. I’ve taken hundreds of photos of them on the feeders. BORING! Even if you manage to get a clear shot, the hummer feeder is distracting and the background is unimpressive. You will discover that ruby throated hummingbirds are quite predictable in their habits.

How To Avoid the Boring Photographs

You must take the time to observe where these little guys go before and after they land at the feeder. First thing I observed is that some of these birds (male and female) spend a lot of precious energy chasing other hummers away from the feeders, watching, twitting, dive bombing, always fast and furious in their attempts to keep others away.

These little sentries don’t guard from a perch on the feeder, but pick a spot on a nearby branch, usually higher than the feeder, on which they stand guard on what they consider to be their territory. This spot is not particularly hidden because they need to watch and be ready for the attack on other hummers coming in for a drink.

Camera and Photographer Setup

These little humming sentries are watching you too. They need to gauge whether or not they can protect their feeders with you so close.   Setting up the camera and pointing it to the “spot” and then waiting takes on a whole new dimension, because you, with your tripod, camera, long lens and stool are not the only one watching, waiting and calculating. The hummers are also busy factoring in your habits, speed and likely territory.

There’s some time involved,multiple days probably. The hummers will soon figure out that you don’t pose a threat. They will observe that you are more likely to be there in the morning and evening light, that you will be sitting very still behind the camera, watching them. After a while, they will be buzzing all around you, tho they will keep darting their little heads in your direction.

Camera ISO Settings for Sharp Photos of In Flight Hummingbirds

Techie Alert. With a certain comfort level established between you and the hummer, you must turn your attention to light, shutter speed, aperture and ISO concerns. First ISO. Hummers are tiny creatures. My longest lens is 300 mm, but from where I’m setting up (the closest I can get)  the viewfinder is still mostly full of tree, with the hummer in the center. That means that once I take the shot, I must use my post processing software to zoom in to the subject on the branch.

My lens is very good and the image will be sharp, but zooming when a high ISO setting is used takes its toll on the quality of the shot.  Sharpness fades with higher ISO, and gets worse the more you zoom in. The higher the ISO, the more “noise” you will see (use to be called “grain”). It’s best to keep the ISO low, like under 600 if you can manage, but certainly no higher than 1000 for tiny, far away subjects. If you can not do that, you need to get closer and fill the viewfinder more with hummer than tree.

 The Impact of Ambient Light on Photographing Hummingbirds

Here is when you hope that the spot the hummer chooses to stand guard is not in direct sunlight when you are ready to take the shot. I’ve found that despite the appeal of early morning glow, early morning light won’t work because it is too dim to set my shutter speed as high as it needs to go and still maintain a relatively low ISO. (Capturing Action with Flash will be addressed in a future post.)

Photograph of Hovering Male Hummingbird
Male Hummingbird Hovering While Watching The Feeder In His Territory

So I’m going to be relying on strong, but not necessarily direct, sun. Strong sun usually comes later in the day and its proximity in the sky paints unattractive shadows and washes out detail and texture on your subject.  If the hummer consistently chooses a spot with direct sun from which to watch the feeder, shoot anyway to see if you get any photographs that are worthwhile.

If you don’t get any photos you like, move the feeder and start watching where the hummer re-establishes his perch.

Photographing In Flight Hummingbirds With Fast Shutter Speed

The most important setting when photographing hummers is the shutter speed. I usually start out by using “shutter preferred” option on my camera. (I set the shutter and the camera decides, based on ambient light, the settings for the aperture and ISO.) To stop action effectively, when hummers are taking off or landing, I’ve learned through trial and error, that I have to set the shutter at 1/6400 second. NOTE: When landing, hummers are slowing down, so definitely easier to anticipate the shot, but you still need a very high shutter speed.

I set the shutter speed and then look thru the viewfinder to see what 1/6400 second does to my ISO. If  there’s enough light and I’m below ISO 1000, I leave it on shutter preferred, set at 1/6400 second. Think about how fast that is!  I remember when the shutter speed on a couple of my old cameras did not go above 1/1000 second.

How to Focus Your Camera Lens to Stop Movement of Hummingbird Flight

Because hummers are so tiny, I choose spot focusing. Our subject is definitely spot like. I focus right on the branch where I anticipate he will land.  Spot focusing can be difficult because if the subject hasn’t flown in yet, and the wind is blowing the branch, the spot focus may loose its lock on the spot area, and focus on a leaf in the stand of trees in the distance or search back and forth, unable to lock onto your chosen spot area.

Most telephoto lenses allow you to set the lens so it only searches within a certain limited range, vastly reducing the distance (front & back) that it searches. A very good lens will let you lock in the focus, so there’s no searching at all.

Of course, you can always set the lens to manual focus, though I find the auto focusing lens mechanism is much more precise at focusing than I am.

Time and Planning Needed to Capture a Special Photographic Moment

This will take time. You can not stand there behind the tripod, looking thru the view finder with your finger hovering over the shutter release. You will get stiff and begin to shake. Believe me, I’ve tried it.

Photo of Hummingbird Coming in for a Landing
Hummingbird approaching branch to land

First of all, there is a slight camera shake when you press that shutter button with your finger. A remote is a must, not only to save your back and reduce camera shake, but also because your eye does not have to be pressed up to the viewfinder. A remote will enable you to be more comfortable while you intently watch that hummer’s spot.

This is not the time to relax and enjoy your coffee and muffin while you gaze upon your garden. You are watching a lightning fast bird and anticipating his landing, and your finger has to be ready to press that remote nanoseconds before the hummer reaches his spot. It will be hard, but try to get comfortable.

And now, sit and wait, eyes locked on the target and finger poised to press the remote, and hope your reflexes are quick enough to capture the bird coming in for a landing, or taking off. Good Luck!

Welcome To My Bird Photography

Oriole bird photoAttention: Photographers and Birders

I shoot birds — with a camera. Over the years, I’ve shot quite a few….

I consider my photographs as unique gifts. Generally, they are well received, if only because they are given freely as tokens of my appreciation, or to celebrate an occasion.

Who doesn’t like free stuff?

I’m writing this blog to tap into the community of photographers and birders – anyone interested in the incredible diversity and beauty of the bird world.

Shooting  this energy while at the same time capturing personality attributes of birds produces photos that are captivating on so many levels. There appear to be so many similarities in the behaviors of humans and birds and I find this connection between my subjects and myself gratifying on a personal level.   NOTE:  I fully realize the quagmire I get into by using my profoundly imbedded human perspective to try to interpret relationships between birds and make comparisons between humans and birds……and I promise I will try to take a  less anthropocentric view when discussing these relationships.

I have alot to learn about birds and photographing them…and I hope I have something to offer others who share my interests.  Ann Lamott writes “just take it bird by bird”. That’s just what I intend to to.

So, are you ready for an adventure?