Photo of Golden Crowned Kinglet

Photographing Kinglets – Through the Glass Photography

Through the Glass Window Photography

Through the glass window photography?

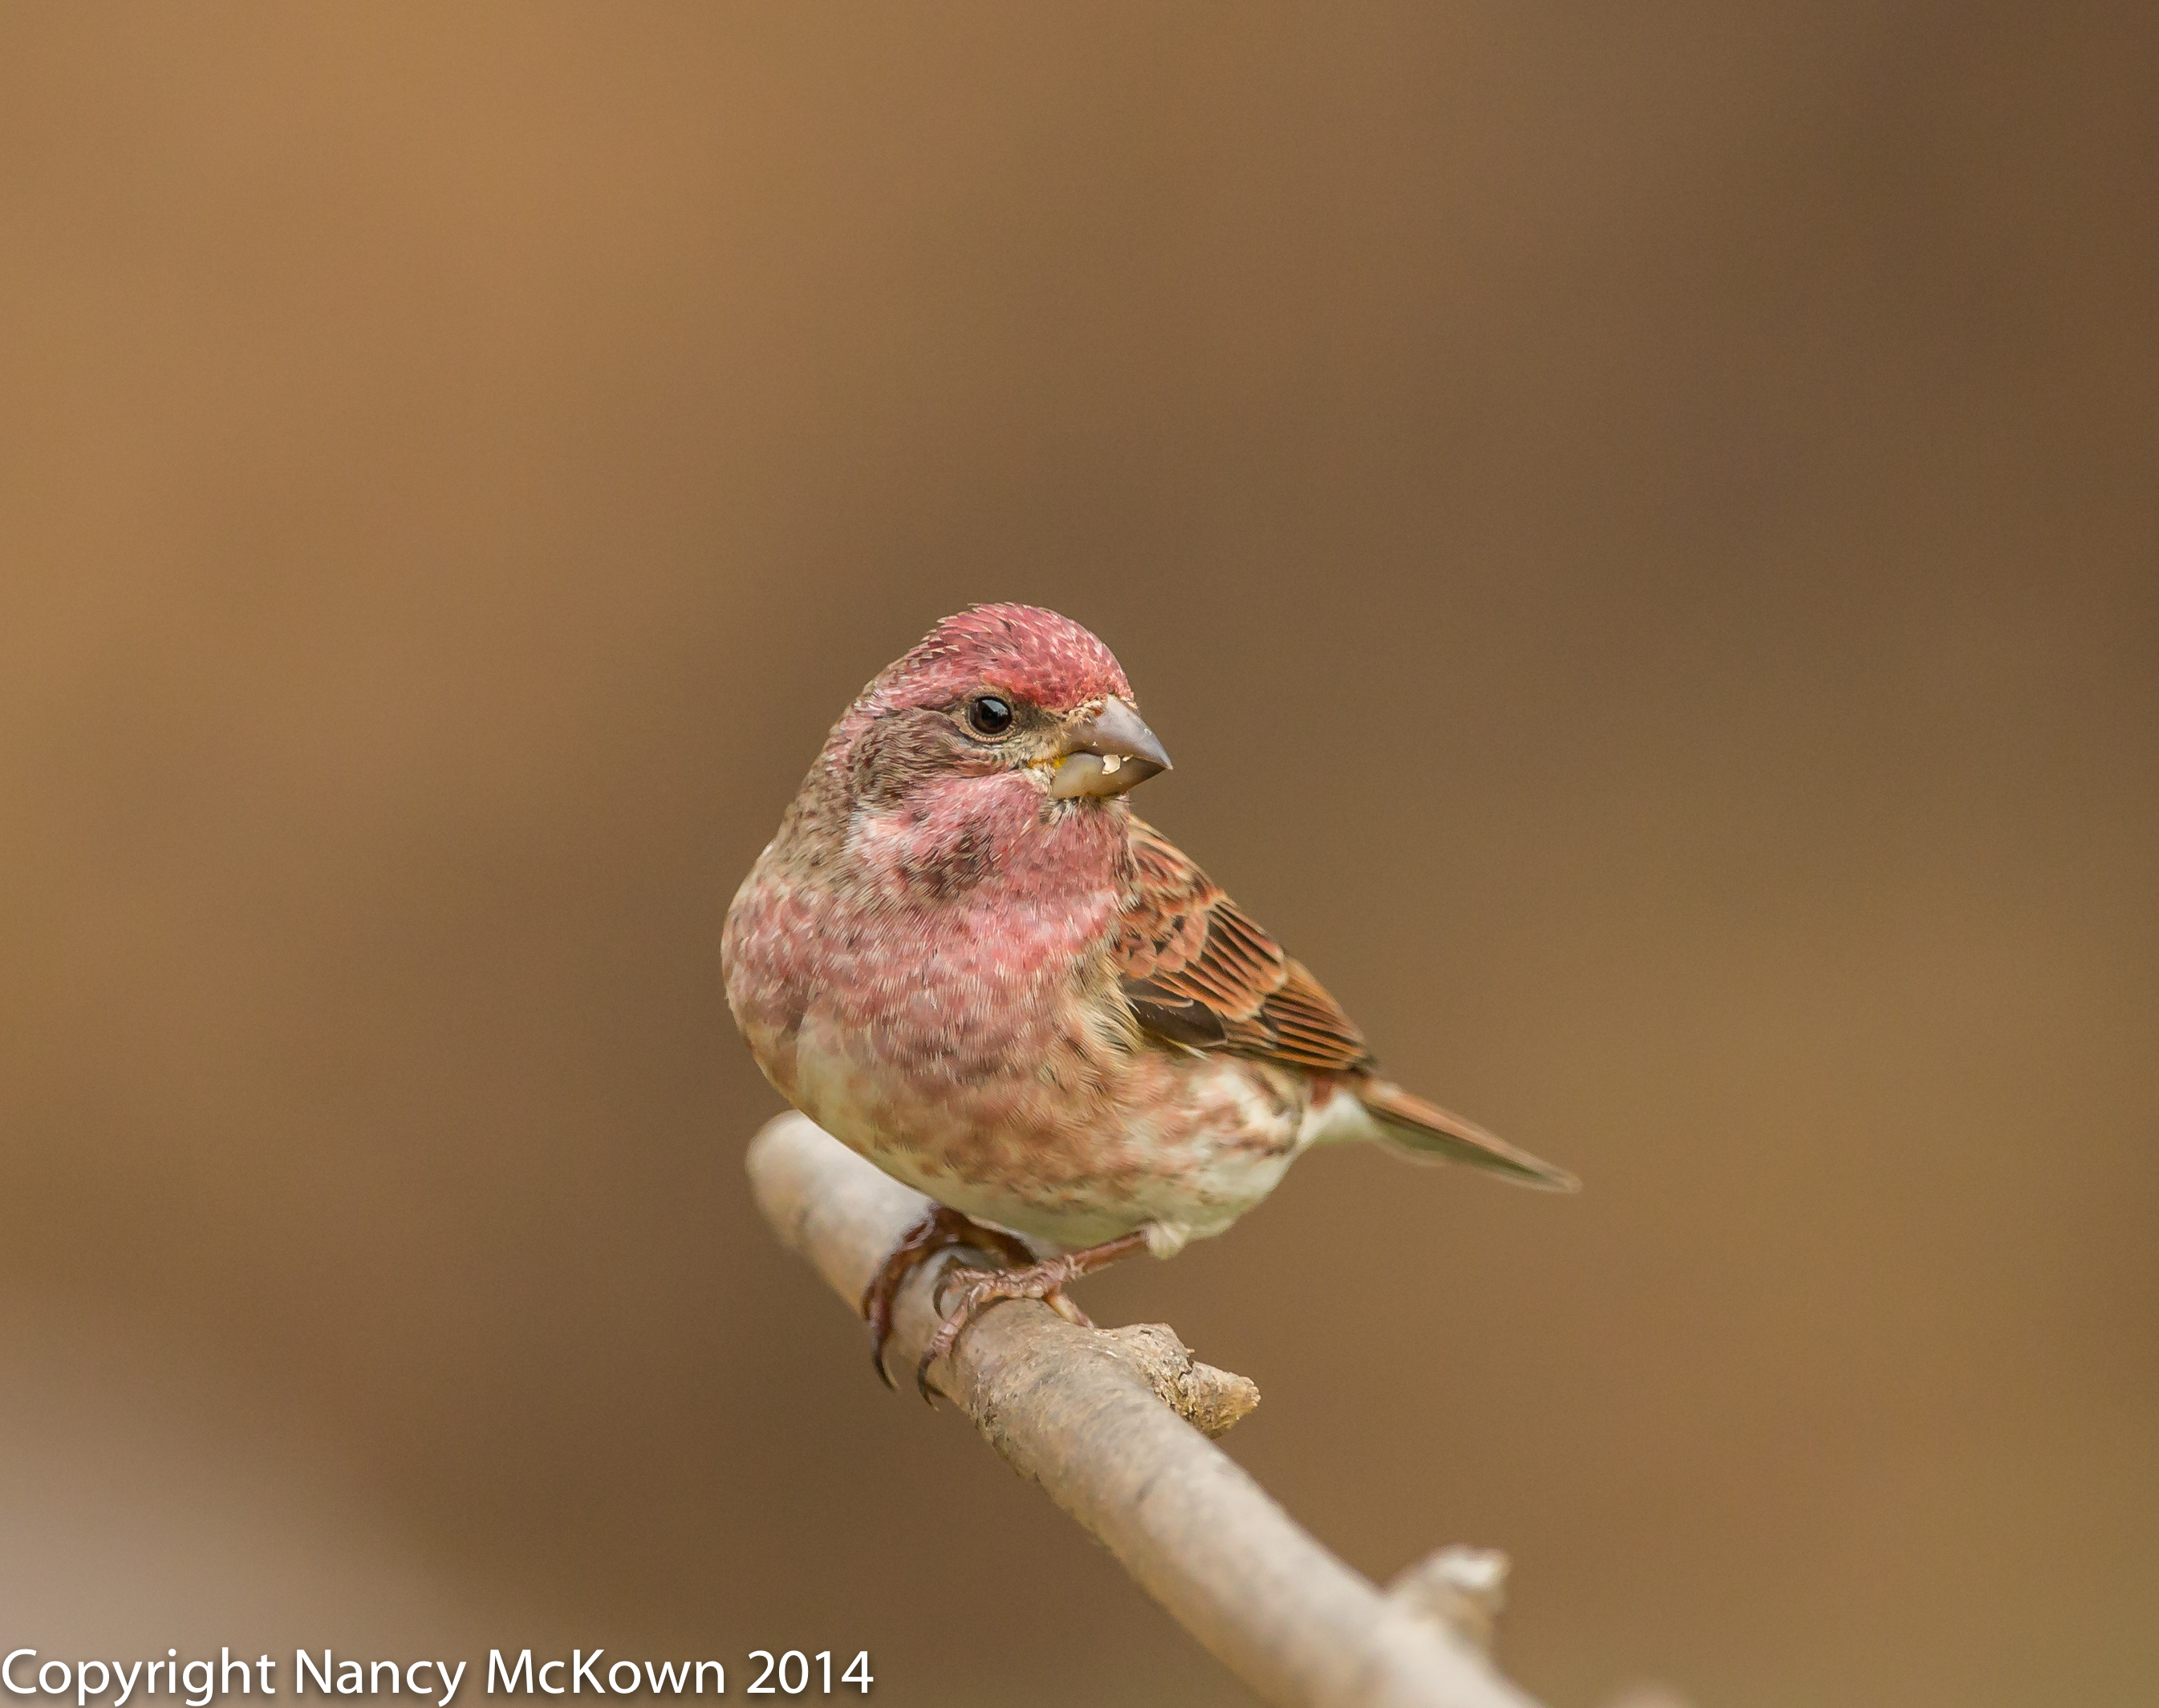
Not recommended…. but how else can I quickly photograph these beautiful newcomers who fly in and out of our lives so quickly?

Photo of Ruby Crowned Kinglet
Ruby Crowned Kinglet.. Not Much of a Crown This Time of Year.
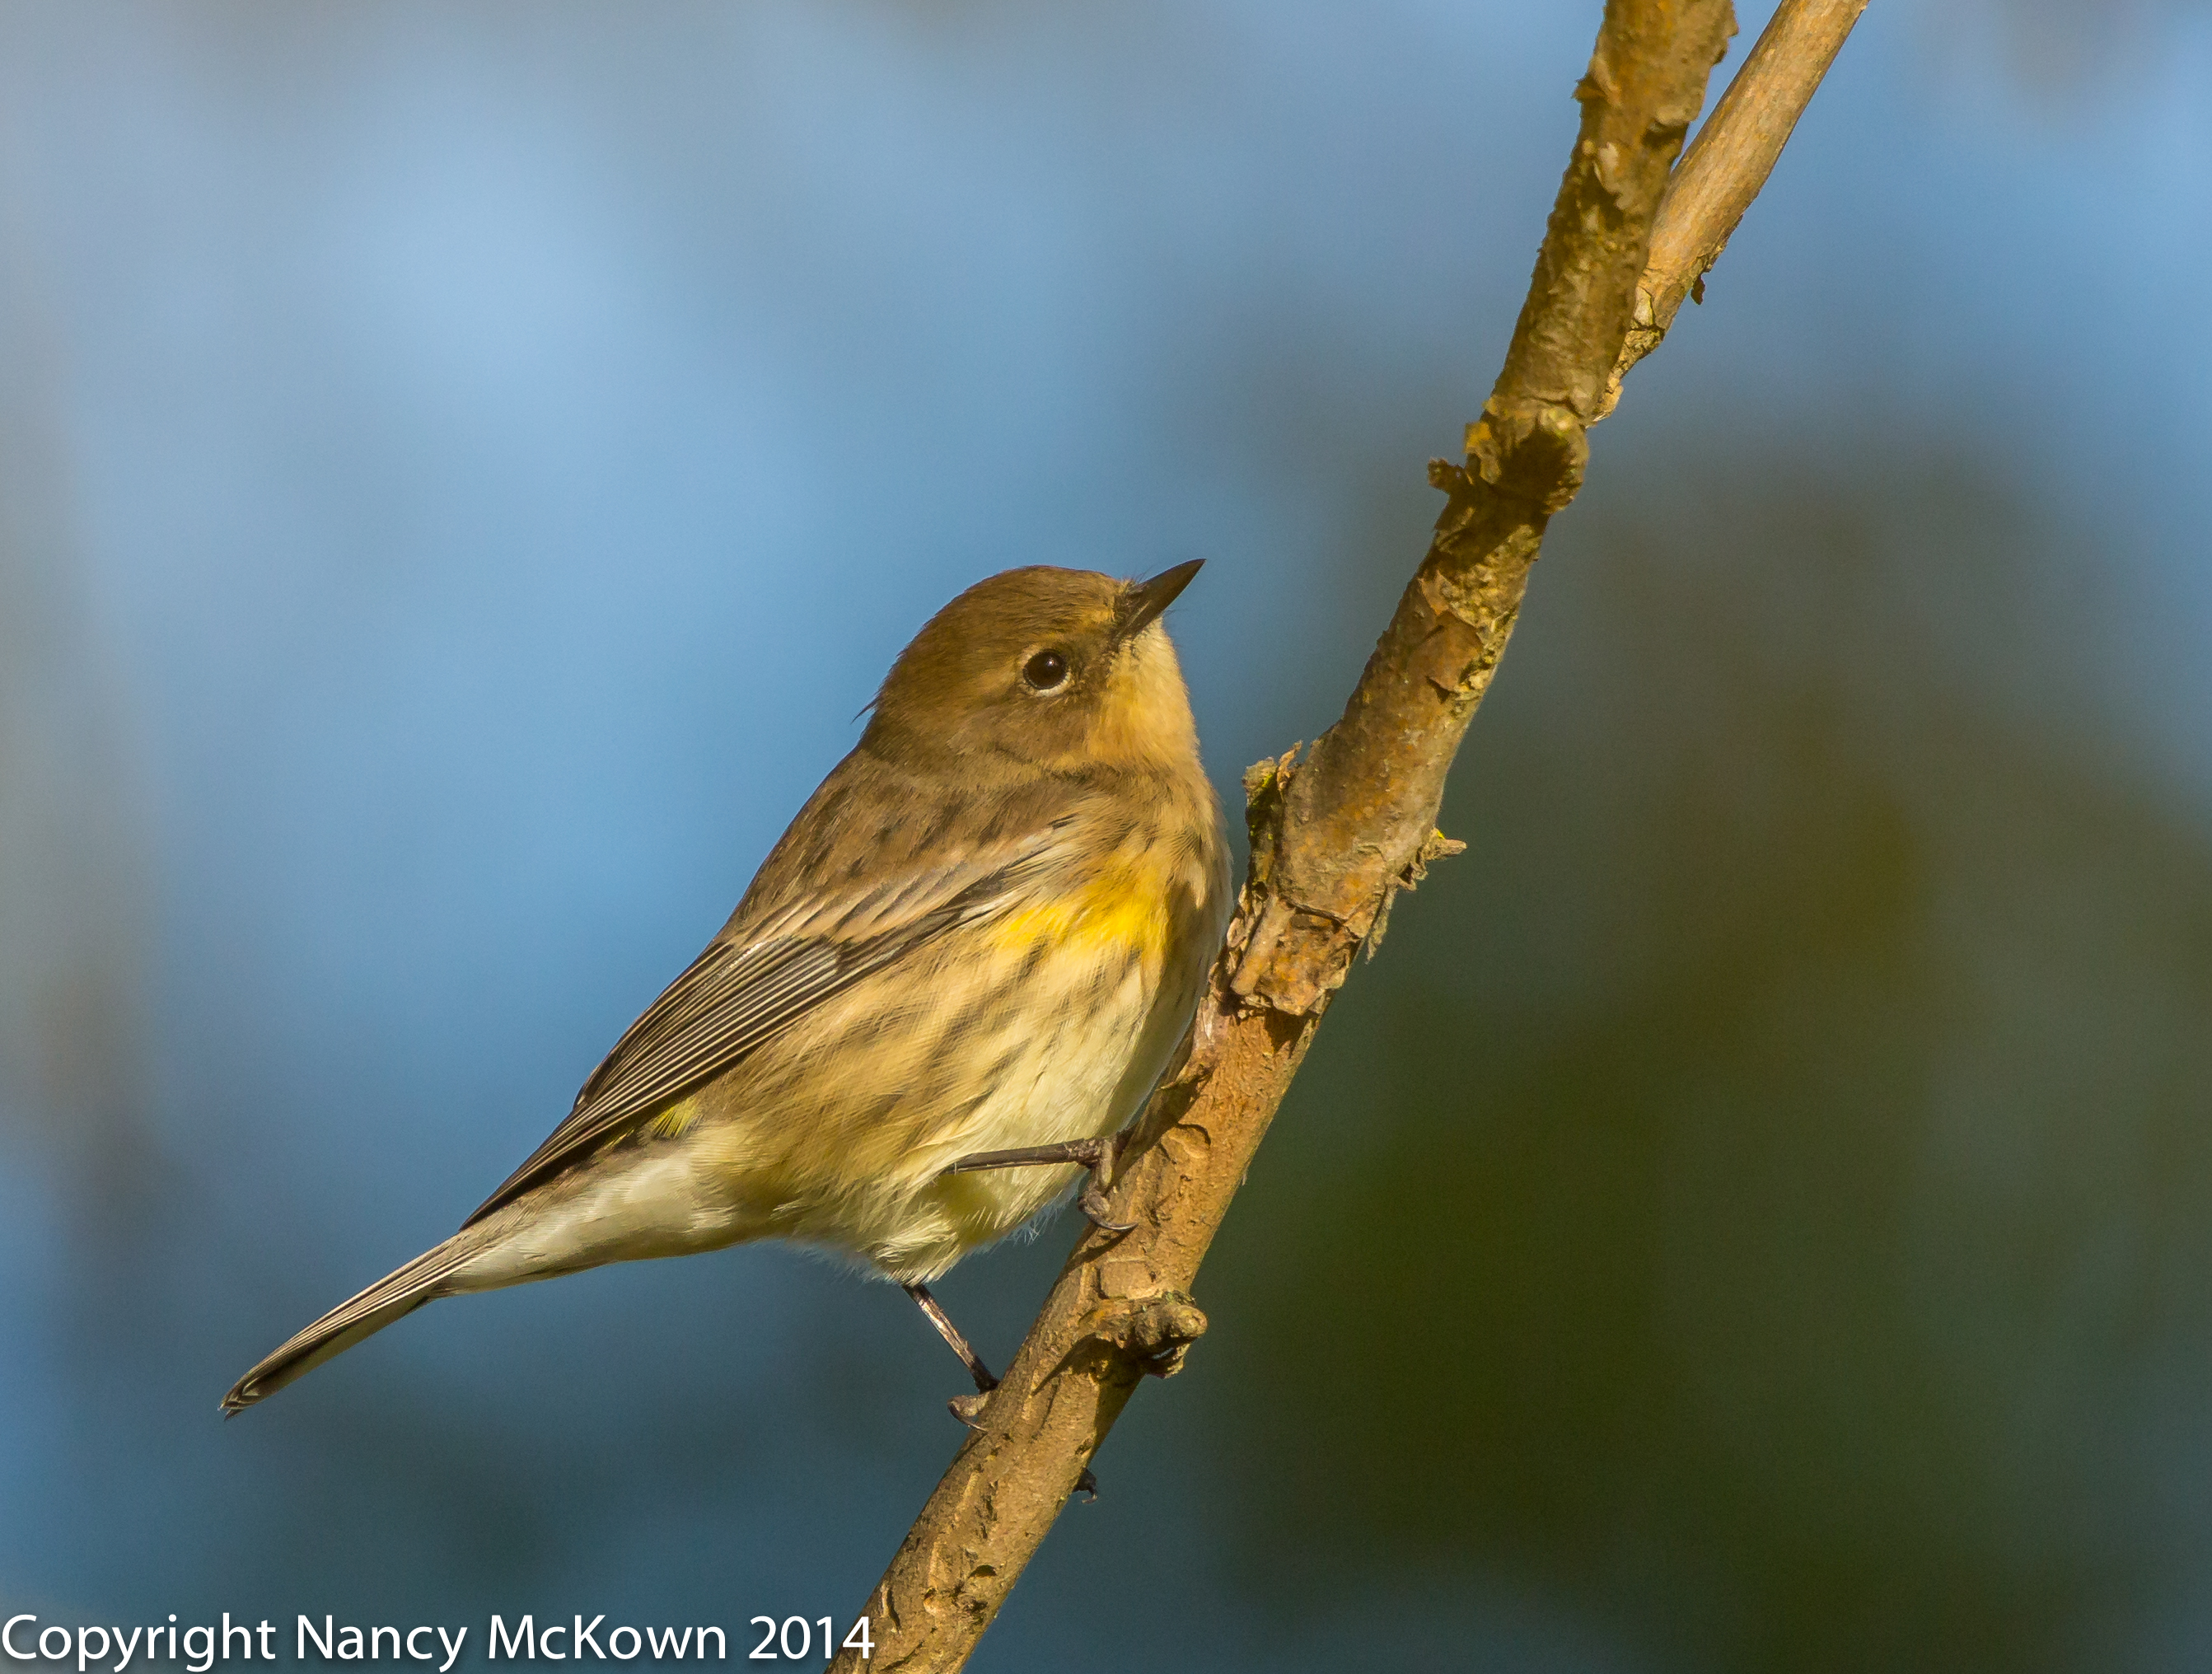
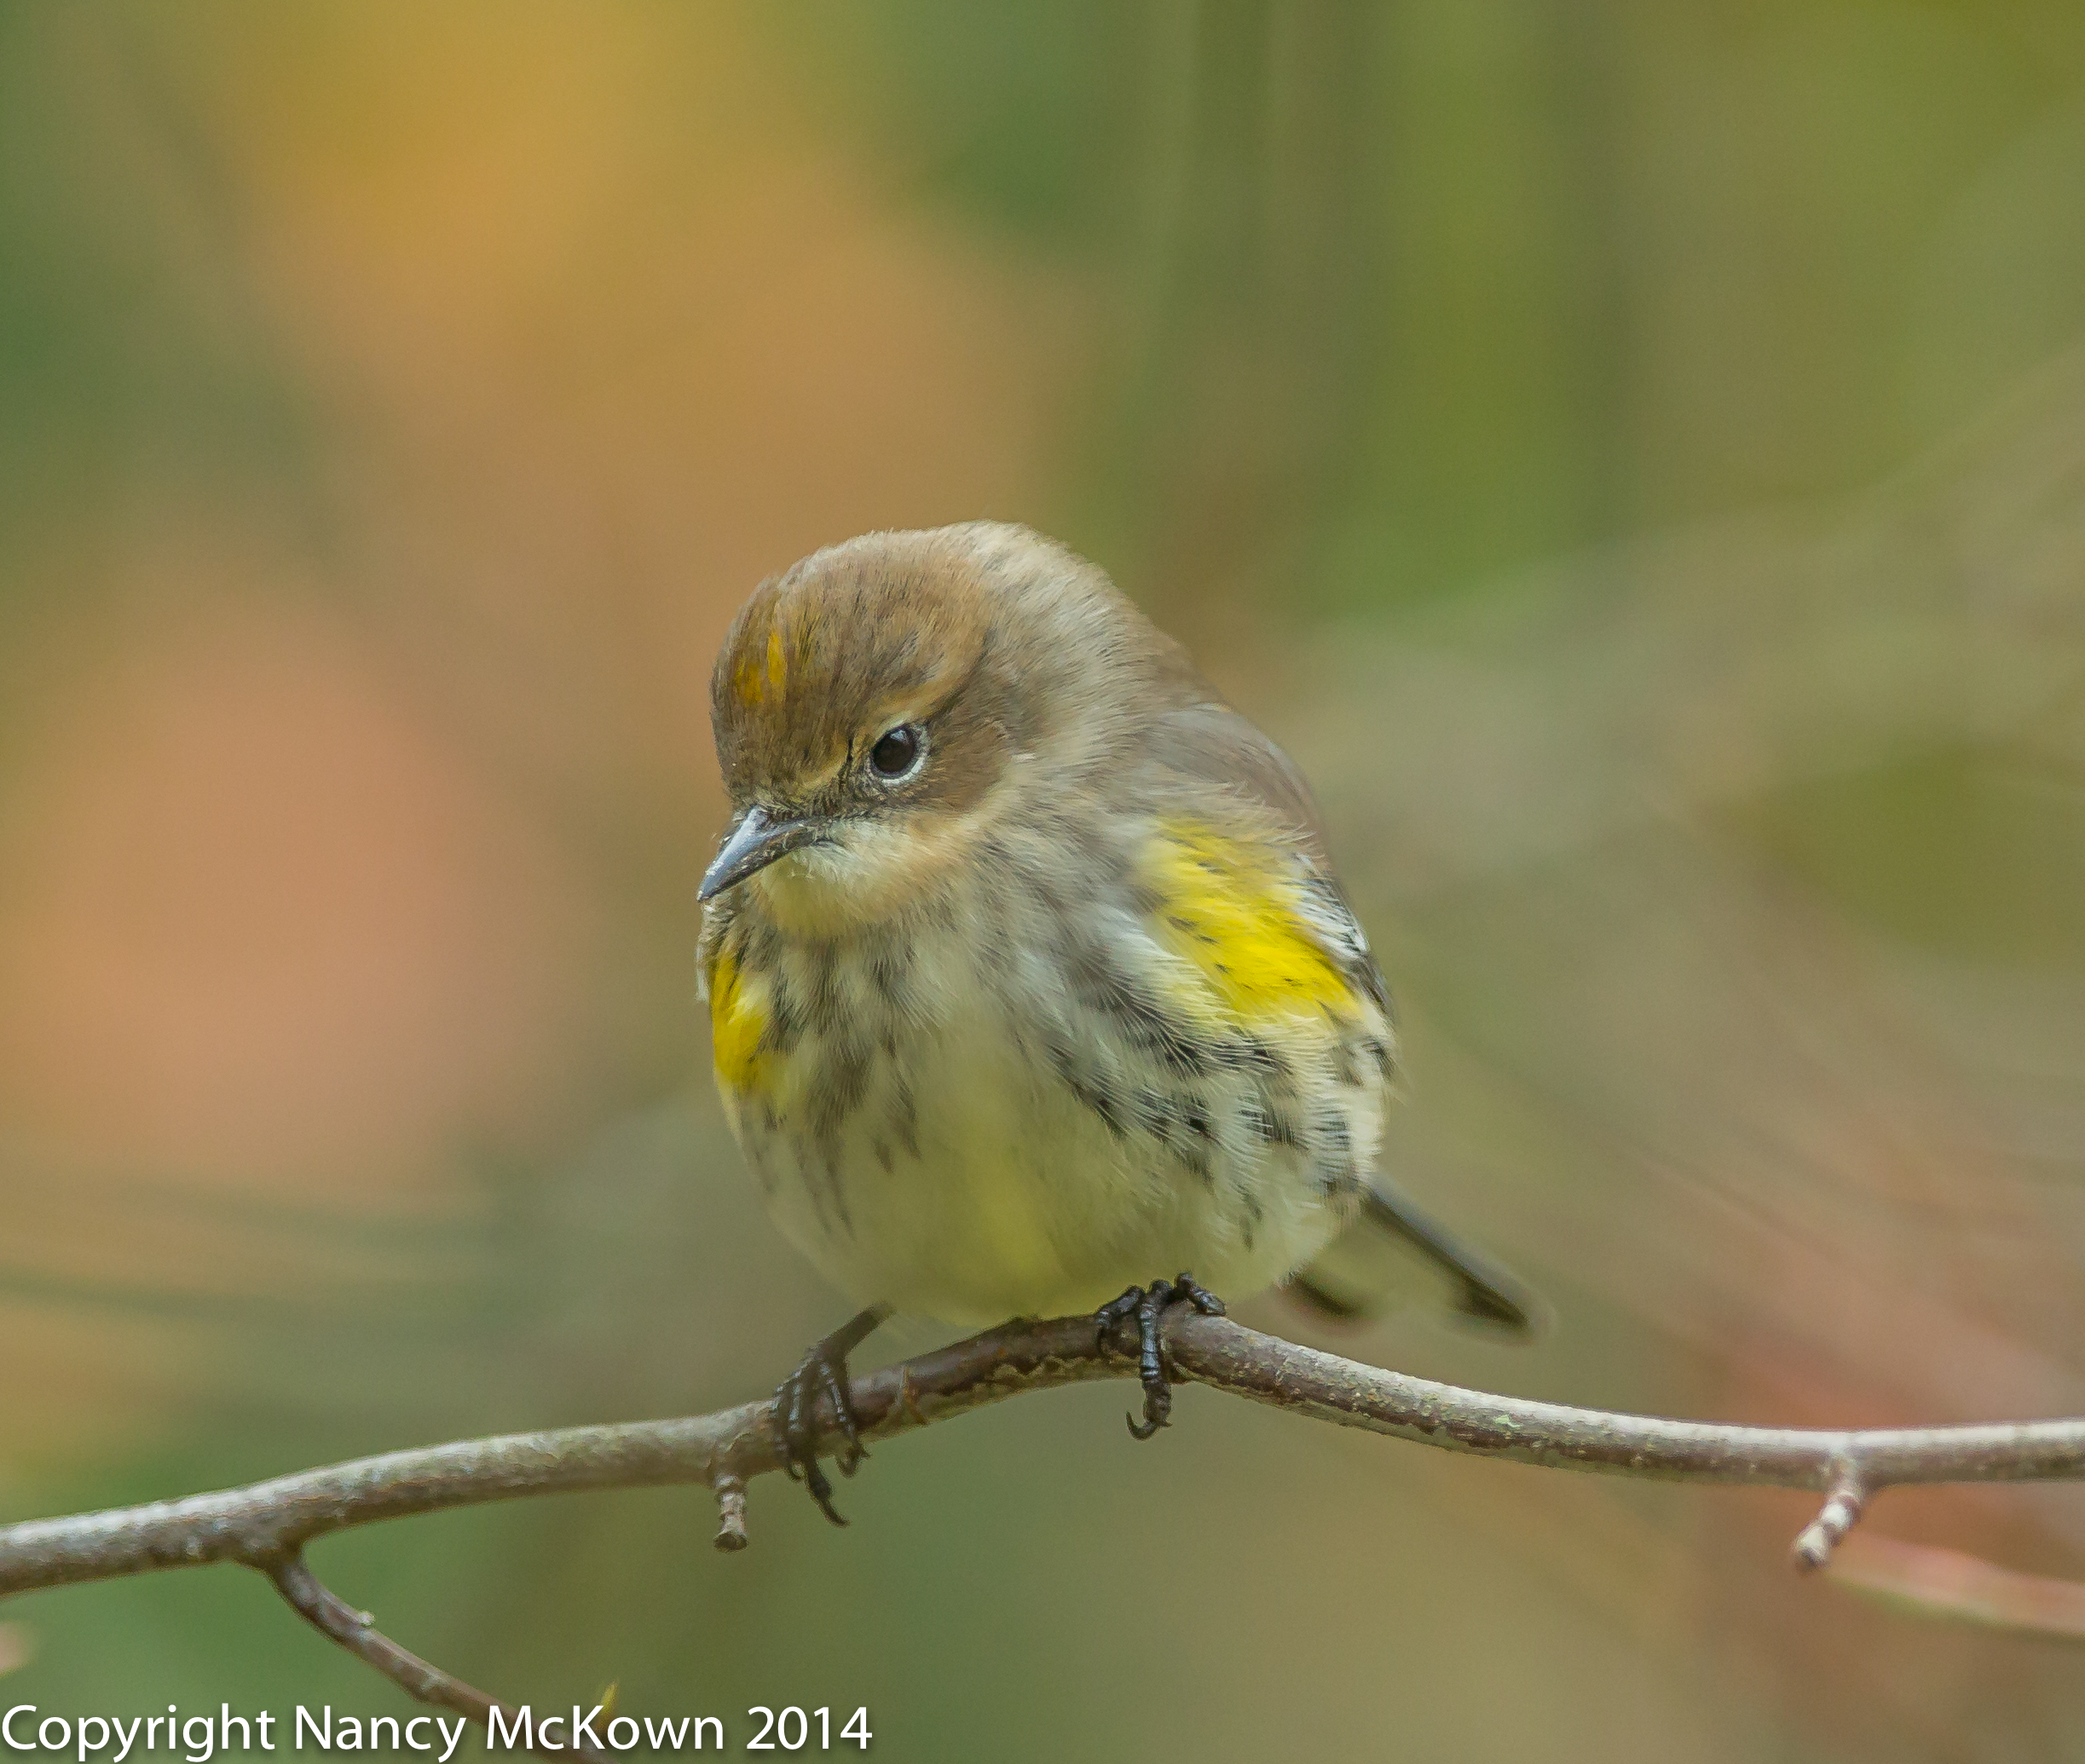
ISO 1000; f/4; 1/500 Second

Late Migrators

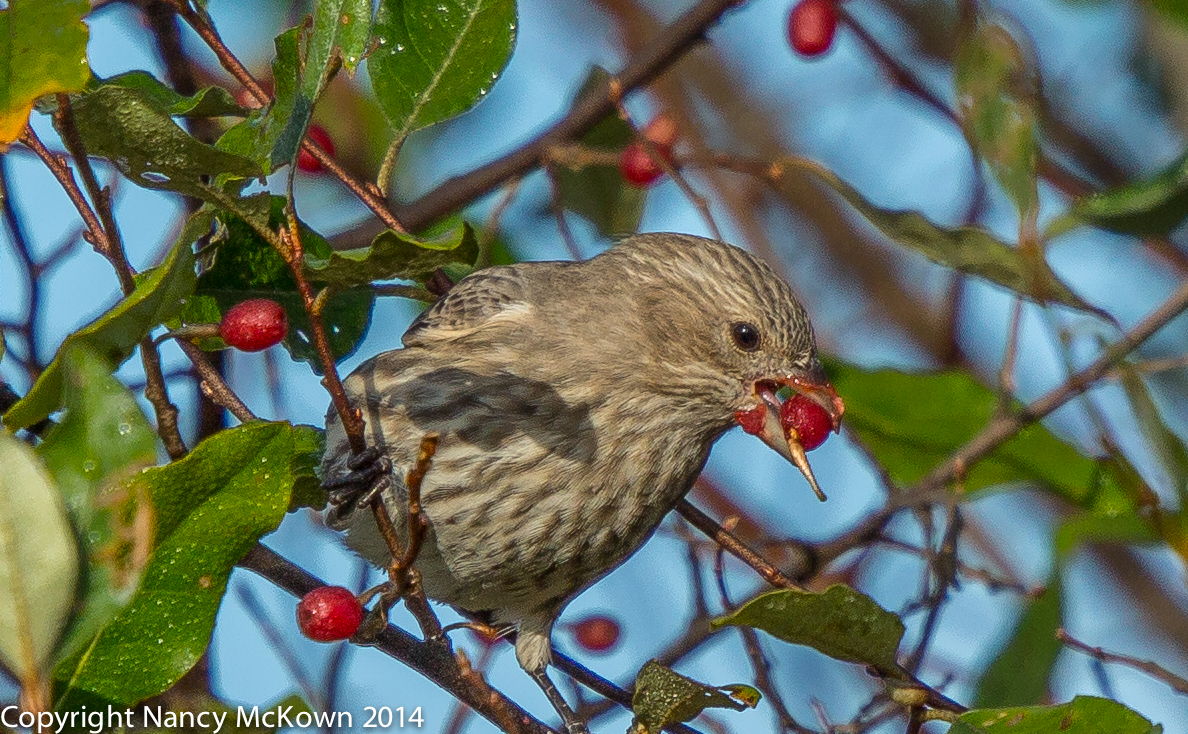
It was late in the fall migration cycle, but I hadn’t given up hope of seeing migrating birds in our yard. My camera and tripod were at the ready near the library window. I sat nearby with a book on my lap, lifting my head every few minutes to look out the window for birds. I noticed a branch swaying, ever so slightly, back and forth.

As my lens tracked the source of the movement, I was almost sure that I was following some species of little warbler. He appeared to have the right size, shape, and fast moving foraging behavior. And there was more than one.

With my 300mm lens plus 1.4 extender, I successfully photographed  both of these warbler like birds. After uploading the photos to Lightroom, I spent a lot of time comparing them to the photos in my warbler book. No matches. I scanned both photos into the “Birdsnap” app on my phone. It returned 4 possible IDs (Wrentit, Kinglet, Vireo, and Flycatcher). NO warblers listed.

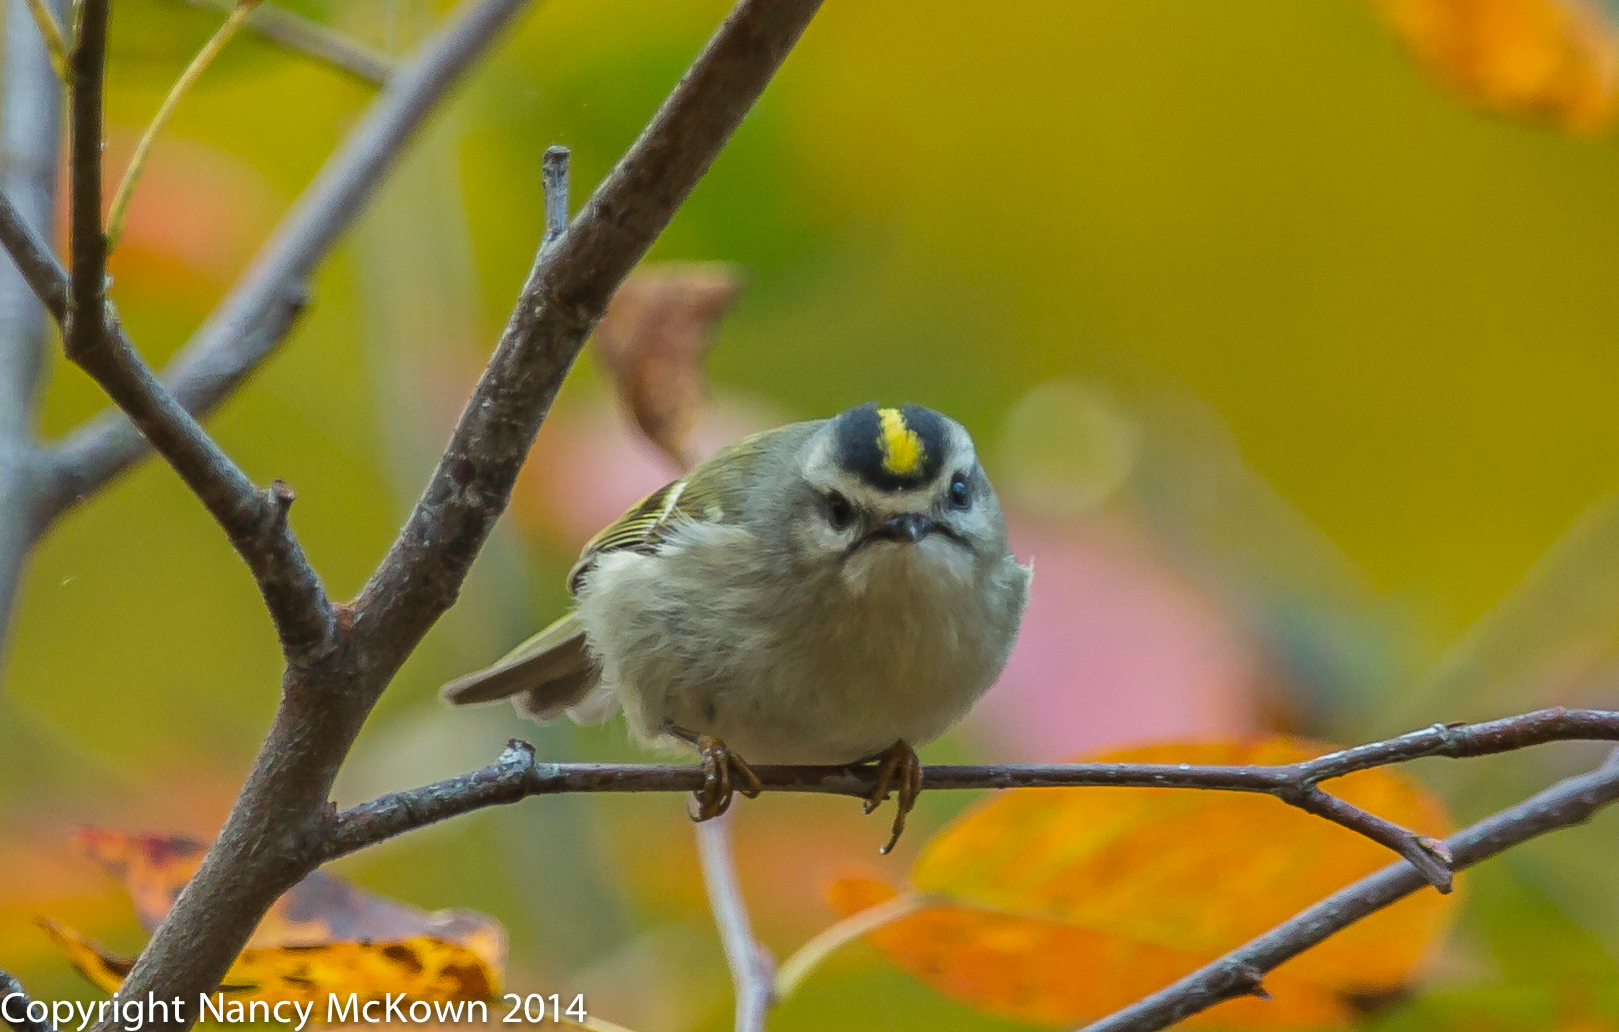
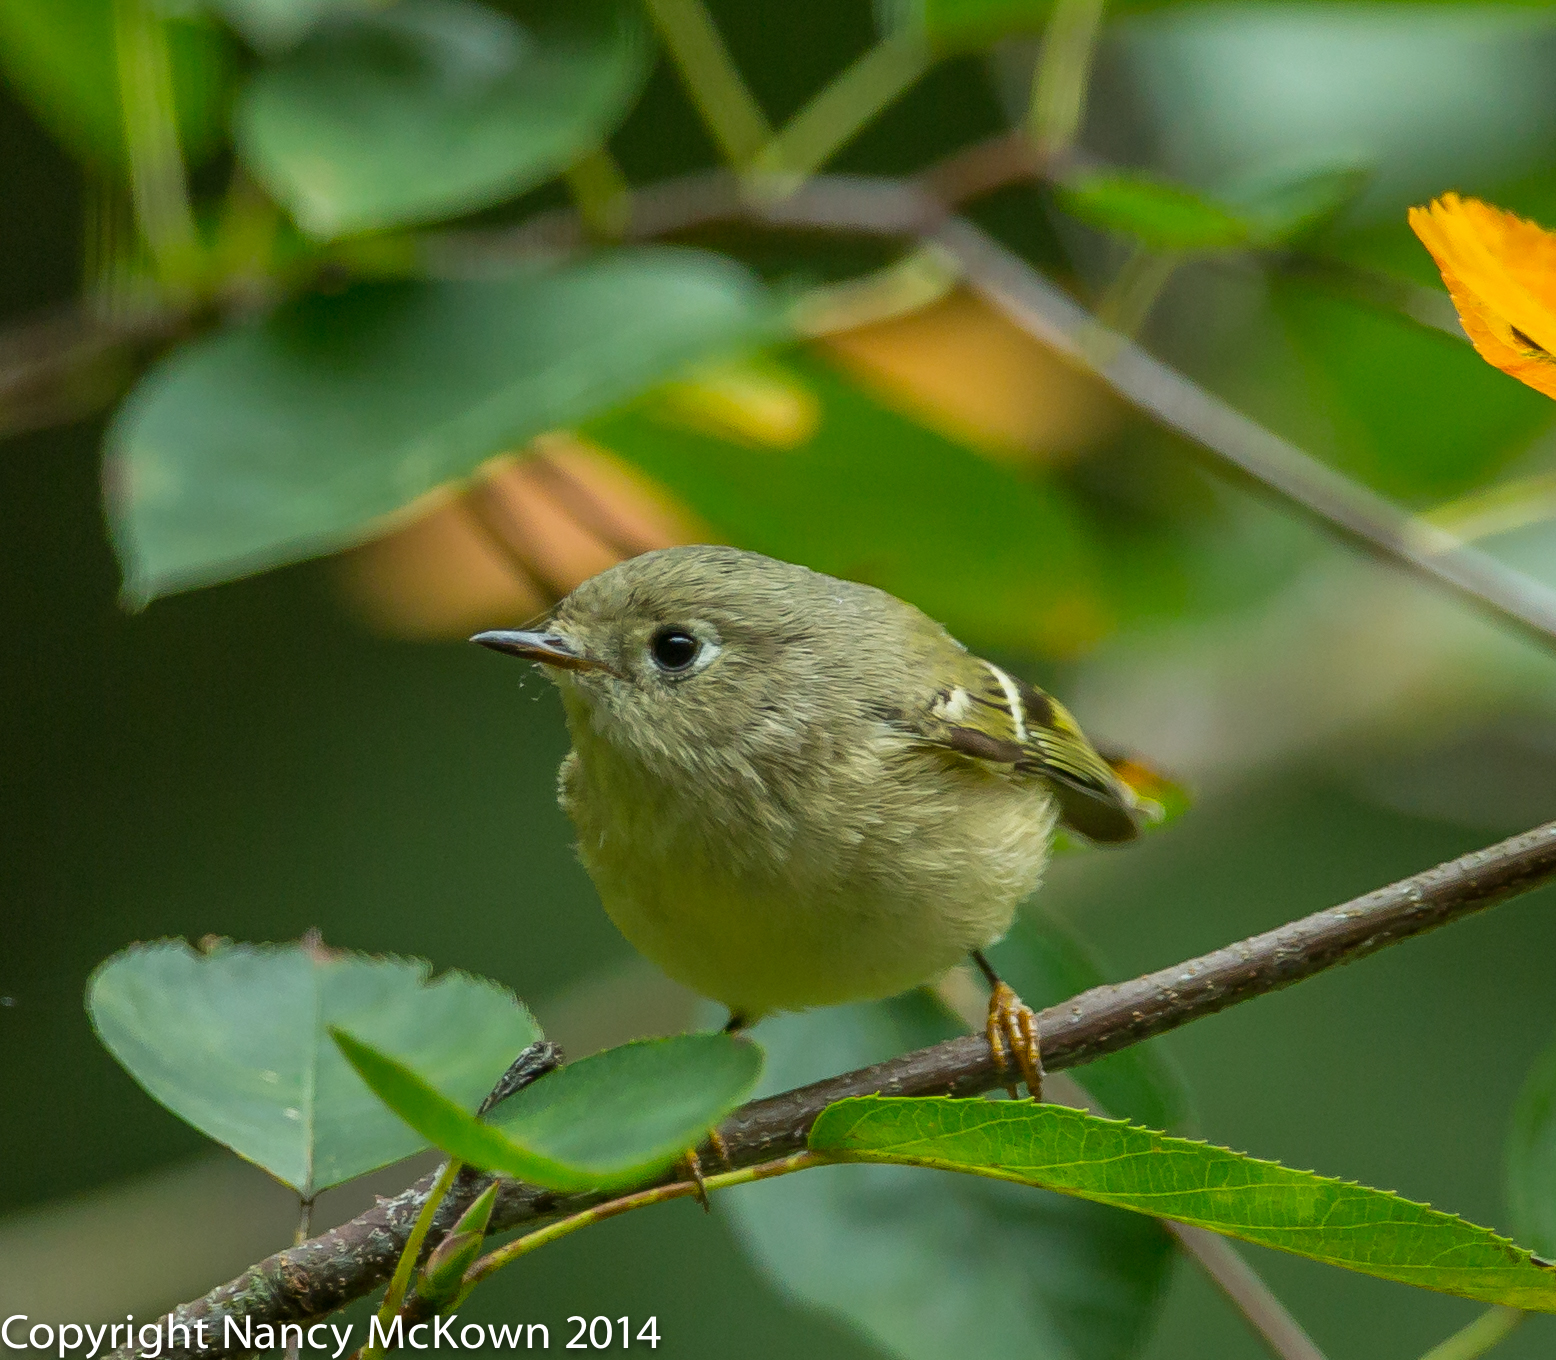
The Kinglet choice seemed to be the best match. As I always do before I publish, I uploaded my photos to WhatBird.com for definitive IDs. The experts identified them as 2 separate kinglet species – the Ruby Crowned Kinglet and the Golden Crowned Kinglet.

Photo of Golden Crowned Kinglet
Golden Crowned Kinglet
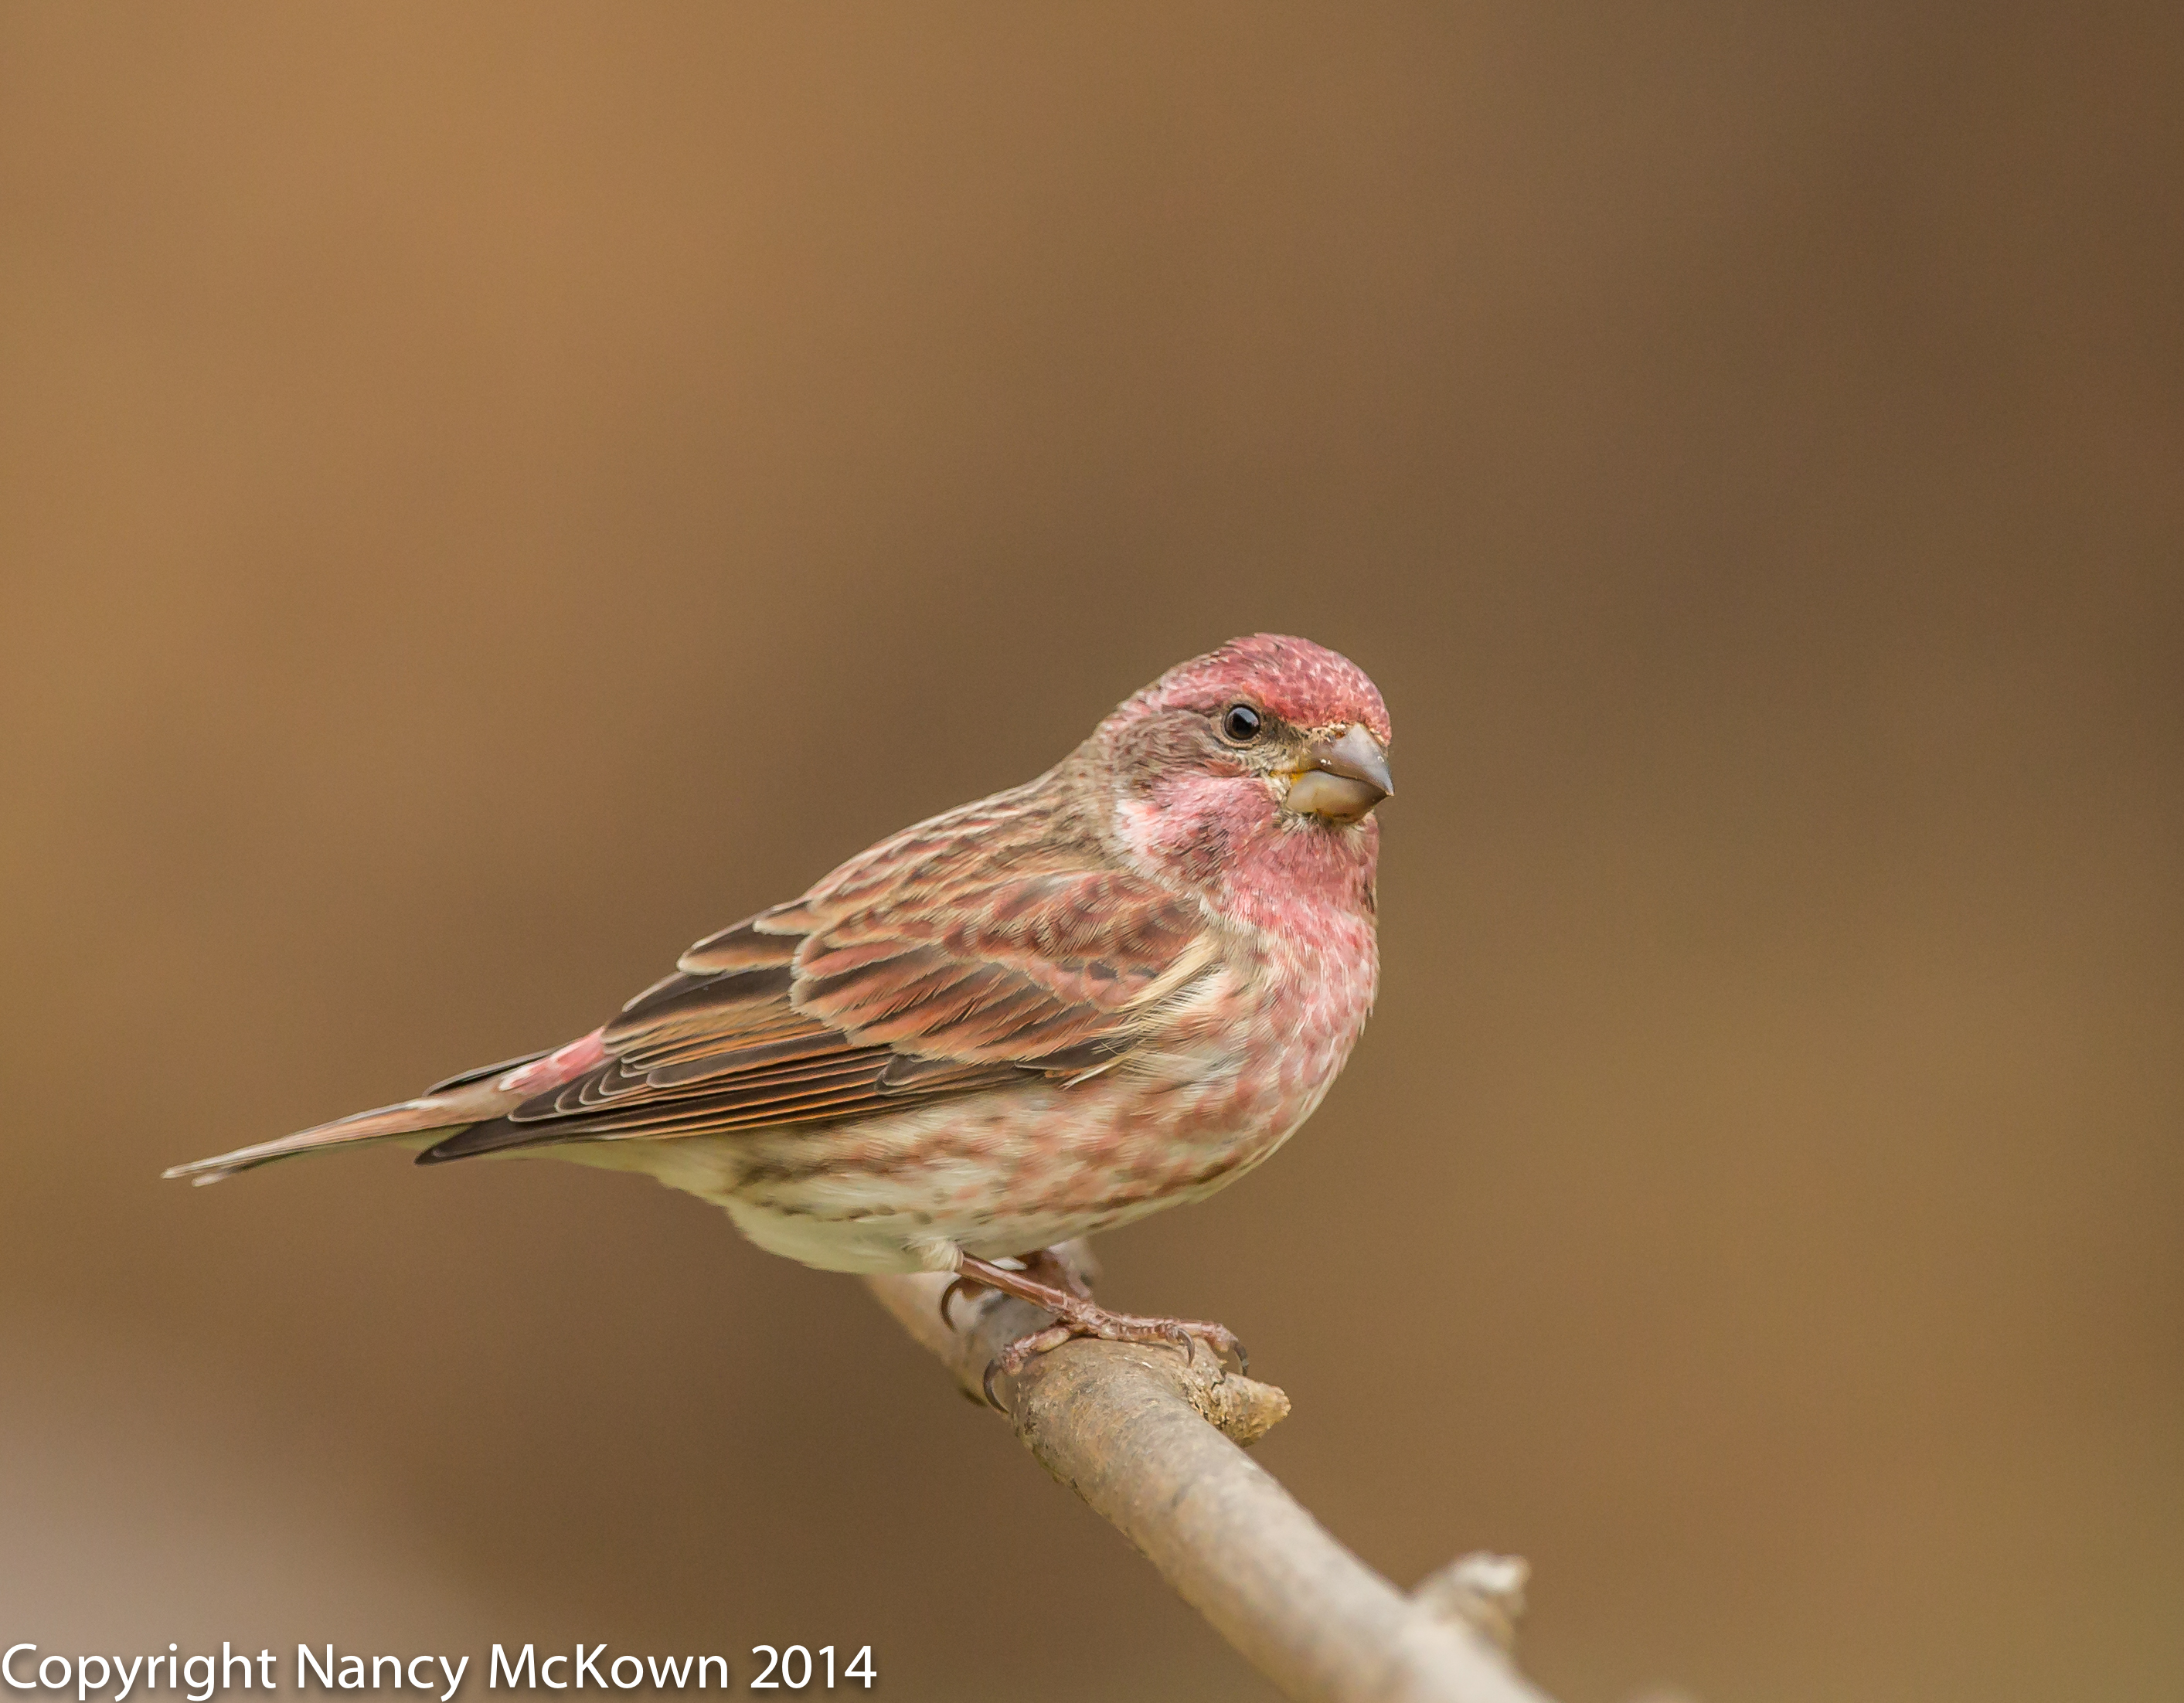
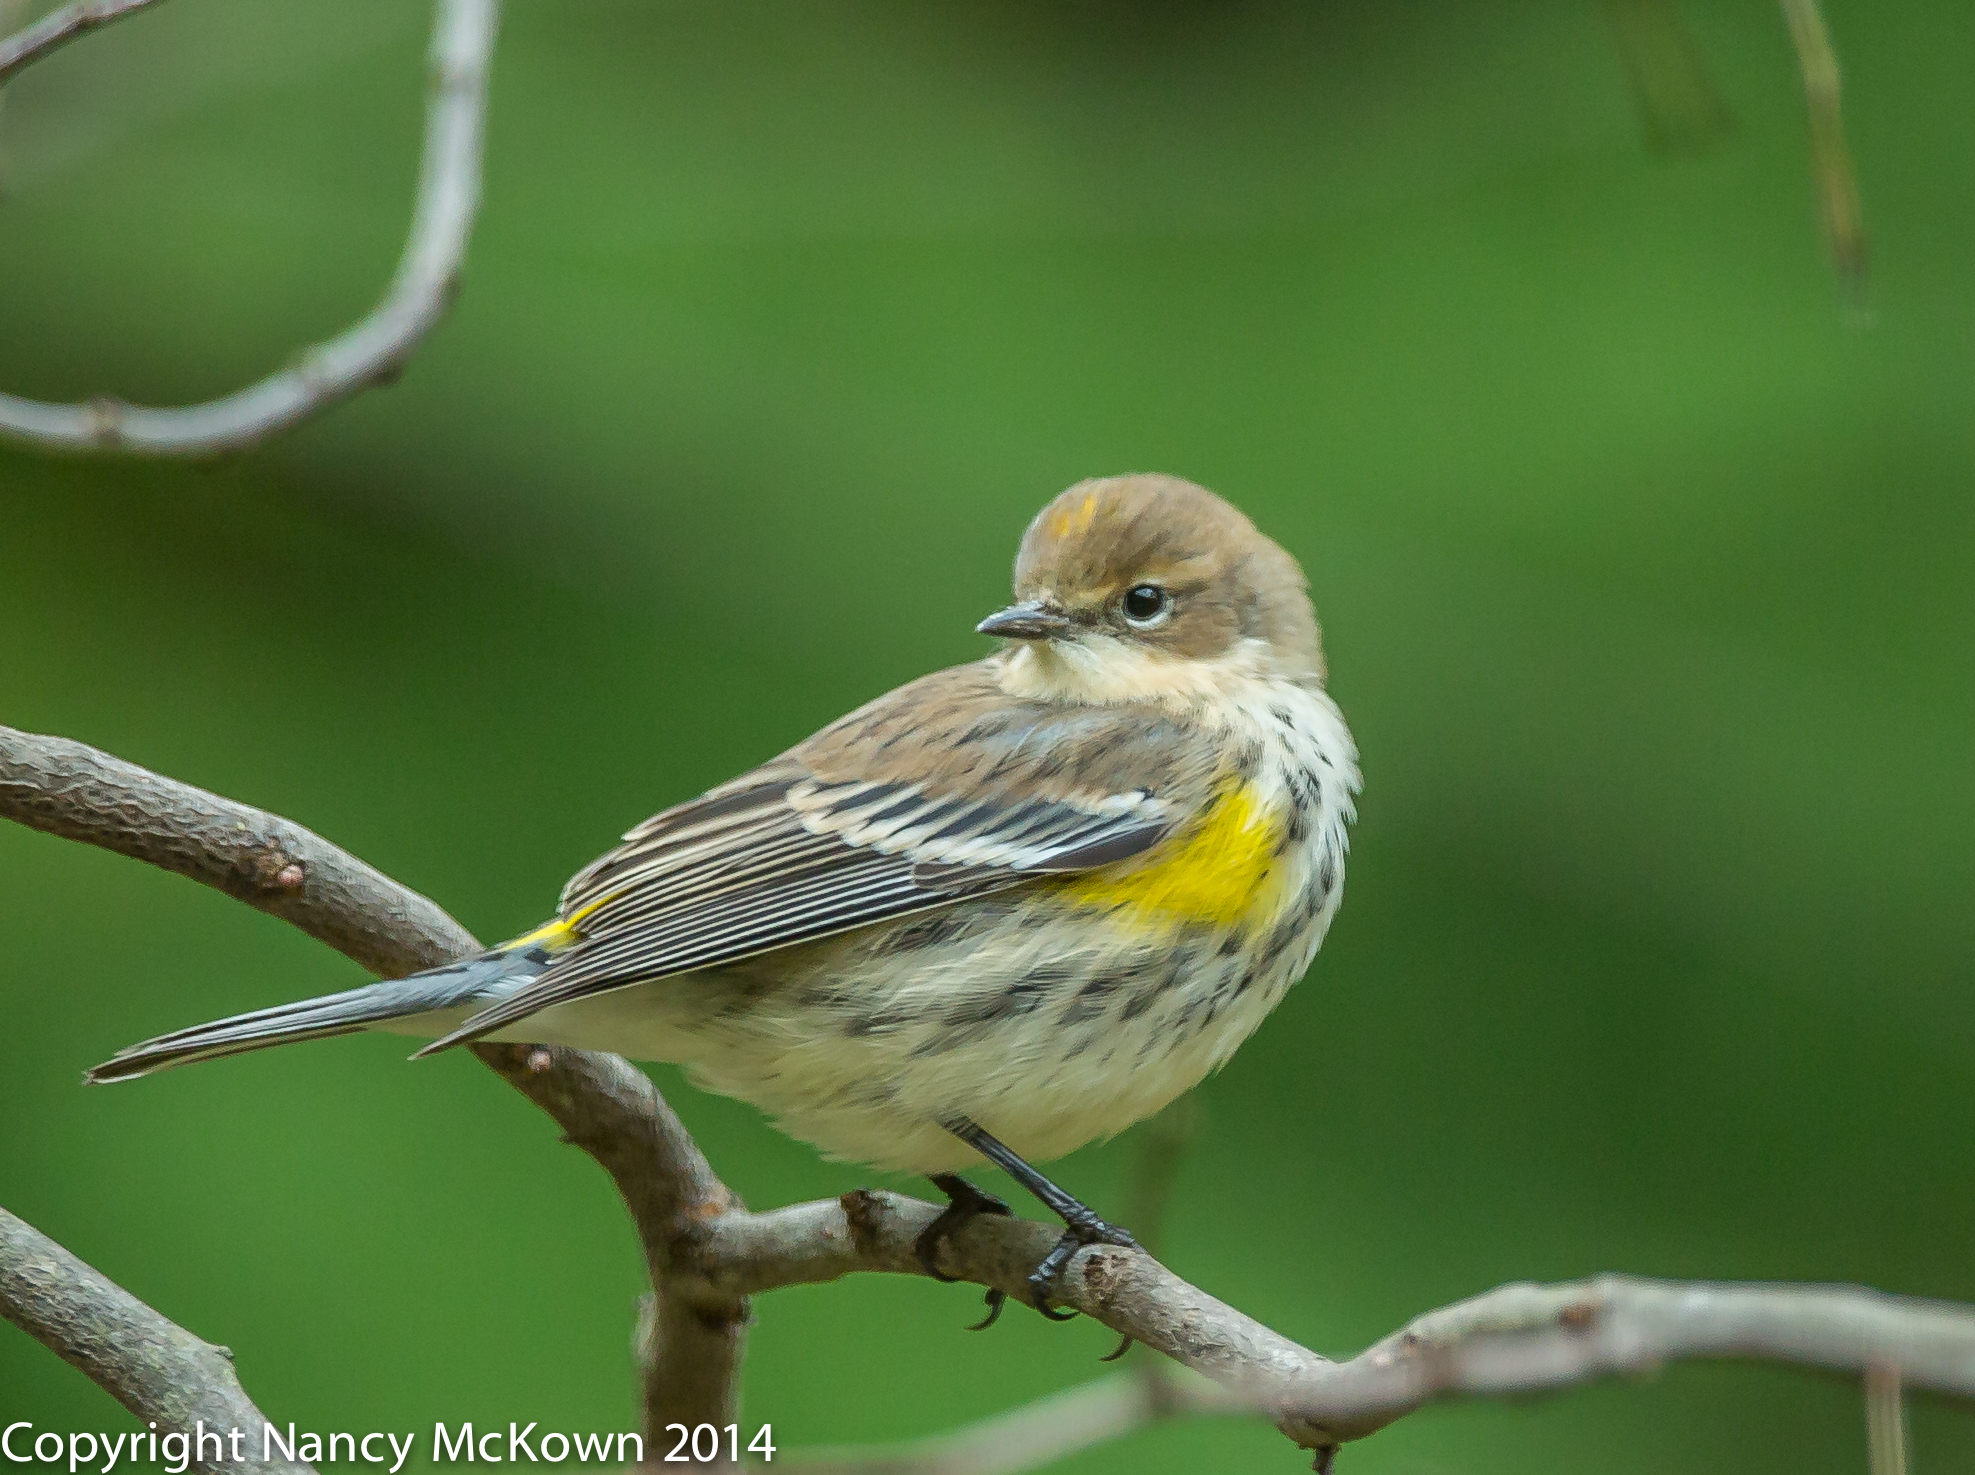
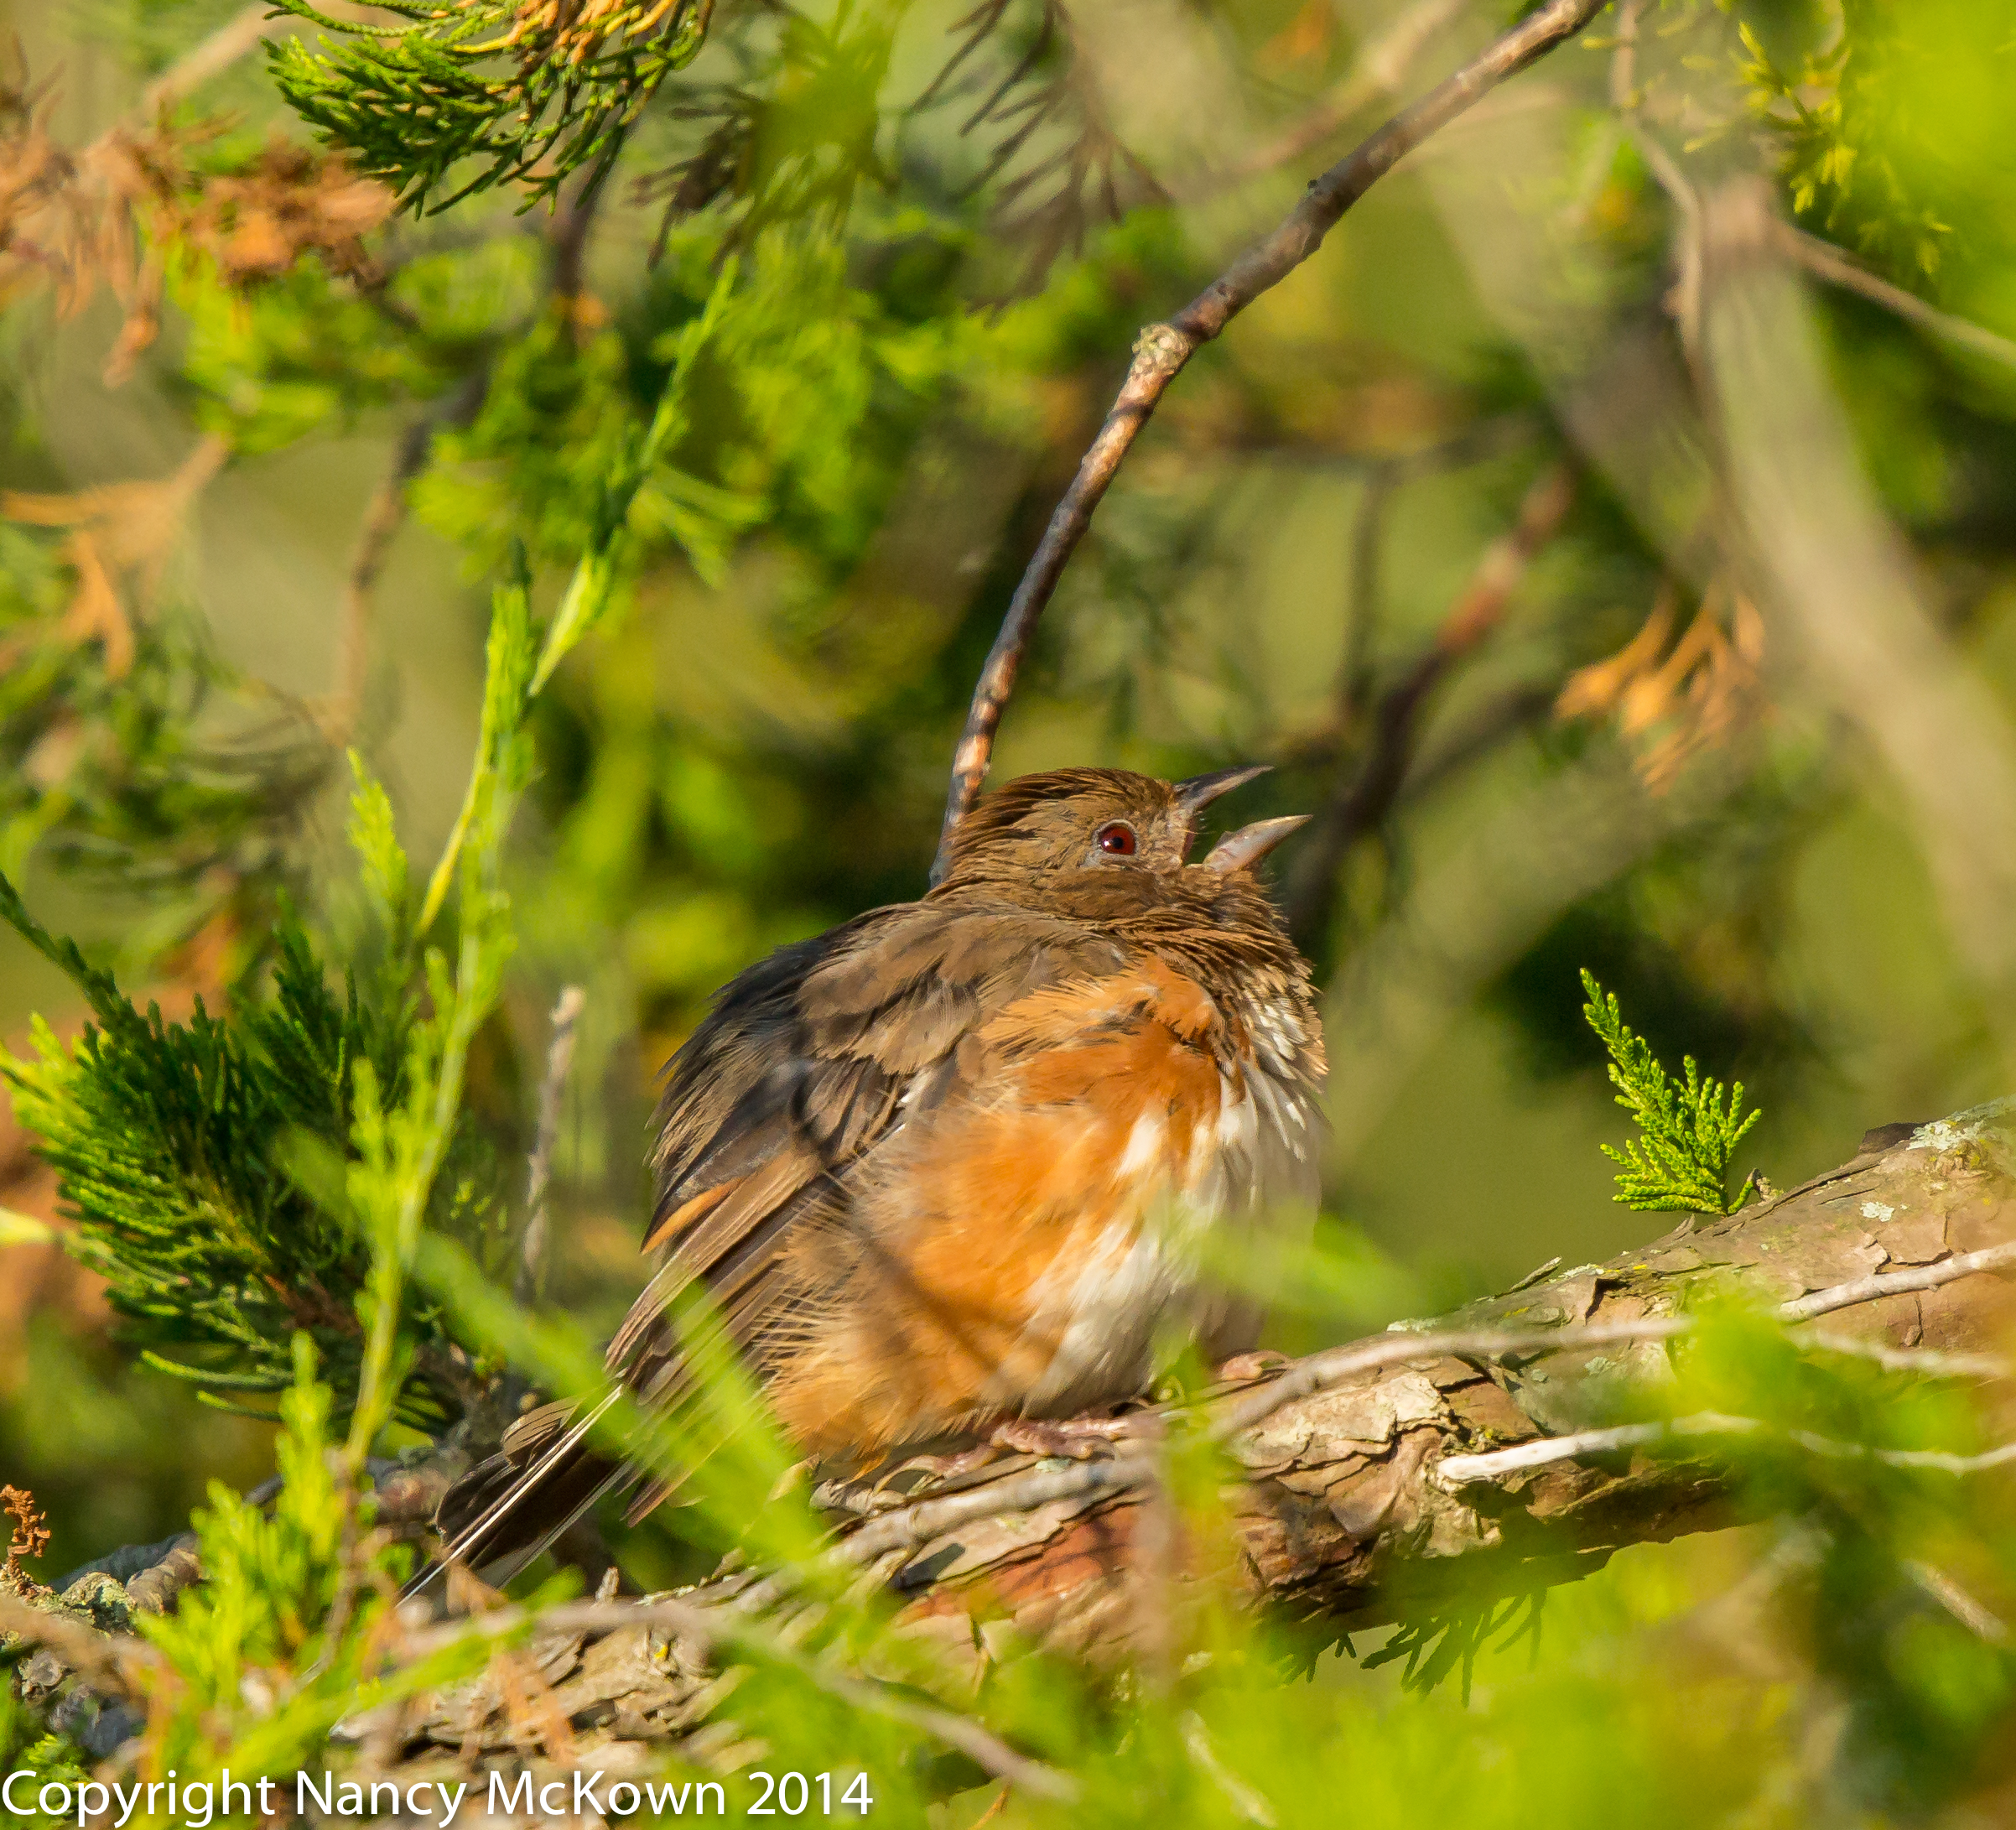
ISO 800; f/4; 1/320 Second

Photographing Two Species of Kinglets

A Kinglet is most certainly not a warbler. Plump and drab, these two species of Kinglets are some of the smallest birds in North American. They do not nest in southwest Michigan. I was very lucky to see and photograph these birds, foraging on the same day, in the same tree in my yard.

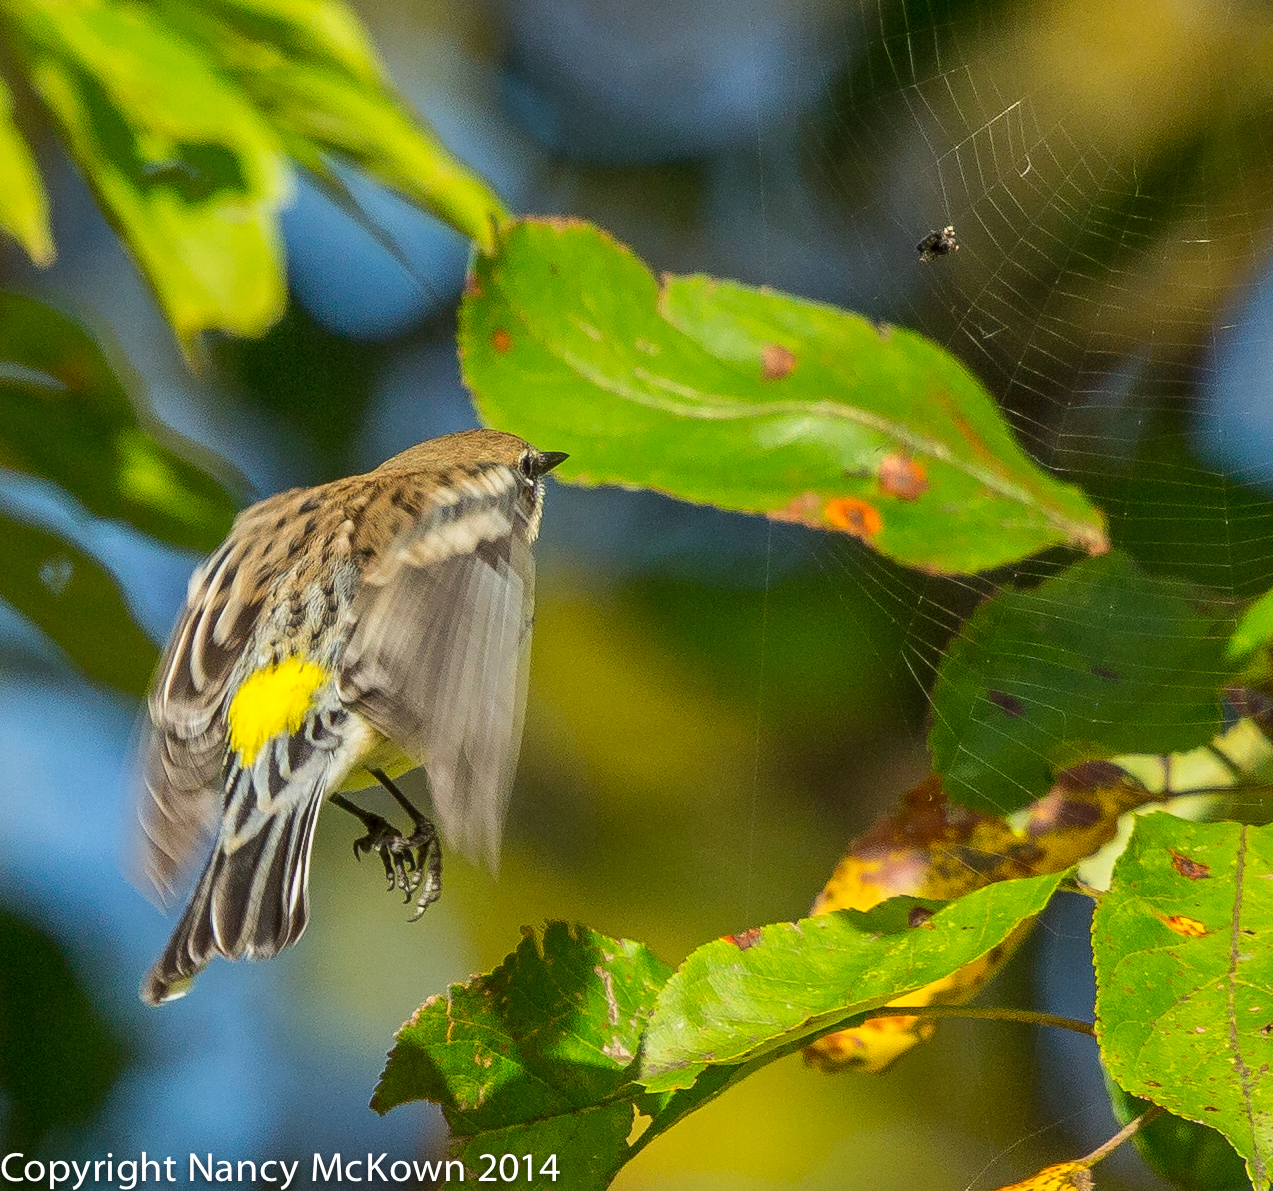
Anything Between the Lens and the Bird

Sadly, image sharpness and contrast clarity on these photos of kinglets (and other transient birds that I’ve photographed this Fall) were compromised because I was shooting through my library window.

The closeness of tree cover and eye level view that are afforded through my library windows offer a perspective that can be found no where else in my yard. Because the feeders are tucked in amongst the trees, this space also provides a level of security for the birds while they feed. Most of the time they don’t even look my way, like I’m under a cloak of invisibility.

Attaching a Filter To An Expensive Lens

A quick check of the web confirms that there is plenty of controversy about whether or not a photographer should put a piece of glass between her lens and her subject.

It is true that the use of a high quality filter on the front element of an expensive lens may avert disaster- usually caused by rough handling and dropping. These filters can also protect the lens from dirt, dust, and smearing that comes from everyday use.

But many photographers (including me) believe that it is a waste of time and money to buy high quality glass and then compromise that sharpness by placing a protective filter in front of the lens.

Not Willing to Miss the Shot

Whether it’s a window or a filter, putting any piece of glass between my lens and the bird means a loss of image quality that is significant to me.

But there are certain birds and certain circumstances that demand that I shoot fast through the glass window or miss the shot. I accept the fact that the result will be subpar photos.

Not Yet Willing to Attach A Protective Filter

There’s no “get the shot” urgency to attaching a filter to my lenses like there is when I shoot through the library window. I suppose that one day, circumstances may arise where I would consider purchasing and using protective filters on my lenses. I’m very careful with my equipment, but accidents do happen. I’m just not there yet.

To learn more about the BirdSnap app, press this link.

To view the “through the library window” photos of 2014 migrating birds, press this link.


Photo of Male Purple Finch

Purple Finch or House Finch? ID Photographs and Clues

Purple Finches and House Finches Visit the Feeder

The House Finch and Purple Finch species are very similar. It’s hard to observe the subtle differences between them without good photos. Even with good photos, the more I compare these look-a-likes, the more I just don’t know. The ID clues seemed elusive, depending on the season, depending on the location, the subspecies, the individual bird…. depending on the considerable color variation and the blurriness of their markings.

It was time to get serious about telling them apart.

First thing I had to do was to get good photographs of the male and female Purple Finches. I had a few photos of the male and female House Finches (positively identified by WhatBird.com). It wasn’t until late November that we had some visitors to our feeders that looked a little different. I was able to get a couple photos of them and, to my delight, Whatbird.com positively identified them as Purple Finches.

Purple Finches

Photo of Female Purple Finch
Female Purple Finch Calling Out to the Male —ISO 800; f/8; 1/1250 Second

Purple Finch ID Clues

A female (photo above) Purple Finch is a little easier to tell apart from a female House Finch. The face is very distinct with brown and white markings. Short, dark brown streaks decorate the female’s white breast.

A male Purple Finch (photo below) is clearly more raspberry colored than a male House Finch. Raspberry splash is evident on the nape, hind neck, back, chest and flanks. In addition, the males sport a subtle rose over brown color on the wings, and a not so subtle raspberry rump.

Additional Clues

  • Male and Female Purple Finches have bills that are shaped like a cone, with a straight upper mandible.
  • Male and female Purple Finches are larger and chunkier than House Finches.
  • The folded wings of the male and female Purple Finches are longer than House Finches and include a strong notch in the tail feathers.
Photo of Male Purple Finch
Male Purple Finch ISO 1600; f/5; 1/500 Second

House Finches

Photo of Male House Finch
Male House Finch
ISO 2000; f/8; 1/1250 Second

House Finch ID Clues

  • The Male House Finch (photo above) has a red or orange forehead, chin, upper throat & breast. The rump can be red or orange. The back and wings are brown. 
  • Females House Finches (photo below) have a plain gray/brown overall head. She has no strong facial markings. 
  • Male and female House Finches have bills with an upper mandible that curved downward  (curved culmen).  The bill appears more round than cone shaped.
  • Male and female House Finches have lots of long (front to back) blurry brown streaking on their chests and flanks.
  • Male and female House Finches are smaller and thinner than Purple Finches.
  • The folded wings of House Finches are shorter than Purple Finches, and their tails are longer with a slight notch.

0U6A5560

My Biggest Clue

I still think the differences are slight and subtle between these two closely related species. My biggest clue is that Purple Finches are irregular visitors….coming from the northern woodlands during migration. Since House Finches are much more common and widespread in the U.S., do not migrate, and are more likely to reside in Southwest MI year round, the odds are very good that I’m mostly observing House Finches.

Both species are beautiful, and bring much needed brightness and joy to an otherwise dreary southwest Michigan November.

Photo of Lapland Longspur

Photographing the Lapland Longspur – Dreaded Lens Flare

Lens Flare– Aack!!

Photo of Lapland Longspur
Lapland Longspur – A Rare Visitor at the Allegan SGA.
ISO 1000; f/8.0; 1/2000 Second

Photographing Lapland Longspurs

I was driving in the Allegan forest on a back service road when I came across a group of Lapland Longspurs foraging for seeds on the ground. I didn’t know what they were then, but I knew that these were birds I had never photographed before. I followed my usual pattern. I quickly and quietly pointed the lens out of the car window, got my exposure settings right, and started shooting. It wasn’t the most comfortable position to be in. The birds were on the ground and had to be photographed from the passenger side of my car. (I didn’t dare get out, or even move the car.) My camera’s weight was resting on the storage bin that I keep ready in the passenger’s seat. The len’s hood stretched outside the window and was tilted downward.

I always check the sun’s location before I shoot. I was facing the sun, so it wasn’t the best direction to be shooting, but the lens was angled downward, so I thought I’d be fine. The anxiety of missing the shot was upon me, with good reason. The birds stayed in place less than a minute before flying away. I was able to get off about 5 shots.

After the birds were gone, I took a look at the camera’s display. Lens flare had ruined my photos. The above photo of the male Longspur was the best shot, the other 4 were heavily washed out and pockmarked with flare. Very disappointing, especially because the Lapland Longspur is not a common sight for bird photographers in West Michigan.

What is Lens Flare?

Pointing the front element of your lens towards the direct and intense light of the sun causes lens flare. Once this bright light sneaks in and hits the camera’s sensor, your images will be subpar. Depending on the severity of lens flare, you will usually see round or polygonal blobs, streaking and washed out images, or images with very little contrast. The anti-reflective coating on the lens element does help minimize flare, but will not eliminate it entirely.

Avoiding lens flare is usually simple if you follow these steps:

  • Make sure the lens hood is attached to the lens.
  • Reposition yourself so that you modify the angle at which the sun hits the lens.
  • If you can’t reposition yourself, shade the lens with cardboard or your hand to minimize the impact of the direct light.

My long lens hood was attached and the lens was angled downward, but unwanted bright light still made its way in to my sensor. I should have taken a quick look at the camera’s display after my first shot and adjusted accordingly. Live and learn.

Next Time

All I can do is look ahead. Lapland Longspurs nest in the arctic tundra, but a few of them visit Southwest Michigan every winter. (NOTE: “Longspur” is a reference to the elongated claw on its back toe.)  I will keep searching this winter and hope that I get another opportunity to photograph these lovely birds.

If you are interested in learning more about the migration habits of the Lapland Longspur, here’s a link to eBird’s Migration Tracking.

Photo of Common Yellowthroat Warbler

Photographing Common Yellowthroat Warblers – Thoughts About Using Flickr

Yellowthroat Warbler Encounter

Last summer, I finally had an opportunity to photograph the bright little warbler with a Zorro mask; the Common Yellowthroat Warbler. This species is common, but not commonly seen out in the open in the Allegan State Game Area. Like most other warblers, the Common Yellowthroat weaves in and out of thick, leafy branches hunting for insects. It rarely show itself fully, at least not when this photographer is around.

Photo of Common Yellowthroat Warbler
Common Yellowthroat Singing his Heart Out in Open View.
Zorro Type Eye Masks Make Identifying This Warbler Easy.
ISO 800; f/8; 1/1000 Second

Enticing Birds with Song

I had already set up and positioned my tripod in an area with optimal morning light, a melt away green background, and a couple possible perches away from branch and leaf clutter. A bright, male Yellowthroat Warbler made an appearance almost immediately, but he stayed hidden in the foliage, seemingly intent on evading the camera.

I opened the I-Bird Midwest app on my phone, clicked on the audio link to the Yellowthroat Warbler song, and played it once. The Yellowthroat abandoned the safety of the bush, boldly flew close, landed on a perch near my setup, and looked around for the intruder in his territory. For 3 minutes or so he sang loudly to warn this “intruder” away.

Too Many Photos in Lightroom

I uploaded 50+ clear, nicely lit, well framed, mostly away from leafy clutter photos of this warbler to Lightroom for post processing. As usual, I was attentive to the descriptors and dates that help keep my photos organized. I highlighted with stars 3 or 4 photos that I thought were the best of the shoot.

I manage all of my photos in Lightroom, many more of each bird species than I will ever need or use. Lightroom is overloaded. When I go into the program in search of a particular photo, it takes time. Plus, I can not resist taking one more look at the hundreds of photos I did not star.  TIME WASTER!!

Photo of Common Yellowthroat Warbler
Common Yellowthroat Warbler Perching Close to the Camera.
ISO 640; f/8; 1/800 Second

Why Bird Photographers Use Flickr

I’ve only recently posted my bird photos to Flickr. I wasn’t impressed the first couple times I visited flickr (years ago) because, well, I’m a photo snob and there were always way too many crappy photos posted.

But I’ve taken a step back and reconsidered.

It’s fun to explore Flickr. I can join birders groups, bird photography groups and quickly share my bird photos with other bird lovers. It is inspiring (and humbling) to check out the artistry and technical prowess of some of the more advanced bird photographers. If I choose, my photos can be placed into photo competitions. Some of the more elite bird photography groups allow photographers to make comments and suggestions pertaining to the quality and caliber of the work. I can make  judgements about how my photographs of a particular species of bird compares to the same species photographed by others.

Free Cloud Photo Storage

Flickr offers a very generous 1 TB of free photo storage. I already have an immense amount of free storage space on Drop Box, Google Drive, Amazon and the company that hosts my website. Free cloud storage options are as numerous as free email resources. I would not use Flickr just for free storage.

Photo of Common Yellowthroat Warbler
Common Yellowthroat Warbler Hiding in the Brush.
ISO 1600; f/8; 1/800 Second

My Running Photo List

Flickr is now my go-to place to document my wild bird photography journey and store the best photo I currently have of each species (male and/or female). It’s my birding “listing tool” and portfolio to keep track of all the different bird species I have photographed.

Best of all, I have a quick and simple way for others to share my journey without boring them to death with too much content.

To visit my Flickr Photo stream, press this link.

Photo of Cooper's Hawk

Photographing Cooper Hawks Hunting at Feeders

Photographing A Cooper’s Hawk

When a Cooper’s Hawk conceals himself in the brush near the bird feeders, all but one or two of the birds are immediately aware of him and scatter for cover. Occasionally a downy woodpecker, still as a marble stature, hides behind a suet feeder. There’s an eerie, quiet sense of anticipation in the air.

Photo of Cooper's Hawk
Cooper’s Hawk Looking Pretty Relaxed, Despite the Humans Nearby. ISO 1000; f/8; 1/2000 Second

Cooper’s Hawk Looking For An Easy Meal

Last August, we were visiting relatives and fellow birders in Madison, Wisconsin. My tripod, gimbal head, and DSLR camera with 500mm lens were set up on their balcony.  I had my longest lens attached because I was hoping to photograph some warblers I had noticed the previous evening on the prairie grasses below.

An immature Cooper’s Hawk (greenish/yellow eyes and a brown cap; adults have red eyes.) surprised us by perching close on a balcony ledge. He came in, seemingly unafraid of the 3 humans on the balcony, to investigate the bird feeders and swallow nests under the deck roof.

The Coop landed a little too close for my long lens, but there was no time to swap out lenses. I swiveled the camera, focused and pressed down that shutter. With the viewfinder stuffed, I was able to get off 20 or so shots as the hawk moved about on the balcony ledge. The hawk flew off after a minute or two because a couple of swallows, in an effort to protect their nest, were mercilessly dive-bombing and smacking him on the head.

Photo of Cooper's Hawk
Cooper’s Hawk, Adjusting His Footing While Being Mobbed by Tree Swallows.
ISO 1600; f/8; 1/2000 Second

Hawks That Hunt At Feeders

This young Cooper’s Hawk just flew in  – no sneaking up, no attack plan, just landed. Perhaps he was checking out the vulnerability of the nests or just getting a better view of the feeder layout.

Cooper’s Hawks are regular visitors at the feeders. They are about the size of a large crow- females typically 35% larger. Quiet, nimble, stealthy and fast, Cooper’s Hawks are able to navigate through dense woodlands to ambush their prey. Near feeders, they usually swoop down from a hidden location toward the feeding song birds and take advantage of the confusion to capture their victim. Occasionally, during the ruckus, a fleeing bird will crash into a window and become momentarily stunned. Easy pickings for the hawk.

Photographing this Cooper’s Hawk had me wishing (again) that I owned a telephoto zoom lens. Sometimes a large bird is just too close to the camera and there’s no time to change lenses. See this post about photographing a too close bald eagle.

Photo of American Redstart

Photographing the American Redstart and the Art of PISHING

Photographing the American Redstart Warbler

I have to admit. I’ve come to love photographing warblers- especially warblers uncommon to our yard. The American Redstart Warblers are especially fun to discover because they are tiny, compact balls of energy. They are not particularly shy (as warblers go) and once in a while, their curiosity will get the better of them.

Photo of American Redstart
Female American Redstart — ISO 1600; f/4; 1/500 Second

Attracting American Redstarts to Our Backyard

The migration map for the American Redstart Warblers shows that they nest in SW Michigan, but this is the first time we’ve seen this species around us. These are conspicuous warblers, but they do not frequent back yards. The female American Redstart does not have the dramatic black and orange halloween colors like the male, but she is still easy to identify when she flashes the orange and yellow patches on her shoulders, wings and spread tail feathers.

My warbler book states that these warblers respond well to PISHING. This practice may enticed them to visit back yards (assuming the habitat is inviting).

What is PISHING?

PISHING is a sound made by birders and researchers to entice a hidden bird to come out into the open.  It sounds like this.


Basically, the call slowly repeats “pish-h-h- h-h”  three or four times, and then follows that with “chit, chit, chit, chit, chit, chit, chit”. The goal is to get the bird to approach more closely. It’s not meant to be delivered continually or loudly. That would only frighten away the birds. A soft and brief delivery is recommended for the best response. I’m sure many birders have developed their own unique PISH sound and style of delivery.

Photo of American Redstart
Female or Possibly Juvenile Male American Redstart

My First Attempt at PISHING

I thought I’d try to entice the female American Redstart Warblers that I had seen in the dense brush to come out into the open by making the PISHING sound. I set up my camera on the porch near a red bud tree that had lost most of its fall leaves. I sat quietly on a stool behind  the camera and started my PISHING imitation, hoping for a close approach.

Birds did come to look me over, but only the ones that frequent our feeders. The female American Redstart Warbler was not interested enough to come out from behind the bushes. I photographed her in the brush where she seemed most comfortable.

Birds attracted to PISHING

This PISH sound, delivered appropriately, has been documented by researchers and ornithologists to attract birds. As it is not specific to a particular bird, the caller will have to be vigilant and purposeful. A moderate and respectful delivery is required. Using PISHING indiscriminately, without any particular bird in mind, is an annoyance and a waste of time. You most likely will lure in the species of birds who are commonly seen and not difficult to photograph. Bird species that best respond to pishing are Chickadees, Finches, Jays, Kinglets, Nuthatches, Sparrows, Titmice, Tits, Warblers, and Wrens.

Odd But True

I find it fascinating to speculate as to why PISHING works. The success rate surely has a lot to do the amount of other ambient noise, other birdsong, weather conditions, and predators.  To learn more about the art of PISHING and why it works, please visit this most entertaining web pdf called “Bringing In The Birds”.

To see all of the warblers and vireos photographed in our yard during the Fall of 2014, see this flickr Link.

Yellow Rumped Warbler

Photographing the Yellow Rumped Warbler

Photographing Yellow Rumped Warblers

It’s early November, frosty and cold, and most of the warblers are long gone from our yard. The Yellow Rumped Wood Warblers linger, seemingly not in a hurry to get to their wintering grounds.

Best of all, they don’t seem to mind posing for the camera.

Photo of Yellow Rumped Warbler
Yellow Rumped Wood Warbler,
Affectionately known as Butter Butt.
ISO 1000; f/4; 1/400 Second

Posing for the Camera

I had no trouble finding and photographing Yellow Rumped Warblers this summer. These venturous birds seemed to be everywhere, boldly and conspicously going about their business and ignoring me. Clutches of them, all flashing their bright yellow tail feathers, could be found searching for insects and berries in the low lying dense foliage. It was a photographer’s dream.

Butter Butts

These perky little warblers nest mostly in northern climates, so they are used to the brisk, November weather. I’ve seen a half dozen or so of them in my yard, flitting about on the leafless branches in search of insects. Seeds and berries are plentiful when the insects are gone. Of all the warblers, Butter butts are hardy enough to survive the Michigan winter. Once in a while, I’ll spot one as the snow flies. I have never seen them take advantage of the free meal at our feeders.

This time of year, these warblers can look quite drab -pale shades of brown. They are easy to identify with that bit of a yellow patch on each side of its body (in front of the wings) and their most identifiable feature, a bright yellow rump.

Photo of Yellow Rumped Warbler
Yellow Rump Prominently Displayed as this Warbler Goes for the Spider in the Web.
ISO 640; f/10; 1/640 Second


Photo of Yellow Rumped Warbler
Yellow Rumped Warbler
ISO1000; f/4; 1/400 Second

First to Arrive and Last to Leave

One morning soon I will wake and the Yellow Rumped Warblers will be gone. One of my many goals in the Spring is to photograph a male, all decked out and flashing his bold and bright yellow, charcoal, and blue/black/white feather finery. The Butterbutts are one of the first species of warbler to come through Southwest Michigan in the Spring. If I’m watchful, I’ll probably get my chance in March.

To take a look at photos of the other warblers that have come through our yard during this Fall’s migration (some starting in July!), visit this link.

Red Tailed Hawk

Red Tailed Hawk Posing for the Camera – Contemplating Exposure Compensation

Red Tailed Hawk Posing for the Camera

This Red Tailed Hawk is all curves as he poses for the camera. Anthropomorphically, I interpret this pose as being coy… you know….artfully modest to the point of being alluring. Lots of curves can make for an elegant composition. They add energy, movement, and balance to the photo.

Of course, in both of the striking poses below, this Red-Tailed Hawk was just caught in the act of preening his feathers. Still, the poses lend themselves to interesting and human centric interpretations.

For now though, I’m going to focus on exposure issues.

Photo of Red Tailed Hawk
Red Tailed Hawk- Keeping an Eye On the Photographer while
He Preens His Feathers.
ISO 1000; f/10; 1/2500 second

Photos Bathed in Harsh, Unbalanced Light

The late morning sun was at the hawk’s back and to my right. When I looked through the viewfinder, I could see a few details, but for the most part, the bird was a dark silhouette against a bright background. He was busy preening, so as long as I didn’t make any sudden movements, I thought the hawk would tolerate my presence.

I had some time to think about how to adjust exposure to ameliorate the harsh light; and that got me thinking about taking the time to fiddle with the camera’s Automatic Exposure Compensation (AEC) Function.

I learned something new about the quirkiness of my Canon’s Automatic Exposure Compensation function.

Photo of Red Tailed Hawk
Red Tailed Hawk Reaching Every Which Way to Preen His Feathers.
ISO 800; f/10; 1/2500 Second

Understanding Exposure Compensation

3 parameters control exposure:  ISO, Aperture, and Shutter Speed

If you believe your camera’s sensor is misreading the light, you have options that will force your camera to override its sensor readings and interpret the light more accurately. (Assuming you don’t want to make the exposure corrections in post processing).

Overriding Your Camera’s Sensor Readings

There are two common ways to over ride sensor readings:

  1. YOU manually re-adjust all exposure settings (aperture, shutter and/or ISO). This is done when your camera is set to Manual “M”.
  2. Set the Automatic Exposure Compensation (AEC) function to temporarily over ride sensor readings. With a little help from you, the camera will calculate and then shift exposure settings. To do this, you must set your camera to one of the creative modes (“P” Program, “AV” Aperture Priority, “TV” Shutter Priority, “A+” Intelligent Auto) and then apply the Automatic Exposure Compensation function. (See specifics about how to set Automatic Exposure Compensation at this post.)

Canon Makes It Confusing

The Automatic Exposure Compensation functionality in Canon Cameras seems to me very peculiar.

I had mistakenly assumed the AEC function on my DSLR worked in Manual “M” Mode as long as I set the camera to Auto ISO. After all, the camera could adjust exposure compensation by changing the ISO. However, on most Canon Cameras, setting the AEC function does nothing at all when the camera is set to “M” Manual mode. The AEC function on the camera will not work because it will not over ride the M manual settings (aperture, shutter, ISO) the photographer has set, even if the photographer set the camera to determine the ISO (Auto ISO).

NOTE: One exception: The top of the line, professional DSLR (EOS-1D X) is the first Canon DSLR that will allow AEC in Manual mode with ISO Auto.

Auto ISO Should Not Be a “M” Manual Setting

Manual “M” mode is technically only really “manual” when the photographer is in control of all 3 exposure parameters (ISO, Aperture, Shutter). With Canon DSLR cameras, the photographer can set the ISO to “Auto ISO” even when the camera is in Manual “M” Mode.

But, if the camera is automatically making exposure decisions by adjusting the ISO, how is that Manual “M” Mode?

The problem is one of labeling. A less confusing way for Canon to manage this would be to assign the manual setting FULL control of exposure (ISO, shutter and aperture) and include another setting …perhaps an “ISO preferred” mode.

Control is an Illusion

I never did get the exposure right in this photo shoot. The Redtailed Hawk was less patient then I thought he would be and flew off after 5 minutes or so.

I have to keep reminding myself that in the art of bird photography, and in most other things in life, control is an illusion.


Brown Thrasher

Photographing Brown Thrashers- Masters of Avian Acoustics

Photographing Brown Thrashers

I came upon two Brown Thrashers skulking in a rather dense and tangled bush in the Allegan State Game Area. By the sound of the songs and calls coming out of the bush, I thought I had discovered the nests of many bird species. As I watched and listened, it soon became apparent that one bold Brown Thrasher, nestled at the top of the bush, was doing all the singing.

Photo of Brown Thrasher
Brown Thrasher.
A Bird of With a Repertoire of Many Songs, Calls and Whistles.
ISO 320; f/9; 1/1000 Second

Camera Angle

I looked up at the crooning Brown Thrasher from the driver’s seat of my car, while my lens rested on the open door window. I knew the bird would vanish if I opened my car door and got out to reposition the camera on a tripod. My camera and monster lens are too heavy to reliably hold still, so I needed to rest the weight on the window. In order to be able to point the lens up high enough to focus on the bird and still be able to look through the viewfinder, I moved the car seat to its lowest setting and scrunched my body down into the seat.

Low Angle Perspective

Perspective changes the feel of a photograph. A “low angle” shot is where the camera is positioned anywhere below the eye line. If the distance is right between the lens and subject, I am always ready contort my head and body into position, if that what it takes to get the shot. (NOTE: My experience has been that opportunities to take eye level photographs of birds do not come around that often.)

Despite the problem with the high perch, the other conditions were good. Mid morning light was behind me, the bird’s pose was engaging and the background colors exceptional.

The second photo (below) shows a juvenile Brown Thrasher snuggling in the brush, appearing rather vulnerable as he looks up in search of his parent. This was an easier shot because the bird was positioned close to eye level. The cluttered brushy background is not ideal, but I like the colors of the Thrasher displayed in this side pose and the way the bird fluffs his feathers and bundles himself in a ball.

Photo of Brown Thrasher
Juvenile Brown Thrasher, at Eye Level with My Lens.
ISO 640; f/9; 1/1000 Second.

Bird Mimicry

Brown Thrashers are rather gangly secretive birds that do a good job of staying hidden, even though the bold copper wings and heavy dark streaking on their white breasts don’t exactly blend. Once you spot movement in a bush, their glaring bright yellow eyes and slightly downturned beak are easy to pick out. Brown Thrashers are most noticeable when they sing because they don’t just sing one or two songs. Generally they repeat a phrase twice, pause and then start again with a different tune. This bird in the top photo was showing off by singing complex songs with radical changes in volume, tempo, tone, pitch.

Avian Acoustics

When you hear birdsong that radically and continually switches from one song to another, it’s a pretty good indication that you’re listening to a mimic. Brown Thrashers are a species of bird (along with catbirds, blue jays, crows, starlings, and mocking birds) that imitate the songs and sounds other birds make. The males can have a repertoire of over 1000 sounds.

Brown Thrashers not only mimic other birds, they also imitate sounds that are not from nature, like construction noise and doorbells.

To learn more about bird mimicry, visit this link.


Photo of RingNecked Pheasant

Photographing Male Ring-Necked Pheasants – The Advantages of Fast Focusing Technology

Photographing the Male Ring Necked Pheasant

Male Ring Necked Pheasants are ground dwelling game birds – one of the most adorned and colorful birds around. Imported to America from China in the mid 1800s, they have survived and thrived in Michigan year round.

The male Ring Neck Pheasants’ plumage, with its red face wattles, green head and shiny copper breast, is spectacular. The males are so conspicuous in the spring that it is relatively easy to find and photograph them foraging for plant materials in agricultural fields, pastures and woodlands.

Photo of Male Ring Necked Pheasant
A Male Ring Necked Pheasant, before He Noticed Me.
ISO 1250; f/9.0; 1/2000 Second
Photo of Ring Necked Pheasant
Two Rather Large “Horns” of Head Feathers at the Back of the Head. They Look Like Pigtails on This Bird.
Close up of a Male Ring Necked Pheasant Running Away from Photographer.
ISO 2000; f/9.0; 1/2500 Second

Know How Your Camera Locks Down Focus

The male pheasant I encountered was quite close to my car when he finally noticed me. He quickly started his evasive maneuvers, weaving in and out of the tall grasses, moving fast and erratically away from me. My camera was set to focus on one single, center point. As I tracked his erratic movements through the grasses, the lens kept losing its focus lock. I quickly expanded the auto focus area mode so the lens would track 8 focus points clustered around the central point as well as the center point. This way, if the central focus point lost track of focus, the secondary surrounding focus points would quickly pick it up.

Photo of Male Ring Necked Pheasant
This Pheasant was Moving Fast as He Ran Away from the Photographer.
I was Glad to Have Set the Camera to Focus at More Than One Point.
ISO 2000; f/9.0; 1/2000 Second

Canon DSLR Focus Points

Sophisticated DSLR auto focus technology is designed to keep up with the action. There are 61 focus points on my Canon 5D Mark III DSLR camera. Each one can operate individually or in conjunction with secondary expanded auto focus points to quickly track and lock focus. The secondary focus points are programmed to be on “stand by”.  If focus can not be locked with the primary focus point (because the foreground or background lacks detail, texture, or contrast) the secondary focus points are automatically activated to get a lock on focus.

Let the Camera Do the Focusing

An advanced auto focusing system offers significant advantages for bird photographers. I can set my camera to focus with one or more focus points anywhere within a range of available focus points or let the camera use all 61 focus points to determine the best focus. Out in the field, when the action is fast and furious, autofocus is the fastest and most reliable way to get a clear shot.

See this post about my experience photographing two immature Ring Necked Pheasants last Autumn.

For more information about automatic focus on DSLR cameras, see this post.

To read about the frustrations of manual focus on DSLR cameras, visit this post.