Photo of Catbird

Photographing Gray Catbirds and Playing with the Light

Photographing the Subtle Beauty of the Gray Catbird

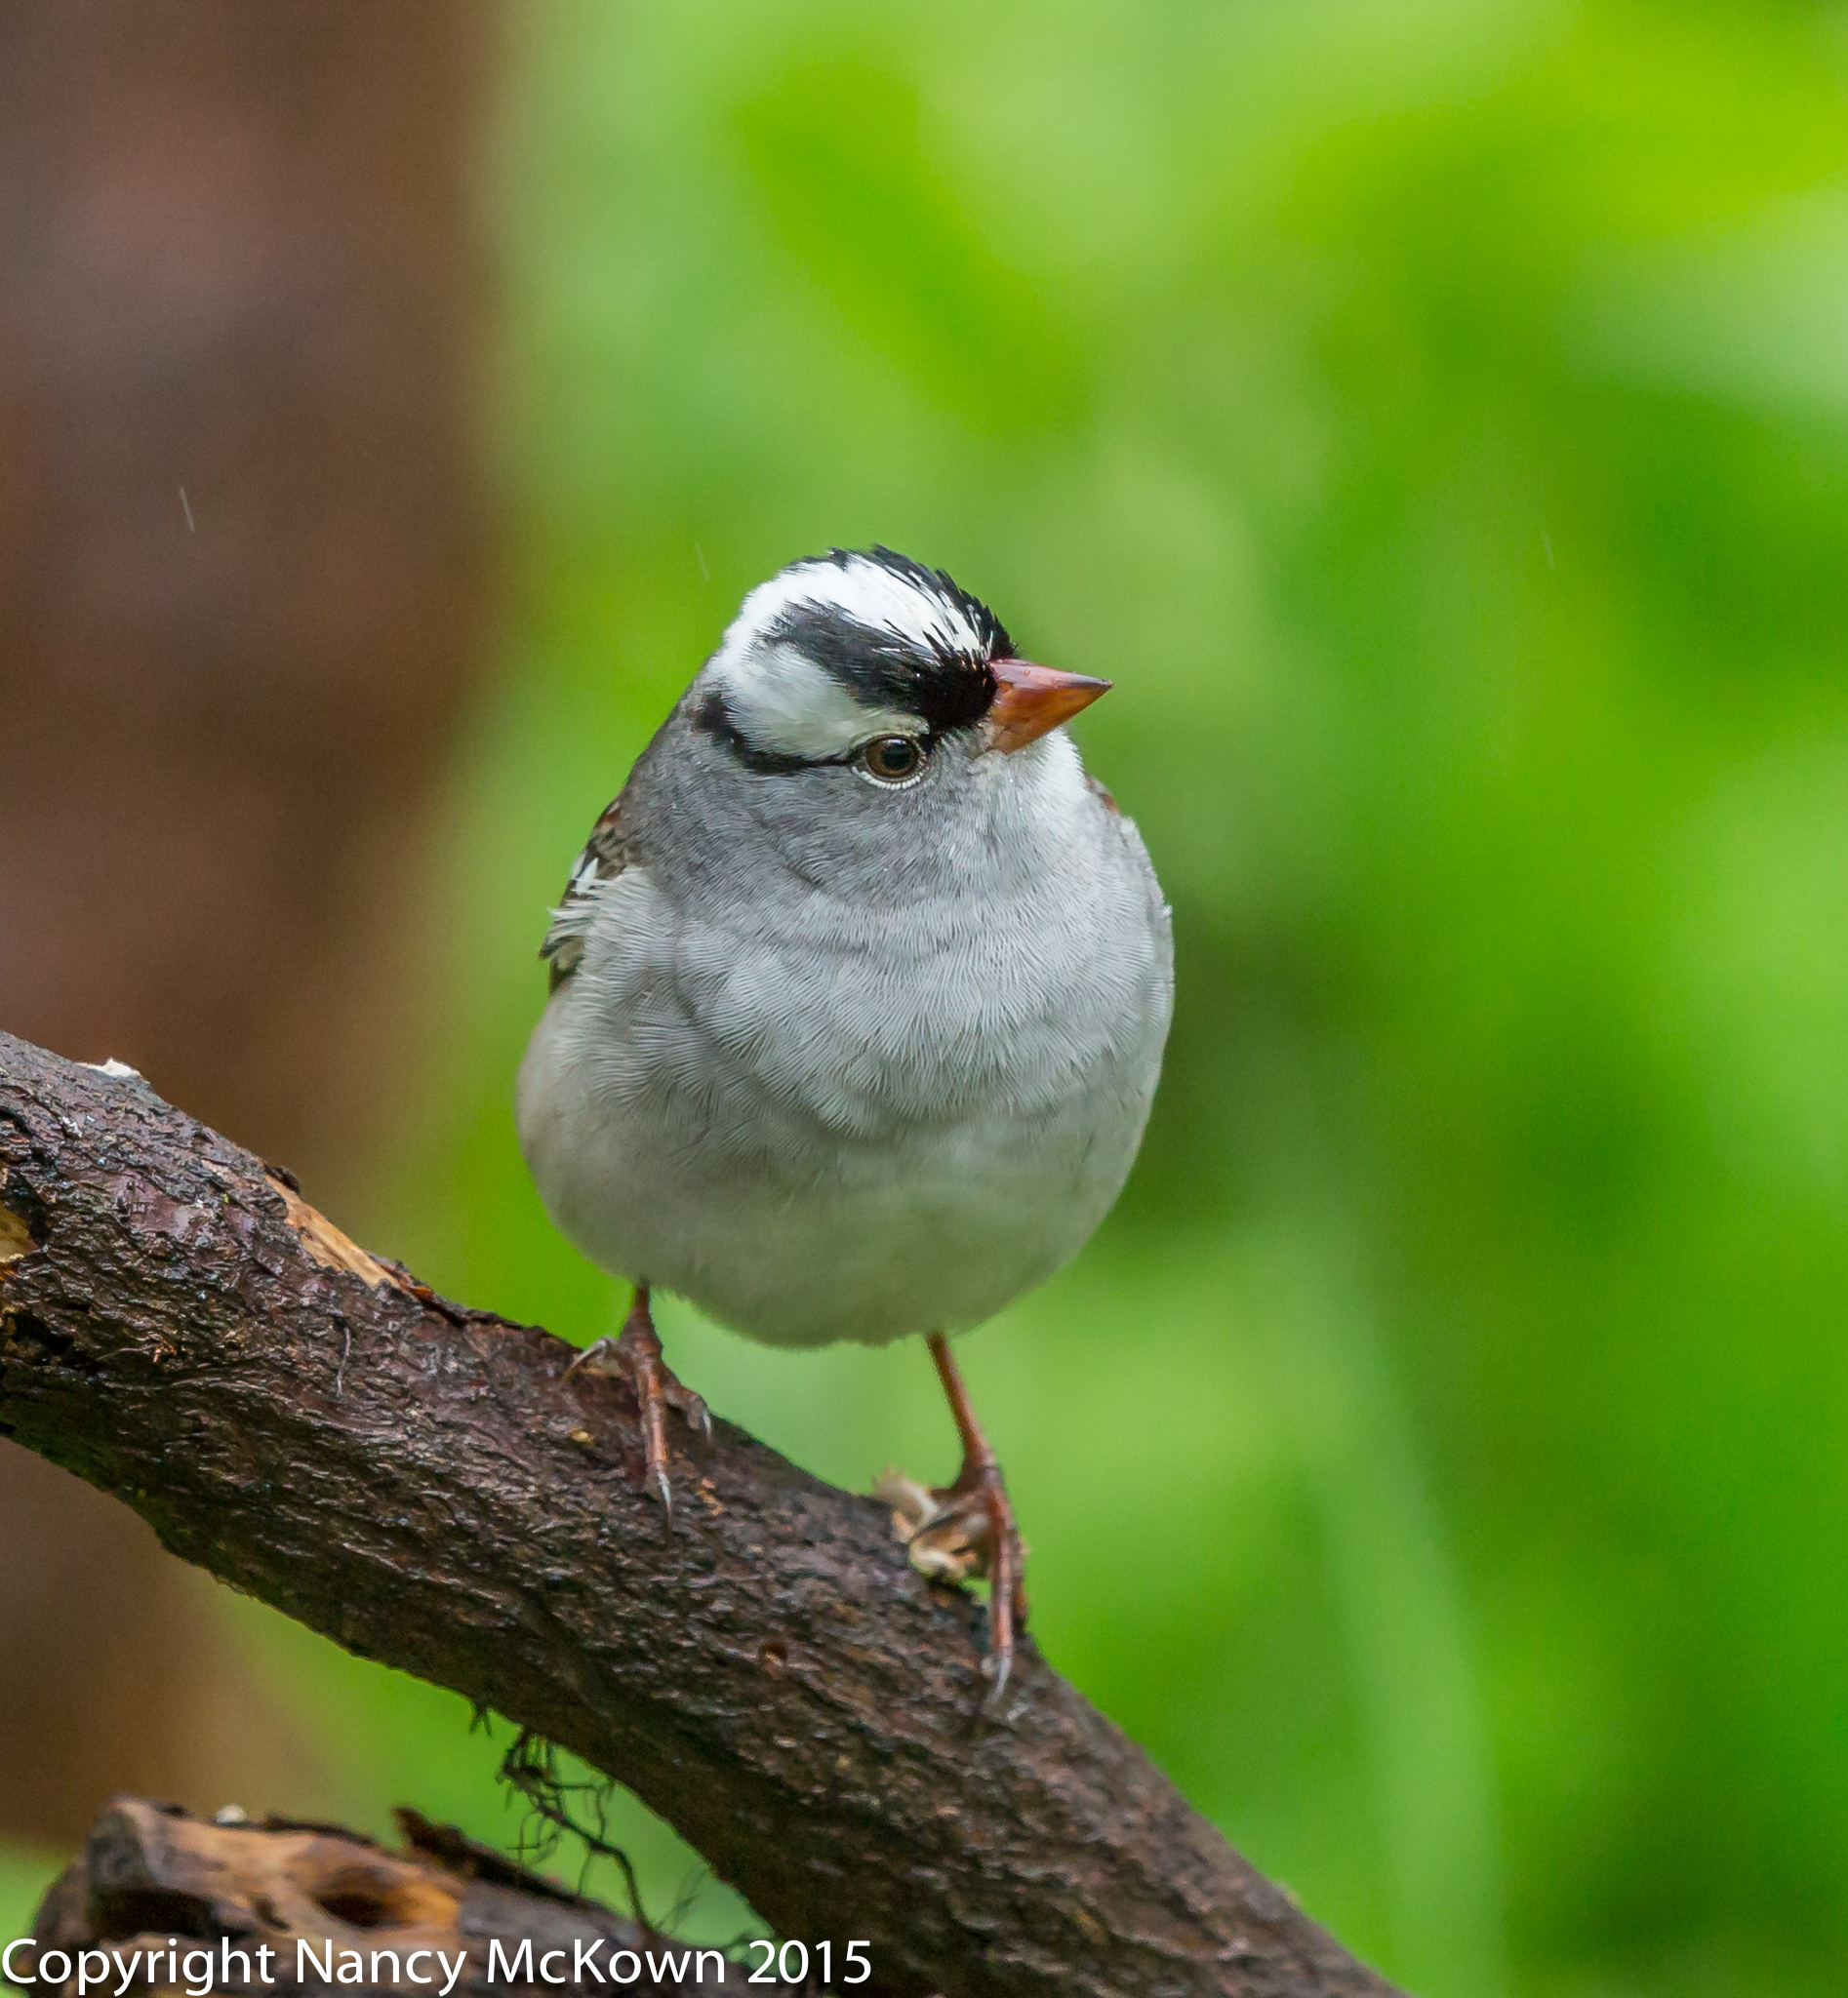
Catbirds are unknown to most of my non-birding friends. I think these birds are often overlooked because they resemble the more common and conspicuous blackbirds. The Gray Catbirds’ beauty is quite subtle. Both male and female are overall gray, with dark eyes, and black on its cap, tail, bill, legs and feet. Rich rusty feathers peek out from under its wings and tail. Not shy, Gray Catbirds are commonly found at feeders, snacking on everything we have to offer. Once in a while, I’ll see them eat the oranges we put out for the Woodpeckers and Orioles.

Photo of Catbird
Gray Catbird
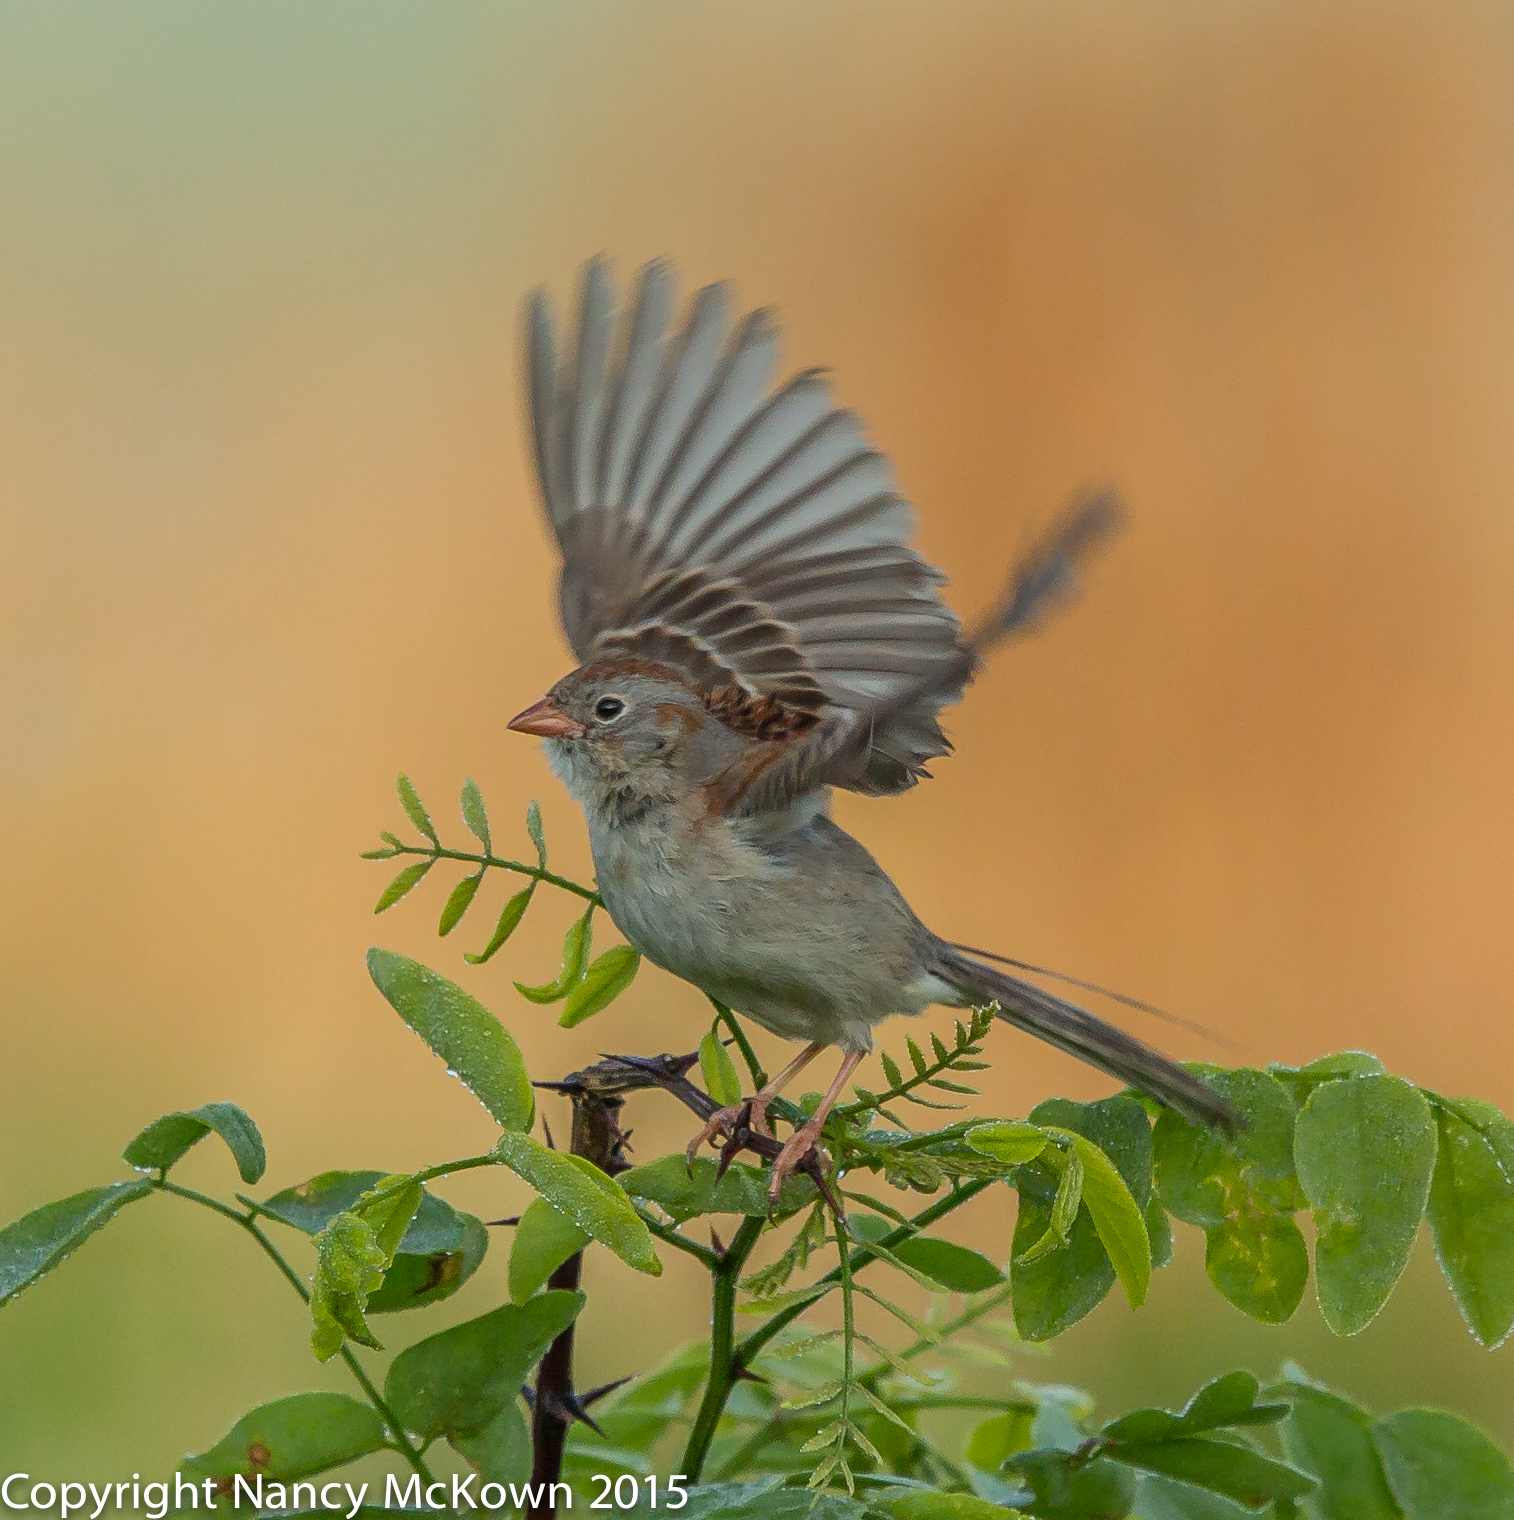
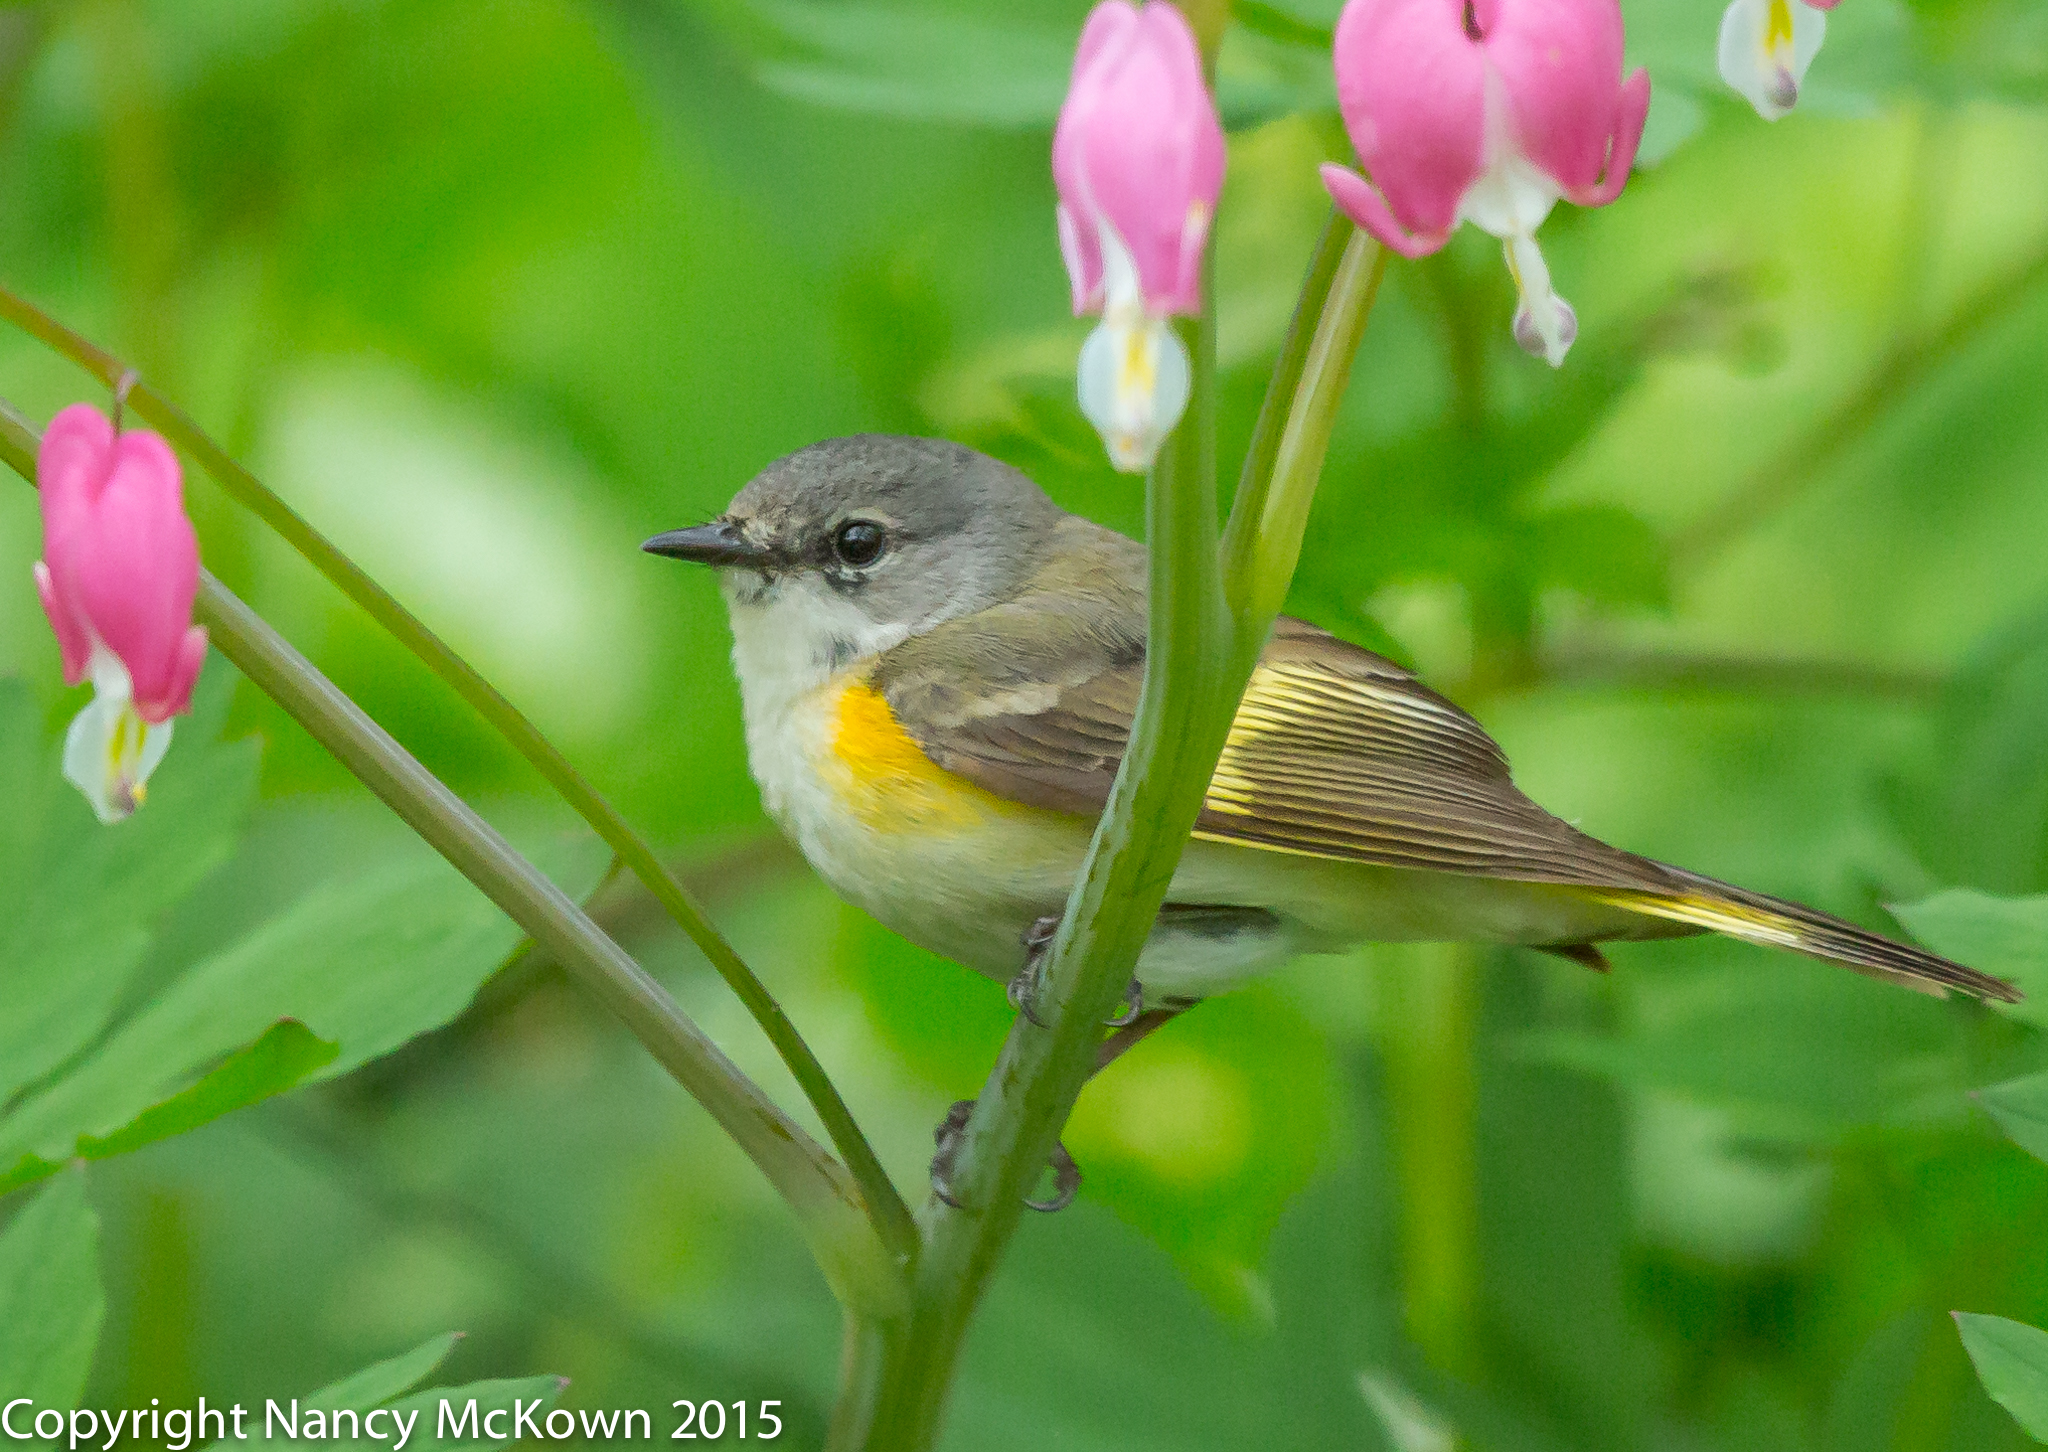
The Morning Light and the Creamy Background
Bring Out more Rusty Brown in the Wings.
ISO 1000; f/4.5; 1/800 second

Playing with Natural Light

The Catbirds in our yard are numerous and stay around all summer. I photographed these Catbirds before the heavy leaf cover from our tall trees grew to block much of the good light in our yard. I set up the tripod, camera and 500 mm lens on the porch and got a cup of coffee. No need to hide behind a blind for these curious birds. As long as I didn’t make any sudden movements, they flew in close to the house and went about their business with hardly a look in my direction.

I had the time and opportunity to just play -photographing the Catbirds at different times against diverse backgrounds. I got off the porch and experimented with the directionality of light.

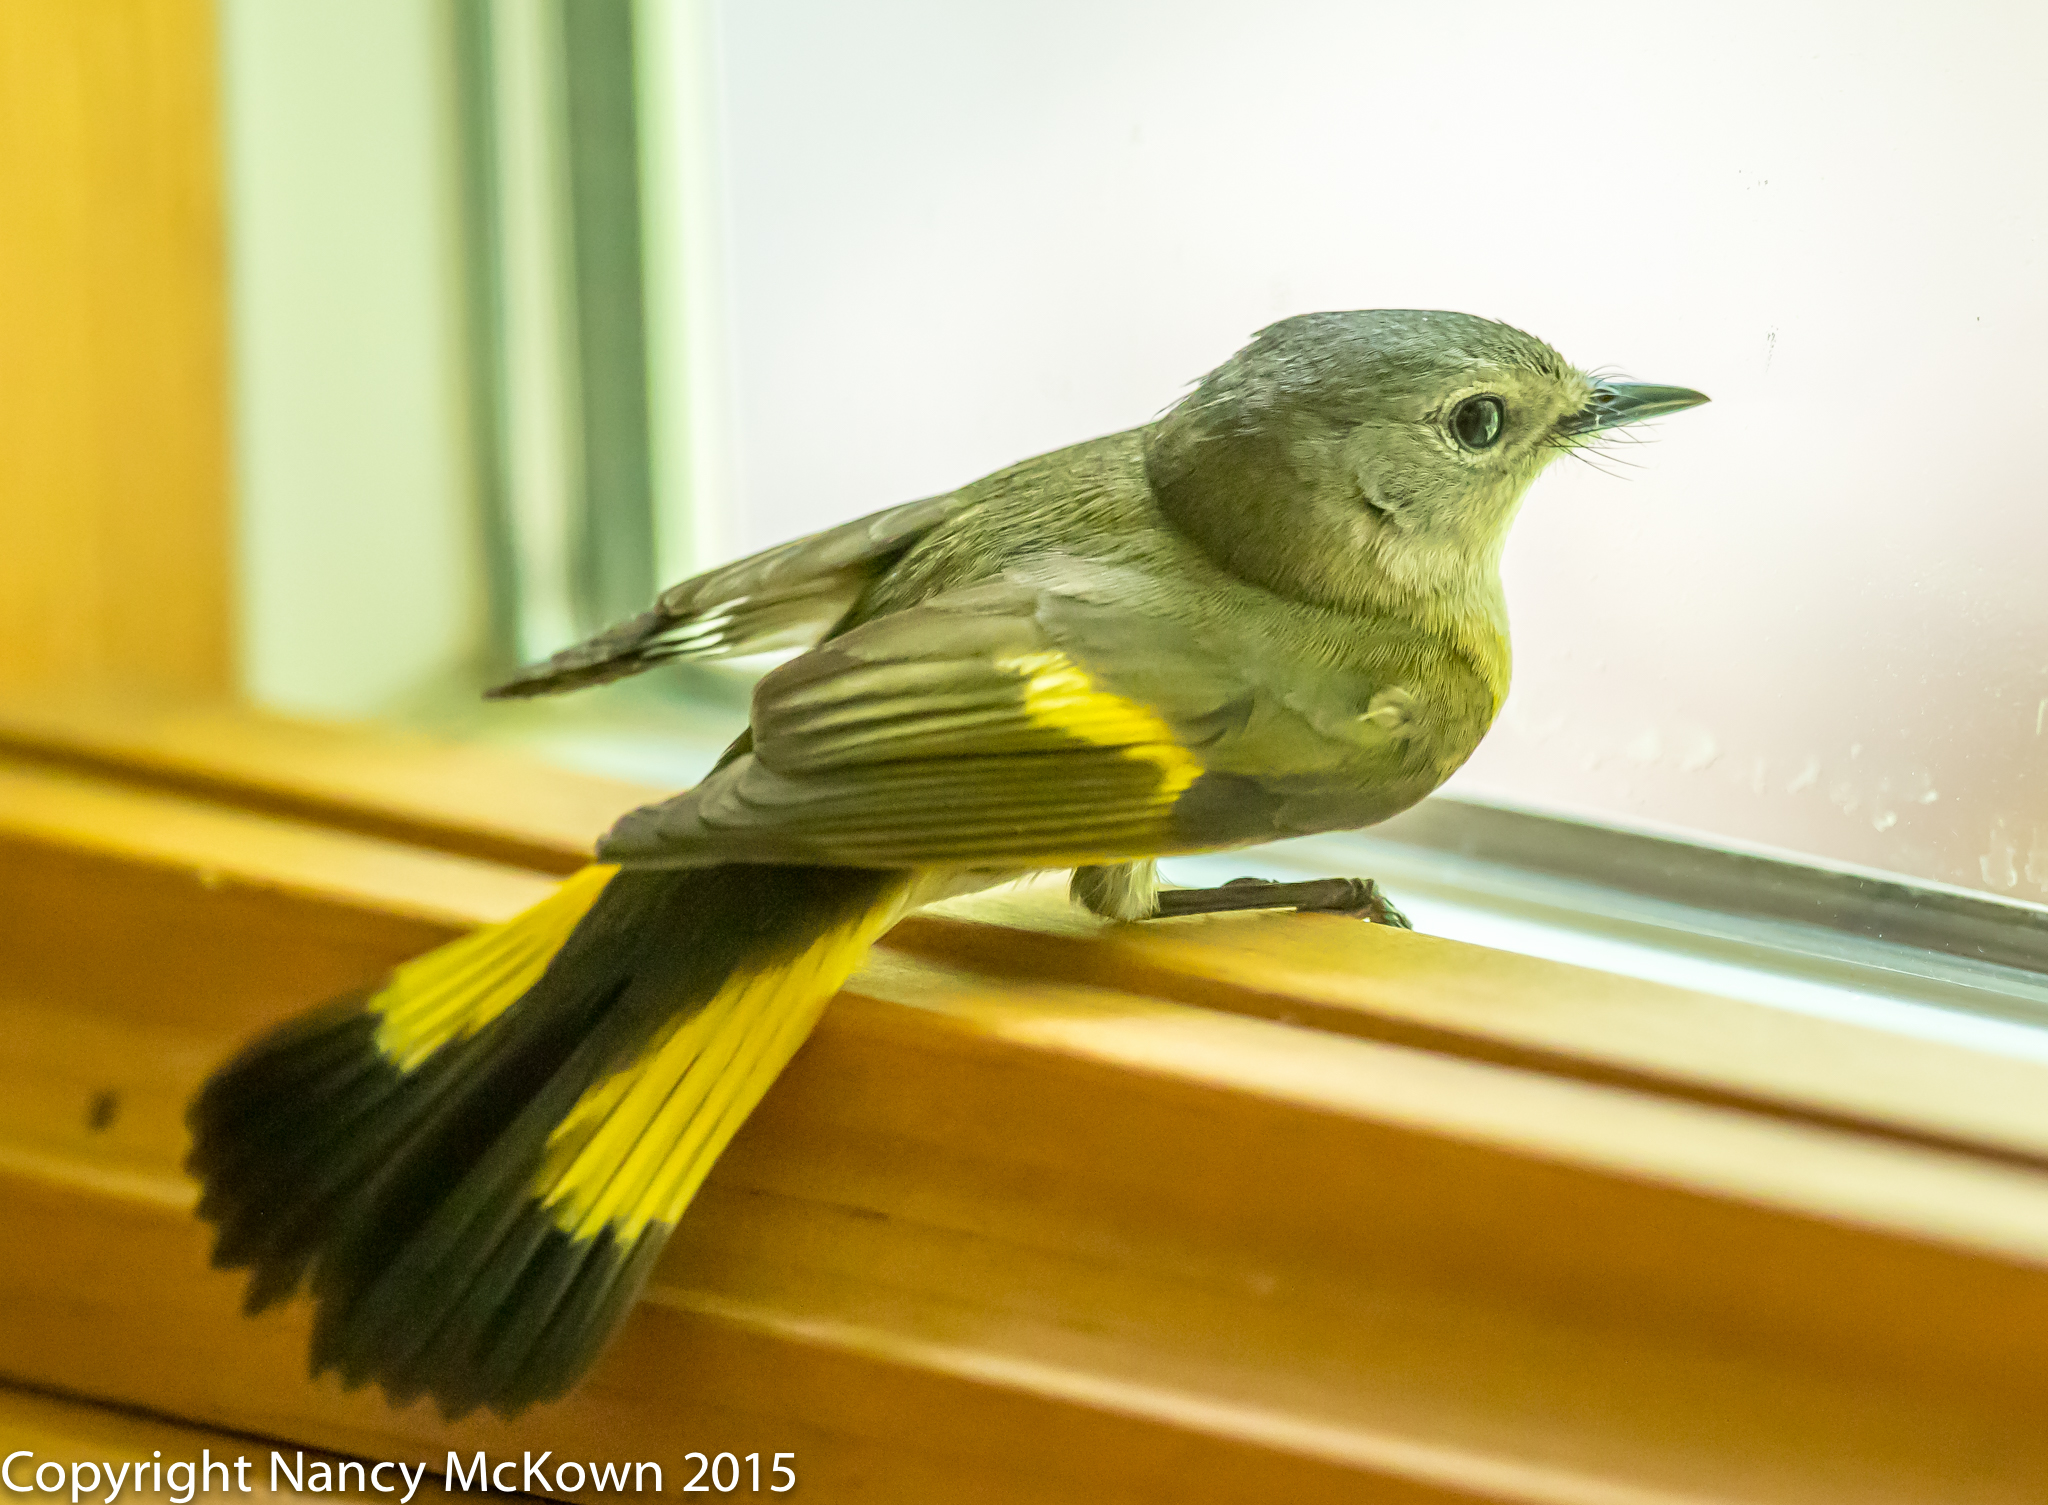
Compare the shadows, textures, and the colors in the two photos (above and below) to see what a difference changing out the natural light can make.

If you want to explore how to manipulate light in your images, don’t get into the rut of going to the same place at the same time. Move the camera and tripod around. Observe and learn how your lens sees light.

Photo of Gray Catbird
Gray Catbird, Tail held High
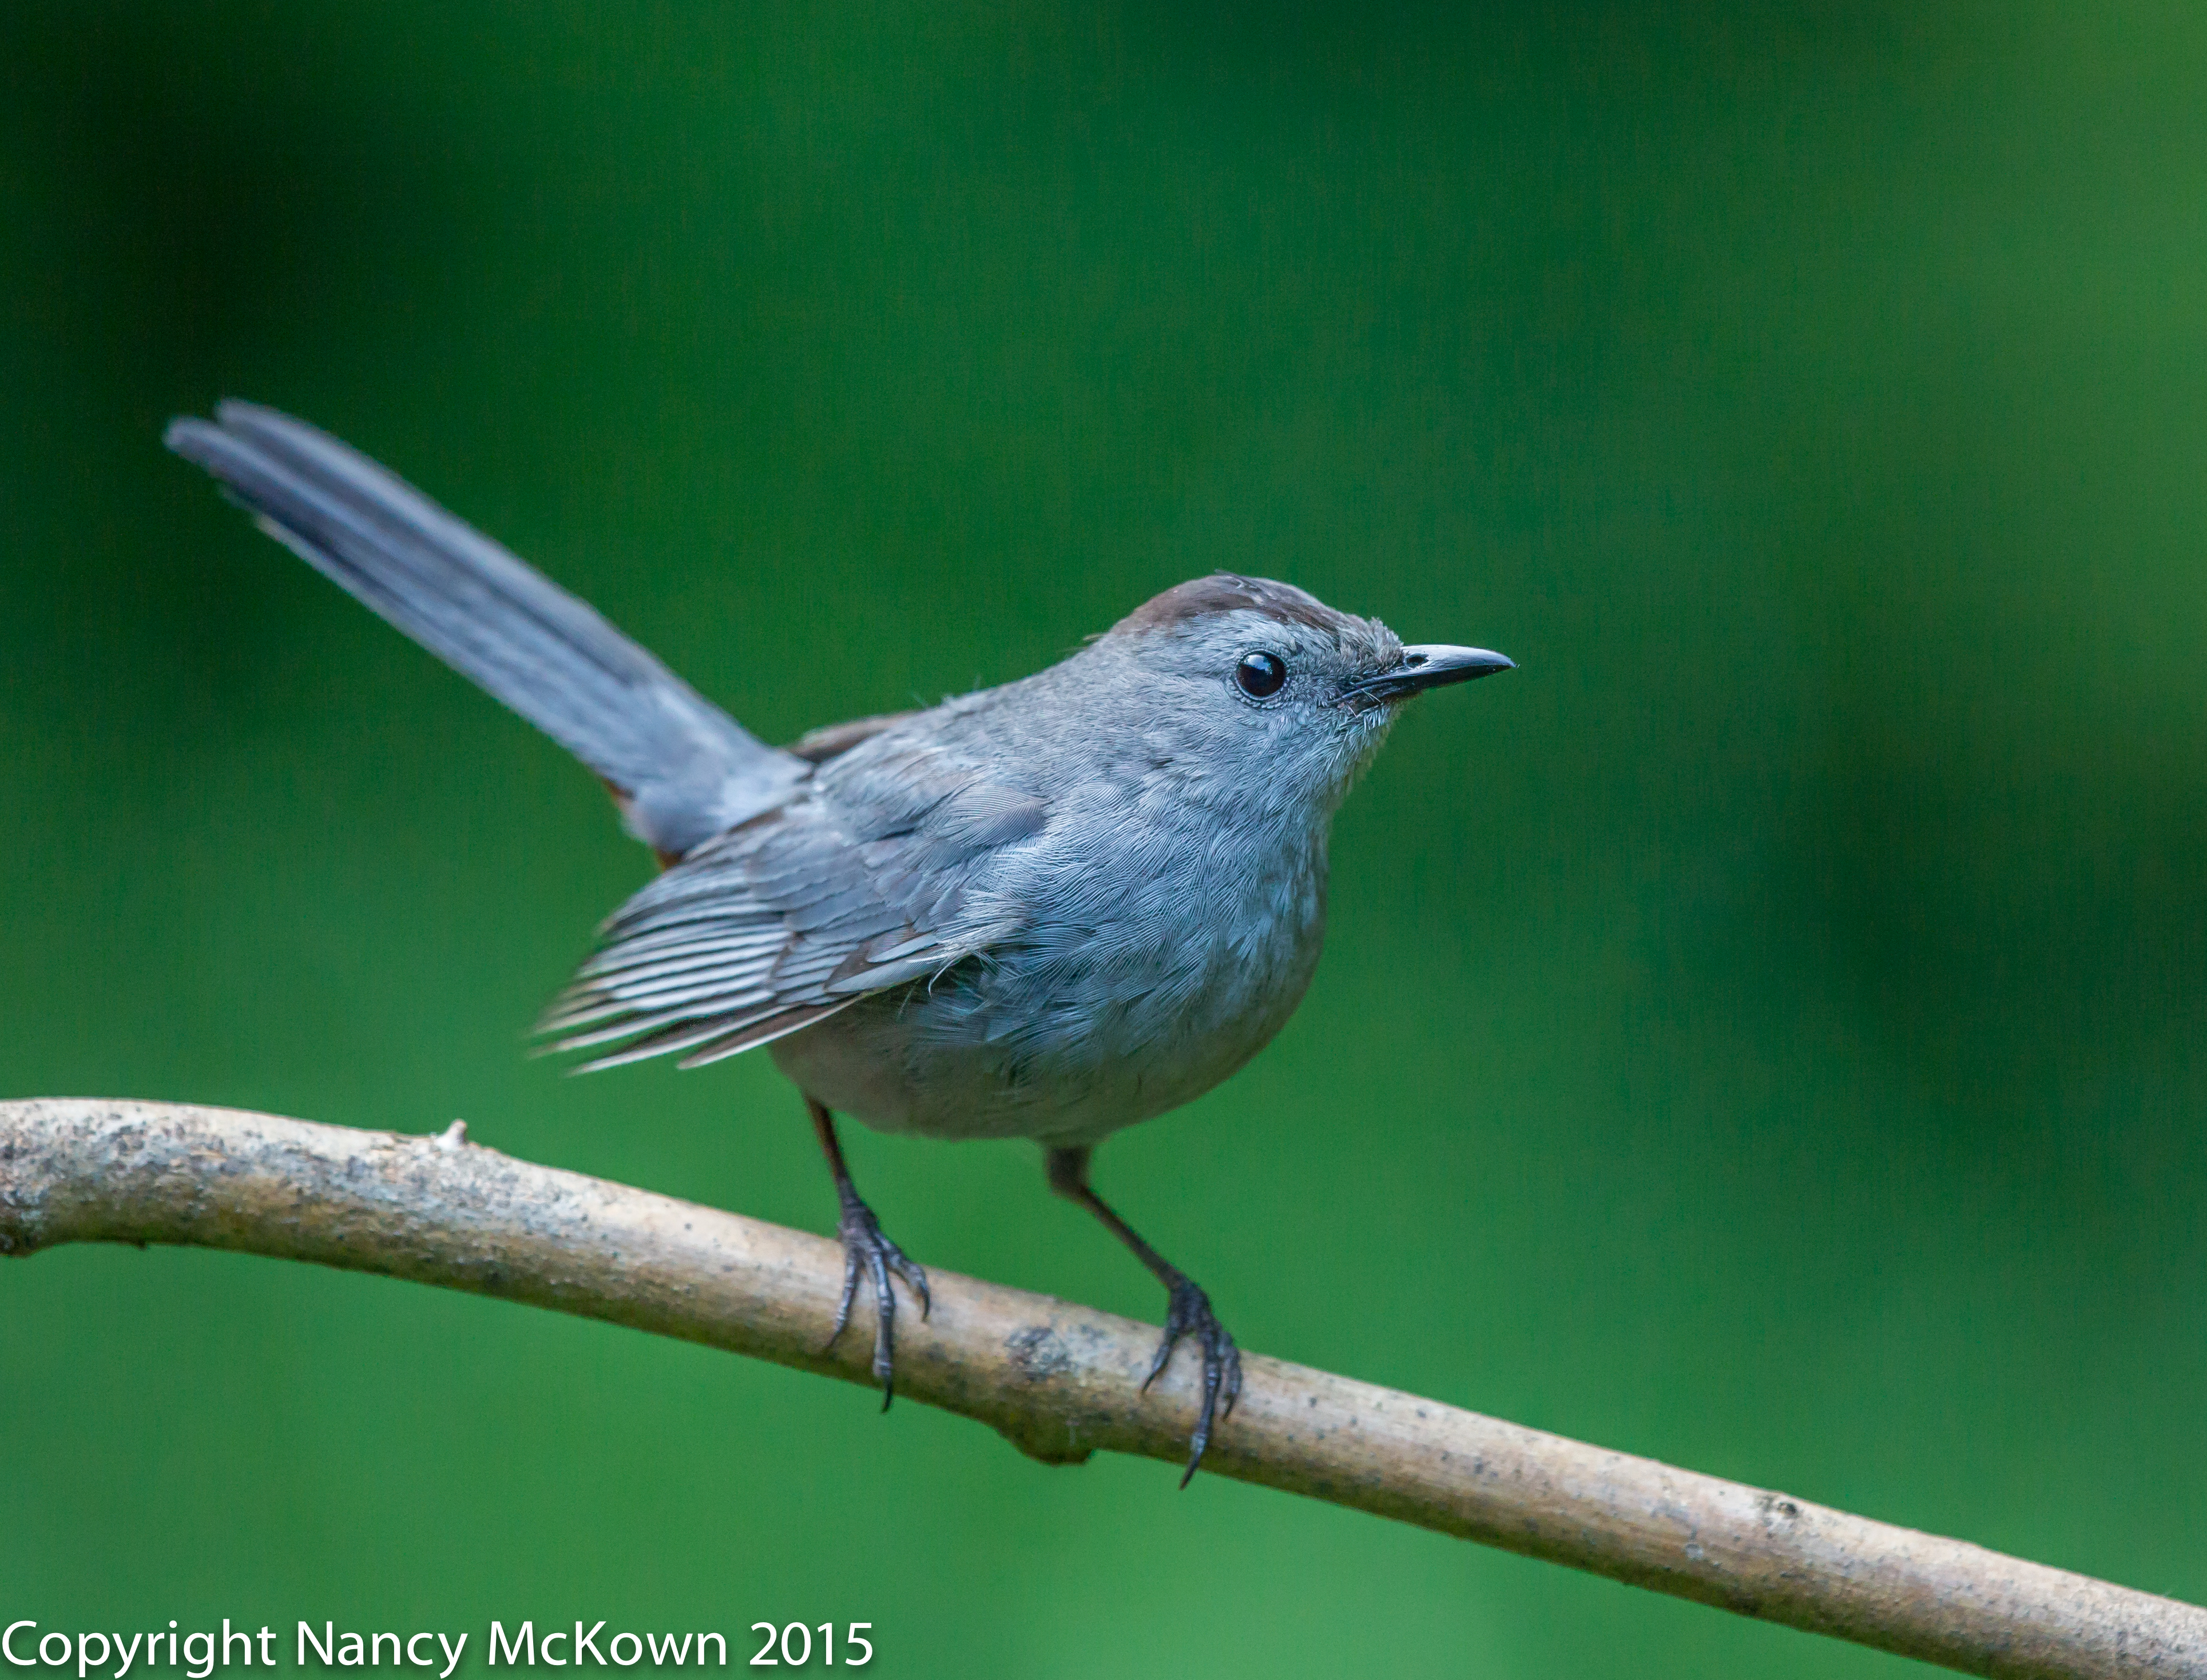
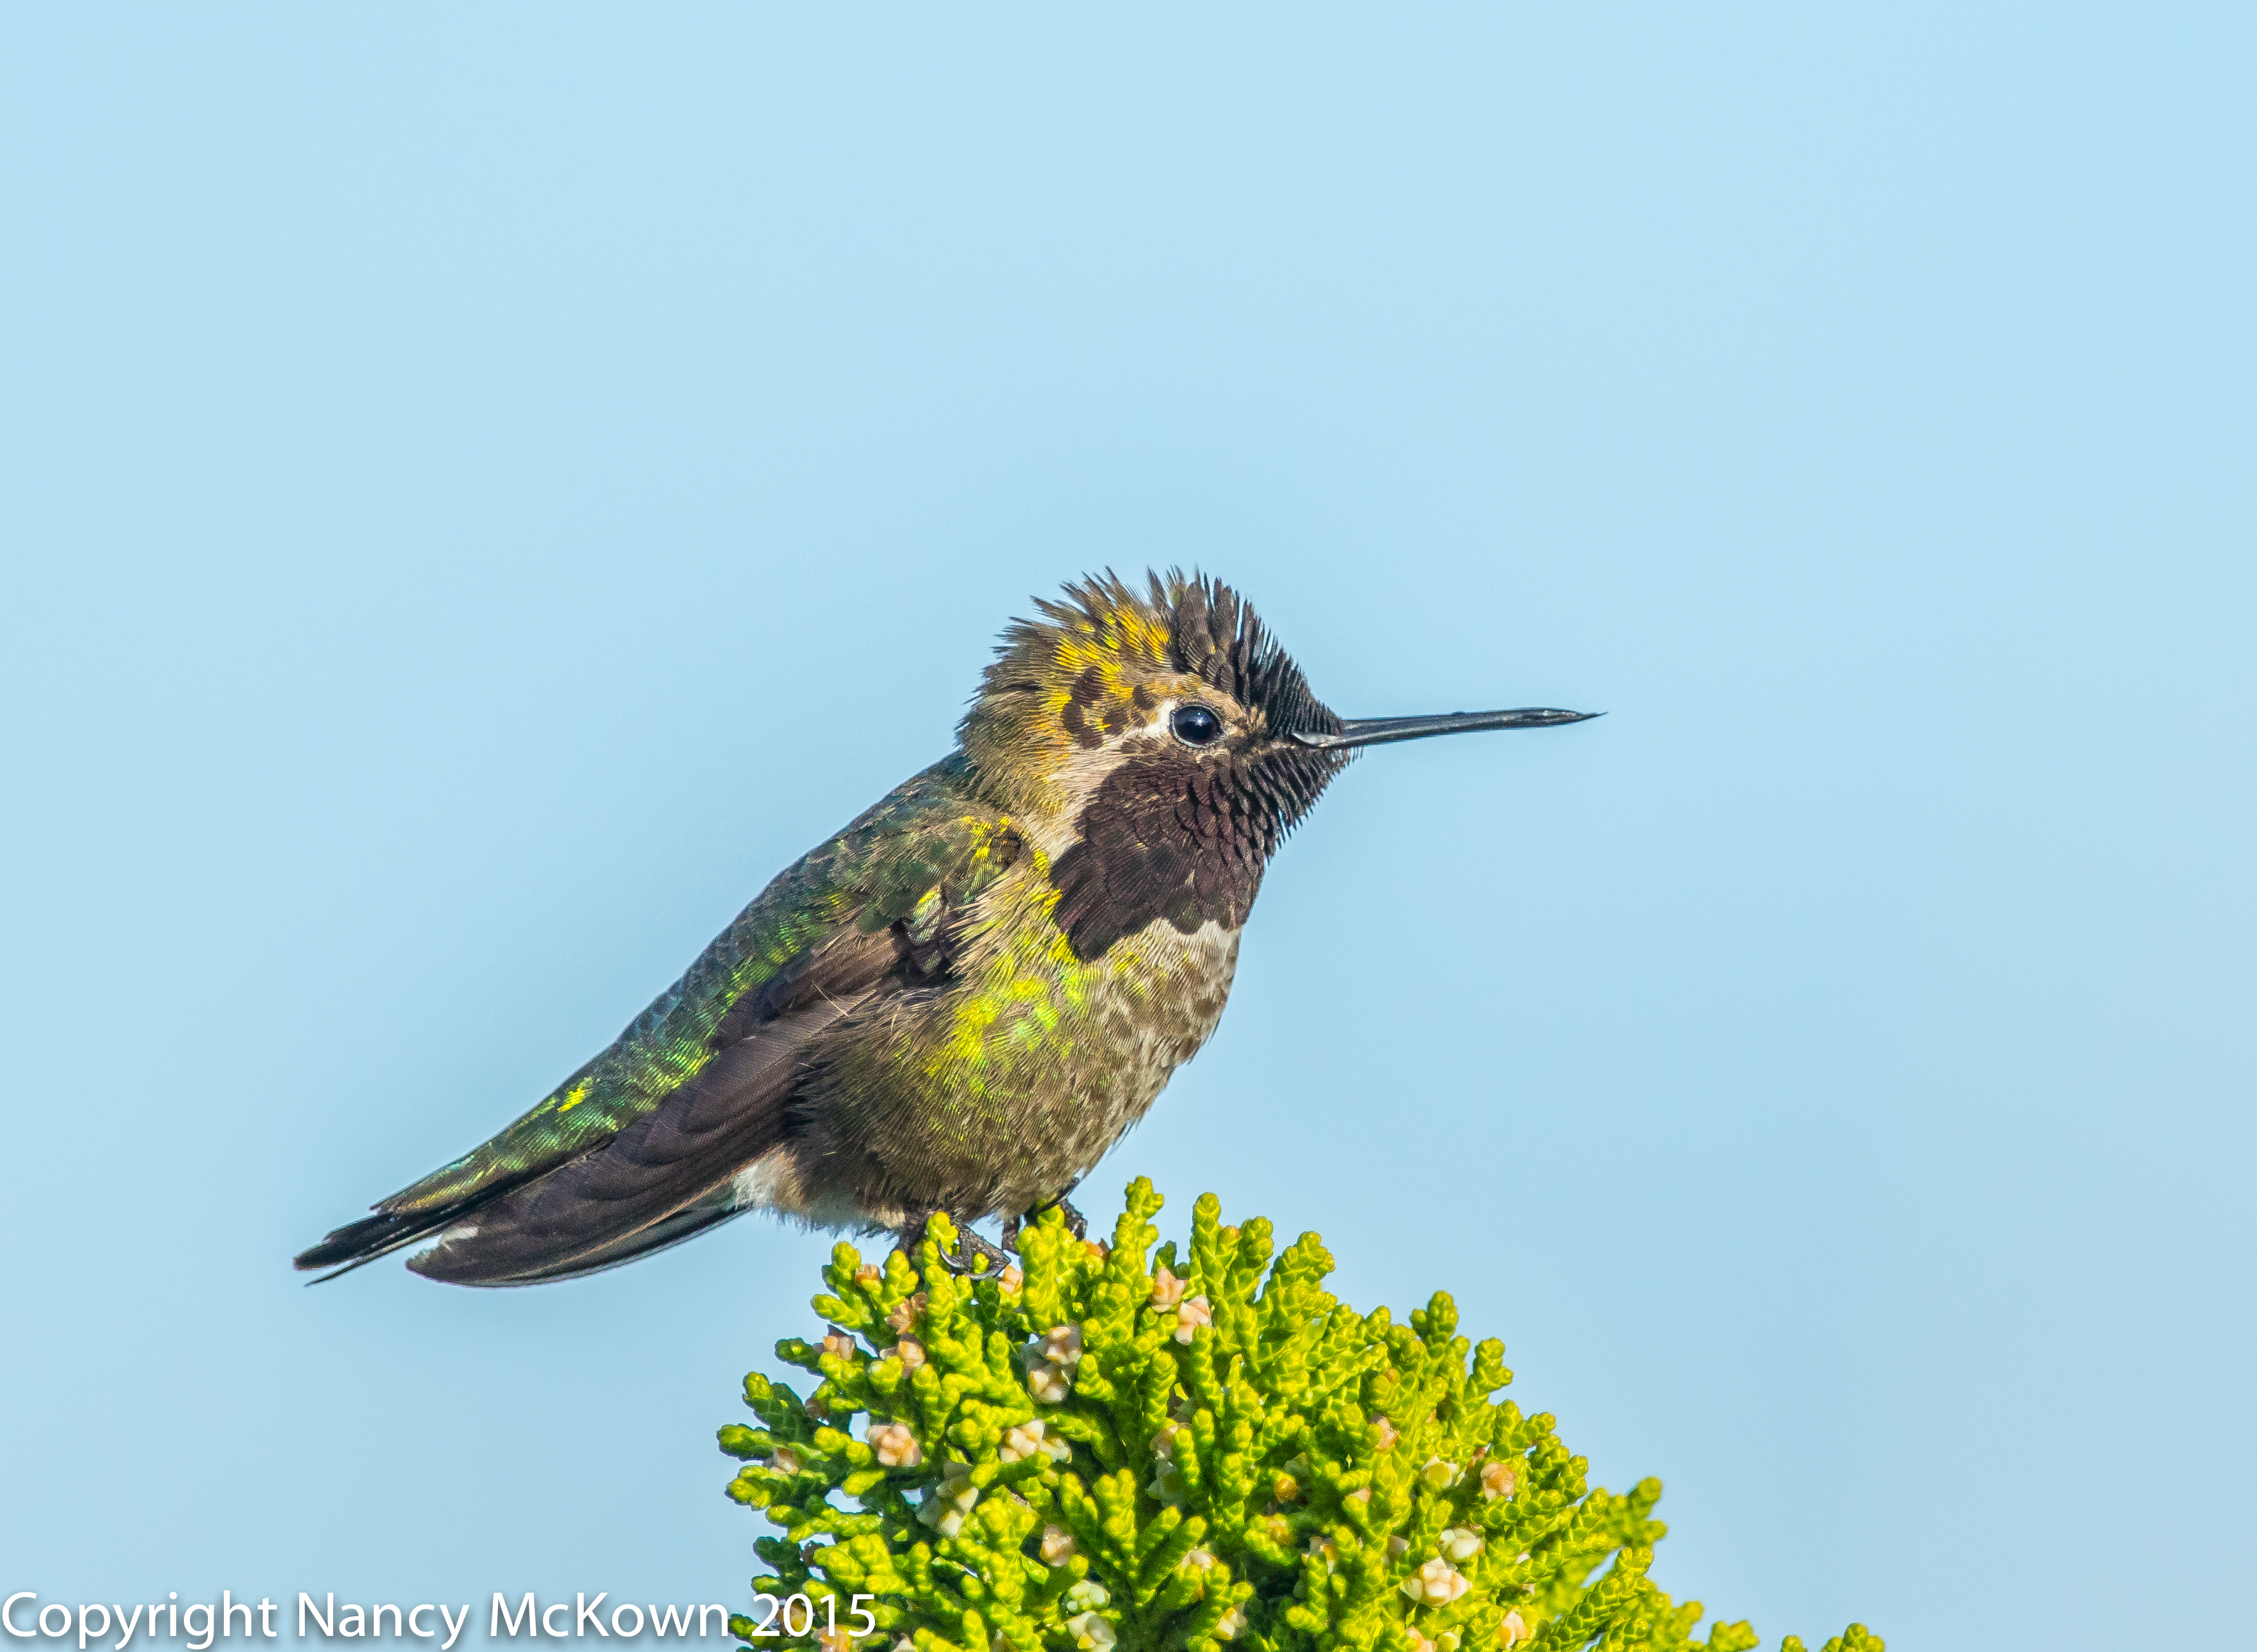
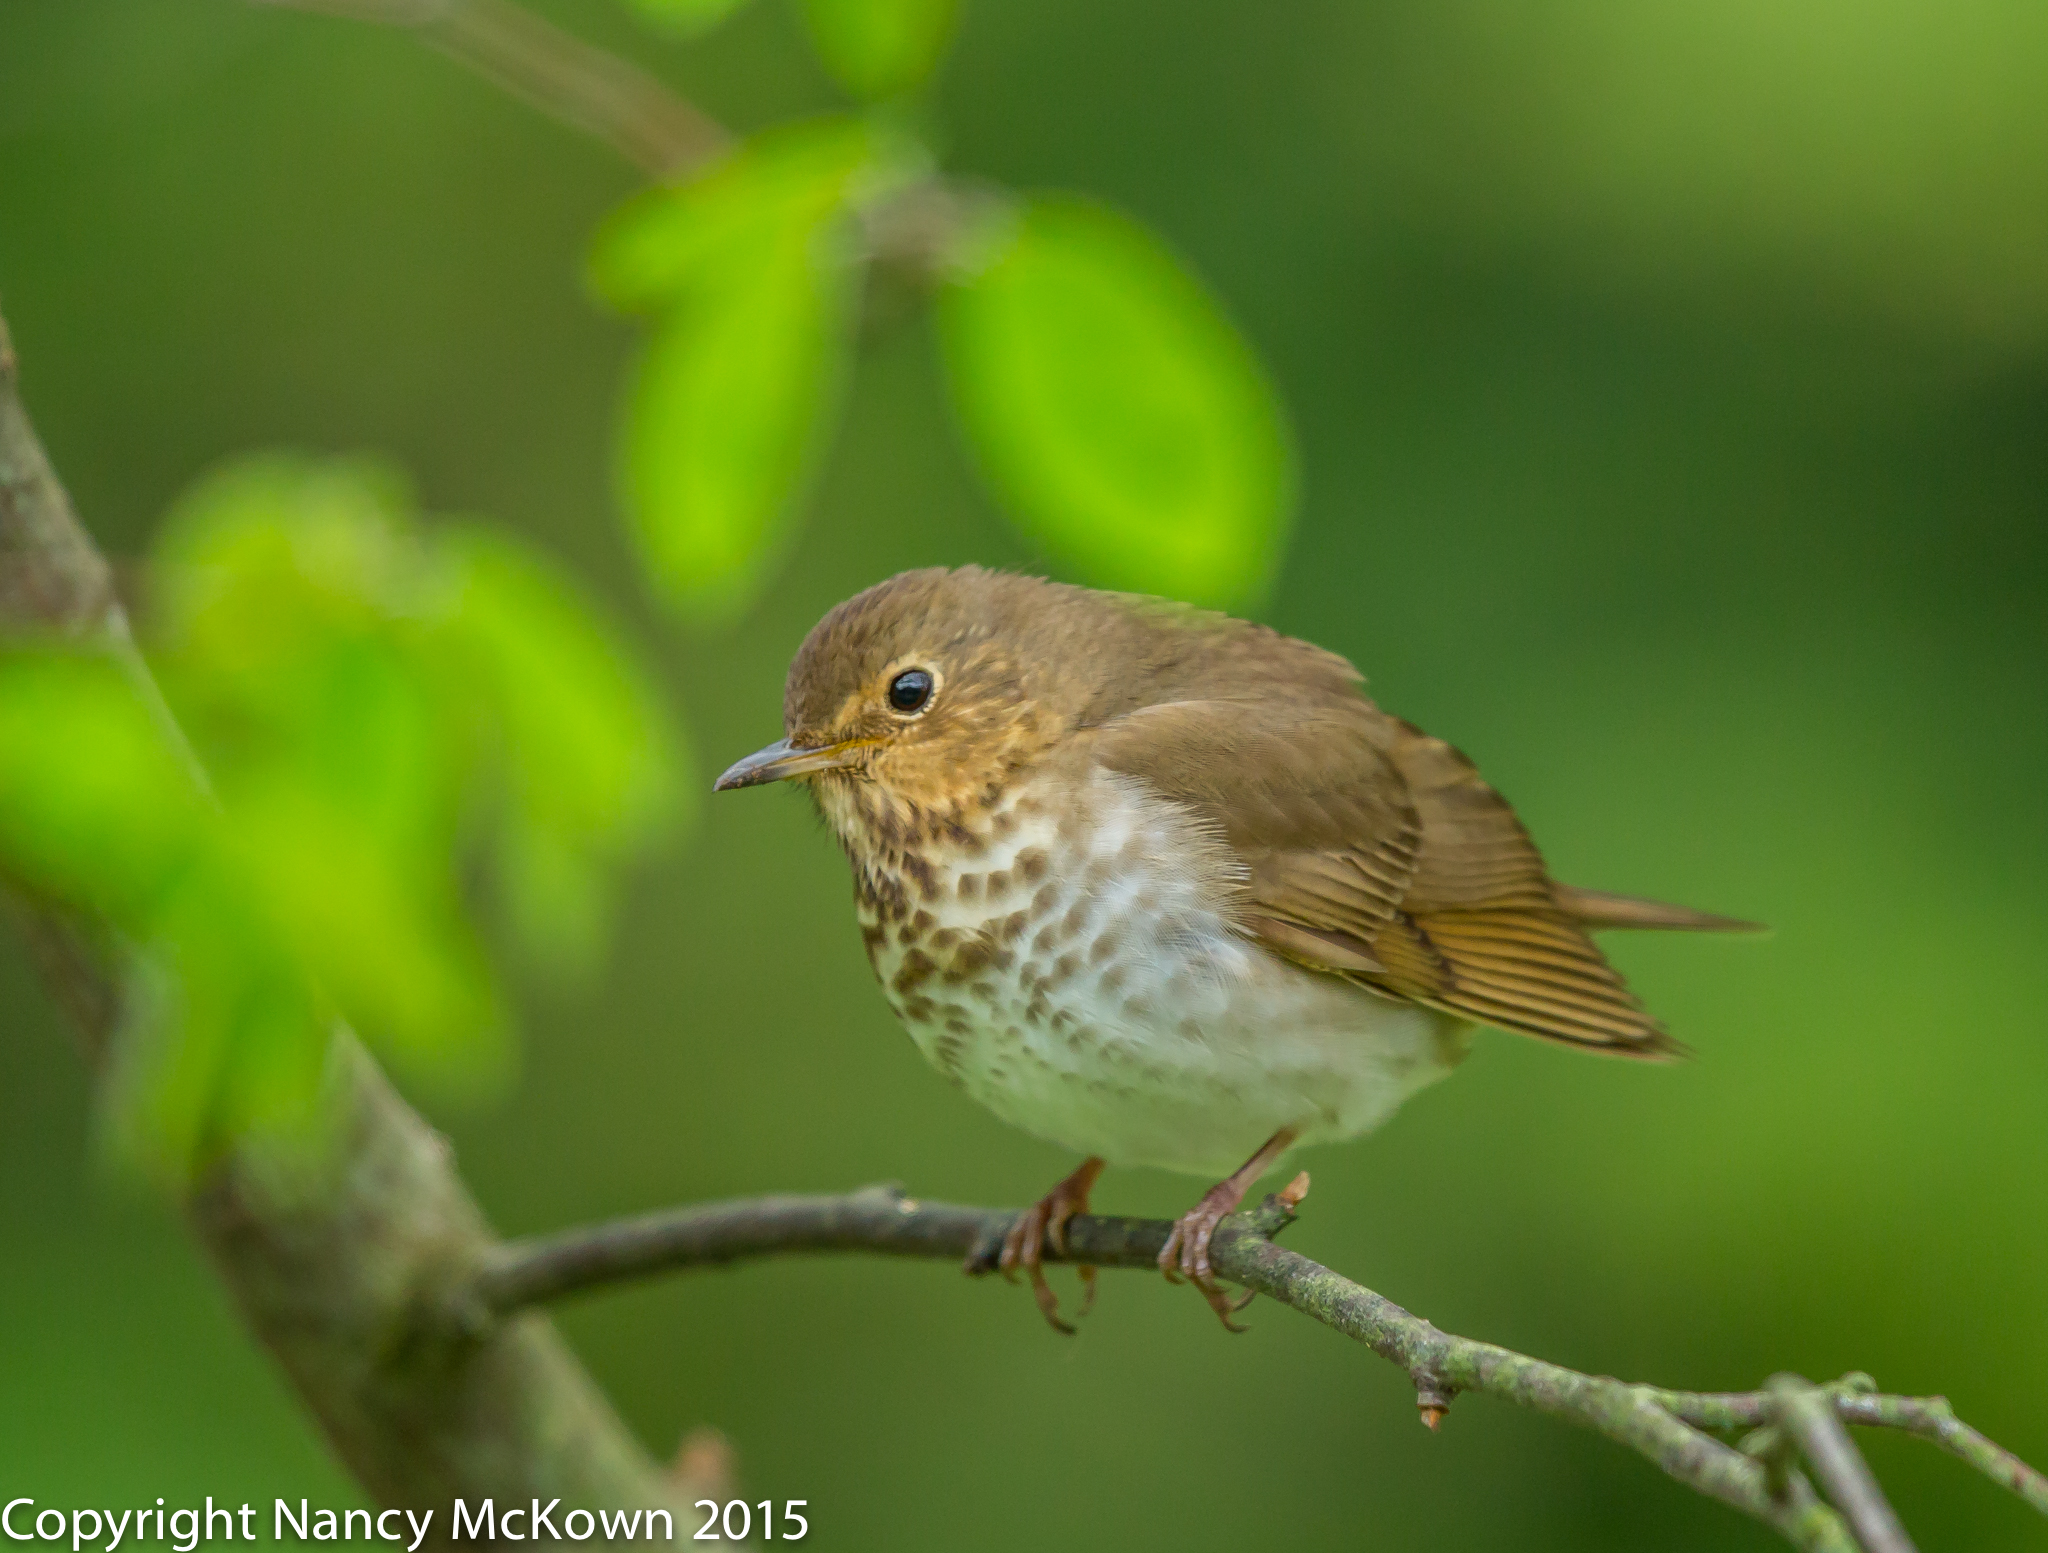
Perching Against a Lush
Green Background in Late Afternoon..
More Gray and Less Brown on the Feathers.
ISO 2000; f/4; 1/500 Second

Listening for the Gray Catbird

For the longest time, I heard but did not see what I thought was a Brown Thrasher singing in our yard. There may have been a Brown Thrasher or two around, but the songs I heard most likely emanated from the much more numerous Gray Catbirds–another mimic thrush.

The Gray Catbird is a member of the mockingbird and thrasher family and known to imitate other birds, mammals and electronic devices. Catbirds are best known for their scolding, screeching, nasally, cat sounding song. Besides his cat calls, the Catbird repertoire includes stringing together many, many lesser known songs, some joyful, but most just odd twitters and tweets. When they are not singing or eating, they like to roll around and splash in the fountain.

The Catbird Seat

According to Wikipedia, “The catbird seat is an idiomatic phrase used to describe an enviable position, often in terms of having the upper hand or greater advantage”.  Easy to speculate as to why the catbird is associated with this folksy phrase. It’s most likely because the males stake their territorial claim by singing a wide variety of birdsong (loudly and early in the morning) from the highest and most advantageous point around.

(Please click on this link to learn more about another mimicking thrush, the Brown Thrasher)

Photo of Baltimore Oriole

Photographing Baltimore Orioles – and Basics for All Photographers

Summertime Photography

It’s summer time, and the Baltimore Orioles abound in their splendor.

Summer is also the time when we are invited to a lot of outdoor weddings. Lots of splendor to ponder there as well… the couple, the gowns, the flowers, the guests. My mind drifts to making observations about the wedding photographers who are engaged in a very different sort of photography than the craft I practice.

Photo of Male Baltimore Oriole
Male Baltimore Oriole Singing His Heart Out.
ISO 500; f/4.5; 1/640 Second

Basics for All Photographers

But is wedding photography so very different than bird photography?  I look over the photographer’s camera and her moves, looking for evidence of skill, efficiency, art, and respect. I can’t help but conclude that all photographers must share the same basic principles to be effective and productive.

At the Low End

On the wide spectrum that includes the best and worst of photographers, it’s easy to spot the rookies…or the ones who just don’t care. These are the people who rank on the low end of the effectiveness meter. Somehow, whether due to ignorance or arrogance, they do not understand what it takes to be successful and are often delusional about what is expected in a situation fraught with uncertainties and uncontrollable events.

Some specific observations:

  • They think showing up accomplishes 95% of what they are there to do.
  • They plan to get in and get out as they are squeezing this shoot in on their way to somewhere else.
  • No time is set aside to check the weather, understand the layout of the location, study the lighting challenges and opportunities, evaluate the backgrounds, and mentally setup the shots for optimal results.
  • Respect for their subjects is seriously lacking as is an understanding of group dynamics.
  • They do not know how best to get their subjects posed attractively.
  • They are not in the right place at the right time to capture those special moments.
  • They arrive unprepared. Worse, they do not anticipate complications nor do they know how to troubleshoot.
  • They bring only themselves, one all purpose camera and lens, one compact disk, and one blinding flash affixed to the top of the camera and aimed directly at their subjects.
  • They do not dress appropriately nor do they try to be unobtrusive to the events around them.
  • They do not search out opportunities that have the potential for candid and stunning photographs.
  • They put no effort into post processing, nor do they screen the photos to eliminate those that are out of focus, poorly framed, uninteresting, and/or redundant.
Photo of Baltimore Oriole
Baltimore Oriole
ISO 800; f/4.5/ 1/800 Second

Photographers’ Skill Set

The skill set of a good photographer consists of a hard earned complement of components – all working together with the best equipment that the photographer can afford. Photographers at the top of their game are diligent in observing and respecting their subjects as they struggle to achieve the milestones of their lives. They understand that things do not automatically fall into place and when something unexpected and wonderful happens, they react quickly and professionally.

Beautiful photos are the result.


Press this link to read about Control as an Illusion.

Press this link to read more about photographing Baltimore Orioles.

Male Bobolink

Photographing Bobolinks – and Being Respectful of Bird Habitats

Photographing Bobolinks in Restricted Areas

A friend and I were having a marvelous time photographing, from the side of the road, two (or possibly three) male Bobolinks.The birds were taking turns scaring each other off. They would circle multiple landing sites and then light on an isolated mullein flower, close to the cameras, that offered a lush green background. The Bobolinks were definitely competitive, carving out territories and vying for ownership of this one little mullein stalk. It gave us ample opportunities to practice landing shots.

Photo of Bobolink
Bobolink Coming in for a Landing.
I like the Motion Blur and His Right Wing
Although, I Just Barely Got that Wing in the Frame.
ISO640; f/9; 1/1250 Second

Photographing Landings and Takeoffs

The morning was sunny and windless. Over and over, a Bobolink would gracefully touch down and try to stabilize himself. My lens was resting firmly on the car door and focused on the top of the closest mullein flower. Trying to anticipate the perfect moment to press that shutter button, my eyes intensely tracked the flight of each bird as he circled and then came in for his landing.

This task definitely requires some precision, and lots of practice. I was successful only a couple times with the landing and take-off shots, but was able to capture the complex efforts the birds made to brace themselves on the mullein stalk. The legs and feet on Bobolinks are large, long and prominent, perfect for grasping and clamping on all sorts of perches. The toes are independent and flexible, three toes in front and one stabilizer in the rear. You can see in the photo below how this Bobolink works his feet and his wings to balance himself.

Photo of Male Bobolink
Male Bobolink, Using
Both Legs and His Wings to Try to Steady
Himself on the Mullein Flower.
ISO400; f/8; 1/800 Second.

Noticing Deformities While Photographing Birds

My 500mm lens allows me to get close to the action and see many details. It was not until after I downloaded the photos onto my computer that I noticed that the right leg on one of these male Bobolinks has only a partial foot and one claw. Sadly, I was not able to get a landing shot of this handicapped bird, but the three photos below reveal that even with one deformed leg, he accomplishes his takeoffs and landings quite well.

Photo of Male Bobolink
Male Bobolink Using His One Good Leg to Try
to Steady Himself on the Mullein Flower.
ISO320; f/8; 1/800 Second
Photo of Male Bobolink
Frontal View of Male Bobolink-
Balancing on the Mullein Flower with one leg.
ISO640; f/9; 1/1250 Second
Photo of Deformed Male Bobolink
Close up of Deformed
Leg of Male Bobolink, as he Leaps of the Mullein Stalk.
ISO800; f/9; 1/1250 Second.

Photographing Birds in Restricted Areas

Not all birders and/or photographers respect the birds’ habitats. They trespass into restricted areas and cause serious disruptions as the birds go about their mating and nesting rituals. The DNR officers are charged with protecting the wildlife and enforcing the rules on all birders and photographers, respectful or not.

I was born well into the last century and I have always been a member of the teacher pleaser class known for respecting and following the rules. So why did I feel offended when the DNR officers told me recently that while photographing birds at the Todd Farm Bird Refuge (in the Allegan County Game Area), I could not stop the car in the road, prop the camera on the door window and photograph birds from the car. The officers said that I must first park the car in one of the designated parking areas and walk (hauling all the equipment) to an approved location (mainly on the road)  from which I could set up and shoot.

Of course, I’ve parked, hauled and set up equipment in the past when I found a location that, given time and favorable conditions, would be productive to photograph birds. Being the rule follower that I am, I have always set up on the roads and pathways, staying well clear of the prairie and wooded nesting areas.

A Little Mutiny

I’m feeling offended because bird photography is so much more than walking to a location with all the photo gear, then waiting and hoping for the best. More important and exciting is the opportunity to explore beautiful back country roads in a vehicle, camera at the ready on my lap. There is always the hope that on these exploits, a fabulous and serendipitous encounter will occur, unknown, exciting and captivating. Seconds later, if I’m on my game, I will have a wildly pounding heart and wonderful photos.

Well…Just saying…. that driving around on public roads with my camera in my car, looking for an occasional and unanticipated thrill is too much to give up, teacher pleaser or not. Nope. They can’t take that away from me.

To read more about photographing Bobolinks, press this link.

Photographing A Dickcissel and Field Sparrow – and Fun with Nik Plugins

Making Adjustments in Lightroom

Post Processing is a necessity for today’s digital photographer. I use Lightroom by Adobe. The fun part of bird photography is watching the birds in their natural environment and then sizing up the light, equipment and scenery to most effectively capture what I hope will be beautiful images. I don’t spend a lot of time with post processing chores. Usually, I just apply one or two global adjustments.

More Precise Post Processing Tools

At times, however, I recognize that more precise adjustments are needed to portions of my photos. For instance, some images just need a little light on one side of a bird’s face and breast, or just a tweak of sharpening around the outline of the bird’s head, while leaving the background blur alone. I was pleasantly surprised to learn how easy and effective it is to apply partial and subtle improvements to my images with specialized post processing tools.

Photo of Dickcissel
Male Dickcissel
Blurred Golden Grasses in the background
gave me the perfect opportunity
to use Nik to fiddle with the background color.
ISO800; f/8; 1/1000 Second

For the Artistically Inclined Photographer

A quick search on the web brings up several post processing toolchests that work with Lightroom and Photoshop. According to the reviews, these work well if you wish to selectively add a little drama through intensifying certain colors, or if you wish to fix one little thing so it draws the eye more (or less), or you want to massively change all aspects of an image to your liking.

I downloaded the 15 day free trial (no credit card required) of Nik Software, mainly because it came highly recommended by a friend. My favorite tool was Vivenza 2. You can purchase the package from Google for $150. It’s a good deal.

Warning: Artistic inclination is a must.

Nik Software, by Google

It was fun to play and it didn’t take long to figure out the functionality of the seven plug-ins included with NIK software.  These include:

  • Simulate the retro film emulsion look with Analog Effects Pro 2,
  • Selectively sharpen portions of the image with Sharpener Pro 3;
  • Selectively reduce noise to portions of the image with Define 2;
  • Selectively adjust color (and add borders) with Color Efex,
  • Selectively adjust brightness, contrast and white balance with Viveza 2
  • Be creative with black and white with Silver Efex Pro.
  • Process HDR images with HDR Efex Pro.
Photo of Field Sparrow
Field Sparrow
Coming in for a Landing
I sharpened the sparrows head and beak.
ISO800; f/8; 1/1000 Second

Shine Light into Dark Corners

Certainly it’s easier and more gratifying to get everything in the image perfect right when you snap the shutter. That doesn’t happen very often in bird photography. Lightroom does have the functionality to allow the user to tweak portions of an image by setting up “masks”, but I find that to be a tedious process resulting in unimpressive results. It’s so much easier to download a set of plugins that offers user-friendly options and good results. You can remove all or part of the adjustments if you don’t like them.

An excellent description and review of the Nik Software package by William Beem, is available at this link.

NOTE: 

NOTE: As of May, 2017, Google will not update the Nik software suite. Specifically, “We have no plans to update the Collection or add new features over time.” 

To read another blog posting on Dickcissels, press this link.

To read another blog posting on Field Sparrows, press this link

Photo of Anna's Hummingbird In Flight

Photographing the Anna’s Hummingbird

Photographing the Anna’s Hummer in SanDiego

Hummingbirds are fascinating to watch and photograph, especially when the light is just right and the camera catches their shimmering iridescent colors sparkling in the light.

Photo of male Anna's Hummingbird
Male Anna’s Hummingbird
ISO 640; f/6.3; 1/3200 Second

Feather Science

When the light hits on the microscopic structures on the surface of the male hummer’s feathers, it breaks up into its component colors (just like it would on a prism). On a sunny day, amplified iridescent reds, blues and purples are refracted back to the human eye. The intensity of these colors vary, depending on brightness of light, the angle of light, the movement of the feather surface, and whether the hummer is displaying his breeding or non breeding plumage.

Photographing the Light Just Right

This male Anna’s Hummingbird was photographed in late February, 2015 in San Diego, California. He displays beautiful iridescent colors on the “gorget patch” or reflective feathers on his throat. In the photograph above, the camera’s lens caught the luminous colors displayed in hummer’s forehead and gorget patch. In the photo below, the angle of light is slightly different, and the lens sees very little iridescent color.

NOTE: It’s easy to see in both of these photos that this hummer’s upper beak is shorter than his lower beak. I assume that he broke it off somewhere during one of his adventures. It did not seem to impact his ability to get nourishment.

Male Anna's Hummingbird
Anna’s Hummingbird- A Green Jewel.
At his Angle, Very Little of His Iridescent
Colors on his Gorget Patch are Visible.
ISO 320; f/5.6; 1/1250 Second

A Perfect Hummingbird Photo Shoot

This male hummer perched on the top branch of a nearby evergreen, very close to our condo rental.  He kept coming back to the very same perch, insistent in is efforts to attract a mate and unconcerned with my presence. It was the closest and easiest Hummingbird I’ve ever photographed. I had plenty of opportunities to move the camera setup, choose a different time of day to play with the light, and change lenses and telephoto extenders. Several other male hummers wandered close and were immediately chased away. I did not observe any females, despite the glorious display of color on his gorget patch.
To read more about how structural color plays a role in most birds of blue… see this post.
To read more about photographing Hummingbirds in flight, see this post.

Photographing Yellow Warblers in Spring

Photographing Bright Yellow Warblers

Tiny brilliant yellow balls flash across my path….so bright and exquisitely delicate.

Photo of Yellow Warbler
Showing off his Spring Finery.
Closeup of Male Yellow Warbler
ISO500; f/8; 1/2000 Second

Photographing Yellow Warblers

Yellow Warblers are one of the most numerous and widespread warbler species, and very common in Michigan in the summer. Male and female Yellow Warblers have solid yellow faces, black eyes, and thin pointy beaks. The adult males have a brighter yellow head and pronounced chestnut streaking on their breasts and bellies. Like most wood warblers, they are difficult to photograph because they spend most of their time weaving in and out of dense foliage, eating caterpillars and other insects.

Camera Setup Options

I often spend time with my camera on my lap, just watching and waiting to see what birds are lurking in the shadows of dense foliage. It didn’t take long before I was able to discern two yellow bursts of light in a dense growth of shrubs near a stream. I parked my car on the road and proceeded to set up my camera, 500 mm lens and tripod approximately 15 feet from these woods. I chose a spot where there were some attractive, open perches. I could see the pair of Yellow Warblers foraging in the thickets, but when I tried for a shot, the lens searched back and forth -utterly confused with the tangle of overlapping branches and leaves.

Photo of Female Yellow Warbler
Female Yellow Warbler.
Her Colors are Not Quite as Bright and
She has less Pronounced Stripes on her Breast
ISO800; f/8; 1/2500 Second.

The Trusty Car Door as My Tripod

Both the male and female Yellow Warblers are highly territorial and will perch out in the open to investigate any sign of other Yellow Warblers intruding into their space. To entice this pair to perch in a less congested area, I set up the blue tooth speaker under several isolated branches.

No luck. The warblers were watching, but stayed hidden in the brush. Clearly, I was too much of a presence for them to feel comfortable. Leaving the speaker in place, I disengaged the tripod from the camera, put everything back in the car and then moved the car to the same spot where I had set up the tripod. I sat in the car and rested my camera and lens on the car door window.

Like many birds in this modern age, the warblers were highly acclimated to the presence of vehicles. With multiple fly-bys and aggressive sounding chirping, they rushed in to investigate the source of the song. It took less than 2 minutes for them to figure out that there was no foreign invader and retreat back to the foliage, but it was long enough to capture 25+ photos.

Photo of Yellow Warbler
Yellow Warbler, right before Take Off.
ISO 1000; f/8; 1/2000 Second
Photo of Yellow Warbler
Yellow Warbler in Flight.
Wingspread slightly obstructed by Leaves.
ISO1000; f/8; 1/2500 Second

Yellow Warbler Nesting Habits

NOTE: A tribute to the diligence of the tiny female Yellow Warbler (2nd photo above). She is not often fooled when her nest is parasitized by Brown-headed Cowbirds. She may abandon the nest- or she may start a new brood by building a new nest layer on top of the parasitized nest-(even if it means burying her own eggs). These diligent female Yellow Warblers will keep building if the problem persists to as high as 6 tiers.

To read a blog post about Yellow Warbler Identification, visit this link.

To read about the pros and cons of setting up shots in the wild, visit this blog post.

Photo of Curlew

Photographing Shorebirds -Form Aligning with Function

Photographing Shorebirds

One of the first things I noticed when photographing the shorebirds foraging for food on the Mission Bay beach in San Diego was that so many of the different species seemed to get along. For the most part, it was a tranquil beach. That’s because physical and behavioral adaptations have made these shorebirds uniquely adept at feeding and nesting on the shoreline without the need for much competition between different species. These adaptations include beak size and shape, size and shape of body, legs and toes, plumage, habitat requirements, and migratory patterns.

Photo of Long Curvy Beak
Curlew with its Long Curvy Beak
ISO500; f/8; 1/2000 Second

Form Aligning With Function

So godwits, plovers, willets, curlews and other shorebird species can work the same beach and rarely waste energy fighting over resources. They have adapted to depend on their highly specialized beaks and feeding behaviors to probe for the food that meets their dietary requirements.

Depending on the season and their location, they forage in mud, water, sand and grass for crustaceans, marine worms, crabs, insects (including flies and their larvae), small mollusks, small fish and plant material, including grass, fresh shoots, and seeds.

These shorebirds are a wonderful example of how nature aligns form with function.

Photo of Long Beak
Marbled Godwit with its Long Beak, pointy and straight.
ISO 320; f/6; 1/2000 Second
Photo of Shorebird
Willet
With His Medium length Beak.
ISO 500; f/6.3; 1/2000 Second

Tripod on the Beach

I walked a long way on this shorebird photographic adventure. I decided that my camera and lens were too heavy to hold without support, so I took my Manfrotto aluminum tripod and Gimbel head with me to help stabilize the equipment on the mucky sand. (I regretted not take my lighter, sturdier carbon fiber Manfrotto on this trip.) The sand was uneven, wet and squishy, but the tripod still steadied the camera much better than I could have without it. As I moved from place to place, the feet and lower end of the tripod legs were sinking more and more into the wet sand and grit. It didn’t take long for these tiny particles to get stuck in the leg locking mechanisms, so much so that function was impaired and wet sand had to be cleaned out before I was able to collapse the tripod legs.

Just like the camera and lens, tripods need routine care. It’s important to clean the dirt, dust and moisture off the tripod after each use, (especially when it’s been exposed to salt water and air) otherwise the mechanism gets sticky and uncooperative. Like most equipment essential in producing good photography, a tripod will let you down if you don’t take care of it.

Photo of Little Beak
A Shorter Beak on this Black Bellied Plover;
ISO 2000; f/13; 1/2000 Second
Photo of Semi Palmated Plover
Semi Palmated Plover; the Smallest Shorebird I photographed.
ISO 800; f/6.3; 1/2000 second

For more information on how to photograph Sandpipers on the Beach, press this blog link.


Photo of White Crowned Sparrow

Photographing the White Crowned Sparrow with a SLOW Shutter

Photographing the White Crowned Sparrow

The leaves are thick on the branches, making for a very shady yard. My camera, 500mm lens and tripod are setup on the front porch while birds flash by me on their way to the feeders. This is not the time to be freezing wing motion, or even trying for an action shot with motion blur. It is so shady that I am playing limbo with my shutter speed, experimenting with how low I can go without sacrificing clarity with too low a shutter speed or too high an ISO.

Photo of White Crowned Sparrow
White Crowned Sparrow
Even at 1/500 Second, (with the aperture wide open)
the ISO is above 1000.
ISO1600; f/4; 1/500 Second

 Migrating White Crowned Sparrows

White Crowned Sparrows arrive in flocks (Spring and Fall) and forage on the open ground under our feeders. We see them migrating through for weeks and then suddenly, they are gone. The adult White Crowned Sparrow is one of the easiest sparrows to ID, with its black and white striped head (the white strip looking like a rather large eyebrow) and light gray breast. The juveniles have quite different coloration (a reddish brown with creamy head stripes), so much so that I thought they were a different sparrow species.

Photo of White Crowned Sparrow
White Crowned Sparrow
The Wind was calm, so I lowered the Shutter to 1/320 Second.
A Little More Light Peeking Through the Clouds
Allowed me to Lower the ISO and Tighten the Aperture.
ISO 400; f/5; 1/320 Second

Shutter Speed as Low As 1/320 Second

When photographing birds with a long telephoto lens, I am rarely successful in locking down a sharp focus when the camera is set to a slow shutter speed. Lots of factors come into play, but if the wind is calm and the White Crowned Sparrow is waiting patiently for his turn at the fallen seed, I can achieve a sharp photo with a shutter speed as low as 1/320 second. When I try a shutter speed setting below 1/320 second, I am usually disappointed with the clarity.

So many issues to consider when balancing exposure settings. To read more about factors that may impact image sharpness, visit this blog link  Photographing Savannah Sparrows – Understanding Focus.

Photo of Female American Redstart Warbler

Photographing A Curious American Redstart Warbler

A Curious Female American Redstart

A female American Redstart Warbler nesting nearby often leaves the woodlands to forage in the trees around our library. Usually, she flits and flutters, constantly on the move, staying hidden behind the leaves as she hunts for insects. Once in a while she will momentarily light on a delicate bleeding heart plant, making for a beautiful photo if I am lucky enough to be behind the lens at that time. I enjoy watching her. Female Redstart Warblers are mostly a pale gray, with olive green wings and flashes of yellow and orange on her shoulders and tail feathers. The colors are especially beautiful when she fans her tail.

This particular Redstart appears to be very curious about the cameras, long lenses and me. Once in a while, she stops her foraging activity, perches close by, and just watches me.

Photo of Female American Redstart Warbler
Female American Redstart Warbler
Resting on a perch close to the Lens.
ISO2500; f/4; 1/500 second.

An Unexpected Visit

My library windows are usually wide open, with two cameras on tripods (one with my 500mm lens and one with my 300mm lens) pointing out to different parts of our garden. Insects of all kinds fly in and out, mostly destined to die on some window sill in another room. I keep a rotating fan blowing toward the windows — hopefully to discourage insects from coming in.

Memorial Day was not a fair weather day, so only one window was open. As I often do, I had left the cameras for a few moments to attend to something in another room. During that short interval, a female American Redstart Warbler flew into the library, through the living room and then made a beeline to another set of windows in the master bedroom.

Of course I can’t be sure that the female Redstart who entered the house through the window near my camera setup is the very same curious Redstart that I see so often in front of my camera. But I’d bet on it.  In the bedroom, she was fluttering back and forth against the window panes. Once in a while, she would rest on the window sill, watch me, and then try again, searching for a way out to the trees she could see, but not get to.

I opened the bedroom window almost immediately – but it took her a little while to find her way out. I grabbed my camera and took a couple shots of her before she left. She graced me with a fan of her tail then flew out and up to a nearby tree. Once she was comfortable, she turned her head back to look at me, then flew off to the woodland. I saw her again later the same day, foraging in her usual places….obviously not too traumatized.

Photo of Female American Warbler
A Curious Female American Redstart
Warbler who Flew into Our House.
ISO 2000; f/3.5; 1/400 second.

Birds and Windows

Window glass is invisible to birds and potentially lethal when they fly in and strike the glass. Birds only see the reflected greenery and skyline and attempt to fly toward it.

Sadly, we hear the sickening thumps of a bird crashing into our windows almost every week. They leave  a splat of dust and feces behind. Most crash victims rest a few minutes after they bounce off the window and then appear to recover. They are able to fly away, although who knows how many of those birds die later of their injuries.

It is estimated that hundreds of millions of birds are killed world wide by flying into glass windows. There are many solutions designed to decrease or block the window reflections if you wish to safeguard birds from crashing into your windows. Visit this link if you would like more information.

Photo of Swainson's Thrush

Photographing a Migrating Swainson’s Thrush

Photographing the Swainson’s Thrush on His Spring Migration

photo of Swainson's Thrush
Swainson’s Thrush
ISO1600; f/4.5; 1/400 Second

Migration Photography

So many birds on their way to someplace else. Last Fall, I saw and photographed 28+ avian migrators as they stopped to rest and replenish (and pose for the camera) in our yard. My library windows have been open for a few weeks now, with 2 cameras at the ready, but visitor activity is minimal. It’s already the 4th week in May, late in the migration season, and I’m wondering if I should abandon my library viewing area and head out to the Allegan State Game Area in search of nesting activity. Fellow birders report seeing a variety of rarities, like the Yellow Headed Blackbird, the White Eyed Vireo, the Short Billed Dowitcher, Mississippi Kite, and the Yellow Breasted Chat, all dressed in their Spring splendor. No such luck for me.

Best not to get spoiled when pursuing the art of bird photography. After all, the trees have not been barren of transients. So far, I have been able to see and photograph (all or parts of) 17 familiar migrators passing through. Most of these actively hid from the camera and peeked at me (or my bird blind) warily.

Close Camera Encounter with a Swainson’s Thrush

One exception was this little Swainson’s Thrush, who posed in full view and close to my 500mm lens. Swainson’s Thrushes often pass through our lakeshore migratory route on their way to nest in the UP, Canada, Alaska, Northwest United States and the upper New England states. Not a new bird for me, but he was very welcome nonetheless.

Like most birds, this migrator often hides in the shadows. I heard his captivating flutelike song before he graced me by flying in right in front of the camera. He stayed only a few minutes, long enough for 25+ shots, and then he was gone.

Photo of Swainson's Thrush
Swainson’s Thrush
ISO1250; f/4.5; 1/400 Second

Capturing the Moment

During this time of year, it’s hard to overestimate the part dumb luck plays when encountering and photographing transient birds. This is true even though there are literally billions of birds migrating through. Of course, regardless of luck, a photographer still has to be ready if she hopes to beautifully capture the moment. Being ready takes hard work, persistence, experience, quiet anticipation, good equipment, patience and most especially, quality of light.

Migration – A Wondrous Phenomenon

There is surely no bird photography experience more thrilling than nailing it…having the camera set up and pointed in the right place at the right time to capture and preserve the memory of a migrating bird before they are gone into the vastness. Migration surely is a wondrous phenomenon.

To see photos of the migrating birds that I was able to photograph in our yard this Spring and last Fall, please visit this Flickr link.