Category Archives: Raptors

Photo of Merlin Falcon

Photographing Merlin Falcons – Equipment Malfunction

My First Merlin Falcon Sighting

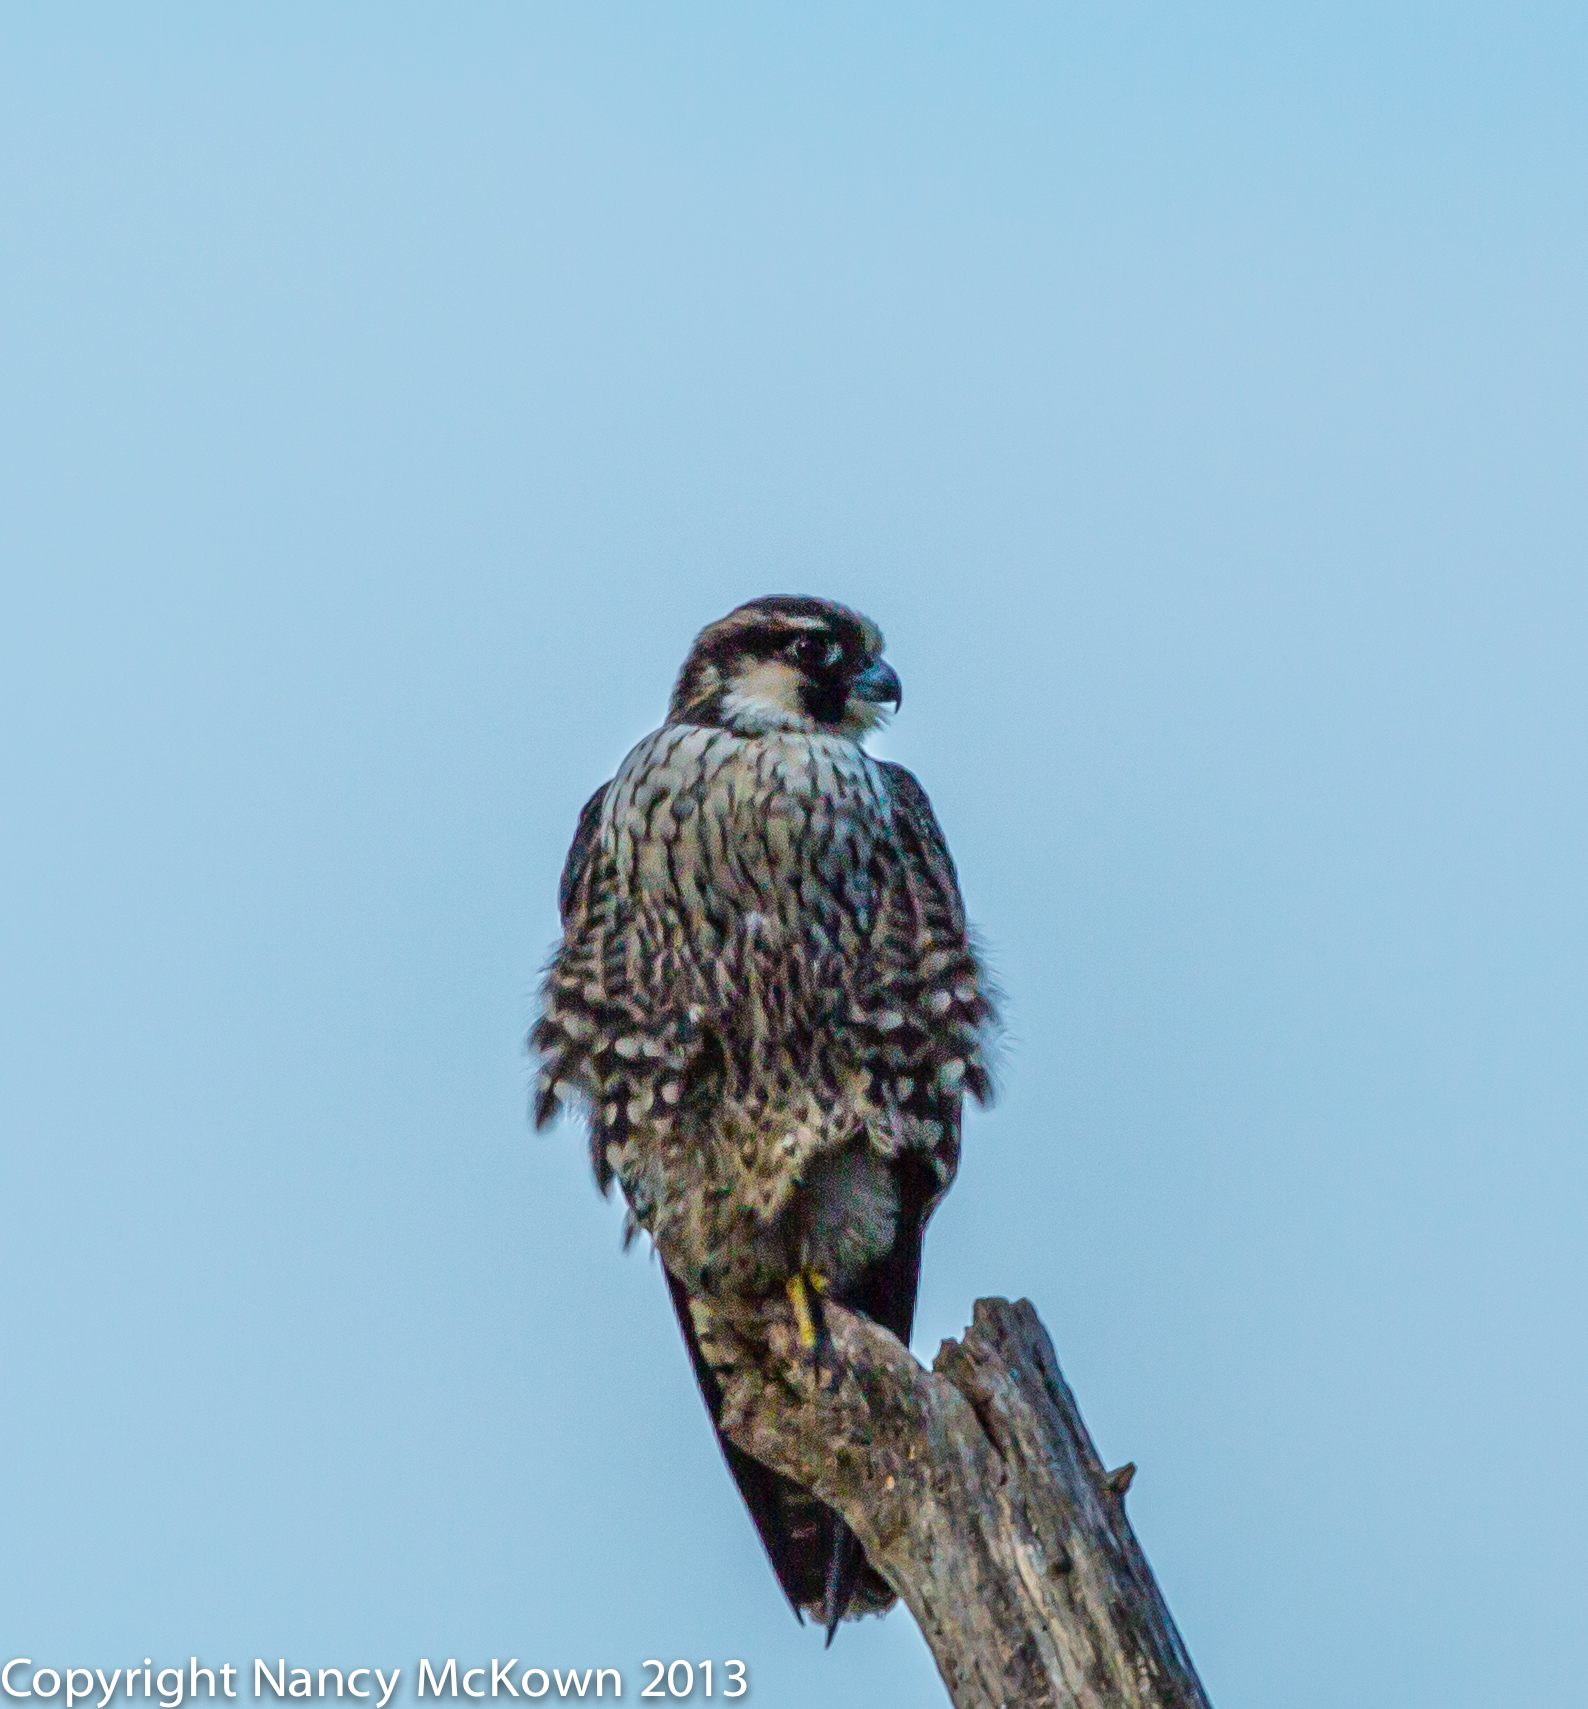
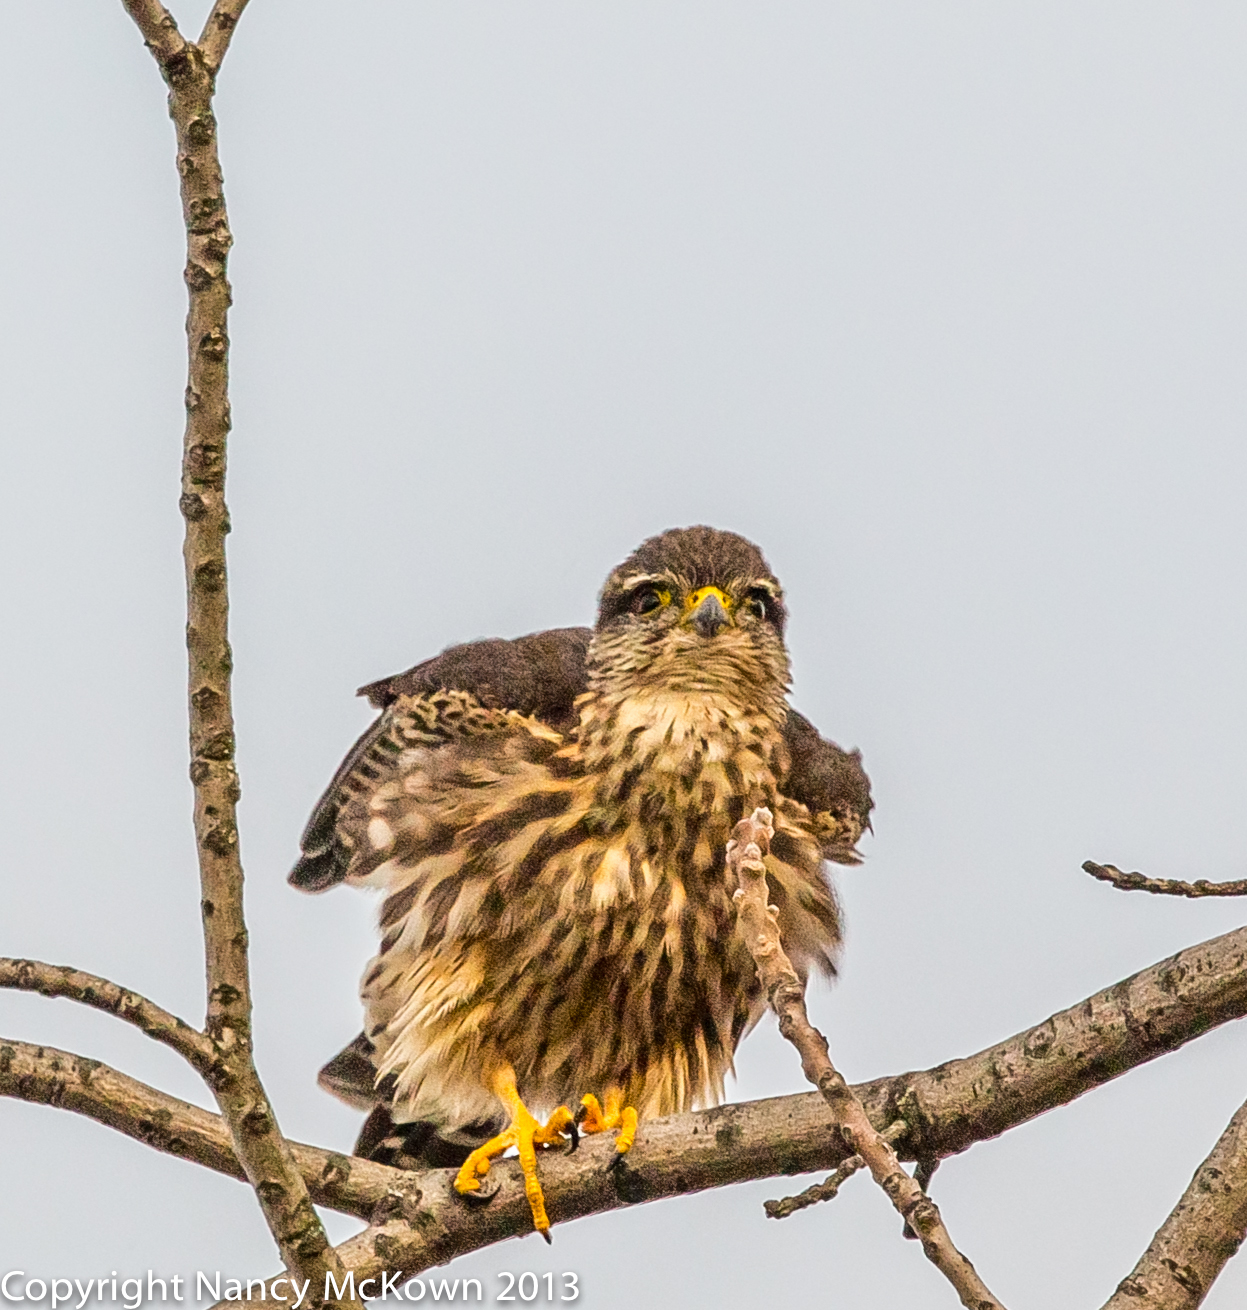
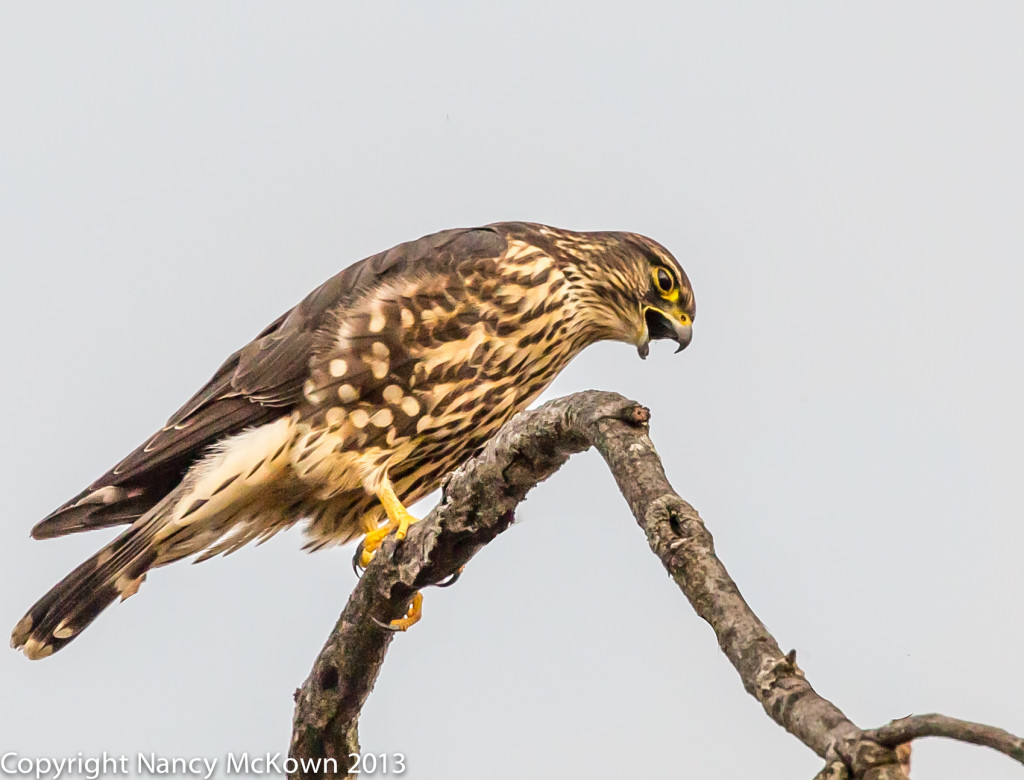
Merlin Falcons are elusive and generally a rare sighting for bird photographers in Michigan. These birds are listed as “threatened” on the State Of MI endangered lists. Previous to this encounter, I’ve only seen other photographers’ photos of Merlin falcons.

So, I was delighted and very excited when, from my car, I saw two Merlins sitting pretty on tree branches overhanging the road.
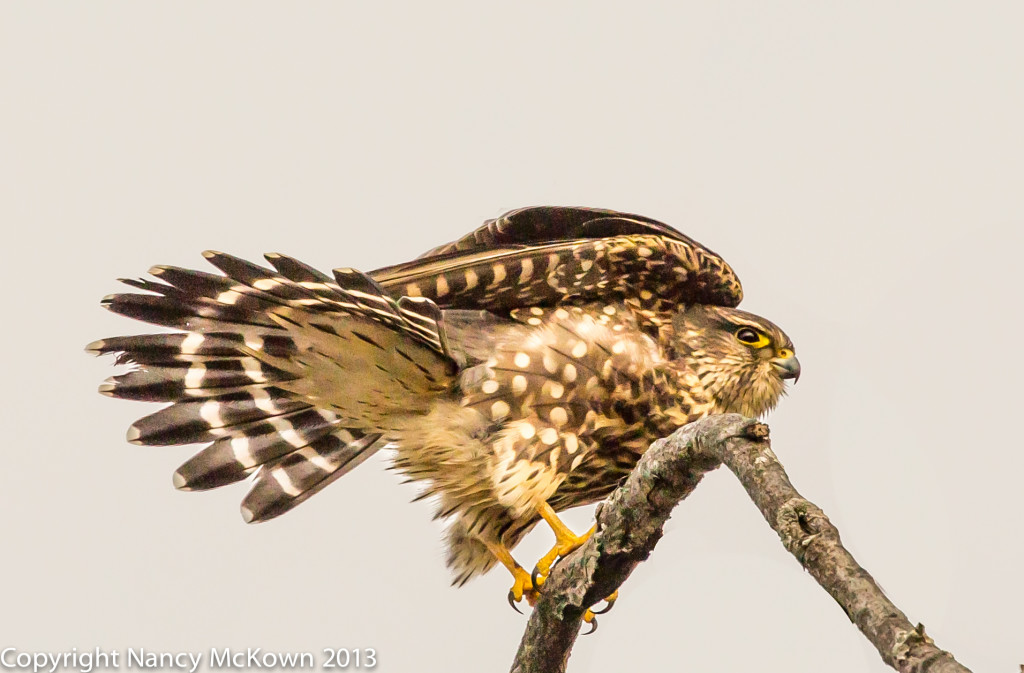
Photo of Merlin Falcon
Merlin Falcon on its Migratory Path Going South Along the Shores of Lake Michigan
ISO 500; f/7.1; 1/2500 Second

I grabbed the camera that had been resting on the passenger seat and positioned it atop a neck pillow that I had hurriedly place on the car door window ledge. I powered it up and pointed it toward the falcons. Nothing. The camera would not autofocus; the shutter would not release. On the display, was a message: Err 01: Lens to Body Communication Error.

Aaack!  Not now!

Faulty Lens to Camera Body Communication

A faulty lens to body communication error (01) is one of the most common errors with Canon DSLRs. It means that the contacts and/or the mounts between the lens and the camera or the extender and the camera are not communicating.

This error might have had something to do with how I was handling my camera and lens.

I have a 300 mm f2.8 lens that weighs more than my DSLR camera. When I am out photographing birds from my car, the camera is usually resting on the seat next to me. When I see a bird I want to photograph, I get excited and tend to grab the camera however is fastest. From a weight distribution perspective, that really isn’t a good idea.

Undue Stress on Camera Mounts

Undue stress on the mounting mechanism can be associated with two behaviors:

  1. The angle at which the camera is laid to rest.
  2. How the camera and lens are picked up.

If you pick up the camera first, and let the weight of the heavy lens hang off the camera mounts, you may get a 01 error because of undue stress or misalignment on the mounts and the contacts. Big lenses come with straps and strap holders securely fastened to the lens, not the camera. They also come equipped with tripod mounts that can be used as a handle to grab the lens and camera.Both the lens strap and the tripod mount are smart, quick ways to pick up heavy camera equipment.

So, when you’re out in the field, in your car, take a moment to think about how you laid your camera/lens to rest, and how you will pick it up to get ready to shoot. Rest the camera strategically on the car seat so that 1) the heavy lens does not put undue stress on the camera mounts, and 2) the camera is positioned to grab safely and quickly.

A Quick Fix for the Canon Err 01

Luckily, I was able to quickly fix the error by detaching the 300 mm lens. This simple procedure involves twisting the lens off while holding down the lens release button. Then I re-attached it. Communicating was restored and the camera operated normally.  And, the merlin had not flown away.

Photo of Merlin Falcon

Merlin Falcons Migrating South

The two merlin falcons were on Lakeshore Drive in Saugatuck Twp., most likely following the Lake Michigan shoreline on their migration journey south. Both had cream and brown feathers, probably females or juveniles. Neither bird seemed fearful, despite all the commotion in the car, and they stayed perched on the tree limb for a good 10 minutes. A godsend for an easily excitable photographer like me.
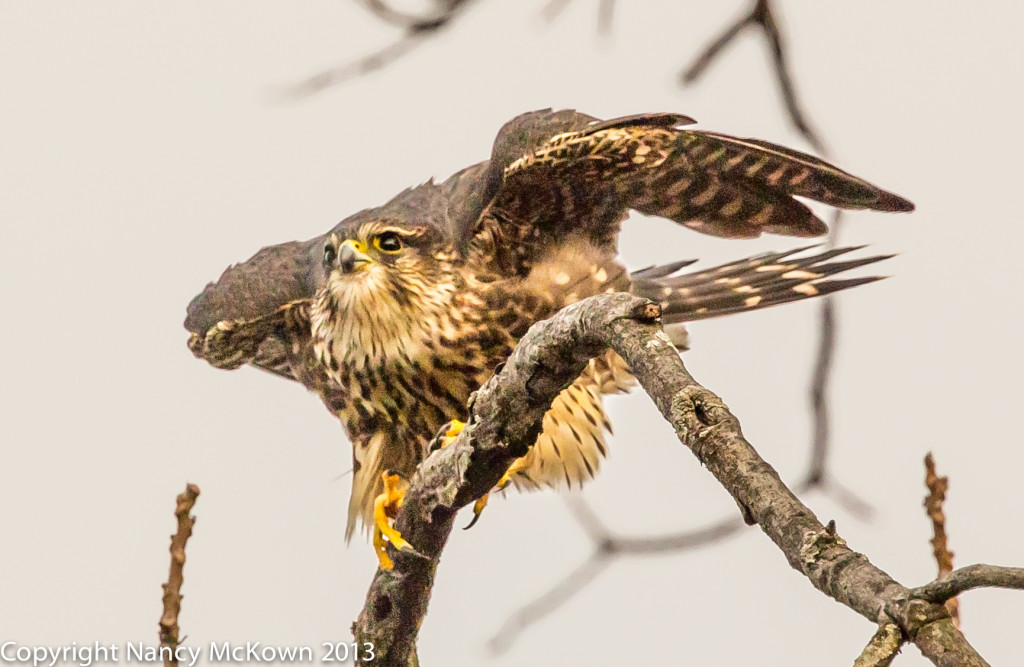
Photo of Merlin Falcon
Merlin Falcon, Acting Like She Might Take Off, But She Did Not.
ISO 500; f7.1; 1/2500 Second

Both of the birds were perched on a dead tree and both made multiple gestures indicating they might be taking off in flight, but they did not. Sadly, when they did take off, they flew away from the camera.
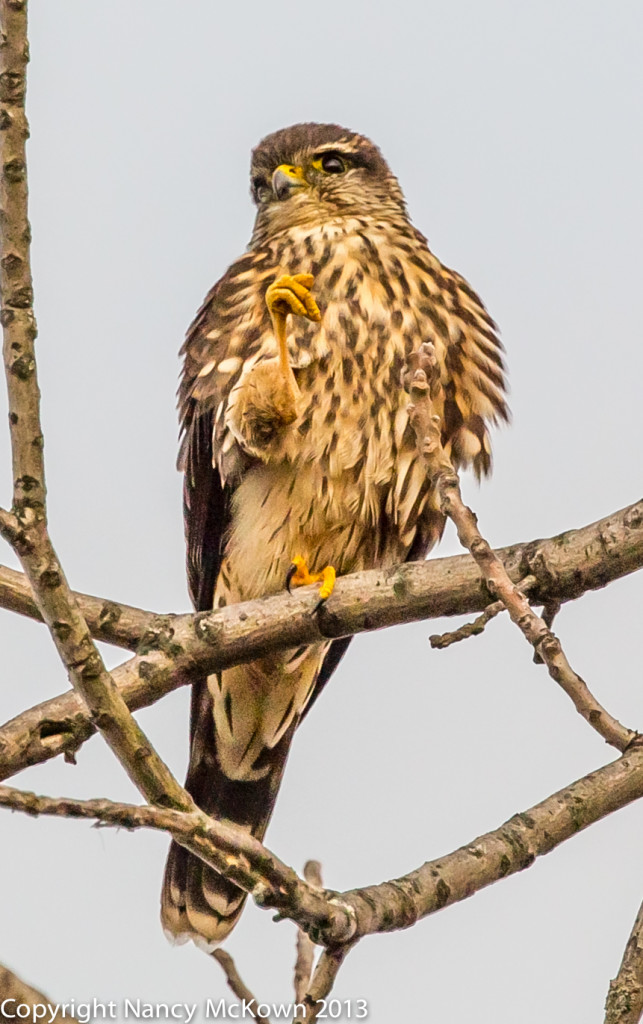
Photo of Merlin Falcon
Both Birds Held Up Their Talons For The Camera.
ISO 500; f/7.1; 1/2500 Second

Photographing Rarely Seen Birds

One of the best things about photographing birds is coming across a rarely sighted bird that is close enough and is not immediately flying off. The last thing you want to happen is have your equipment fail. I was lucky that my Err 01 error was easy to remedy.

I have always handled my photographic equipment gingerly, but now I will pay more attention to how the weight distribution impacts the connecting electronics.


Peregrine Falcon

My Personal “Hot-Spot” To Photograph Raptors

Special Birding Hotspot

Bird Photographers are always looking up and around for locations upon which birds frequently perch – preferably locations that give the photographer a clear shot of a handsomely posed bird.

There are lots of “Birding Hotspot” recommendations on the web that list the best bird watching/bird photography destinations. I’ve been to a few of these, and they are very fruitful. However, I think every photographer needs to search out one special birding spot that’s close to home, not crowded with people, and guarantees a variety of visiting birds during the Spring and Fall migration seasons.

A Perch On The Dunes of Lake Michigan

One such hot spot for me is a large, long dead tree, standing strong in the dunes overlooking Lake Michigan. This tree is rather stark looking, with no leaf cover, so it’s perfect for raptors to perch upon while hunting for mammals, fish, and other birds.

I’m designating this dead tree as my hot spot for photographing raptors.

I’m lucky enough to have my neighbor’s permission to setup my equipment on her family’s beautiful deck. This deck is built into the dune, and puts me at eye level with the top most branches of the dead tree. Also, this tree is situated so I can get a fairly close shot if I happen to be on the road in my car with my camera.

So far, I have been lucky enough to photograph two raptors perched on this tree that I could not initially identify and have never photographed before.

Whatbird.com – A Valuable Bird Identification Resource

The expert birders at the WhatBird.com website (under the “Help Me Identify A Bird” tab) came to the rescue. NOTE: If you haven’t already, take a look at this informative site. In addition to being a valuable resource for bird photographers, it’s a great place to learn bird identification skills.

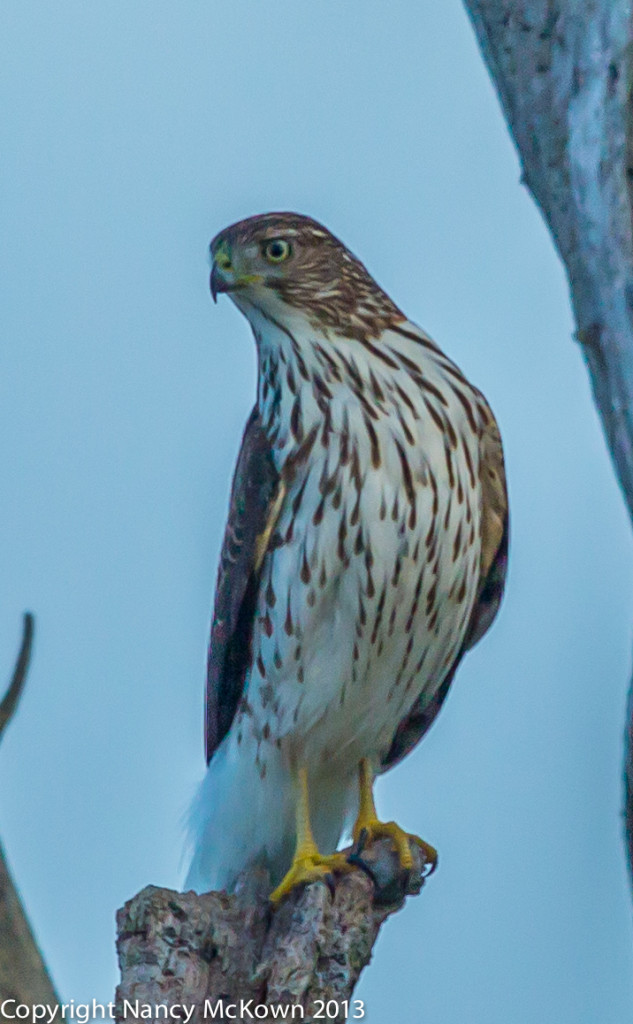
My two newbie raptors, perched on that long dead tree, turned out to be a Cooper’s Hawk and a Peregrine Falcon. Both of these raptors regularly hunt other birds.

Cooper’s Hawk

The Cooper’s Hawk (about the size of a crow) is an “accipiter” hawk. According to the experts, accipiter hawks have the kind of wings and tails that allow them to easily maneuver in tight spots, like wooded areas. These small hawks are also known to hunt smaller birds at bird feeders.

Photograph of a Cooper's Hawk
Cooper’s Hawk, Perched on a Dead Tree Overlooking Lake Michigan
ISO 1000; 1/3200 second; f/6.3

This Cooper’s Hawk perched on the tree for less than a minute. I pressed the shutter once and he was gone. His arrival wasn’t a surprise because he was heralded in by a mob of loud crows. This particular juvenile Cooper’s hawk was being insufferably scolded, harassed and pecked by the crows. I don’t think it was my camera and me that caused him to fly off so soon.

Peregrine Falcon

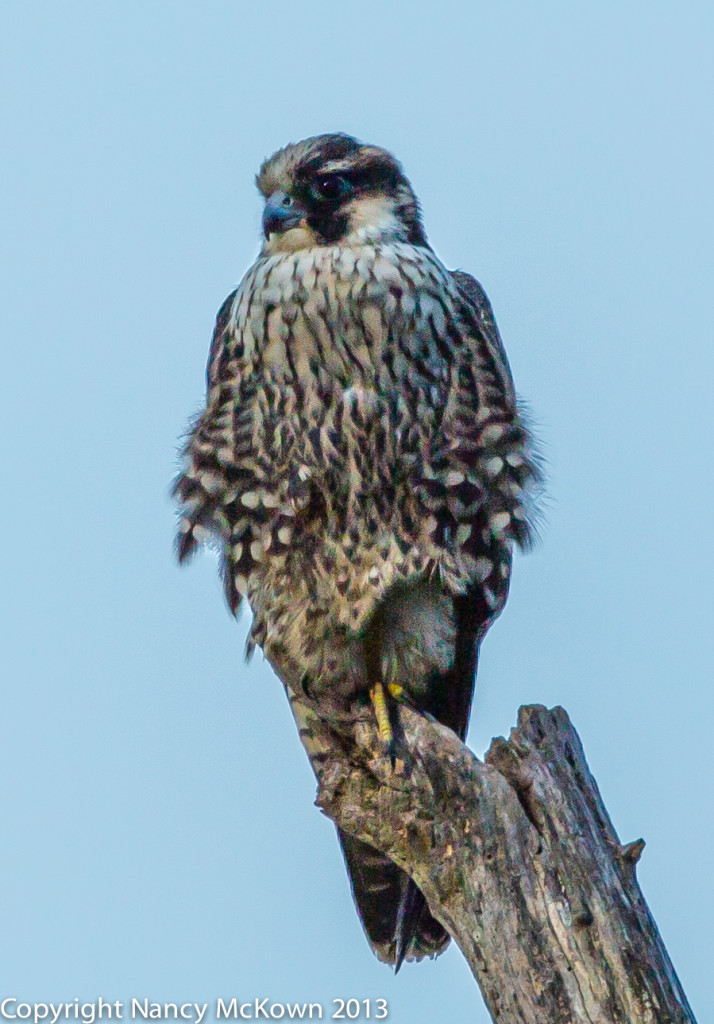
The second surprise visitor to my hotspot was a Peregrine Falcon. I was driving down Lakeshore Drive when I notice her on my hotspot. I stopped the car and shot this image from my car window.  Peregrines are about the same size as Cooper’s Hawks  – anywhere from 15″-20″ long, head to tail.

Photograph of Peregrine Falcon
Adult Peregrine Falcon Perched on a Dead Tree Overlooking Lake Michigan
ISO 250; 1/2500 Second; f/5.6

Peregrine Means Wanderer

In an effort to help restore the population of this raptor, peregrine falcons have been “transplanted” in a lot of different cities. They perch on tall buildings, nest on the building’s ledges and feed on doves, blackbirds, jays, pigeons and starlings.

This Peregrine was most likely migrating south along the Lake Michigan shoreline.  Crows were also mobbing this much faster, more powerful, mid-air hunter of other birds. Sadly, the peregrine falcon did not stick around for me to get more than one or two shots.

Mobbing Crows

Crows are known for their intelligence and curiosity. Makes me wonder why they harass raptors that specialize in eating other birds. Certainly makes it more exciting. I’m hoping that the crows haven’t also designated this dead tree on the dune as their raptor hotspot.


How to Photograph Red Tailed Hawk

Photographing the Red Tailed Hawk

Where the Hawks Are

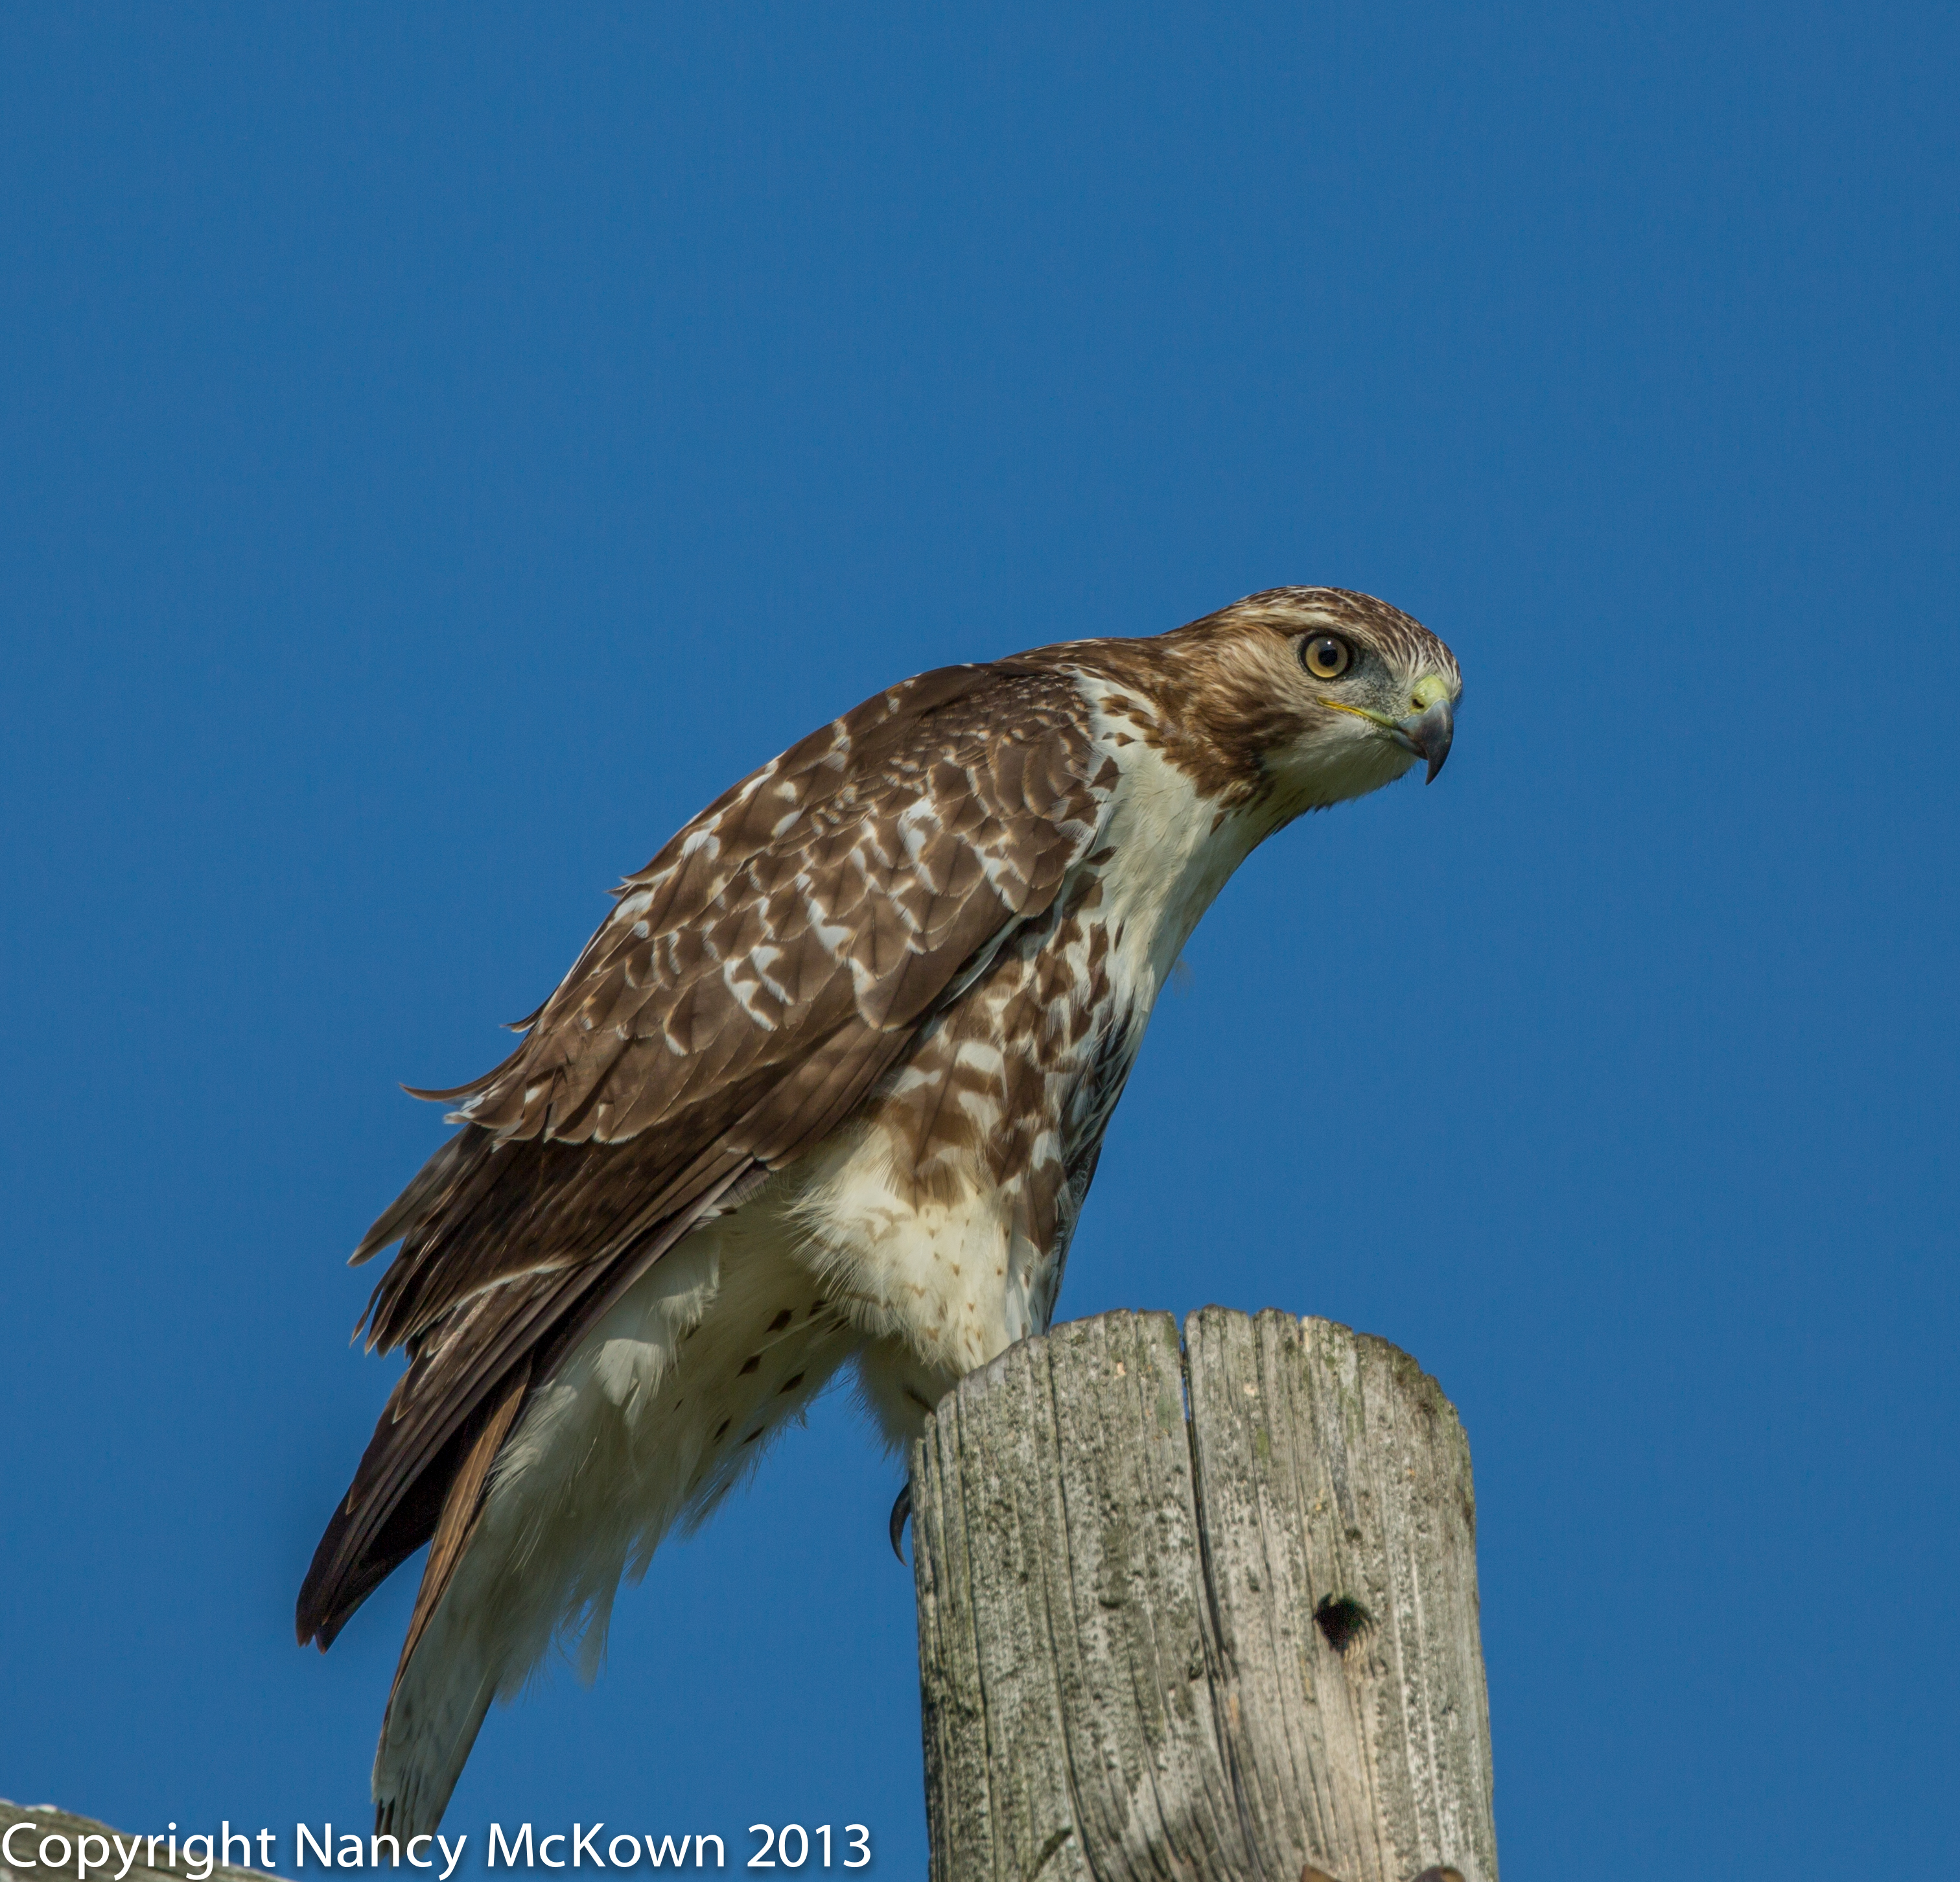
It seems I’m always looking up, hoping to spot birds. Going down the road one morning, I spotted a red tailed hawk at the top of a utility pole, scanning the cut corn field looking for a meal. I knew the sun was too high and too bright to get a well exposed photo. Worst of all, the hawk was east of the highway, at my 2:00, so my lens was facing the sun. We pulled off the highway anyway.

From the passenger seat, I propped the camera (with the 300mm lens and 2x extender attached) on the window ledge, aimed, and took some test shots. I looked at the histogram and could see that the light wasn’t bad enough to send the graph clipping over the right side.

So what do you do if  the sky in the background is brighter than your subject in the foreground?  Here are 3 suggestions to address this problem:

1)  Attach a Graduated ND filter.  The photographer adjusts the filter on the lens so that the dark part is at the top (to reduce the amount of the light from the sky).

2)  Adjust the Ambient Light Exposure Compensation. (See post about histograms and exposure compensation called “Photographing Sandpipers on the Beach”.)

3)  Make the adjustments when you get back home with your post processing software.

I decided that this time, I would solve the uneven lighting problems in post processing.

Post Processing Software to the Rescue

The camera display confirmed that the photographs from this light and this angle would be full of unattractive shadows and highlights. These photos would definitely not be keepers; unless I was willing to spend a little time adjusting the exposure, light and shadows in my post processing software.

Photo of Red Tail Hawk - Before Processing
Red Tail Hawk as Shot – No Adjustments.

RAW and JPG Formats

There are generally two choices a photographer has to record digital files on the memory card;  RAW and JPG.

RAW files are not processed or compressed by the camera’s computer. Consequently RAW files retain much more information that can be manipulated (when you get back home) by post processing software.

JPG files are processed and compressed by the camera’s computer. A JPG file will therefore provide fewer details that the post processing software can manipulate.

Because RAW files are not processed, the digital files are much larger than the processed JPG files. This is a consideration when choosing between JPG and RAW formats because RAW files take up much more space on your camera’s memory card. And, since it’s a much bigger file, it will take the camera more time to save the data to the memory card.

Photograph in RAW Format If You Want Maximum Post Processing Control

I always shoot birds with the camera set to RAW format. It’s a big advantage to start from scratch, with all the data, when the lighting is subpar and post processing is needed. Many cameras allow the user to save both the RAW file and JPG file for each photograph. I would not recommend this setting because your camera is recording double the number of files on your memory card. It is, however, a good way to see the difference between how the same image looks in RAW and JPG.

NOTE: Since RAW files are so big, it is critical to start out every shoot with plenty of high capacity memory cards- at least 16 GB and usually 32 and 64 GB.

Photograph of Red Tailed Hawk
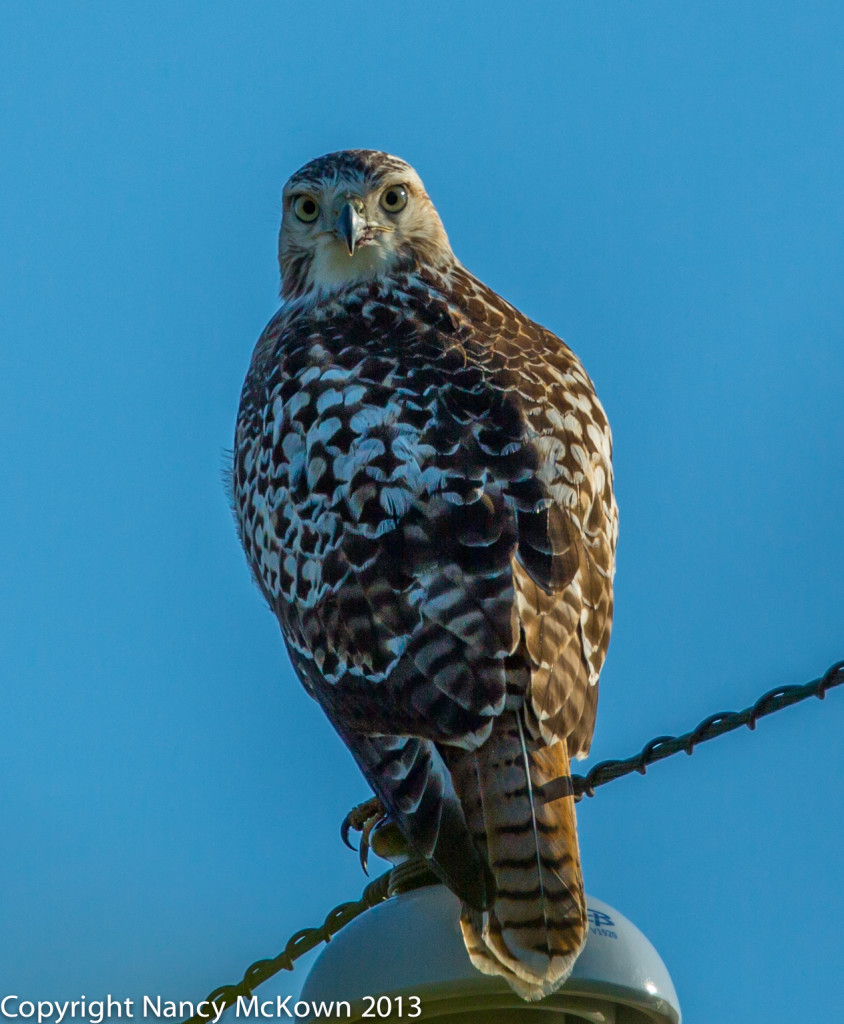
Photo of Red-Tailed Hawk -After Adjustments were Made to RAW file in “Lightroom” Post Processing Software. Voilà!

Post Processing Software

There are lots of free post processing software programs to choose from, and your camera may have come with its own software for this purpose. The free stuff does a good job, but the fixes they provide are limited, mainly because the problems they address tend to be “one size fits all”.

The first photo is shown as it came out of the camera, with no post processing adjustments. It is simply unusable in this state. The second photo is the same photo, but the highlights and shadows, details and exposure are adjusted in Lightroom 4.

Many more basic post processing options are available in Lightroom; like crop/rotate, adjust color/exposure, sharpening, noise reduction, etc. It’s also a great tool for organizing, sharing and backing up your files. The software is easy to learn. And, if you do need help to learn Lightroom, (or any post processing tool) there are plenty of targeted resources on the web.

Don’t Pass Up The Photograph Because of Uneven Light

Light will be one of the biggest challenges you will face when photographing birds. With the right post processing software, you won’t have to pass up a shot because the light is not optimal.


Photograph of Osprey Sitting in Nest

How to Photograph Ospreys

Photographer’s Assistant

Whenever I research the work of Annie Leibovitz (one of the best portrait photographers out there), she is surrounded by photography equipment and assistants. Her assistants do alot of the hauling in of equipment, setup and prepping of the lucky individuals scheduled to be photographed.

So wouldn’t it be a good idea for bird photographers to have assistants as well?

Camera Boy

I have a wonderful assistant. By day he is a competent, hard working attorney and the love of my life, and during my photography adventures, he is Camera Boy! Camera Boy does alot of the car packing and unpacking, and helps with setup. He also does the driving and helps scope out possible locations to photograph birds.

The photographer is generally too busy framing the shot and pressing the shutter to nudge a sitting bird to take flight. Often, the bird is content to just sit there while the sun rises to the point where harsh shadows will dominate the shot. This is where the assistant steps in. On cue, all he has to do is walk toward the bird. With a little luck, the bird will take flight at the exact time and in the intended direction needed for the perfect shot.

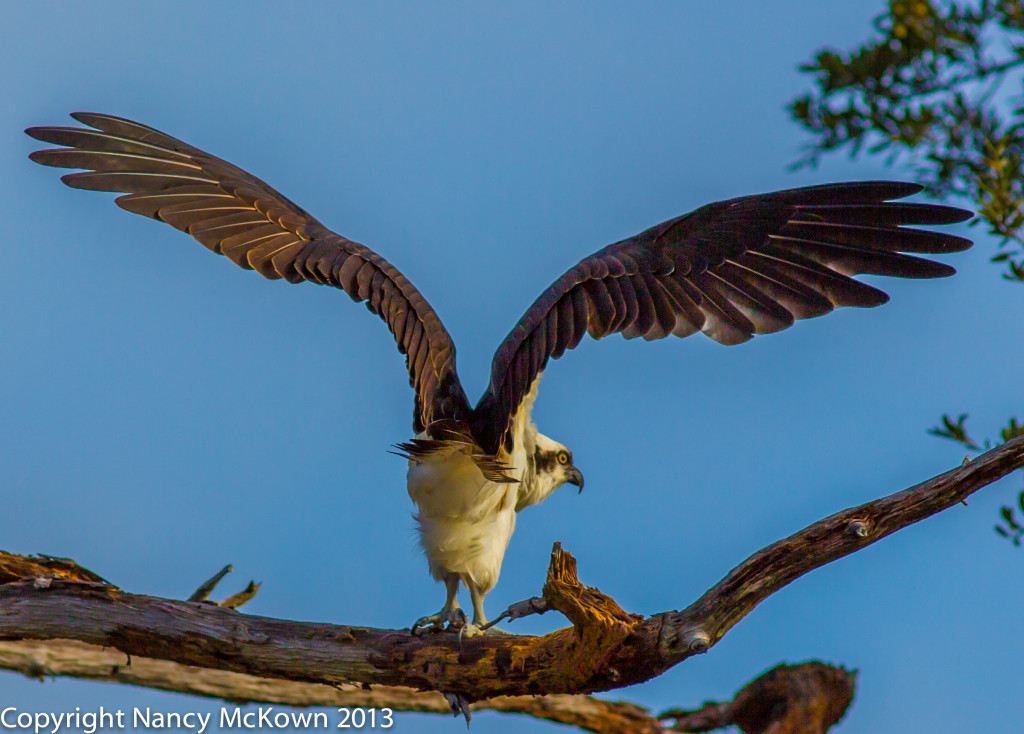
Perched Osprey Photo
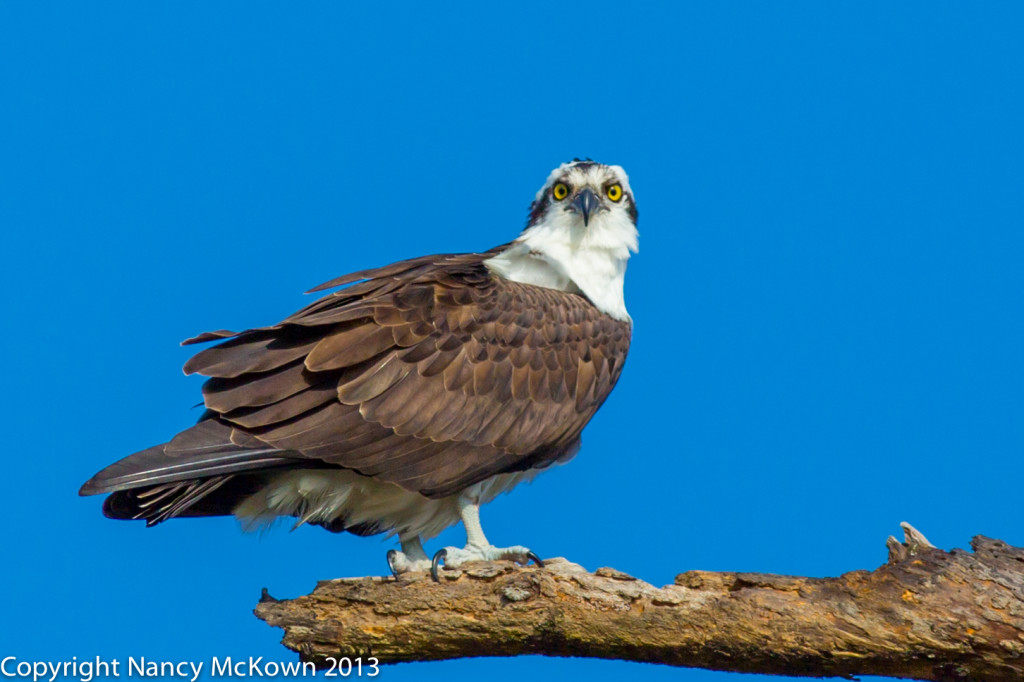
Osprey Perched and Staring at the Photographer and Assistant. Not Looking Too Worried.

Photographing Ospreys in Florida

We came across 2 ospreys at Fort Pickens National Seashore on Santa Rosa Island, near Pensacola Florida. There wasn’t much gear to carry because I don’t like hauling a bunch of equipment when I travel.  My camera with my 300 mm lens and a monopod was all I brought with me.

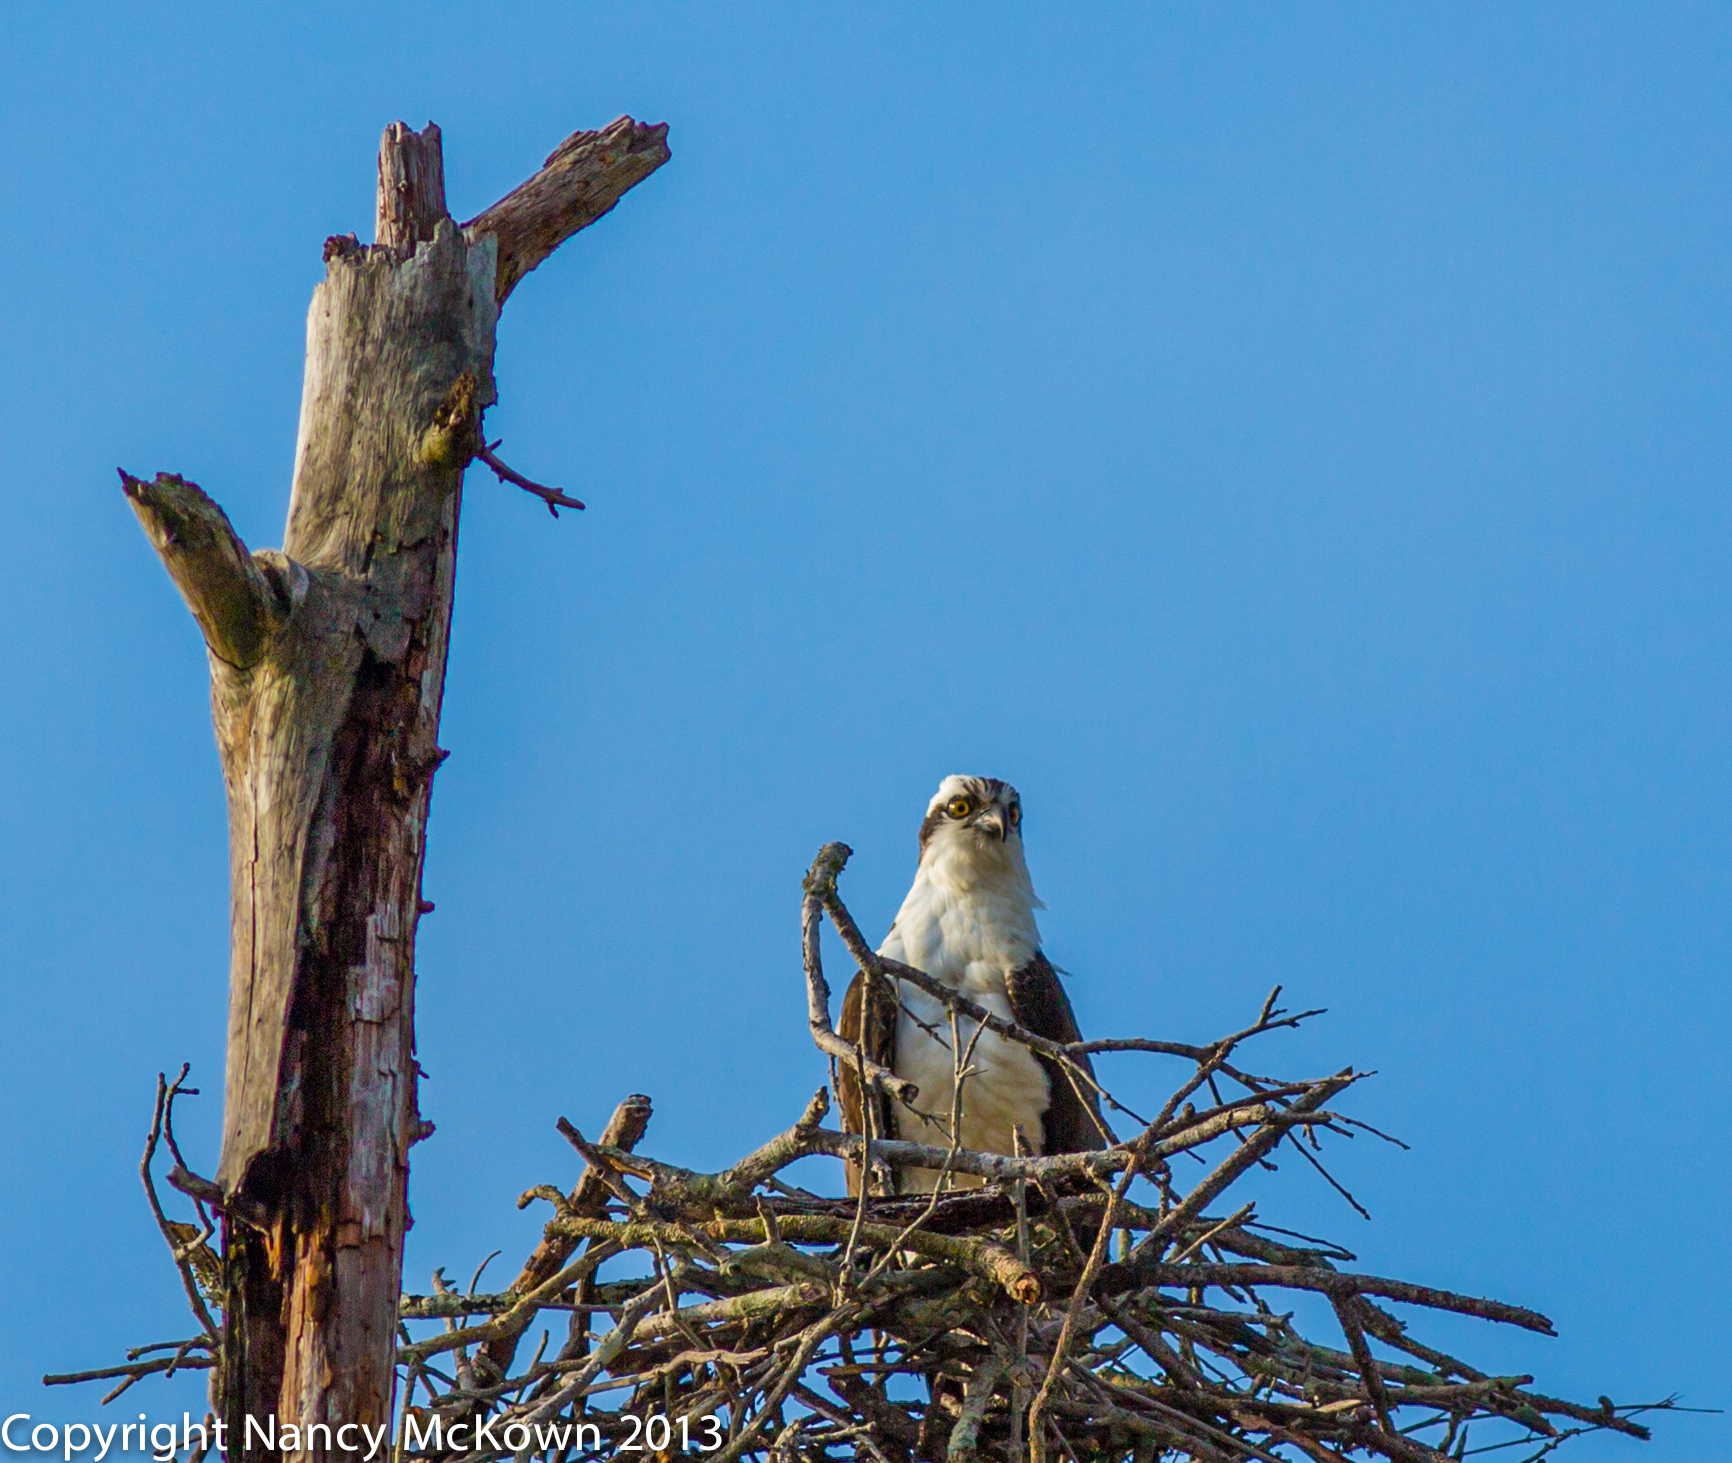
The ospreys were perched on trees in and near their nest with a great view of the ocean. Their nest was built on a manmade nest platform not too high up from the ground. No baby birds were visible.

Ospreys are also known as Sea Hawks because they are so adept at diving and catching live fish. I was hoping to get a photograph of one of the ospreys coming back to the nest with a fish, but no luck. These birds were obviously acclimated to humans and seemed content to sit and watch us from where they perched.

In Flight

I was able to take many photographs of both ospreys sitting in trees with the clear blue sky as a backdrop.  Camera boy and I wondered if we could prompt some in-flight action by simply walking toward the birds.

I was in place, as close as I could get to one of the birds with my camera and monopod. I had the camera facing the side of the bird’s body, with the sun behind me. If we were going to prompt him to fly, a side view of him taking off in the direction we wanted him to go would be best. So Camera Boy was behind the bird, ready to walk forward, hoping his proximity would propel the bird forward.

Photograph of Osprey Ready to Take Flight
Osprey Almost Ready. Foiling our Plans, He Turned Away from the Camera Before Taking Flight

Ready!  Set!!  Action!!!

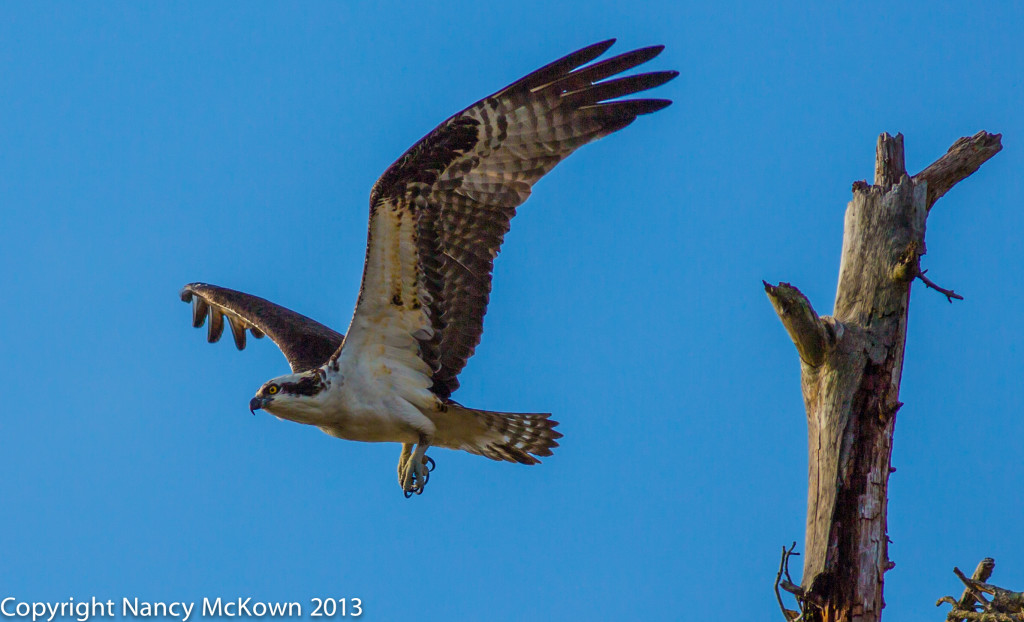
It was mid morning and there was plenty of soft light from the morning sun. On my cue, Camera Boy walked toward the bird. The osprey did indeed take flight at a time when I had the camera focused and ready.

Photography of Osprey in Flight
Finally, Osprey Taking Flight at the Intended Time in the Intended Direction.

The ospreys did not show fear, they did not fly away or move to a higher branch or dive bomb us. They simply flew to another close-by tree, perched and looked down on us.

It’s no wonder that Annie Leibovitz has assistants to help her set up for the perfect shots. Camera Boy and I will have to work out a plan to get a shot of the ospreys diving and catching fish.


Bald Eagle with Deformed Lower Beak

Unexpected Photograph of an Immature Bald Eagle

Be Prepared to Photograph the Unexpected

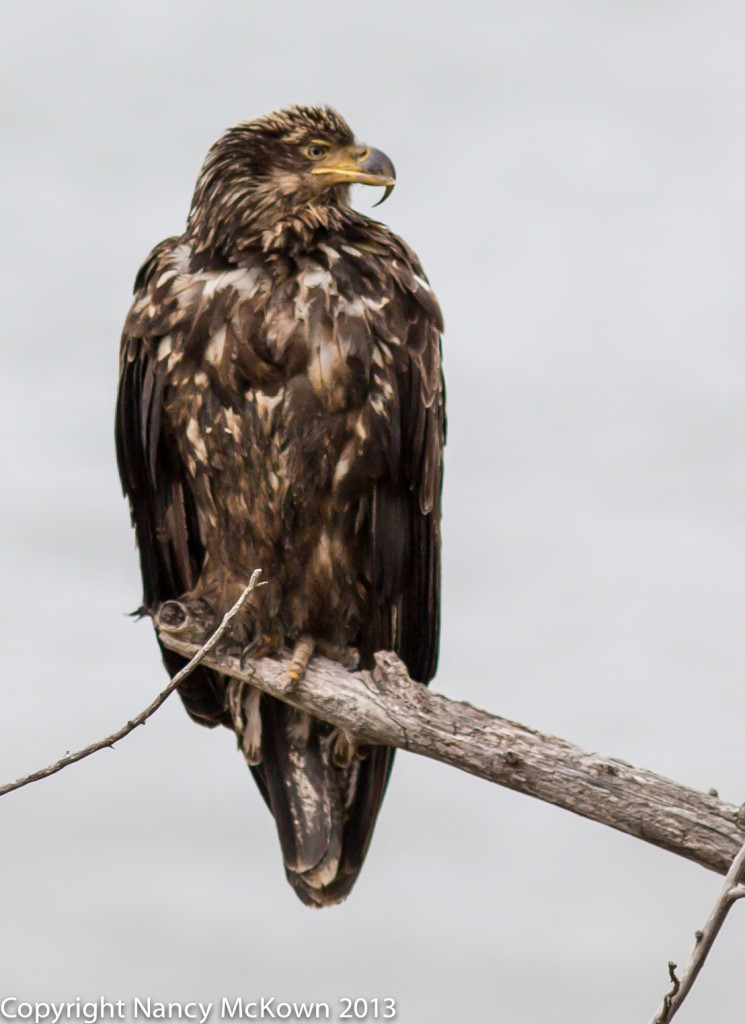
I try to carry my camera with me in the car, even when I’m not on a mission to photograph birds. I curse myself if I come across what could be an awesome bird shot and I don’t have my camera. Most of the time, I don’t use it because I’m on the road and generally don’t see anything worth stopping to shoot. But a while back, on a grey and windy day, I came across an immature bald eagle just resting on a dead tree branch overlooking Lake Michigan.

I pulled off the road. Even though birds are generally less spooked by cars than small humans tiptoeing toward them, there was no way I could stay in the car and get any worthwhile photographs. I got out of the car with my camera and immediately started shooting. I usually shoot, then take a few quiet steps, shoot again, and repeat this pattern until I get as close as I possibly can, or until the bird flies away. This way I’ve at least got something to take away with me besides the excitement of coming across one of these beautiful birds.

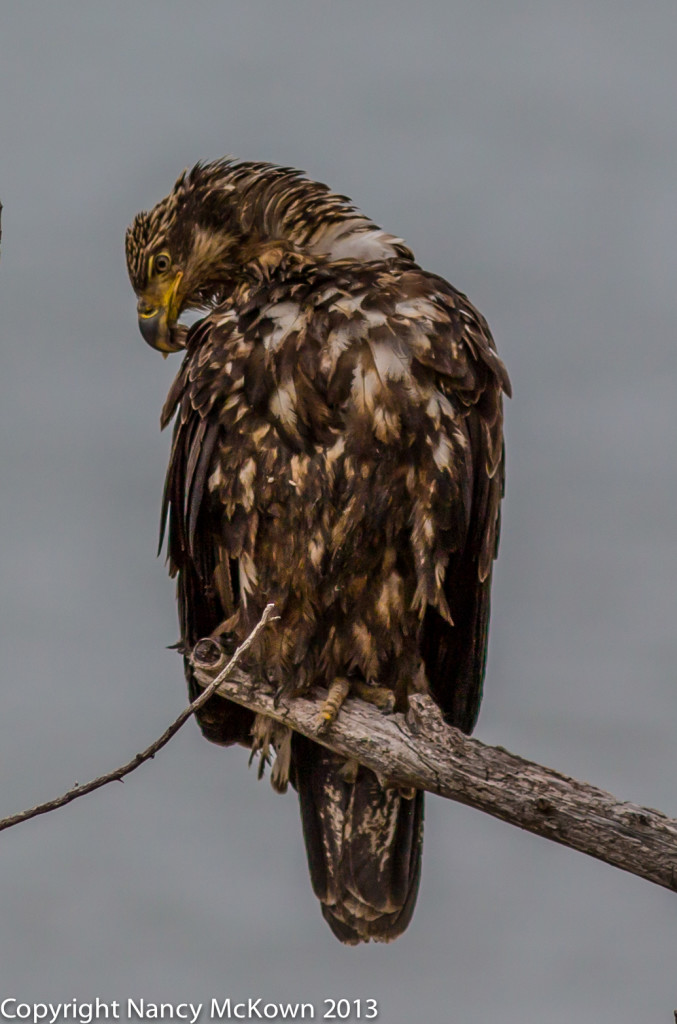
This time the eagle just looked at me as I slowly approached. In fact, he was so bored that  he started preening himself. I was able to climb down onto a friend’s deck (thank you Mary Kay and Mark) and keep shooting.

Immature Bald Eagle Preening.  First Sighting of the Lower Beak Deformity
Immature Bald Eagle Preening

Camera Shake Causes Blurry Images

It was a very windy day, and I did not have my tripod or the bean bag that I use as a stabilizer in the car. Wind is a problem for photographers. Even slight movements get magnified at the end of long lenses and  hoods and result in fuzzy images. This can happen even when using a tripod. I had to stabilize the camera as much as I could by propping my elbows on the deck railings and cradling it against my body. I also cranked up the shutter speed (I’d much rather have noisy photos than blurry photos) and, very gingerly, kept pressing the shutter button.

It’s quite an effort to hold the camera still when hand holding in heavy winds. The wind was coming out of the west, right off the lake. During this shoot, my hands could feel that 300mm lens move about and my eyes could see the effects the wind was having on my ability to center that subject in the viewfinder. Waiting for the wind to calm down was not an option, nor was sheltering the camera with my back.

Image Stabilizer on the Lens

A 300 mm lens is really the largest lens that can be reliably hand held. Anything bigger should have a tripod. On this shoot, the image stabilizer on my lens proved to be very useful to help compensate for camera shake caused by the wind. However, if the subject is moving, image stabilization will not help.  It’s only helpful to reduce blur that comes from the photographer during hand held shooting.

Also, above a certain shutter speed, the stabilizer is not useful and may even cause more blurriness. The image stabilizer on my lens automatically shuts off when it senses a tripod is attached.

What the Camera Captured

I wasn’t close enough to fill the viewfinder with the eagle, but it was still an impressive sight. I stood there, heart pounding,with elbows propped on the deck ledge and shot until the bird flew away, maybe 20 minutes.

The camera display showed some usable shots, but I didn’t realize what I had until I imported the photos into my post processing software. At first I was disappointed because it looked like most of my shots were blurred.

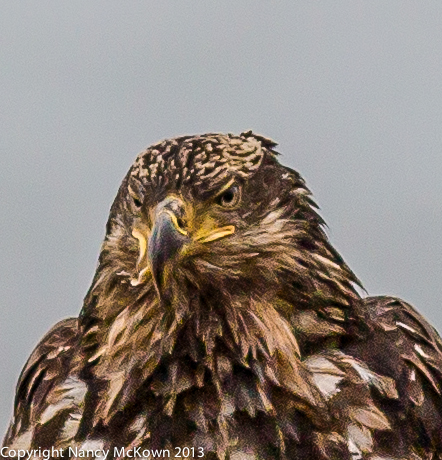
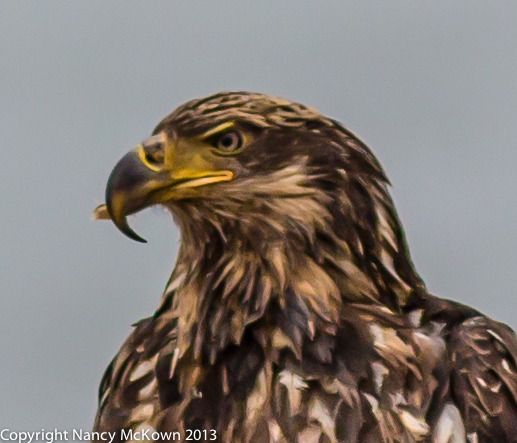
But when I zoomed in, it was clear from these photographs that this eagle’s lower beak did not match up with his upper beak.

Photograph of Immature Bald Eagle with Beak Deformity
Immature Bald Eagle with Lower Beak Deformity
Photograph of Immature Bald Eagle with Beak Deformity
Closeup of the Eagle’s Head, showing a Better View of the Lower Beak Deformity

I sent these photos to Rebecca Lessard, who heads Wings of Wonder, a non-profit raptor sanctuary focusing on education, rehabilitation and research, located in Empire, Michigan. Rebecca forwarded my photos to a supervisor of the US Fish & Wildlife Service for Michigan. He believes this deformity may have been caused by environmental contamination.

I keep watching for this bird, hoping to come across him again. No luck so far. He’s big, and he looks healthy, so my hope is that he will survive and thrive.


Immature Eagle Taking Off

How to Photograph a Bald Eagle

Bald Eagle Sightings

Bald Eagles are massive, powerful birds. Hard to miss them going down the road, even with the trees full in bloom. Too big to blend and too fast to chase, at least without a car. You can’t sneak up on a bald eagle mostly because they are usually looking down at you with their eagle eyes – eyes that are estimated to be at least 4 x sharper than human eyesight.

Where to Photograph Bald Eagles

I wish I had a spot to reliably photograph bald eagles. I’ve watched them over the years, trying to determine if there’s a pattern in their daily schedule that I can take advantage of to get a good shot. I’ve never seen an eagle’s nest that can serve as my spot, plus I would be very hesitant to risk having the nesting pair abandon their nest and/or hatchling because of the commotion I caused trying to photograph it.

The behavior consistencies that I’ve observed are that eagles search for food around water and are one of the first scavengers on the beach to get their share of dead birds and fish. I also notice other birds chasing them, so it’s a good bet that they go after nest eggs and fledglings of other birds.

Depending on Luck to Find Bald Eagles

It was a gray and cold winter’s day. I loaded my camera in the car and depended on luck as I drove the Lake Michigan shoreline road to get my eagle shots. Luck means that the eagle would be in a tree that would be close enough to shoot, that she would not get spooked when I got out of the car and she would fly away only when I’m ready to capture her in flight. Luck means that there would not be a crowd of people around the eagle, thereby increasing the chance of her flying away when I do spot him. That’s a lot of luck. But it happened.

I came across this immature eagle resting on a branch on the east side of the road. She was situated so I couldn’t photograph her unless I got out of the car. She wasn’t spooked, if anything, she was bored as he looked down at me with my 300mm lens taking his picture. There was not time to set up the tripod. Since she was sitting still, I moved the shutter speed around a bit – no lower than 1/640 second and as high as 1/2500 second.

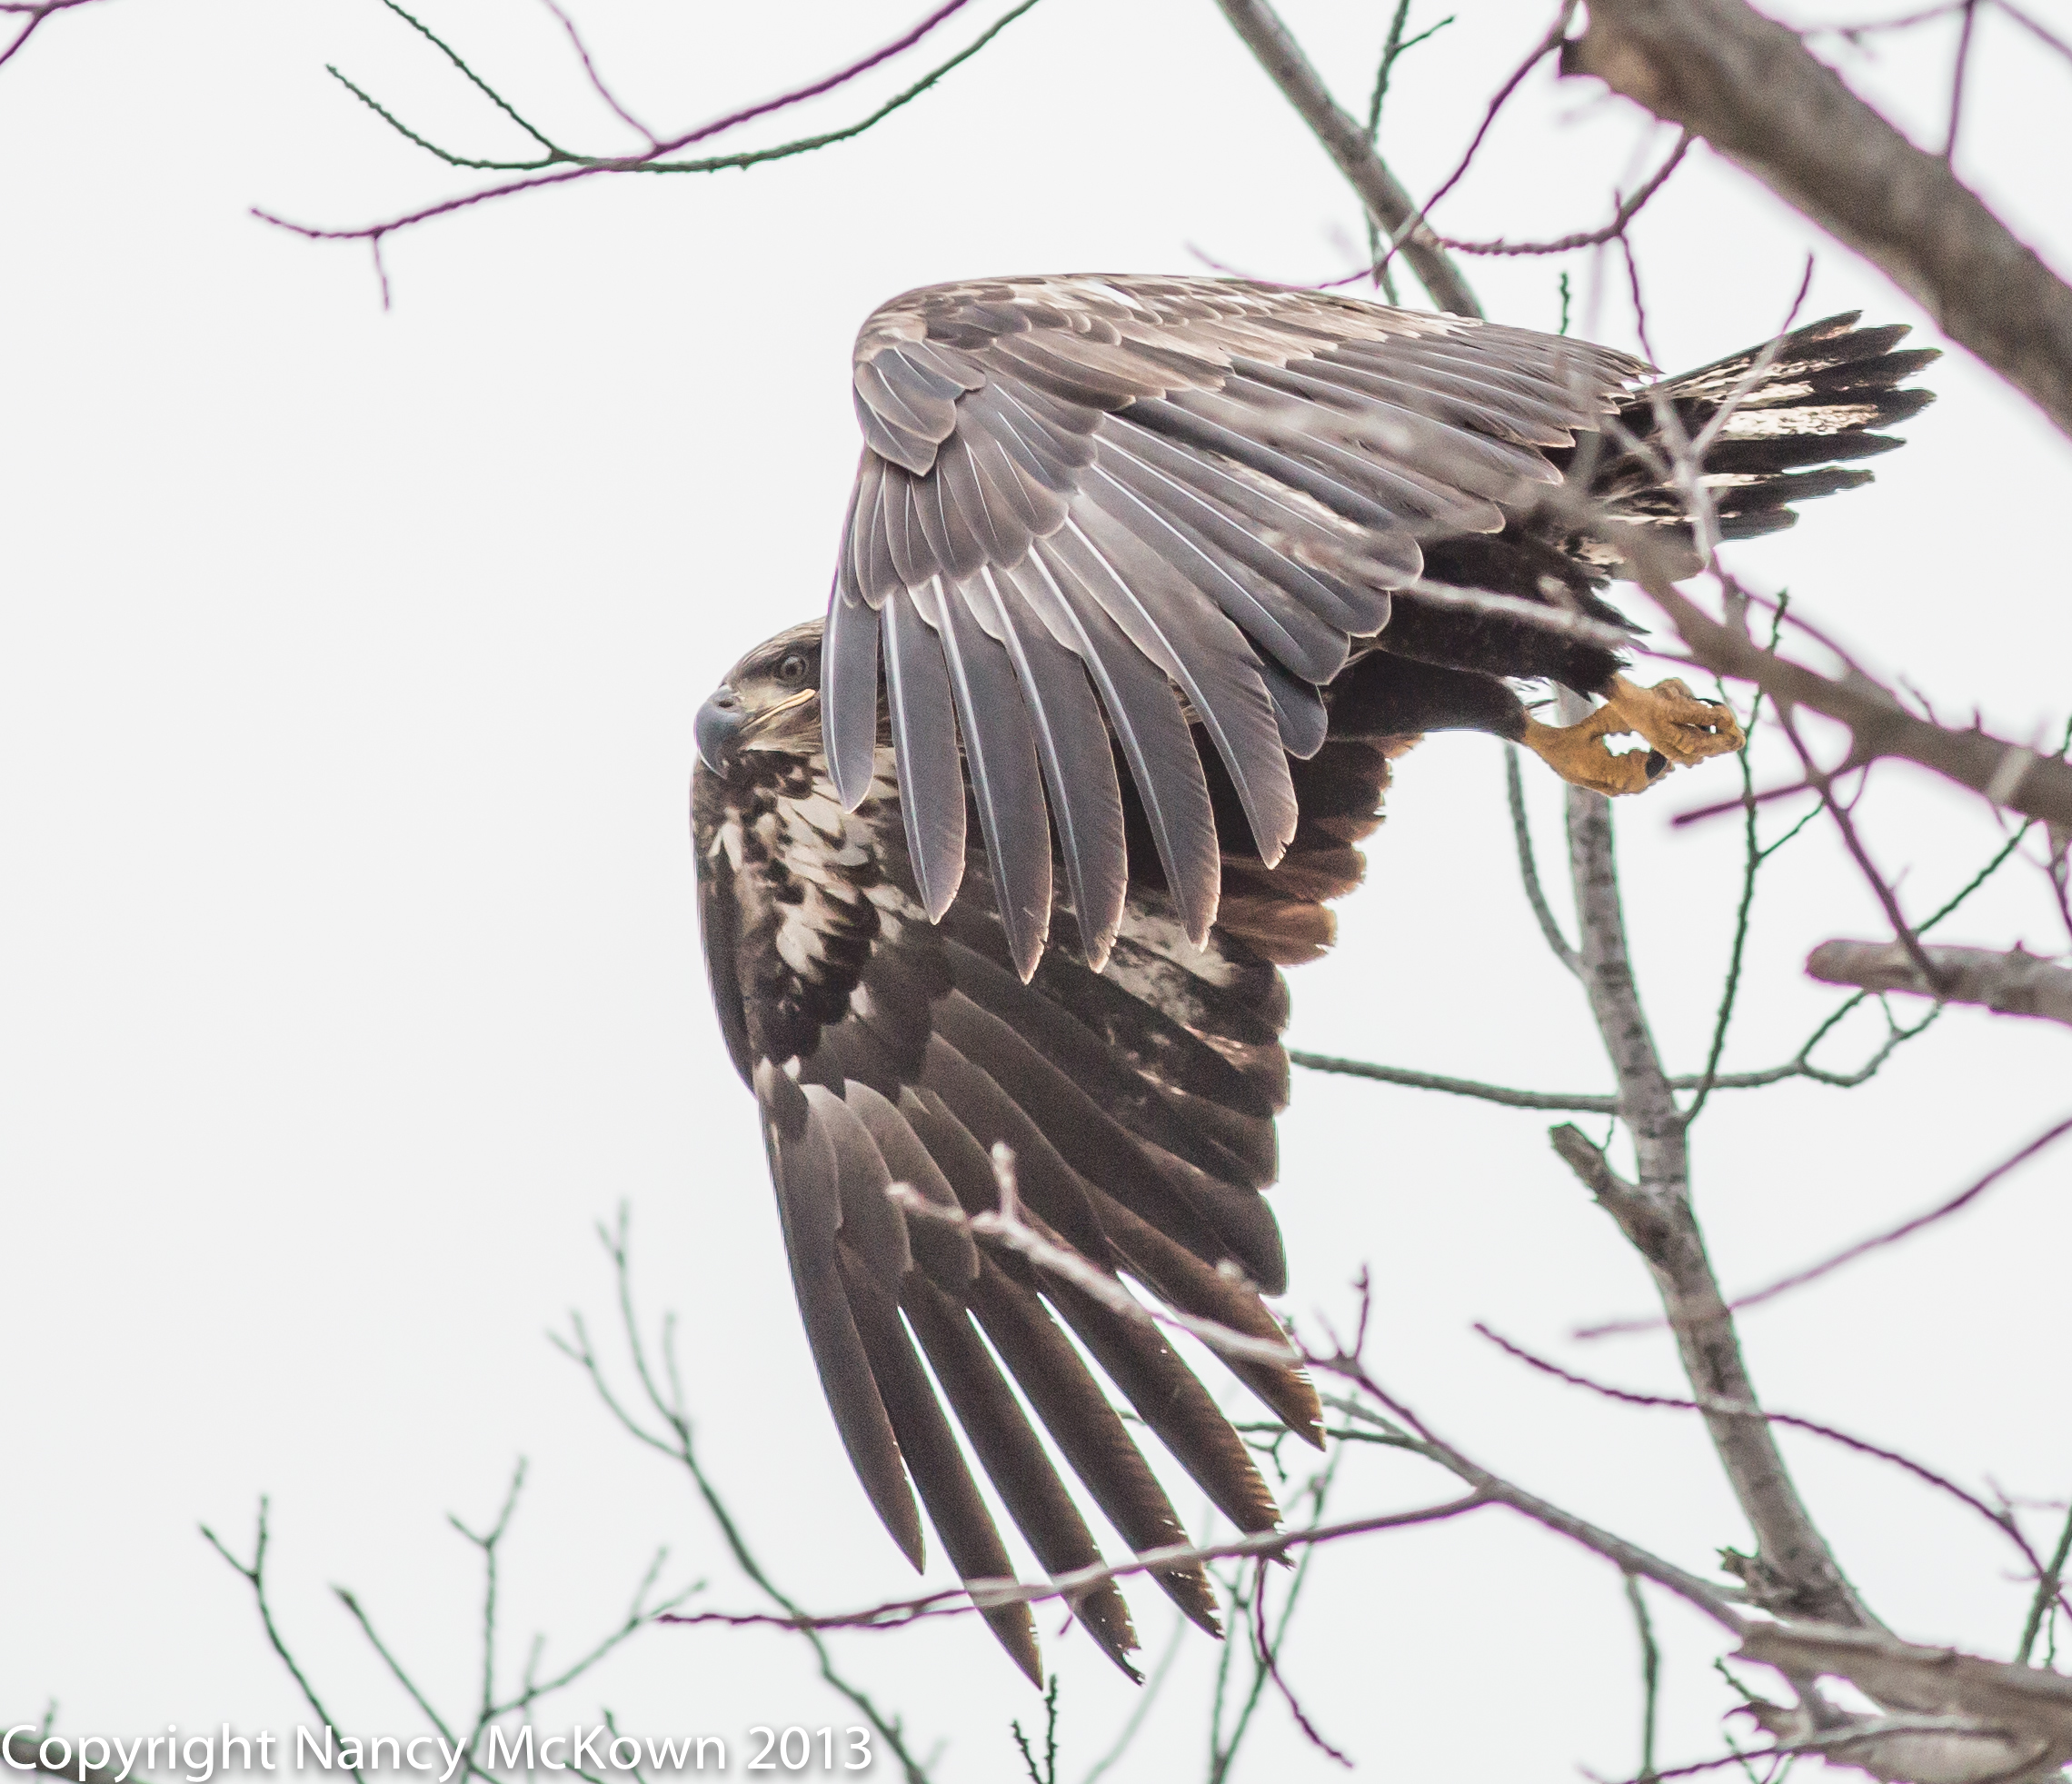
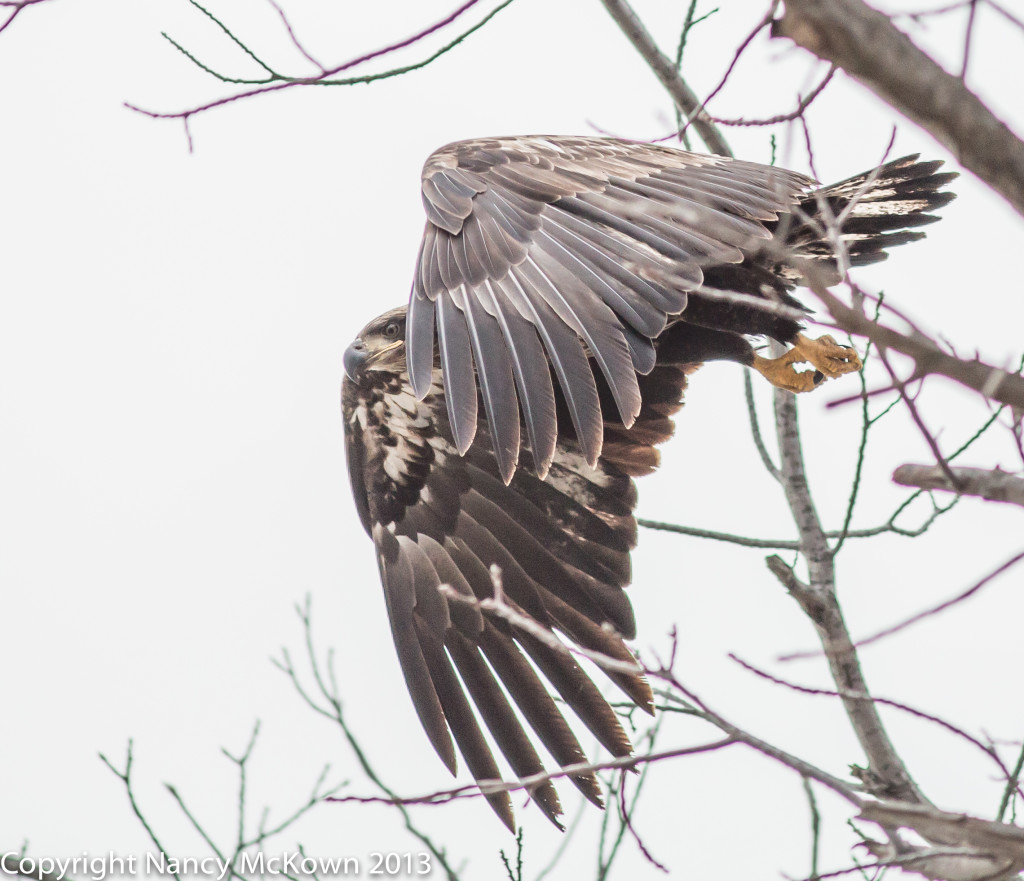
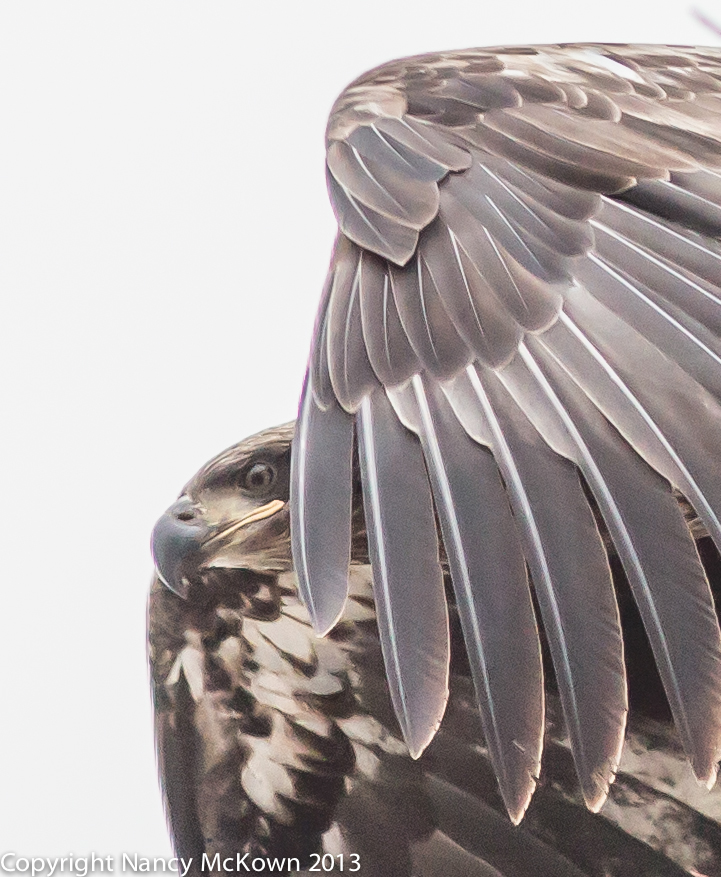
When I first looked at this shot (see below), I thought the eagle’s face was hidden by her wing. It wasn’t. The eagle’s face blended with the contours and the colors of her wings, making it appear like her face was hidden by her wing. (See closeup)

Immature Eagle Taking Off
Immature Bald Eagle Just Leaving His Perch

Immature Bald Eagle Closeup
Closeup Photograph of Wings and Head of Immature Bald Eagle

Rule of Thumb for Setting Your Shutter Speed

As the absolute minimum, you should set your shutter speed (when hand holding your camera) to the length of your lens. If you have an image stabilizer on your lens you have more flexibility to set the shutter a little slower. So the minimum shutter speed for a camera sporting a 300mm lens should be 1/300 second. This is for a subject that is sitting still.

Don’t Follow the Rule of Thumb for Action Shots

Since you don’t know when a bird is going to take off, and action/in flight shots create more interesting photographs, you need to crank that shutter up much higher than the length of your lens. The shot above was taken at 1/2500 second.

Telling the Difference Between Male and Female Bald Eagles

I see quite a few immature yet somewhat independent eagles along the Lake Michigan lakeshore. These eagles are as large as the adults, but don’t have the white plumage on their heads. It takes 4-5 years before eagles are sexually mature.

Telling apart the adult males and females is easy according to web resources.  The females are approximately 30% larger. Besides being smaller, the males have brighter white plumage and their eyes look like they use black eyeliner. In addition, the female also have longer beaks- the mandible on the male doesn’t extend as far back.

It’s not easy to tell the male and female eagles apart unless you have a close up photograph. The only definitive way to tell the difference is to photograph a male and female pair together. I’m guessing that the photograph above is of an immature female, judging by the length of the mandible and the gray feathers (rather than black) around this eagle’s eyes.