Monthly Archives: September 2013

Photo of Immature Male Ring Neck Pheasant

Photographing the Ring-Neck Pheasant

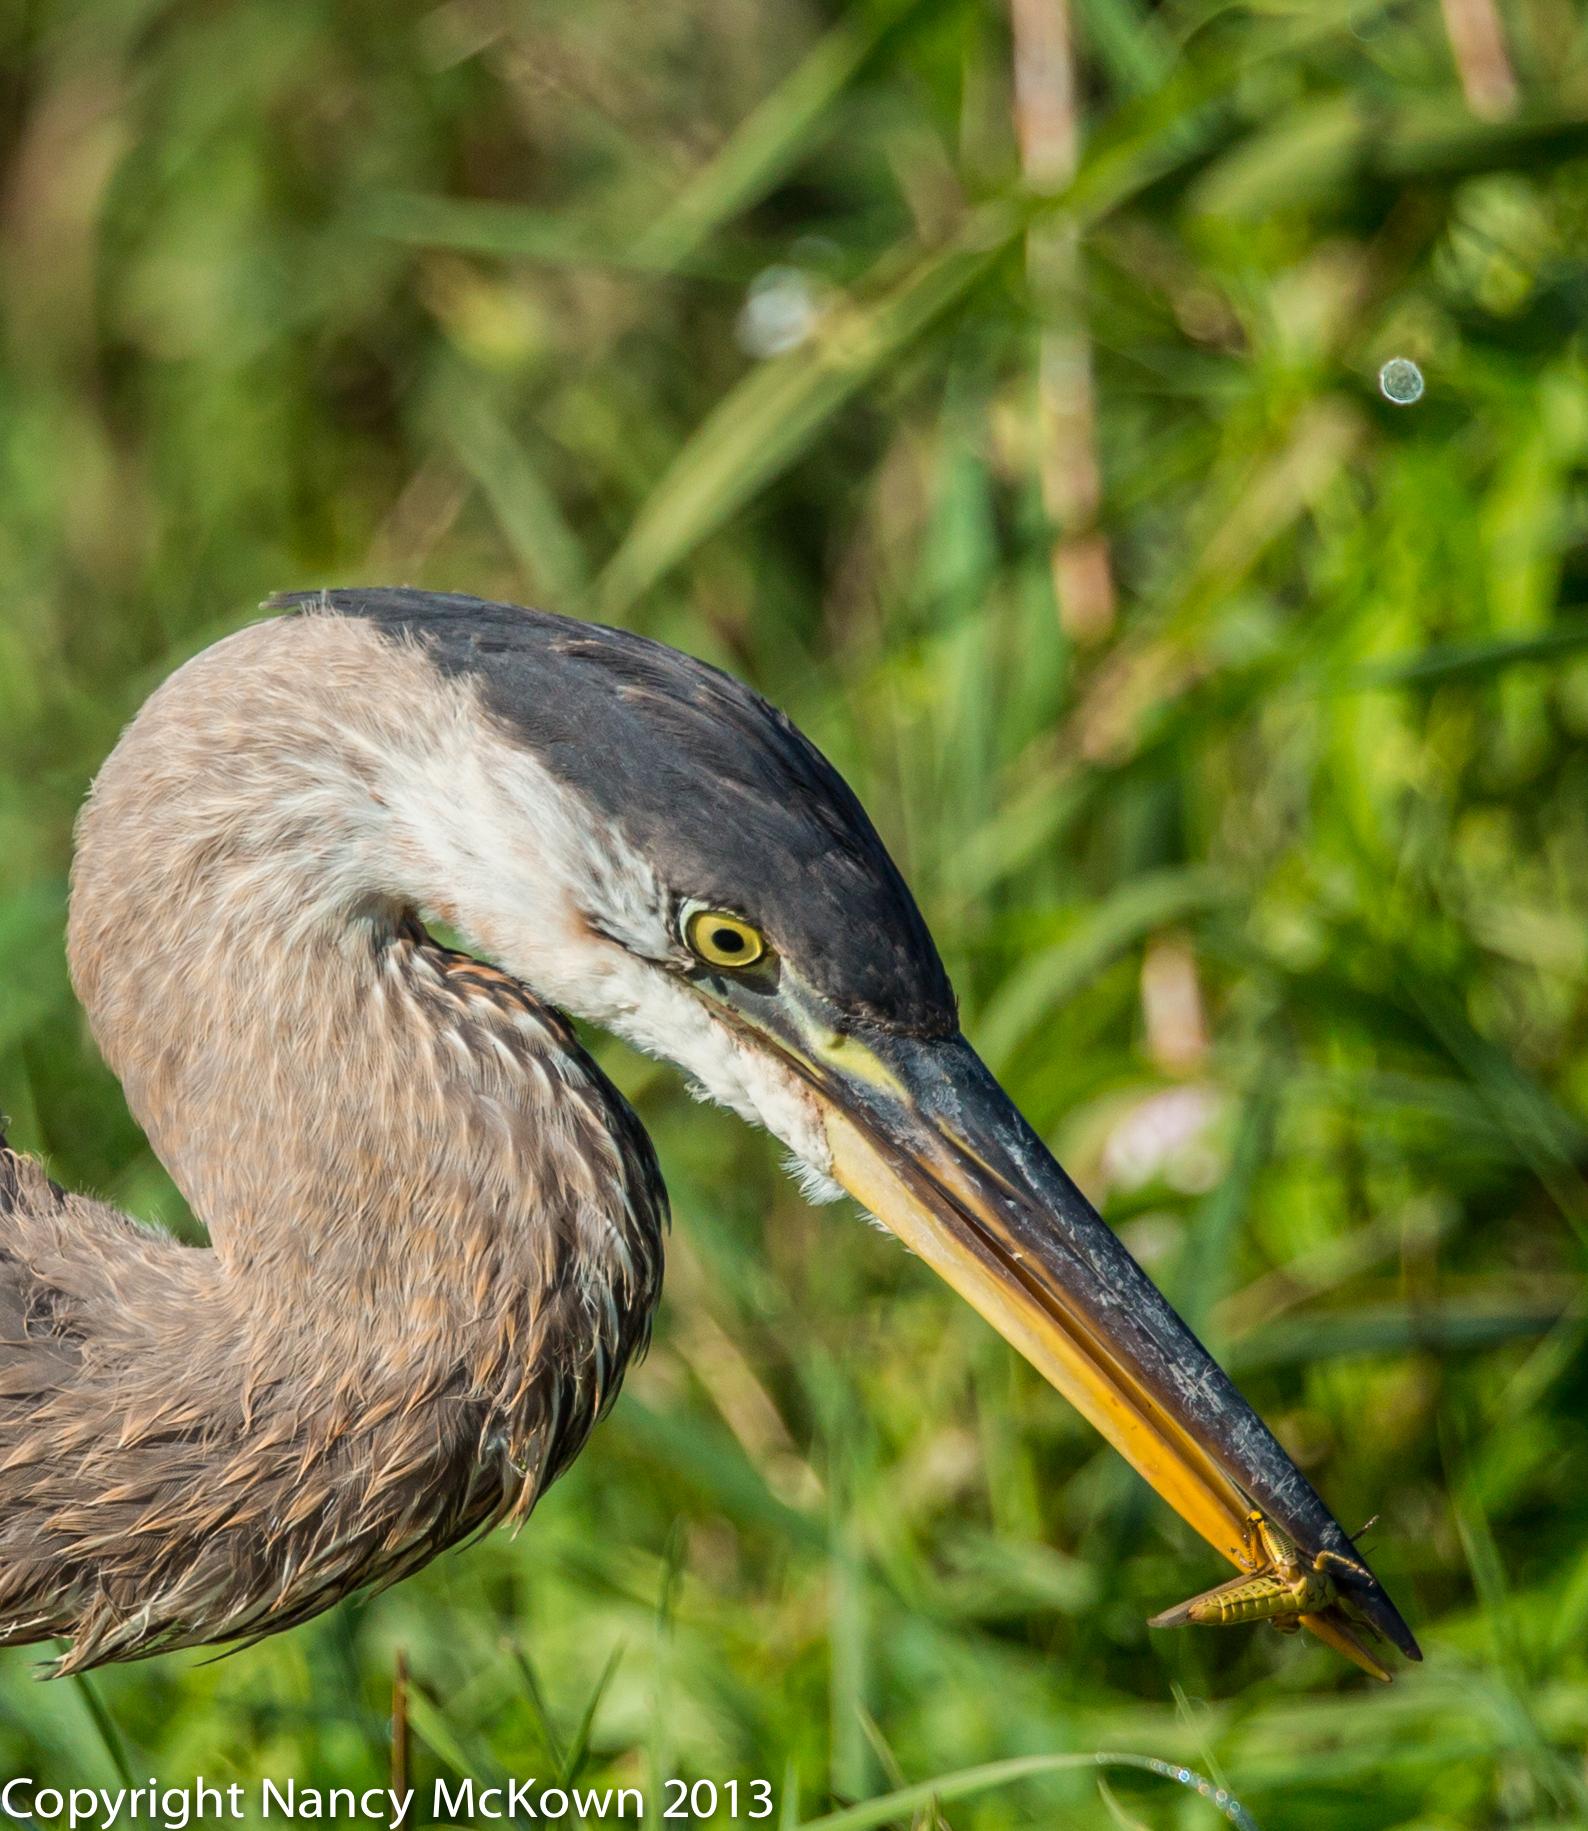
Photography Opportunities on the Back Roads

Lately, I’ve been spending a lot of time in my car, traveling down the back roads in the Allegan Forest & Allegan State Game Area, near “Todd Farm”, the Fennville Farm Unit. Todd Farm is a wildlife refuge, located at the west end of the forest. It is full of corn and soybean fields planted specifically for migrating and gaming birds. The DNR officers who work there are friendly and helpful to bird lovers.

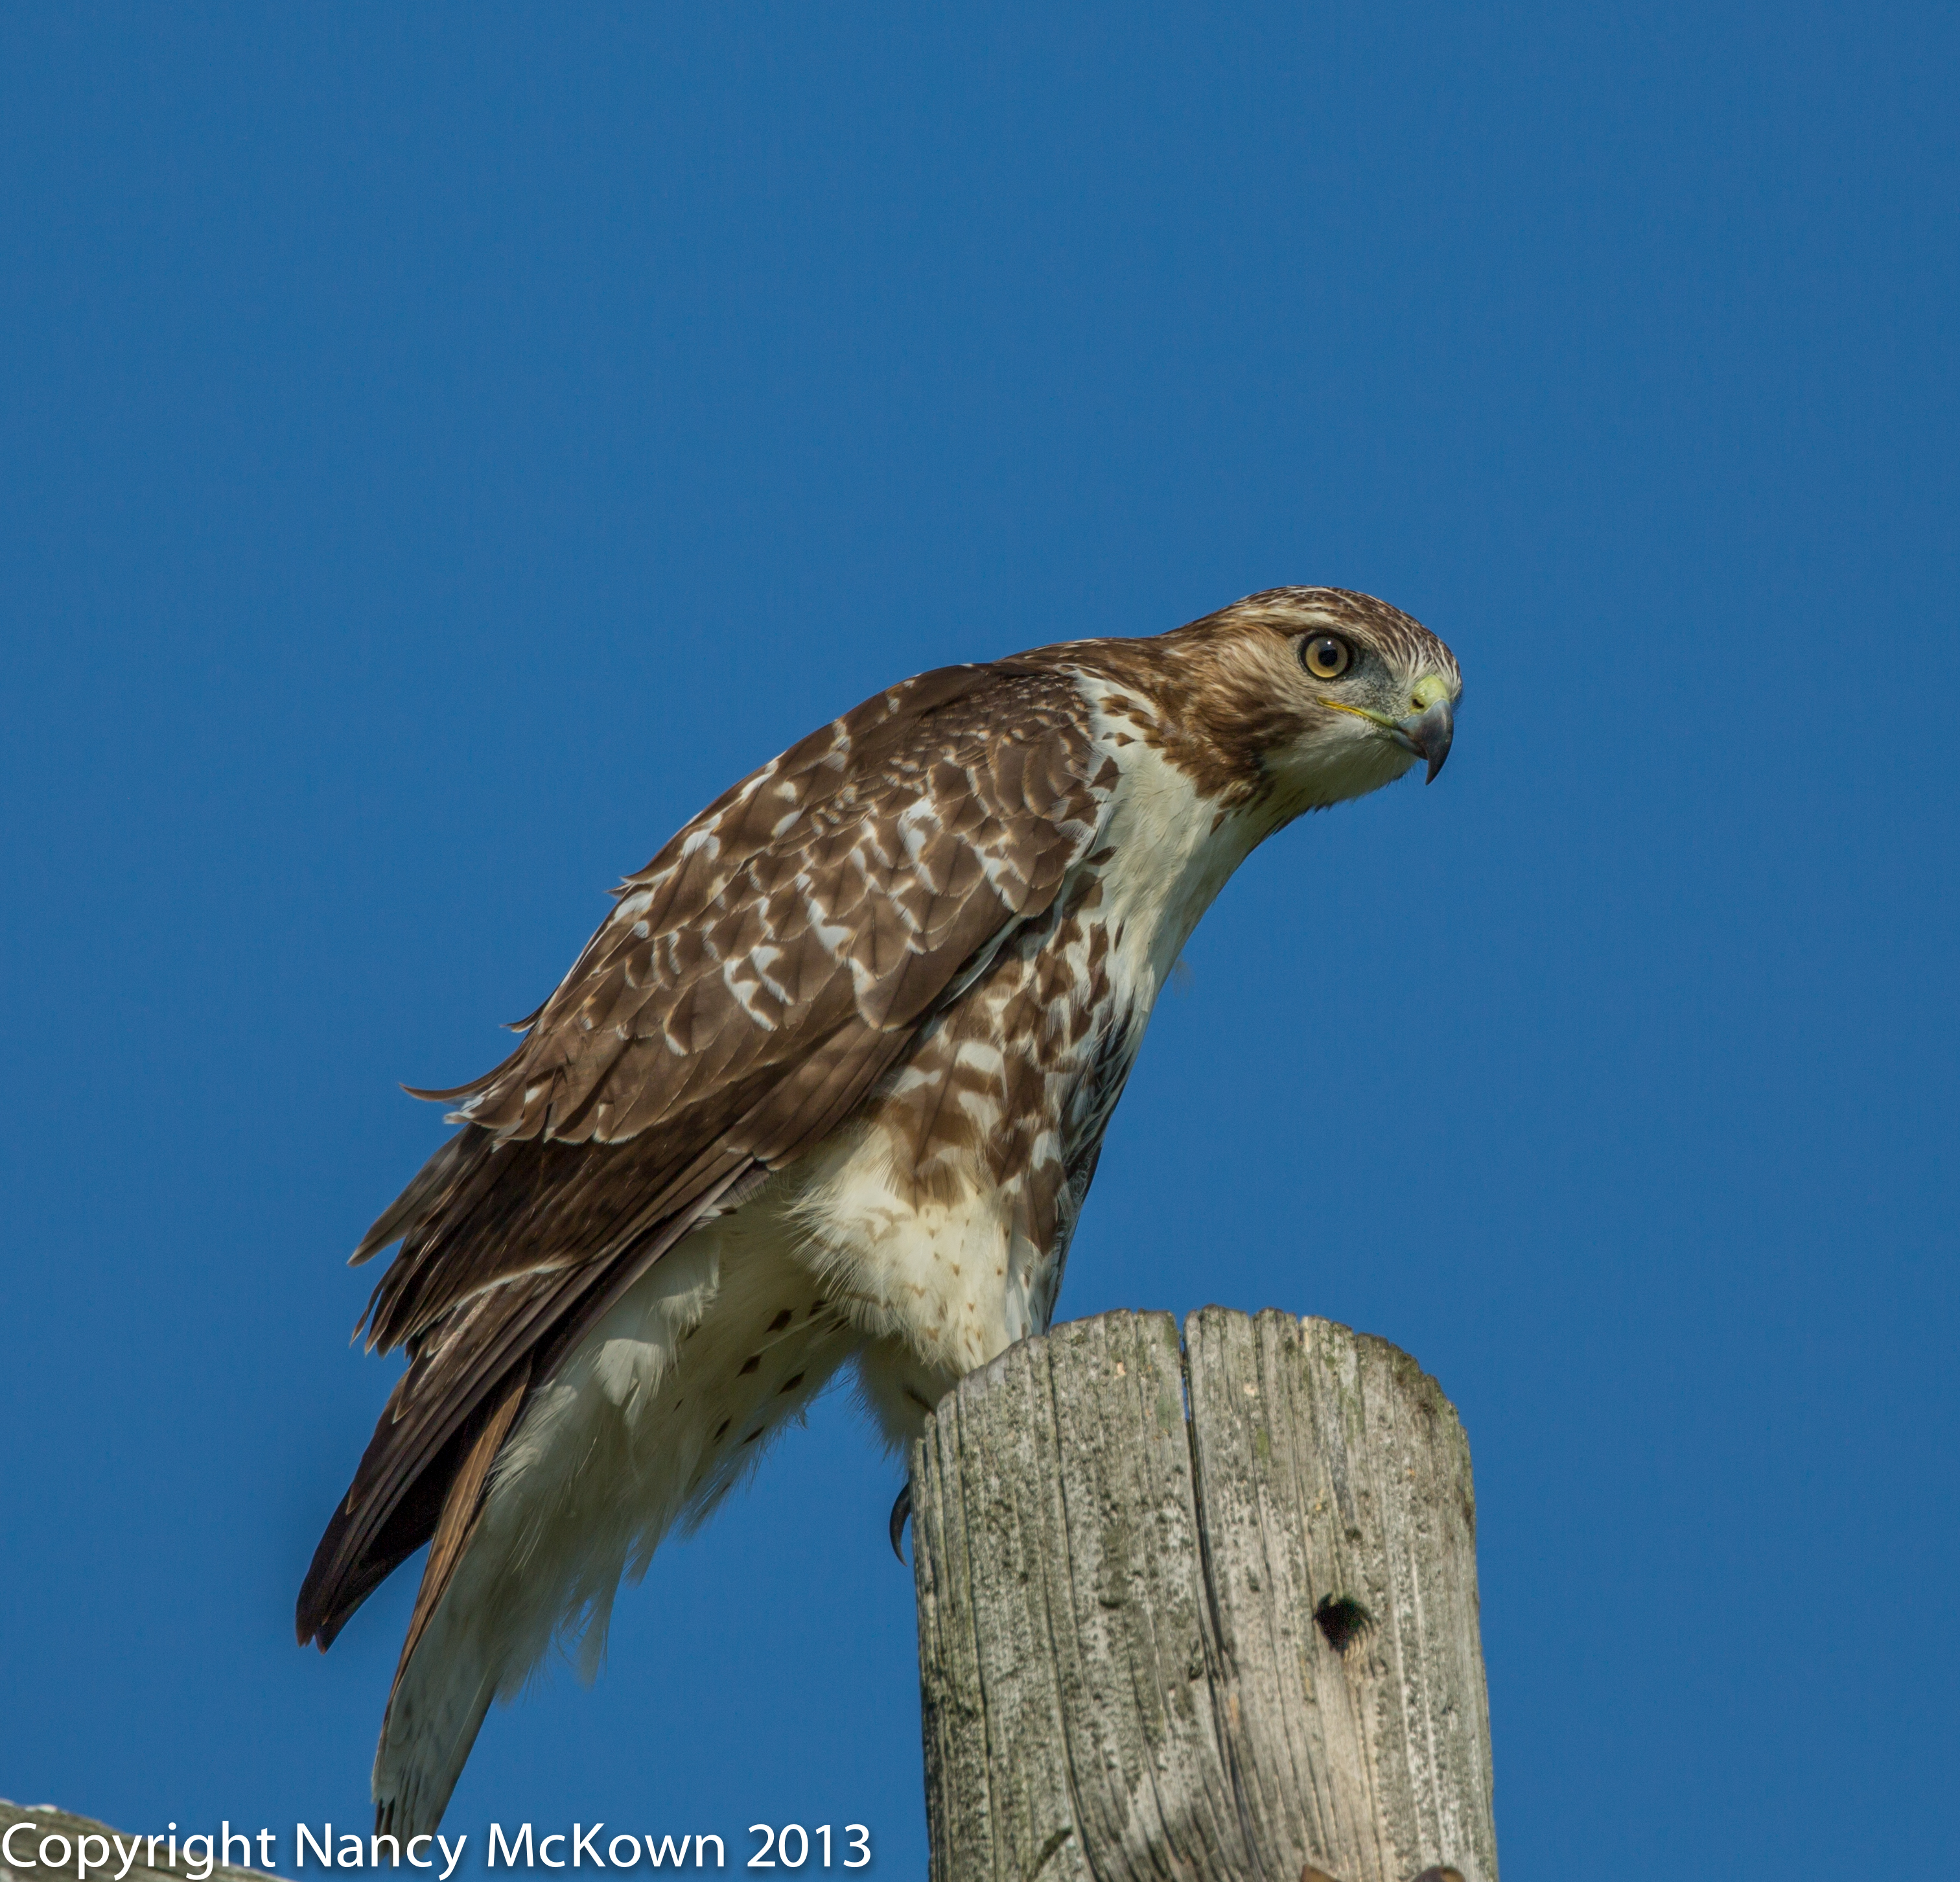
The Leaves, They Are A Changin’

Michigan is a great place to be in Autumn. The weather has been sunny and cool. Todd Farm will be open for hunting (in designated areas at designated times), so it won’t be long before the hunters dominate the fields and the birds (and this photographer) will not be out and about.

Photo of Immature Male Ring Neck Pheasant
Immature Male Ring Neck Pheasant on the side of a Country Road.
1/640 second, ISO 200, f/3.5

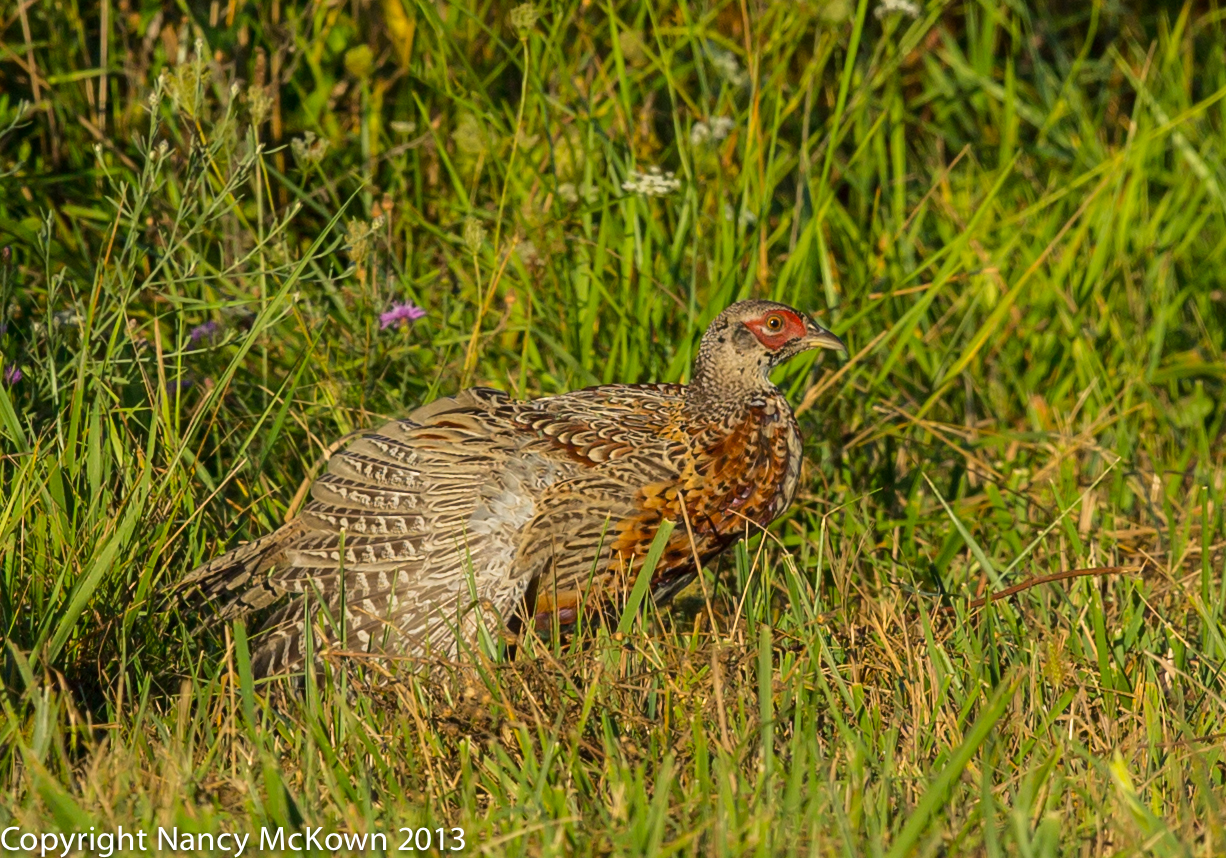
Photographing Male Ring-Neck Pheasants

Recently I came across 3 immature male ring-neck pheasants on the side of the road near a large, waterlogged ditch. They tolerated my car’s approach, but stayed close to the tall corn stalks and brush in case it was necessary for them to make a quick get away.

What a study in fall colors!  The feathers on these birds are bright, varied, spectacular and yet blend with the early autumn landscape. The mature males have elaborate green head feathers and a white ring around their necks. The hens’ feathers are a soft brown, quite plain in comparison to the males.

I have seen groups of these birds running off  in the distant fields, but have yet to digitally capture a mature ring-neck pheasant – male or female. The DNR officers said that they see pheasants drying themselves on the road after a rain. I’m hoping to be lucky enough to spot them before hunting season starts in October. I will add those photos to the end of this post if/when I do.

Stabilizer Tools for Photographers

Since the birds were not in a hurry to leave, I had time to try out my new stabilizer tool, a bean bag specifically designed for photographers to use in the field. I needed something to help stabilize the camera and heavy lens on the window ledge when I am in the car and out on the backroads. A quick response to photographing birds demands that the camera is in place and ready to shoot. A bean bag helps to provide quick and easy support on the window ledge. It would also work on a tree stump or post if I wanted to use a remote shutter release out in the field.

The bean bag offers some tension relief for my neck and back. It also allows me to quietly swivel the camera as needed to follow the action without scratching the window ledge or the camera lens. NOTE:  I usually have the camera strap around my neck just in case of a spill.

Unfortunately, the bean bag supports the camera right on the window ledge and consequently, does not always give me the height I need for some shots. For eye level support, I rest my camera on a contoured, high density foam neck pillow.

One More Support Tool for Photographers

Often times when I’m driving, I see the bird I want to photograph through the passenger side window.  This requires that I quickly move the camera from my window and point and shoot out the passenger window. Since I can’t reach the passenger window from the driver’s side, I can’t rest the lens on it, so I am hand holding that heavy camera/lens – trying to compensate for the inevitable shake with a high shutter speed. (The image stabilizer helps with the shake too.)

I bought a rather large storage bin that rests on the passenger seat; upon which I can stabilize the camera before I aim and shoot through the passenger’s window. This bin also provides enough space inside to store the camera when needed.

Photo of Two Immature Male Ring Neck Pheasants
Two Immature Male Ring Neck Pheasants
1/800 second; ISO 200, f/3.5

Upland Game Birds

My husband said that ring neck pheasants are upland game birds, along with grouse, prairie chickens, partridges, quails, and wild turkeys. They are not native to Michigan, but brought over from China in the mid 1800’s as game birds. They do fly, but their get-aways are more successful if they duck and run. (Survival of the fittest, the flyers were more likely to be shot by hunters.)  These young males have probably not yet experienced a Michigan hunting season.

And finally, just in case you need a refresher of the Autumn colors to come, here’s a close-up photo showing the variety of Autumn colors and intricate designs sported by the immature, male ring-necked pheasant.

Photo of Pheasant Feathers
This Young Male Pheasant sports a Cornacopia of Autumn Colors, not to Mention Gorgeous Feather Designs


Photo of Blue Heron Eating Grasshopper

Close up Photography with a Telephoto Lens – Focusing on the Details

A Great Blue Heron Out of Its Element

We were driving on the backroads in Allegan County searching for birds in the corn fields when we came across a very large bird that was not only out of its natural element, but strangely unafraid of moving cars and humans.

The Great Blue Heron is a long legged, wading bird usually found near water. Its long neck and sharp beak make it highly adept at fishing.

We came across this heron on a very dry looking country road. He was “fishing” for insects in the rows of corn.

When A Bird Lets You Come Close With Your Camera

The strange part about this particular bird was that we were not only able to move in very close, but we were also able to get in and out of the car as needed. The heron was not about to come meet us, but he definitely wasn’t fearful and did not attempt to fly off.  We were able to get so close that the 300 mm lens with 2x extender (600mm) was too long to get the entire bird in the view finder.

Instead of removing the 2x extender and using the 300mm focal length, I decided to leave it on and take advantage of the sharp, close-up possibilities that a telephoto lens can provide.

Photo of Great Blue Heron Eating a Grasshopper
Close up of Great Blue Heron Out in a Corn Field, Feasting on a Large Grasshopper.
f/6.3, 1/2500 second, ISO 640. 300 mm lens with 2x extender.

Macro Lenses Not Preferable for Bird Photography

I owned a Canon EF 100mm f/2.8L IS lens with macro. I used the macro for flowers and insects, but it never worked for photographing birds. I ended up selling it.

Even though macro lenses will let you capture incredible, close up detail, I found that it was not practical to use a macro lens in bird photography because it requires that you get as close as 2 inches away from a bird. When does that happen?

Telephoto Lenses Work Well for Close-Up Photography

If you want close-up photos of a bird, or bird parts, you can use your telephoto lens. This is especially true if you and your lens are able to get close enough to the bird to capture the details.

Photo of Grasshopper Trapped in the Beak of a Great Blue Heron
Close-up of Grasshopper Trapped in the Beak of A Great Blue Heron

Zooming In With Post-Processing Software

Close proximity to your subject is essential to get the tack sharp details. The less zooming you need to do in post processing, the clearer the close-up details will be.

Post processing software will help you to zoom in on any portion of a photo. As I wrote in my post labeled “How to Photograph a Great Blue Heron – Part 1”, digital images are made out of pixels/dots. You enlarge the dots when you zoom in to a relatively small component of the photo. The more you zoom in on a detail in the photo, the larger the dots become. As the pixels/dots enlarge, the image becomes less clear.

Photo Details

I like the long beak in the first photo. It’s all scuffed up; as if this crane has been in a lot of sword fights. And, of course, the details seen in the close-up of the poor, doomed grasshopper trapped in that razor sharp beak is fascinating. I would not have seen that detail if I was not able to get as close with my long lens.

So when a bird allows you to get close, take advantage of your long telephoto lens and focus in on details that interest you.

How to Photograph Red Tailed Hawk

Photographing the Red Tailed Hawk

Where the Hawks Are

It seems I’m always looking up, hoping to spot birds. Going down the road one morning, I spotted a red tailed hawk at the top of a utility pole, scanning the cut corn field looking for a meal. I knew the sun was too high and too bright to get a well exposed photo. Worst of all, the hawk was east of the highway, at my 2:00, so my lens was facing the sun. We pulled off the highway anyway.

From the passenger seat, I propped the camera (with the 300mm lens and 2x extender attached) on the window ledge, aimed, and took some test shots. I looked at the histogram and could see that the light wasn’t bad enough to send the graph clipping over the right side.

So what do you do if  the sky in the background is brighter than your subject in the foreground?  Here are 3 suggestions to address this problem:

1)  Attach a Graduated ND filter.  The photographer adjusts the filter on the lens so that the dark part is at the top (to reduce the amount of the light from the sky).

2)  Adjust the Ambient Light Exposure Compensation. (See post about histograms and exposure compensation called “Photographing Sandpipers on the Beach”.)

3)  Make the adjustments when you get back home with your post processing software.

I decided that this time, I would solve the uneven lighting problems in post processing.

Post Processing Software to the Rescue

The camera display confirmed that the photographs from this light and this angle would be full of unattractive shadows and highlights. These photos would definitely not be keepers; unless I was willing to spend a little time adjusting the exposure, light and shadows in my post processing software.

Photo of Red Tail Hawk - Before Processing
Red Tail Hawk as Shot – No Adjustments.

RAW and JPG Formats

There are generally two choices a photographer has to record digital files on the memory card;  RAW and JPG.

RAW files are not processed or compressed by the camera’s computer. Consequently RAW files retain much more information that can be manipulated (when you get back home) by post processing software.

JPG files are processed and compressed by the camera’s computer. A JPG file will therefore provide fewer details that the post processing software can manipulate.

Because RAW files are not processed, the digital files are much larger than the processed JPG files. This is a consideration when choosing between JPG and RAW formats because RAW files take up much more space on your camera’s memory card. And, since it’s a much bigger file, it will take the camera more time to save the data to the memory card.

Photograph in RAW Format If You Want Maximum Post Processing Control

I always shoot birds with the camera set to RAW format. It’s a big advantage to start from scratch, with all the data, when the lighting is subpar and post processing is needed. Many cameras allow the user to save both the RAW file and JPG file for each photograph. I would not recommend this setting because your camera is recording double the number of files on your memory card. It is, however, a good way to see the difference between how the same image looks in RAW and JPG.

NOTE: Since RAW files are so big, it is critical to start out every shoot with plenty of high capacity memory cards- at least 16 GB and usually 32 and 64 GB.

Photograph of Red Tailed Hawk
Photo of Red-Tailed Hawk -After Adjustments were Made to RAW file in “Lightroom” Post Processing Software. Voilà!

Post Processing Software

There are lots of free post processing software programs to choose from, and your camera may have come with its own software for this purpose. The free stuff does a good job, but the fixes they provide are limited, mainly because the problems they address tend to be “one size fits all”.

The first photo is shown as it came out of the camera, with no post processing adjustments. It is simply unusable in this state. The second photo is the same photo, but the highlights and shadows, details and exposure are adjusted in Lightroom 4.

Many more basic post processing options are available in Lightroom; like crop/rotate, adjust color/exposure, sharpening, noise reduction, etc. It’s also a great tool for organizing, sharing and backing up your files. The software is easy to learn. And, if you do need help to learn Lightroom, (or any post processing tool) there are plenty of targeted resources on the web.

Don’t Pass Up The Photograph Because of Uneven Light

Light will be one of the biggest challenges you will face when photographing birds. With the right post processing software, you won’t have to pass up a shot because the light is not optimal.