Monthly Archives: October 2015

Photographing Black Throated Green Warblers and Understanding the “Blinkies”

Photo of Black Throated Green Warbler
Black Throated Green Warbler
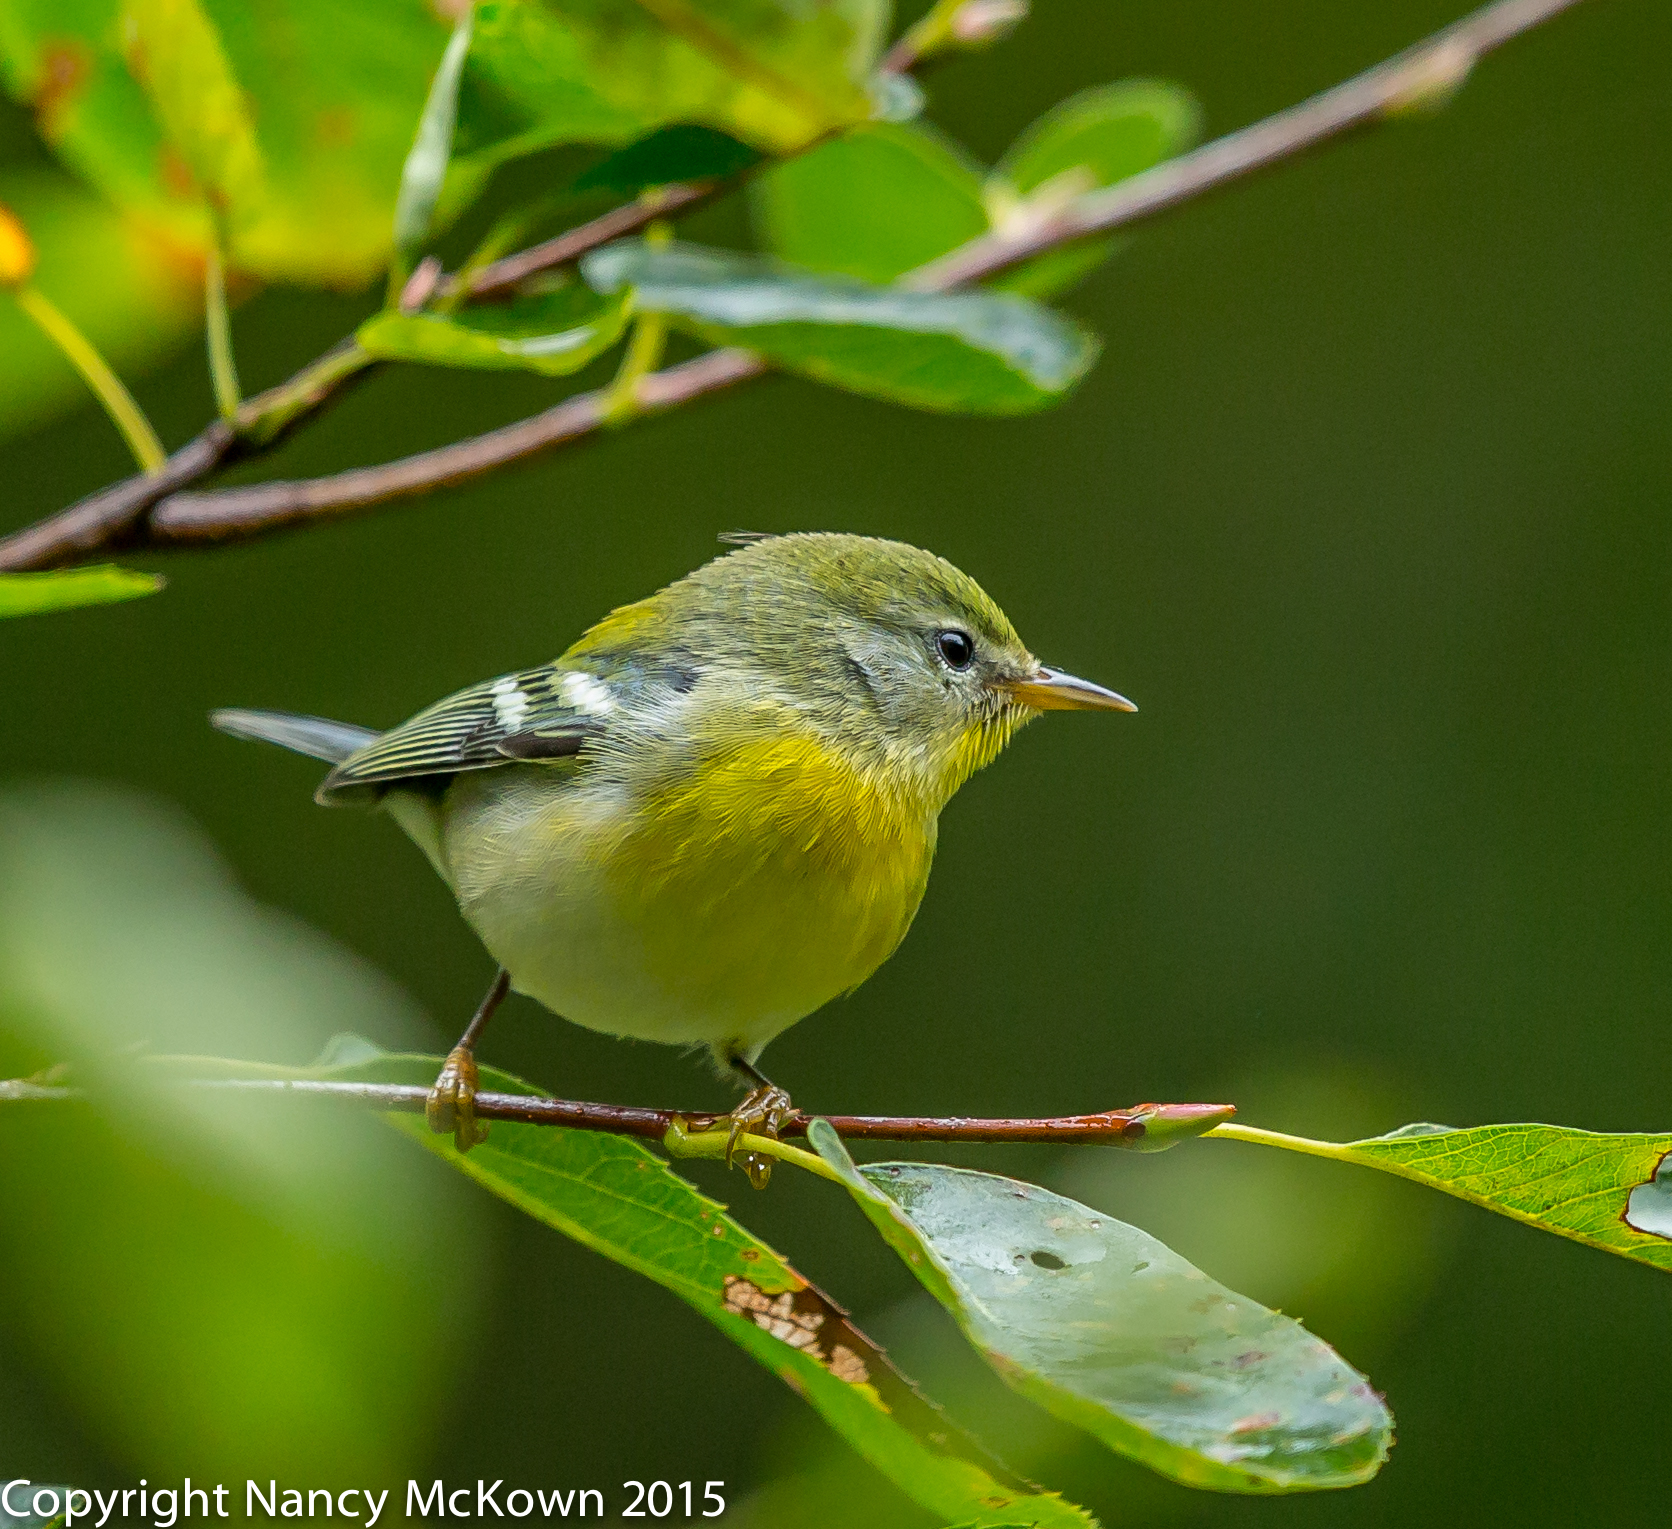
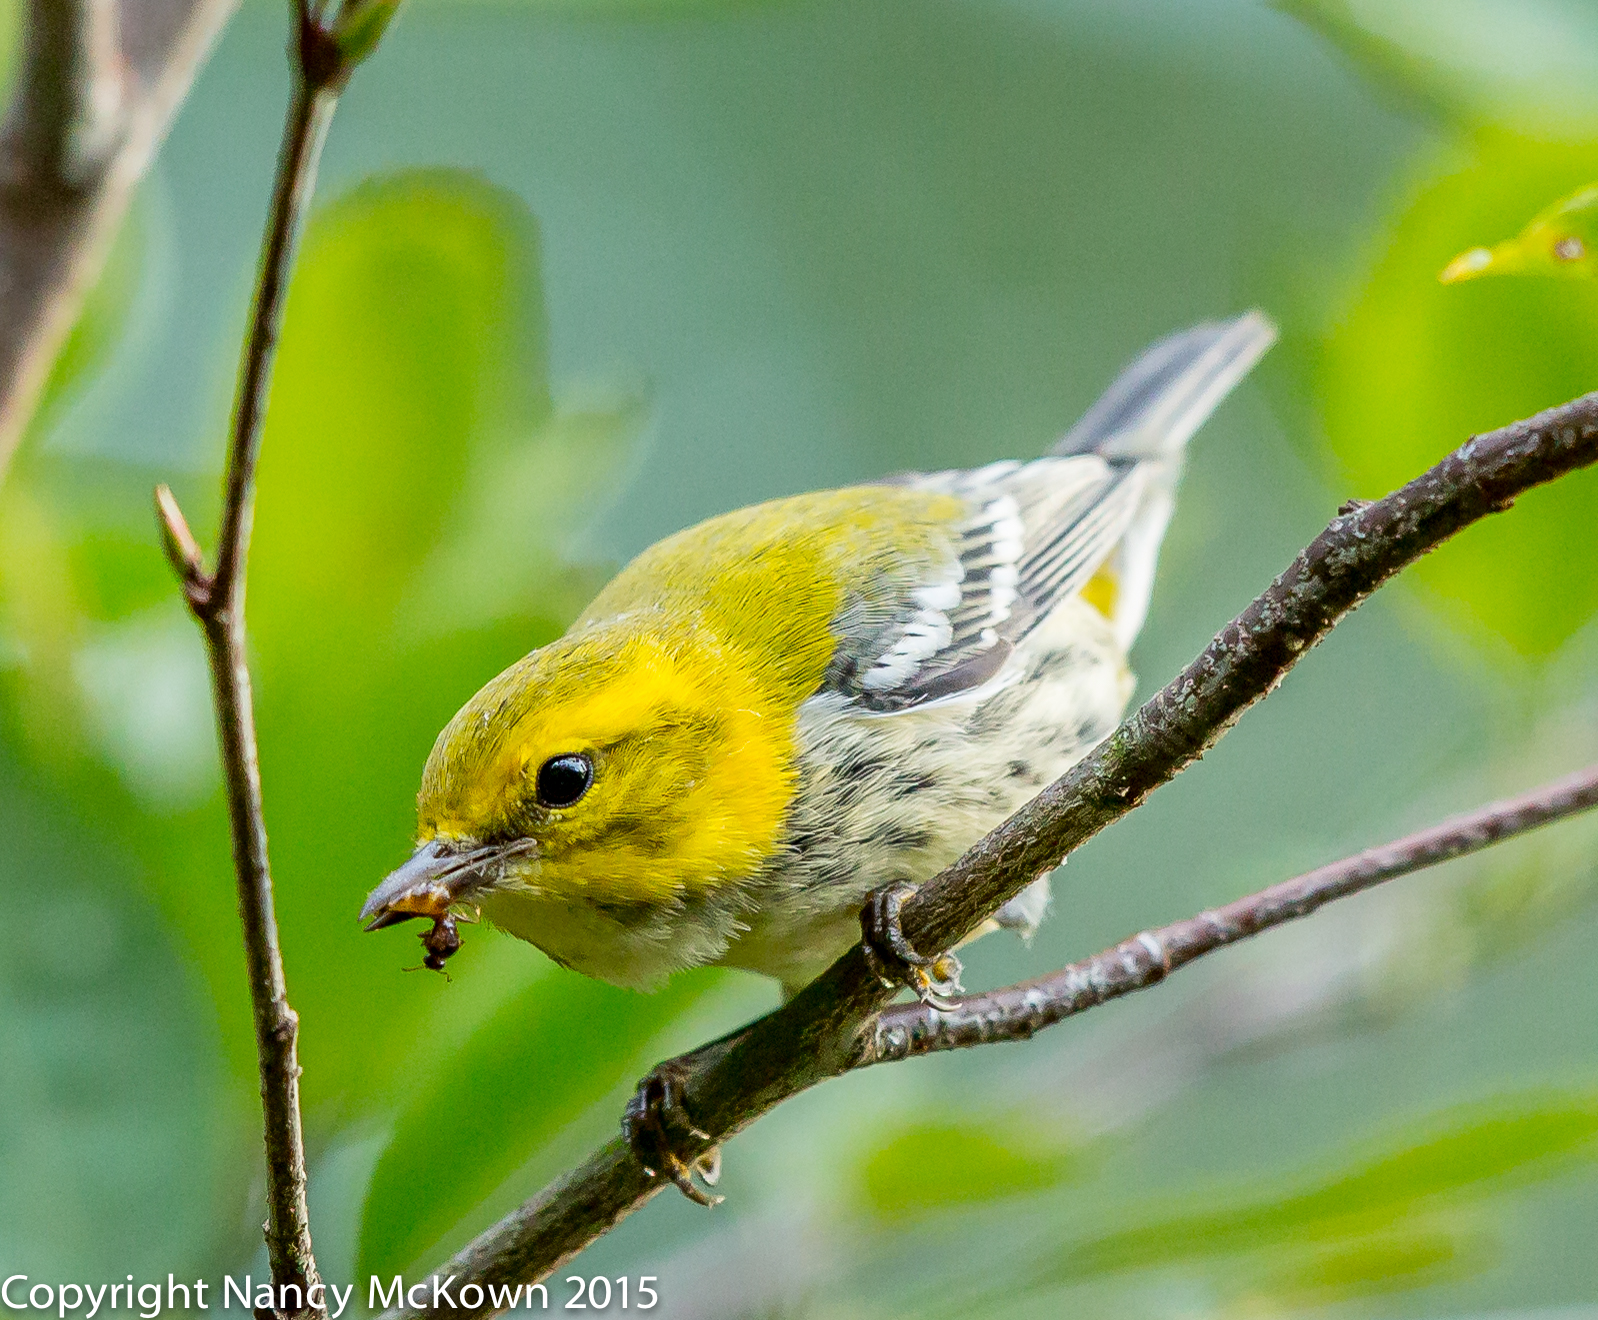
Not Much of a Black Throat- Possibly a Female.
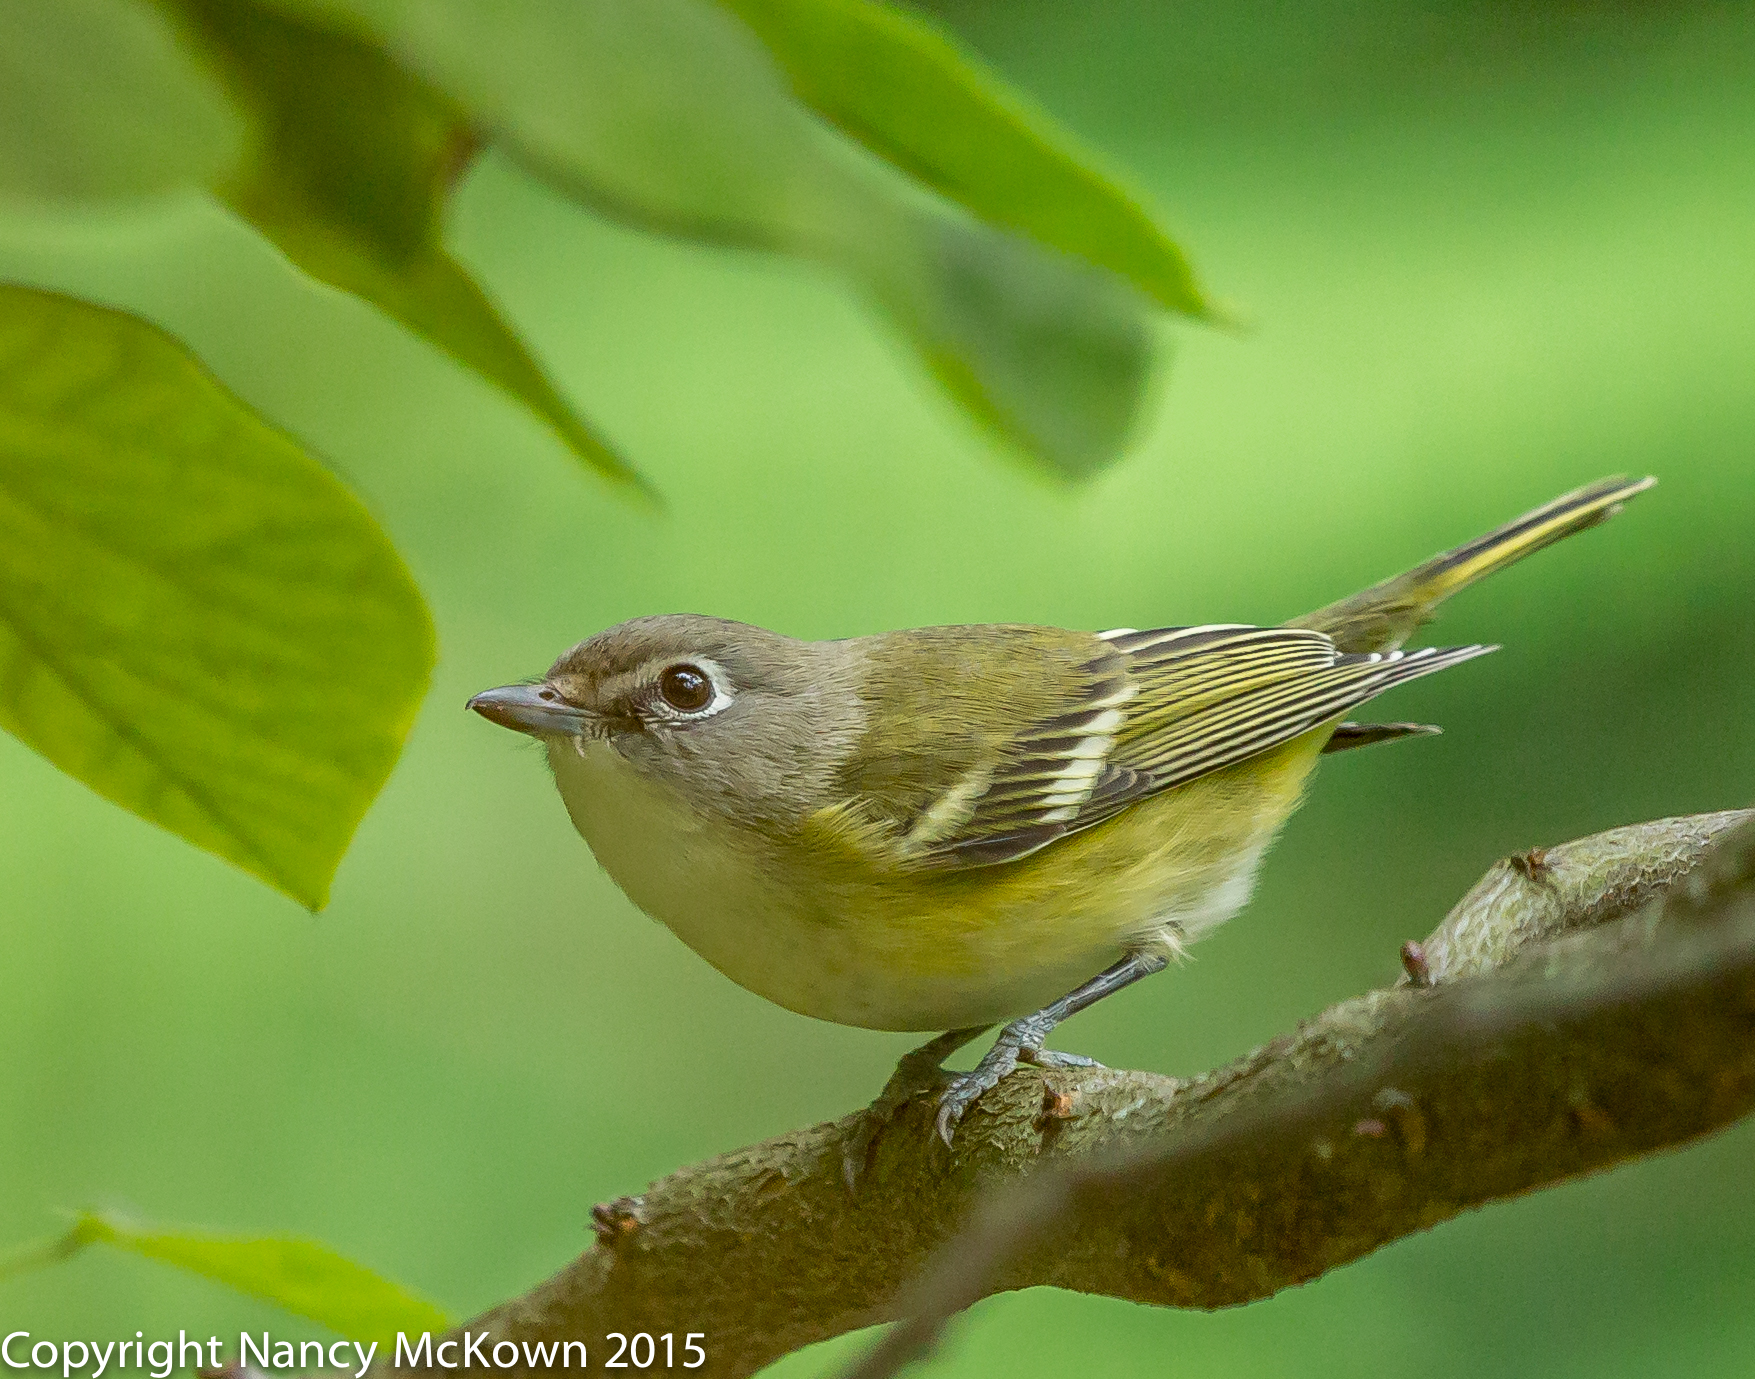
A More Balanced Light in the Background.
ISO1600; f/4.5; 1/640 Second

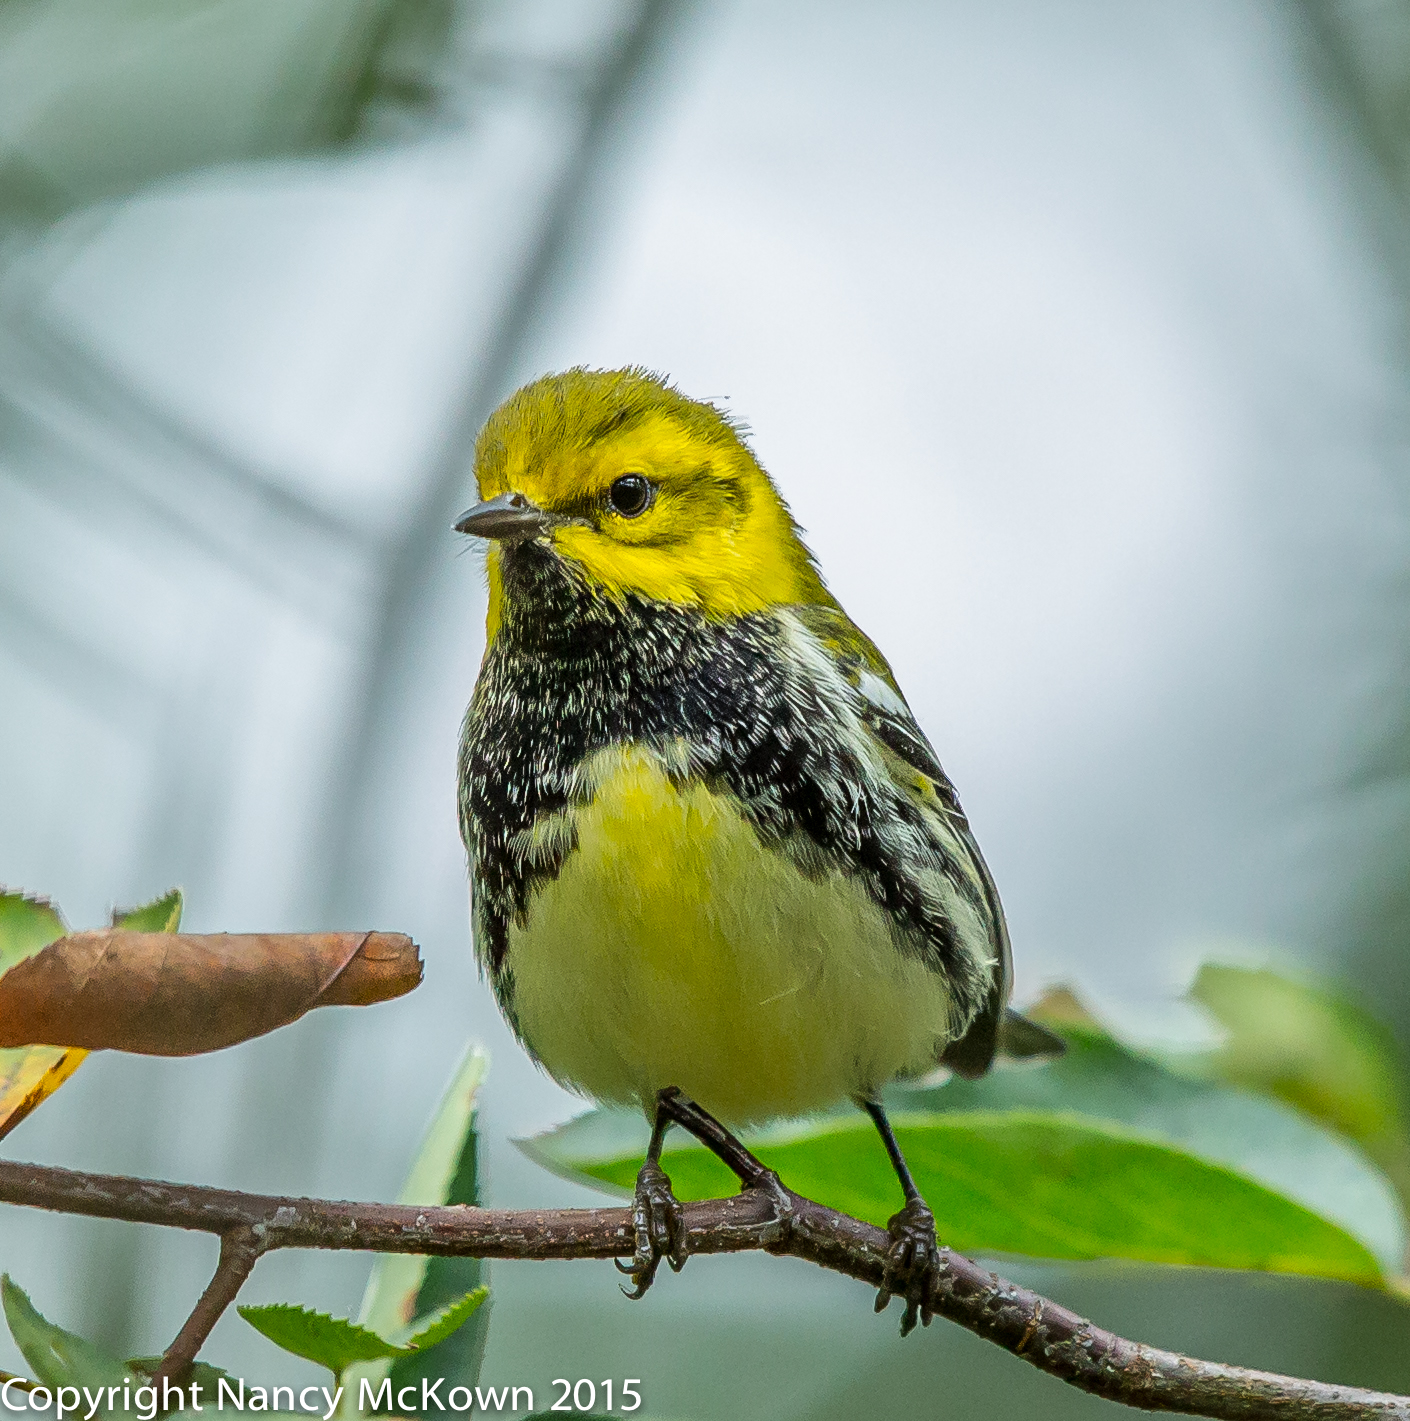
Overpowering Background Light

I photographed this Black Throated Green Warbler in late afternoon on a bright day when the bird was perched high in the Serviceberry tree. My lens was pointing up, and I could see the bright patchy sky in the background was confusing the sensor. (See photo below.) The highlight alerts confirmed that these backlights were overexposing the images, rendering certain areas with little or no detail. These colorful warblers don’t come around that often, so I had to quickly adjust exposure to let in less light— but not to the point where the bird registered as too dark. I also had time to switch the metering mode from Evaluative to Partial Metering, which helped the sensor better read the important areas of the image.

Photo of Black Throated Green Warbler
Black Throated Green Warbler.
Exposure Adjusted While Shooting and in Post
Processing to Offset Bright Background.
ISO2500; f/5; 1/500 Second.

Highlight Alerts

A Highlight Alert is basically a quick check of overly bright areas (overexposure) on the image. If you have turned on this option on your DSLR, you will see blinking alerts on your review screen after you’ve taken the photo. If the alert is not in an obvious or important portion of the image, the patch of overexposure does not matter. Ignore the blink and stick with the initial exposure readings. If the blinkies cover large areas of the photo, it’s probably best to quickly adjust your exposure settings. If there’s time and opportunity, move to a different location and reshoot.

As happens so often in bird photography, you may be in a situation where you have no choice but to move quickly and precisely and consequently, you have no time or opportunity to check highlights and reshoot. After all, ignoring the highlight alerts may not be a problem, assuming you shoot in RAW and make exposure adjustments in post processing.

Photo of Black Throated Green Warbler
Black Throated Green Warbler.
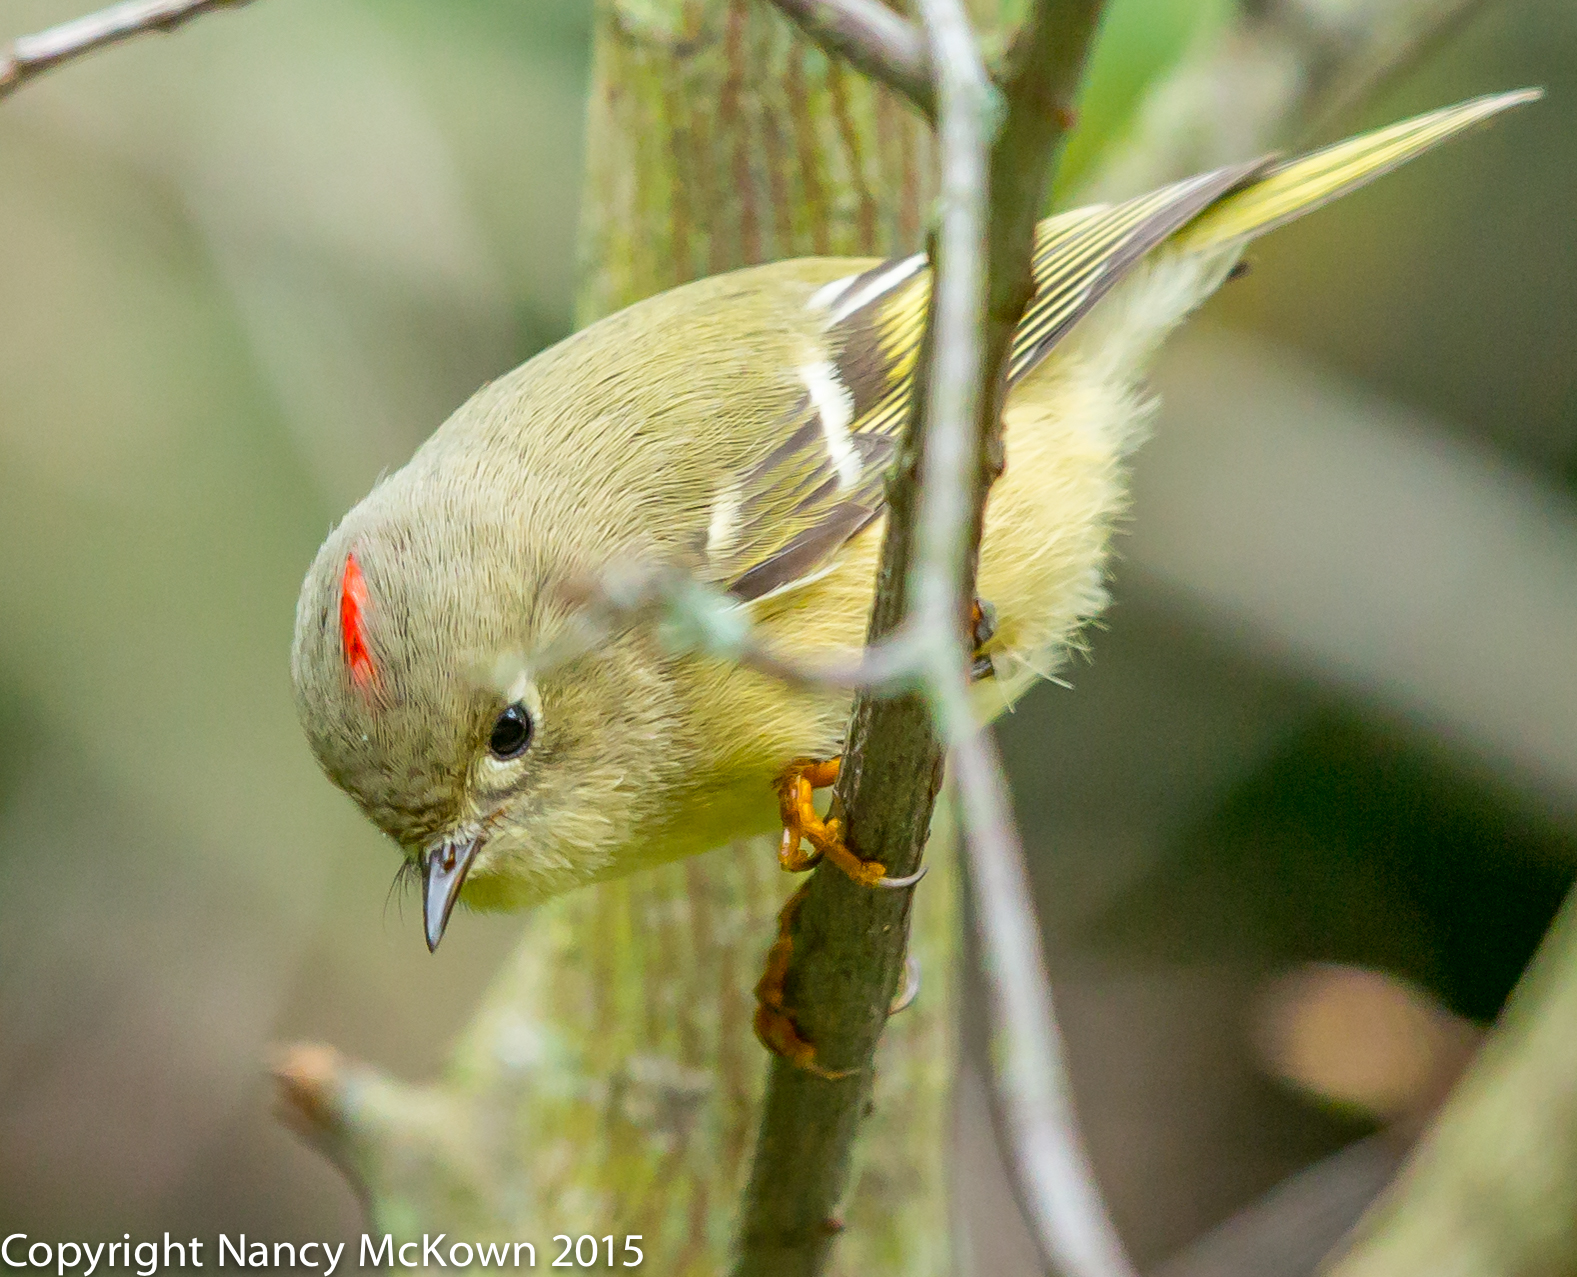
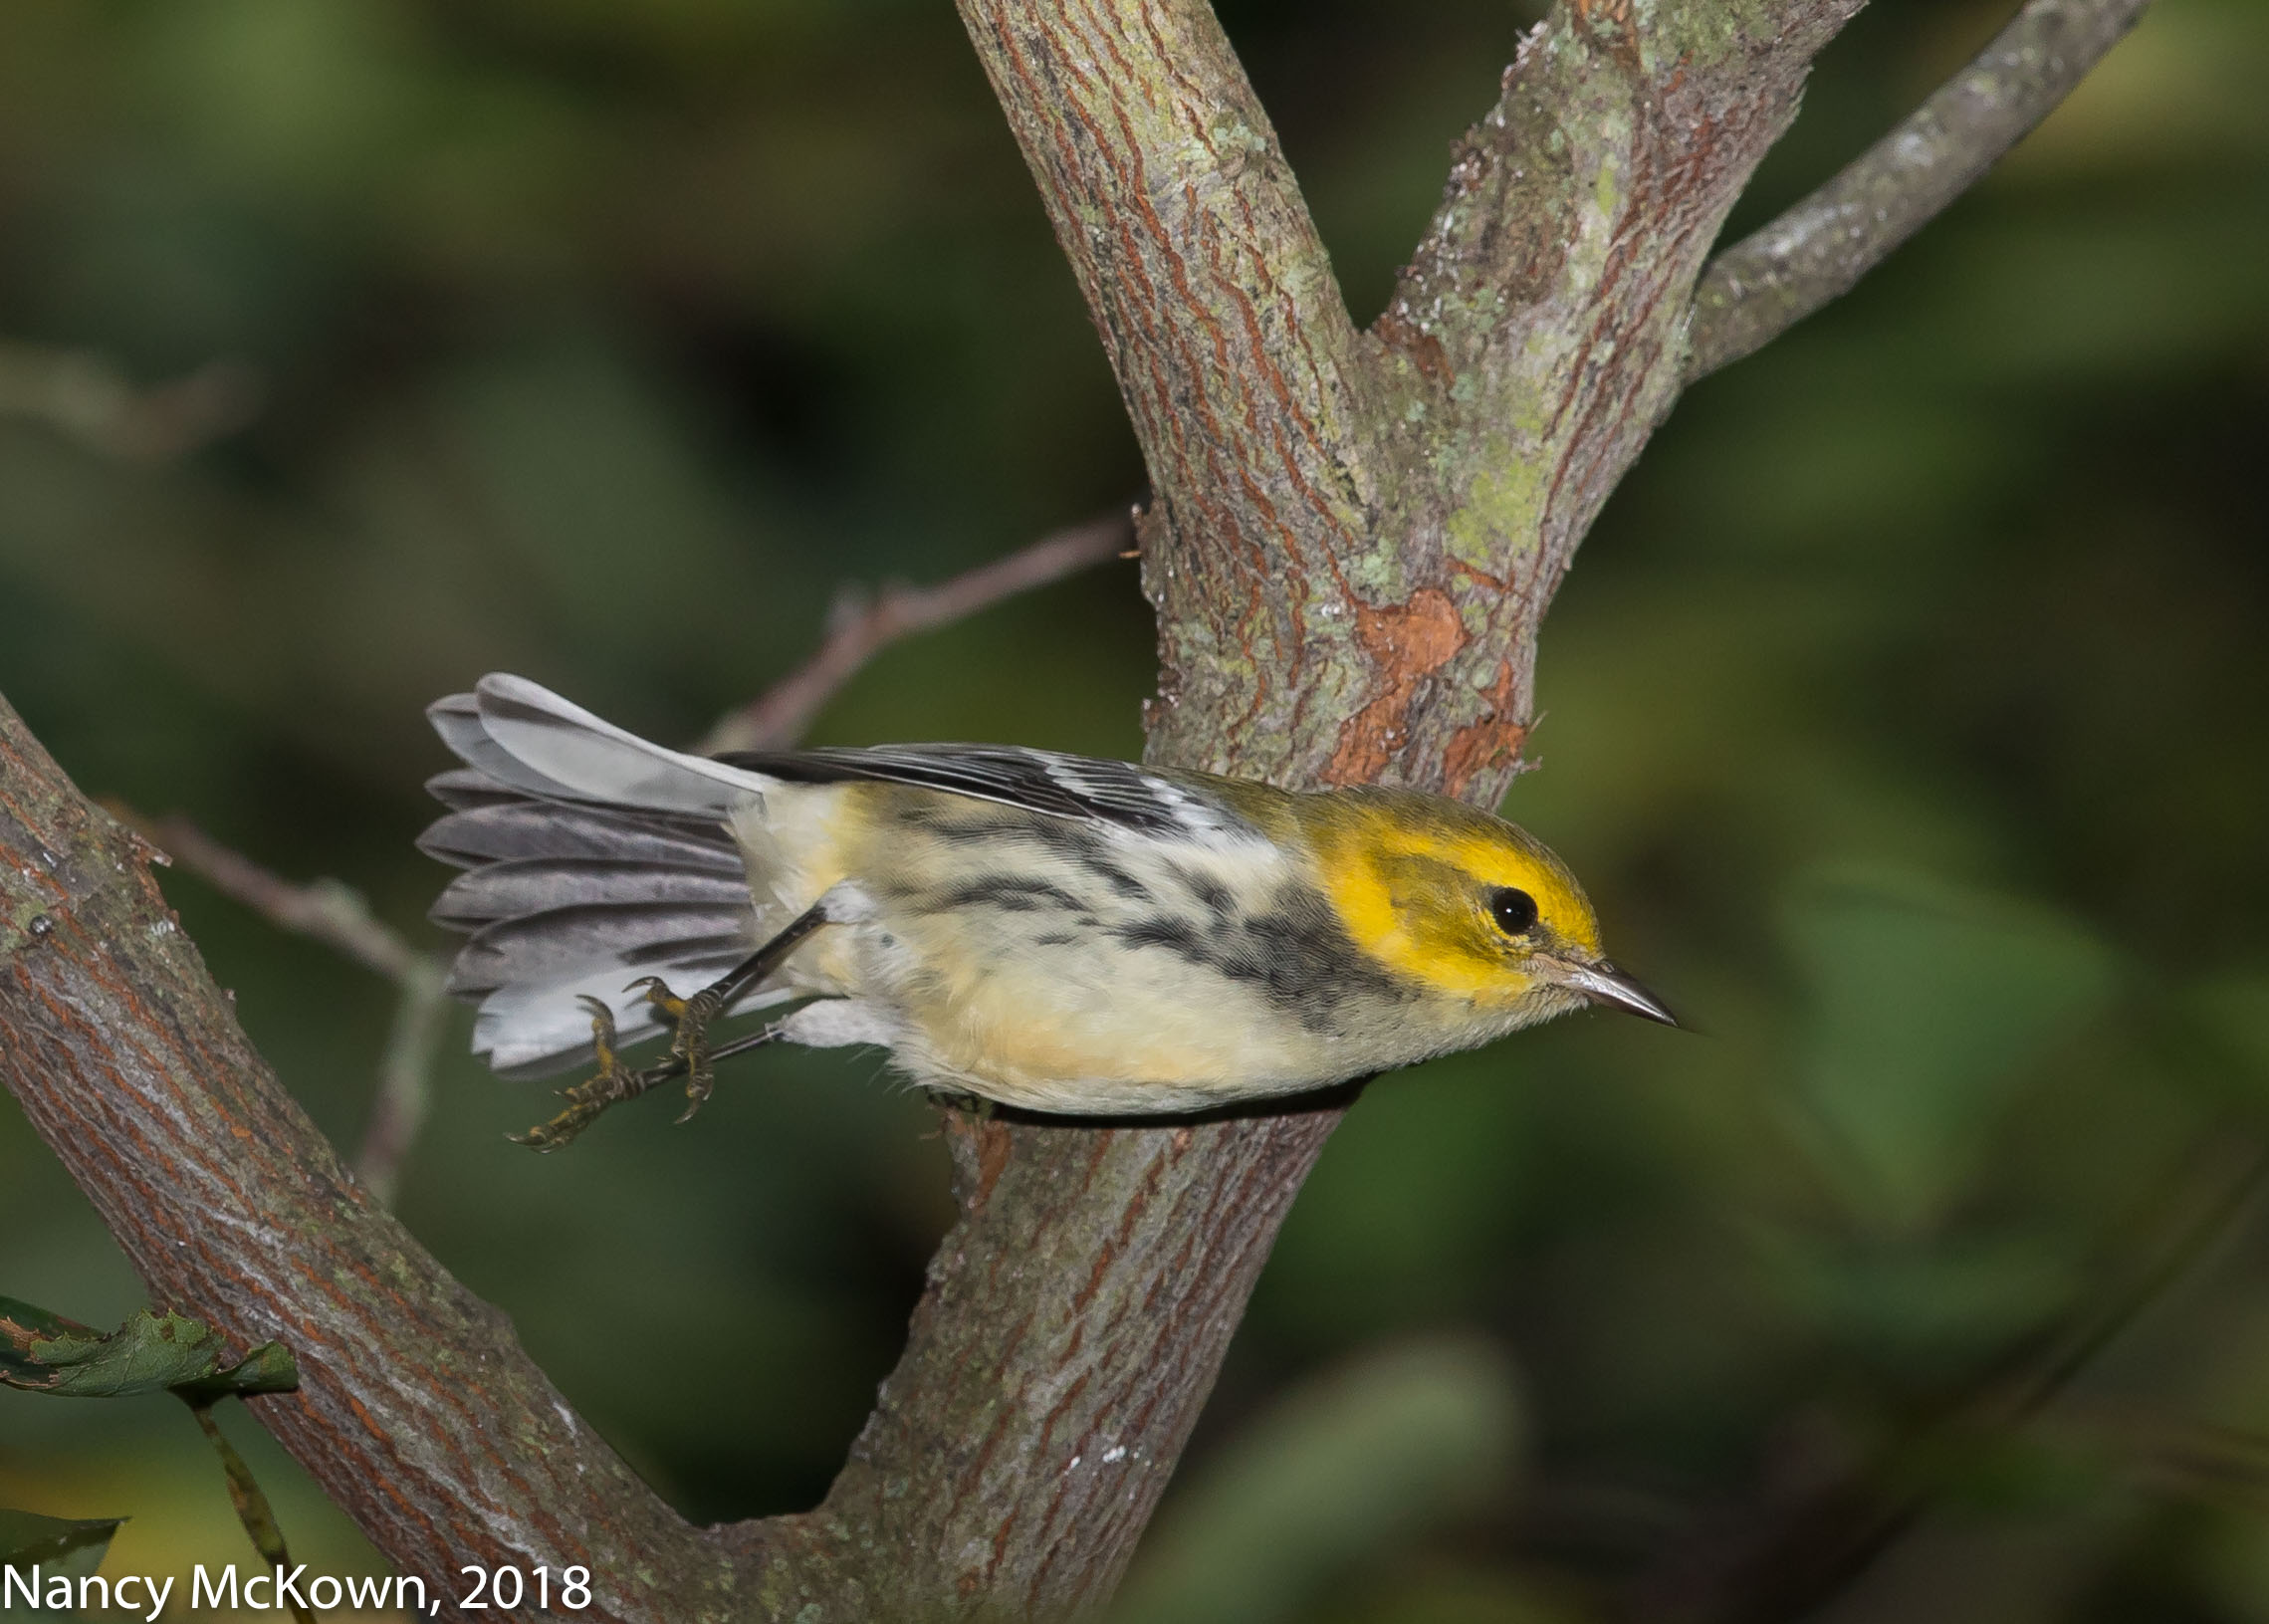
He Hopped down to a Lower Branch, so I was
able to tilt my lens away from the bright background.
ISO2500; f/5; 1/500 Second.

The Thrill Can Be Distracting

The more time I spend behind the camera, the more adept I am at recognizing when harsh background light will cause a problem with the sensor correctly gauging exposure. Nevertheless, I keep the highlight alerts on my camera turned on because the excitement of photographing a new bird can distract me to the point where I’m not paying attention to conditions that can mess up exposure readings.

The best way to check overall exposure while in the field is by checking and correctly reading the histogram. See this post for more information.


Black Throated Green Warbler
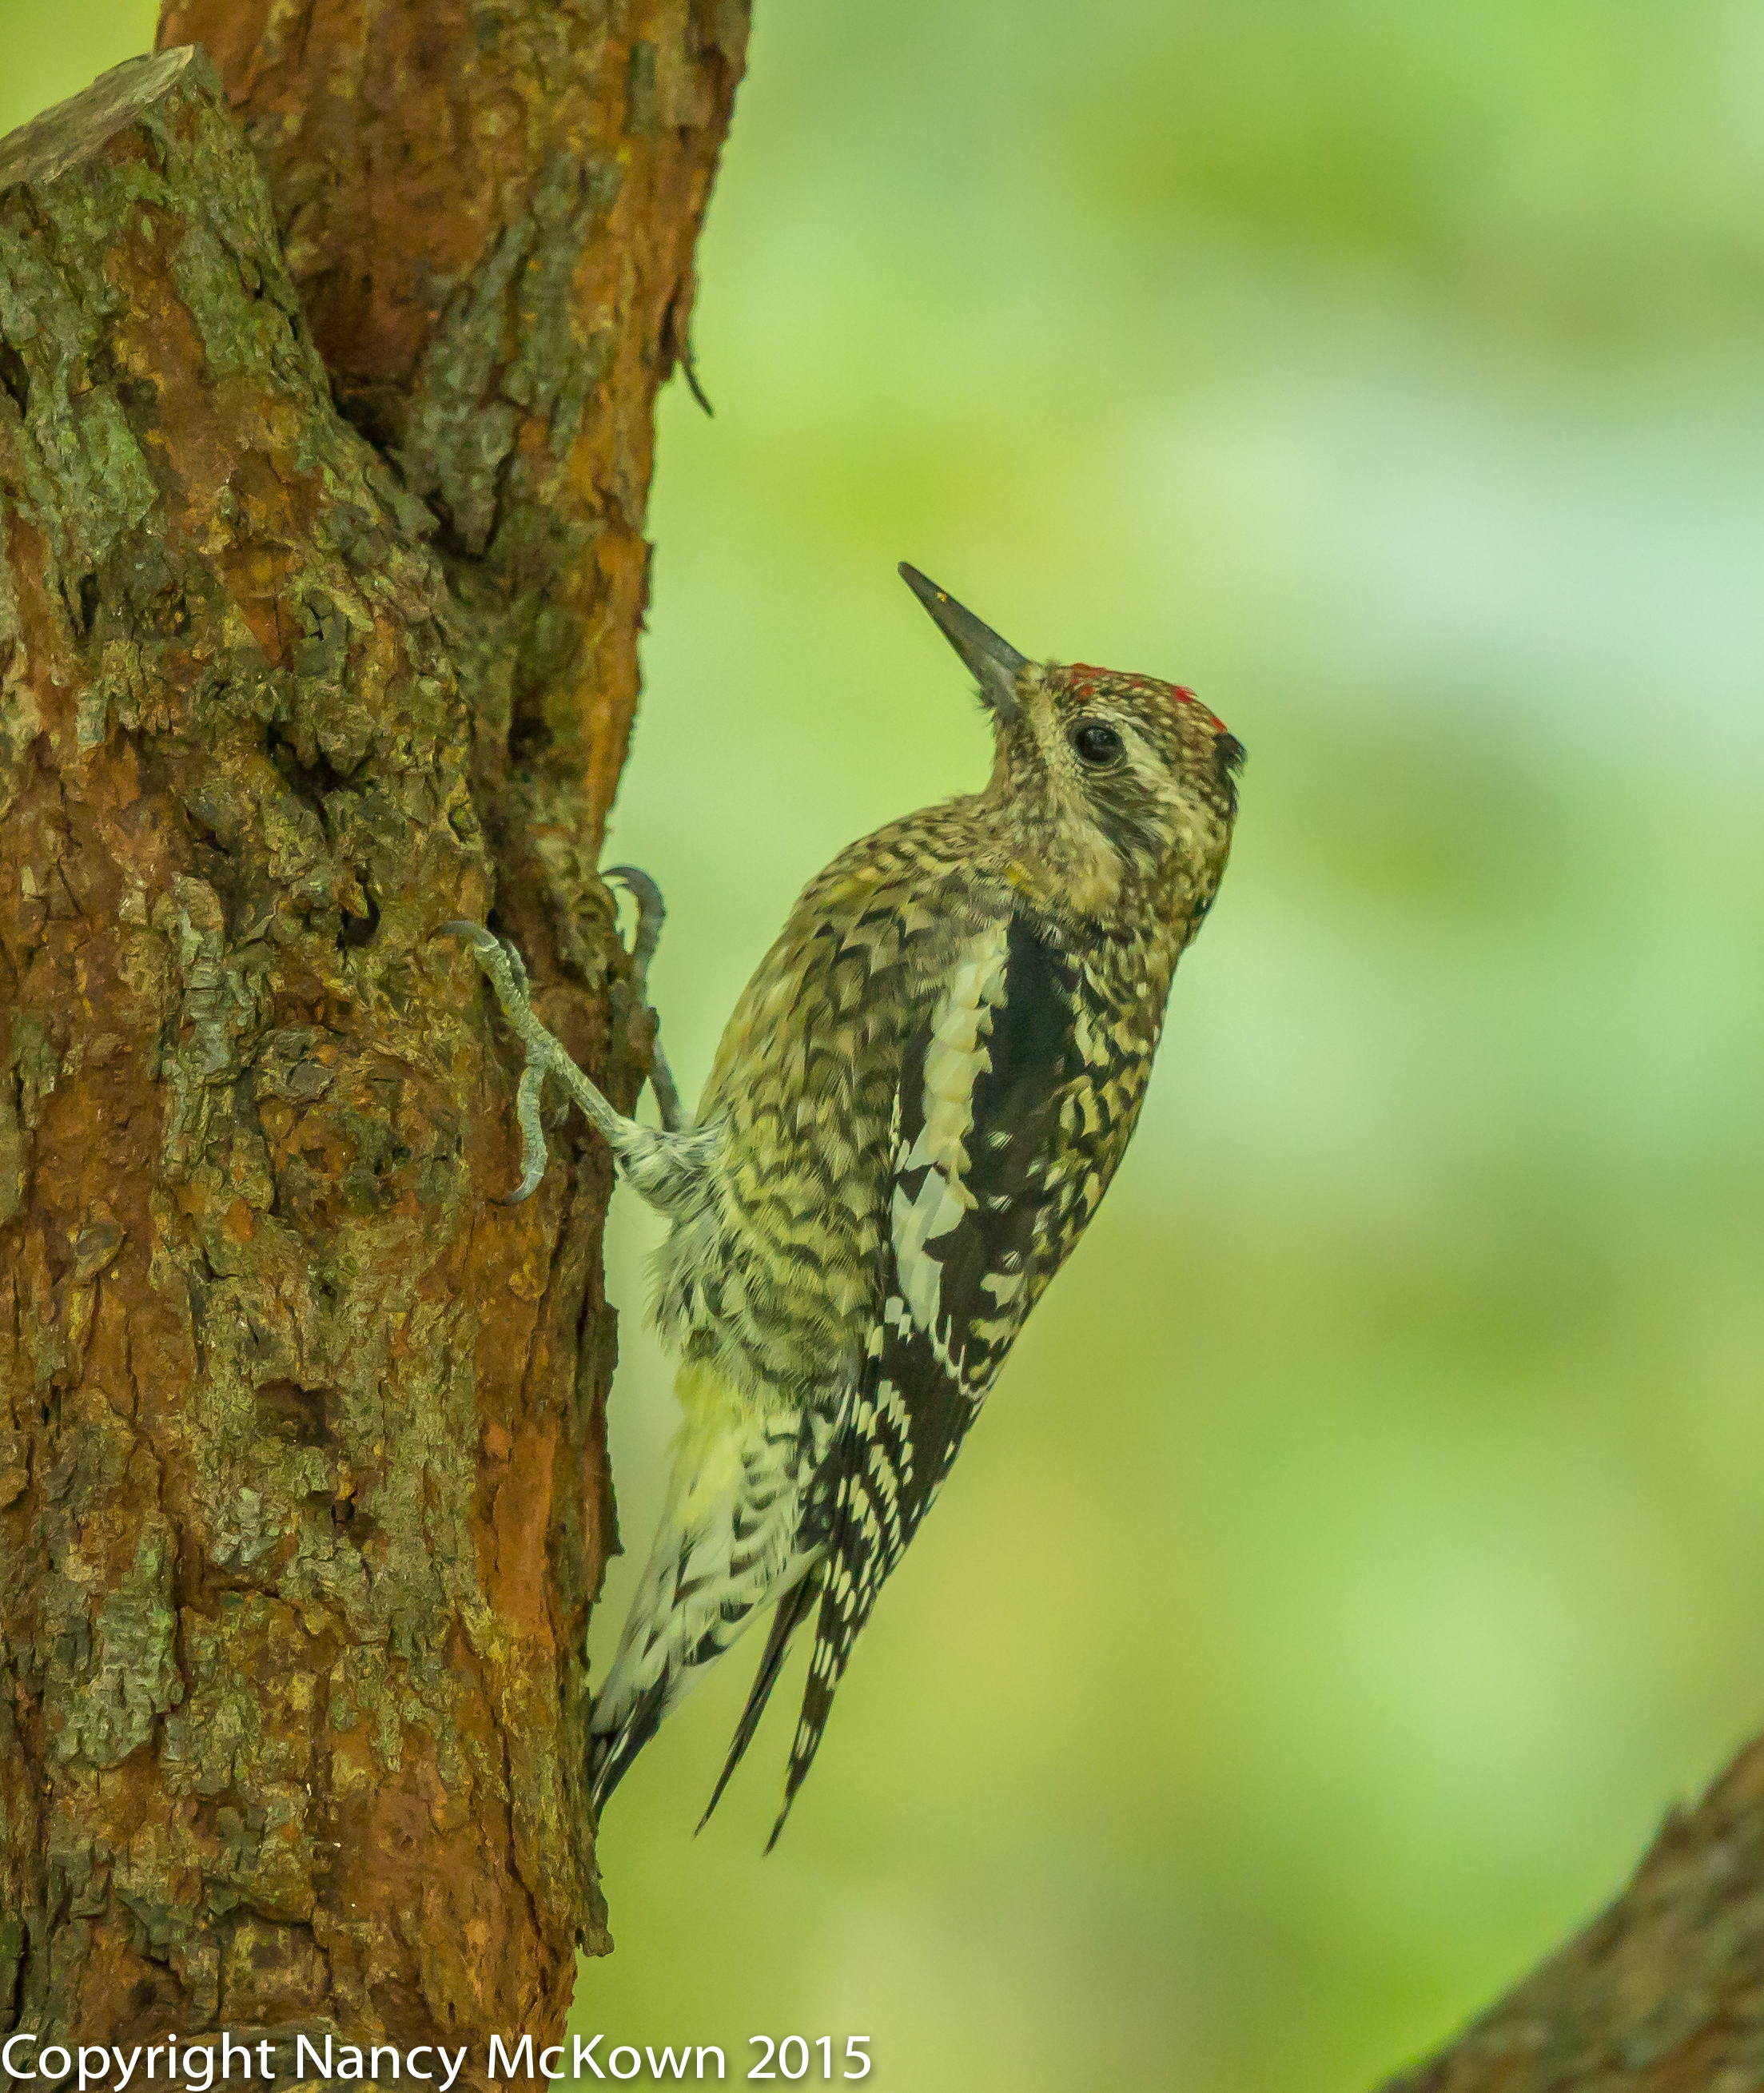
With Flash.  Photographed in Fall, 2018 
ISO400; f/7.1; 1/200 Second


Photographing the Ruby Crowned Kinglet – Up Close

More Light- Fewer Leaves

The sun filtering through the trees was bright… no doubt because the canopy of deciduous  trees above my house is full of holes left from fallen leaves. The migrating birds can not hide as well on the branches closest to my house, but a few tired and hungry ones still come to rest and replenish.

Photo of Ruby Crowned Kinglet
Ruby Crowned Kinglet
ISO1250; f/5.6; 1/500 Second

The Photographer as Wallflower

On windy days, it’s interesting to watch and wait for migrating birds to descend (seemingly out of nowhere) upon the trees nearest to my library windows. Whenever a cluster of clamorous titmice or chickadees come together to hop about on the Serviceberry or Redbud, I crouch behind my camera and wait for the vagrants to join the frenzy and alight on the same tree. Most of the time one or two come to see what all the fuss is about. (Safety in numbers?) Then, quiet as a wallflower, I point my long lens at the partygoers and join in on the fun.

Up-Close Detail with Telephoto Lenses

You don’t need a dedicated macro lens to capture fine detail in your images. Telephoto lenses allow you to magnify the details while not invading the comfort zone of your bird subjects. My Canon 500mm II f/4 L lens has a remarkably close minimum focusing distance  (12.4′ or 145.7″). Combine that with the narrow field of view that comes with amplification and you’ve got superior image quality.

Too Close for AutoFocus

This Ruby Crowned Kinglet came in so close to the camera that autofocus was not quite capable of achieving focus. Assuming the kinglet would stay close, I had to make a quick choice…. either physically pick up the camera and tripod and back it up a couple inches or turn on Manual focus and hope that the minimal focusing distance would decrease just a touch and allow me to manually nail focus. The light and contrast on the scene were very good and would allow auto focus to work optimally. I went with picking up the tripod and moving back – and then letting the autofocus do its job.

Photo of Ruby Crowned Kinglet
Ruby Crowned Kinglet.
A Closeup View of His Ruby Crown.
ISO1500; f/5, 1/500 Second

Does Manual Focus Decrease Minimal Focusing Distance?

There are lots of sites on the web touting the advantages of using manual focus over auto focus. One such benefit is giving the photographer a slight close-focusing edge by reducing the len’s minimal focusing distance. Later I did a quick (and unscientific) experiment to determine if switching to manual focus would reduce the minimal focusing distance of the Canon 500 L f/4 II lens. I fixed the lens on a bird perch spot right on the edge of where I knew auto focus could not achieve focus because it was a 1/2 inch or so too close to the lens. With the lens locked in place on the tripod, I turned off autofocus and tried to manually achieve focus on that spot. No luck. Manual focus didn’t seem to give me any advantage in the shorter distance category.

Just as well. I depend on fast auto focusing technology almost every day.

To read more about fast focusing technology, press this link.

To read more about close-up photography with telephoto lenses, press this link.


Photographing Magnolia Warblers and Thoughts About Camouflaging Your Telephoto Lens

Camouflage the Camera and Lens

Lately I have been researching online, trying to learn more about the art of stealth. I wish to camouflage my lenses with water resistant neoprene, similar to the stuff that wraps my bird blind and lens pouches.

Photo of Magnolia Warbler
Magnolia Warbler
Cautiously Taking a Look at the
Photographer and Camera.
ISO800; f/4.5; 1/400 Second

For the longest time, I convinced myself that I did not need to cover these bright white Canon telephoto monsters- that the birds just ignored them and did not need to feel more comfortable to perch a little closer. That’s just not the case.

Why Blend?

In bird photography, you must avail yourself to every advantage to keep the birds coming in close to the camera. Over the years, more and more migrating birds have been stopping off in our yard to rest and replenish. I have posted dozens of photos of these transients on my website and my flickr albums. I’m betting that if I make an effort to camouflage my equipment, more birds will come.

Photo of Magnolia Warbler
Magnolia Warbler
ISO1250; f/5; 1/500 Second

Options To Better Blend

First of all, why doesn’t Canon offer a painted-on camouflage lens option when they sell their professional photography equipment?  It’s true that third party vendors do market simple, pre-made lens wraps (for ridiculously big bucks) specifically designed for each brand and size of telephoto lens.  I just can’t bring myself to pay $100+ dollars for that stuff.

Since Canon will not step up, here are a few options for a photographer and her equipment to blend better into the birds’ natural environment:

  • Break the bank and buy a pre-made, form fitting, no adhesive, sleeve like and waterproof Neoprene lens covers. Lenscoat.com has options to protectively cover all your camera equipment (for $100+). Their website looks like a good place to start.
  • Conceal everything by throwing a green/brown cotton scrim net (with military pattern) over yourself, the camera and long lens. (Sort of like Harry Potter’s Cloak of Invisibility.) Lots of different sizes are available. The 42″ by 78″ costs $12.00 and is available at Amazon. This netting covers head to toe and is the most likely solution to conceal movement of the camera and photographer.
  • Make your own. One particularly ingenious photographer has designed his own home made, cloth camouflage jackets for his lenses. He has shared step-by-step directions at his website at this link.
  • Investigate Camouflage Gaffers Tape: 2 in. x 60 ft. in woodland forest green for $20 at Amazon. This will adhere vigorously to any lens. The manufacturer claims that Gaffers tape will leave no sticky residue when removed.

Working on The Art of Stealth

Billions of diverse species of birds migrate in the Spring and Fall, and we are very close to a major migration corridor along the shores of Lake Michigan. I am convinced that there are many more bird species near our yard that I can not see, birds that are not so approachable; birds who can no doubt see me with their keen eyesight and observation skills and consequently steer clear of the camera. To be a more effective photographer, I’ve got to do more to hide myself and the camera.

To read more about photographing Magnolia Warblers using manual focus, visit this blog posting.

To view the migrating birds that came through our yard last year, visit this post and this post.


Photographing a Blue Headed Vireo and Thoughts About Fast Lenses

Exposure Tradeoffs

We all know the low light exposure conundrum. The more you open up the aperture, in any lens, but most especially in long telephoto lenses, the more shallow (to the point of being razor thin) your depth of field becomes. With bird photography, that means (depending on the pose) that much of the bird’s little body is simply NOT in focus.

When I’m out in the State Game Area in the early morning, there’s usually lots of glorious sunshine allowing me to tighten up the aperture to 8.0 or smaller. Here at home, light filters down on a sunny day to accommodate a comfortable aperture of f/5 (with low shutter speed –assuming there’s no wind– and relatively high ISOs). But when it’s cloudy and rainy, the aperture on my 500 mm f/4L II IS lens  is mostly wide open. I could swap out lenses and use my 300 mm lens (2.8 L wide open), but then I sacrifice amplification. I’d much rather have high noise in an image that does not need cropping/zooming in post processing.

Photo of Blue Headed Vireo
Headshot of Blue Headed Vireo.
Beak and Eyes are in Focus, But not Much Else.
ISO1000; f/4; 1/500 second.

What’s a “Fast” Lens?

Lenses on which the aperture opens wide and thus allows more light on the focal plane are referred to as “fast” lenses. The more that aperture can open to let in more light, the “faster” the lens. The more light transmitting through the lens, the more flexibility with exposure parameters the photographer has.

NOTE: In aperture speak, when you “stop down”, you are letting in less light…. making the aperture smaller (by moving to a larger number)– and consequently, getting a deeper depth of field. Remember: The f/ represents the size of the hole allowing light into the lens. The smaller the f number, the larger the aperture.

Shallow Depth of Field

When I was photographing this Blue Headed Vireo, I had the 500mm lens wide open to f/4. See photo above. The head and eyes of the vireo are sharp because those bird parts were within the in-focus DOF arena. Those bird parts that were too close or too far away from the sensor are blurred because at f/4 there are only a few millimeters on which to lock focus.

To get an idea of how thin your depth of field can be at wide open apertures, see this DOF calculator. And, of course, if you want this information readily available in the field, there are DOF calculator apps available for iPhones and Droids.

Entire Subject Parallel to the Sensor

In the photo below, shot at f/5, most of the bird’s body is parallel to the sensor, and consequently, overall sharpness is good.

Photo of Blue Headed Vireo
Blue Headed Vireo.
Another Day, A Little Brighter.
Aperture Stopped Down, Just a Touch.
ISO2000; f/5; 1/400 Second

A Good Telephoto Lens

High end prime (fixed) lenses are usually “faster” than zoom lenses. Faster lenses are usually larger, heavier (I usually prefer a tripod with fast 300mm+ lenses) and much more expensive because of the sophisticated optics and highly responsive autofocus and metering technology incorporated into these lenses. A good telephoto lens will always be distinguished by its largest aperture setting. On a cloudy day, that means a lot.

To read more about image sharpness, please press this link.

Photographing a Yellow Bellied Sapsucker and Thoughts About Low Light Sensors

A New Woodpecker Comes to Town

Everybody has heard of this bird. Its name has been used in cartoon comedy for decades. The first time I saw a live Yellow Bellied Sapsucker was last week, clinging with its large, sharp claws onto the crusty trunk of the red bud tree right outside my window.  I’m used to seeing lots of woodpeckers, most of which stick around all winter. But photographing this transient, so distinctly wood-peckerish with its shock absorbing thick-head, chisel bill, and oversized clinging 4 toed feet (zygodactyl – two toes forward, two toes back) was a treat.

Photo of Yellow Bellied Sapsucker
Yellow Bellied Sapsucker Woodpecker.
ISO3200; f/4; 1/500 Second.

Drummer of Tree Bark

Yellow-bellied Sap Suckers are long distance migrators whose plumage looks quite different from our resident woodpeckers. Sapsuckers are woodland cavity nesters whose stiff tail feathers act as a prop as they hop up and down on tree trunks and drum on the bark. Like most large and mucivorous woodpeckers, they excavate the tree bark for sweet sap. Once these neatly arranged shallow holes are drilled, they feed and re-feed at their dripping “sap wells”, using their brush-like tongues to suck up the sap.  A good part of their daily routine involves maintaining and protecting their oozing sap wells from other sap loving marauders.

Photo of Yellow Bellied Sapsucker
Yellow Bellied Sapsucker.
ISO5000; f/4; 1/500 Second

Insufficient Contrast and Light

My ISO readings soared as I photographed this Yellow-Bellied Sapsucker clinging to the shedding red bud tree trunk. Despite my exposure settings, (low shutter speed and wide open aperture, mostly), conditions were just too dark to get a decent ISO.

Even sophisticated autofocus systems can only do so much when insufficient contrast and light are available. In addition, too much noise (caused by high ISO) disrupts the edges of an image, making them lose clarity and detail. The noise reduction software in Lightroom helps, but the more you try to reduce the noise in post processing, the more sharpness suffers.

The Canon 5D Mark III DSLR camera has a well balanced 22.3MP sensor, but the lack of sharpness on these images is readily noticeable. The only real noise reduction advantage I had during this shoot was that I photographed this woodpecker at fairly close range, thus reducing the need to zoom in and crop.

Photo of Yellow Bellied Sapsucker
Yellow Bellied Sapsucker.
ISO4000; f/4.5; 1/500 Second

The Sensors of Tomorrow

Since I photograph birds in low light conditions so often, I take notice of the research about new DSLR sensors under development. A new and improved 120MP sensor working prototype was introduced at the 2015 Canon Expo. Good thing hard drive space is cheap because each exported raw image gobbles up 210MB. This incredible resolution means that you can keep zooming and cropping in post processing (on a video monitor with enhanced resolution) and still see only fine detail, not pixels. 

At this point in development, the 128MP sensor demands the brightest of light to achieve sharp resolution. The DSLR camera that housed this new sensor was fixed at ISO100.  Too bad.

See this post about the advantages and limitations of the 50MP sensor Canon introduced this year on the Canon 5DS.

Addendum:  To my surprise, the Yellow Bellied Sapsucker came back the next day.  The light was better, so the ISO was considerably reduced.  (See photo below.)

Yellowed Belled Sapsucker
Yellow Bellied Sapsucker, in Better Light.
ISO1600; f/4.5; 1/500 Second