Monthly Archives: December 2016

Photographing an Eastern Screech Owl –Nocturnal Birds

Photographing An Eastern Screech Owl

My camera, 500mm lens and tripod are now facing a vacant wooded backlot.  An Eastern Screech Owl moved in to our owl house around Christmas, 2016. We erected this house almost 3 years ago, so a resident has been a long time coming. Up until now, we had only squirrels and a mob of European Starlings (Yikes!) look it over.

Front Row Seat

The owl house is positioned approximately 15 ft high on an Oak tree in front of and at eye level with a bedroom window. There’s plenty of room to move the tripod around for both close-up shots, full body flight shots and everything in between. The window at which the camera waits is approximately 20 feet from the opening of the owl house.

Eastern Screech Owl
Eastern Screech Owl,
Poking Out His Head to Check on The Disturbance.
ISO400; f/9; 1/250 second

Pretty Exciting, Right?

I’ve been dreaming of photographing these majestic creatures for a long time. If I am to believe the looks in his large and striking eyes, he is weary and disinterested in my shenanigans and thinks that the camera and I are pretty boring.

Photographing Birds in Near Darkness

Eastern Screech Owls are little raptors, (6-10″ long; 4-9 ounces; wingspan 18-24″) short and stocky with an oversized head and no discernible neck. They do not screech as their namesake would imply, but instead sound more like the somewhat spooky whinny of a horse. Eastern Screech Owls are for the most part nocturnal and highly camouflaged, and therein lies my problem.

A lens can not focus in darkness. If it’s too dark, it won’t even go thru the motion to hunt back and forth. There is nothing upon which its technical eye can fix – no contrast, no color, no edges, nothing. The fresnel attached flash will try to emit a light beam (auto focus assist beam) so the lens can do its calculations for autofocus to work- but that assist beam only travels so far…. most certainly not 20 feet. So far, moonlight and starlight have not been bright enough to be helpful.

Use Manual Focus?

I could turn off autofocus on the lens and work with manual focus. This would require that I pre-set focus on one target when there is light and then guess when to press the shutter when my eyes detect motion in the near darkness. This is a desperate measure for me. I’m not yet at a place where I will forego the benefits of autofocus. (NOTE: Perhaps I should read up on motion sensors that automatically detect movement and trigger the camera.)

A Light Fix for the Lens

A light that casts a versatile, wide, even illumination for night vision is needed; perhaps LED video lights, a rechargeable lantern (180 degree or 360 degree coverage), or just an adjustable flashlight. All these devices emit light that: a) Is easy to prop and point, not directly on the owl, but perhaps on the branches below; b) Too weak to register on the digital image and screw up light balance; and c) Strong enough to give the lens a fix on focus. Most importantly, the beam intensity on these lights can be set to low power making the light too weak to disrupt the owl’s nightly routine or impair his remarkable dark adaptation vision.

Unexpected Daylight Commotion

One cold, cloudy afternoon, I opened the bedroom window, turned on the heater and positioned myself with a shutter remote. I hoped that my new neighbor would abandon the cover of darkness and take an impromptu daytime flight. During this surveillance, I noticed a few of my less tolerant wildlife neighbors fearlessly patrolling the owl box and expressing their dissatisfaction with a nocturnal predator trespassing within their boundaries. (NOTE: At the risk of anthropomorphizing here, perhaps they object to the Owl’s presence because he regularly and methodically strikes terror in the dead of night.) The rather loud rattles, chirps and thumps on and near the owl house could not help but interfere with the owl’s beauty sleep -so once in a while he stuck his head out of the box to see what all the commotion was about.

Eastern Screech Owl
Eastern Screech Owl with
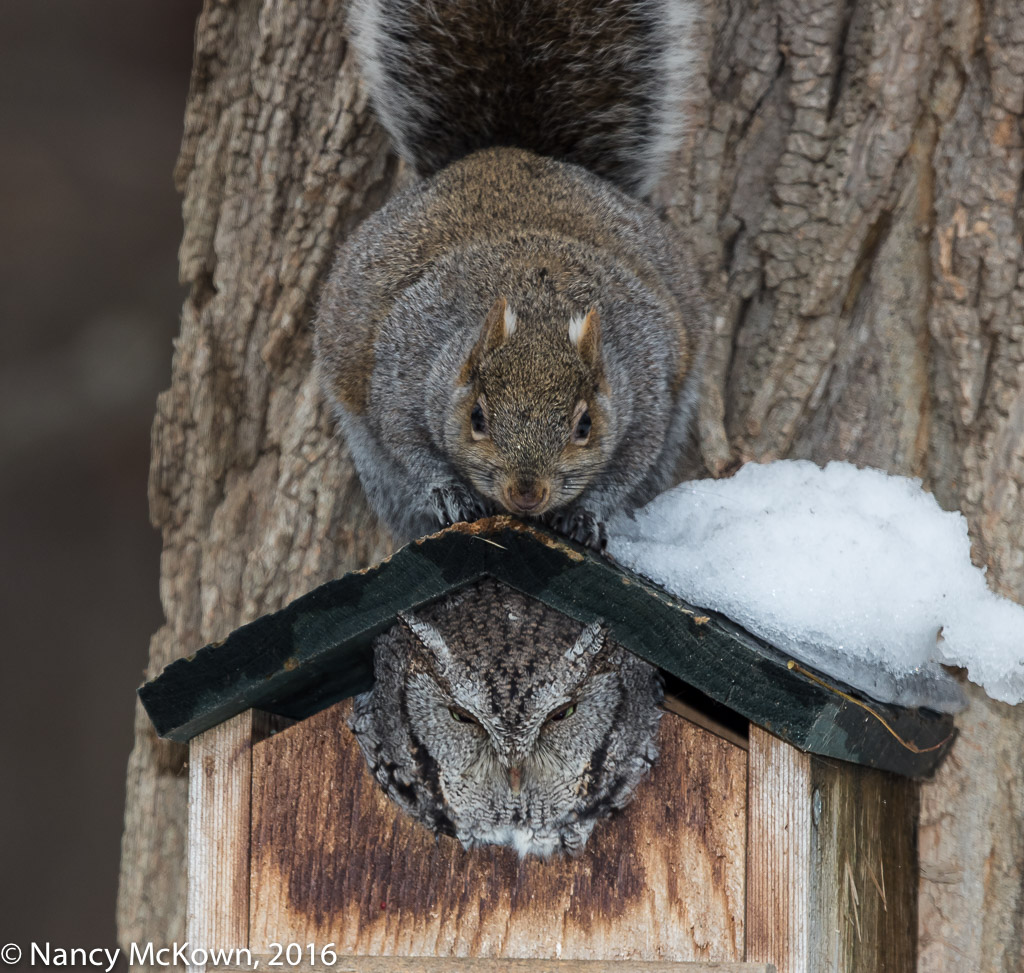
a Red Squirrel atop His House.
ISO400; f/8; 1/250 Second

Photographing the Agitators

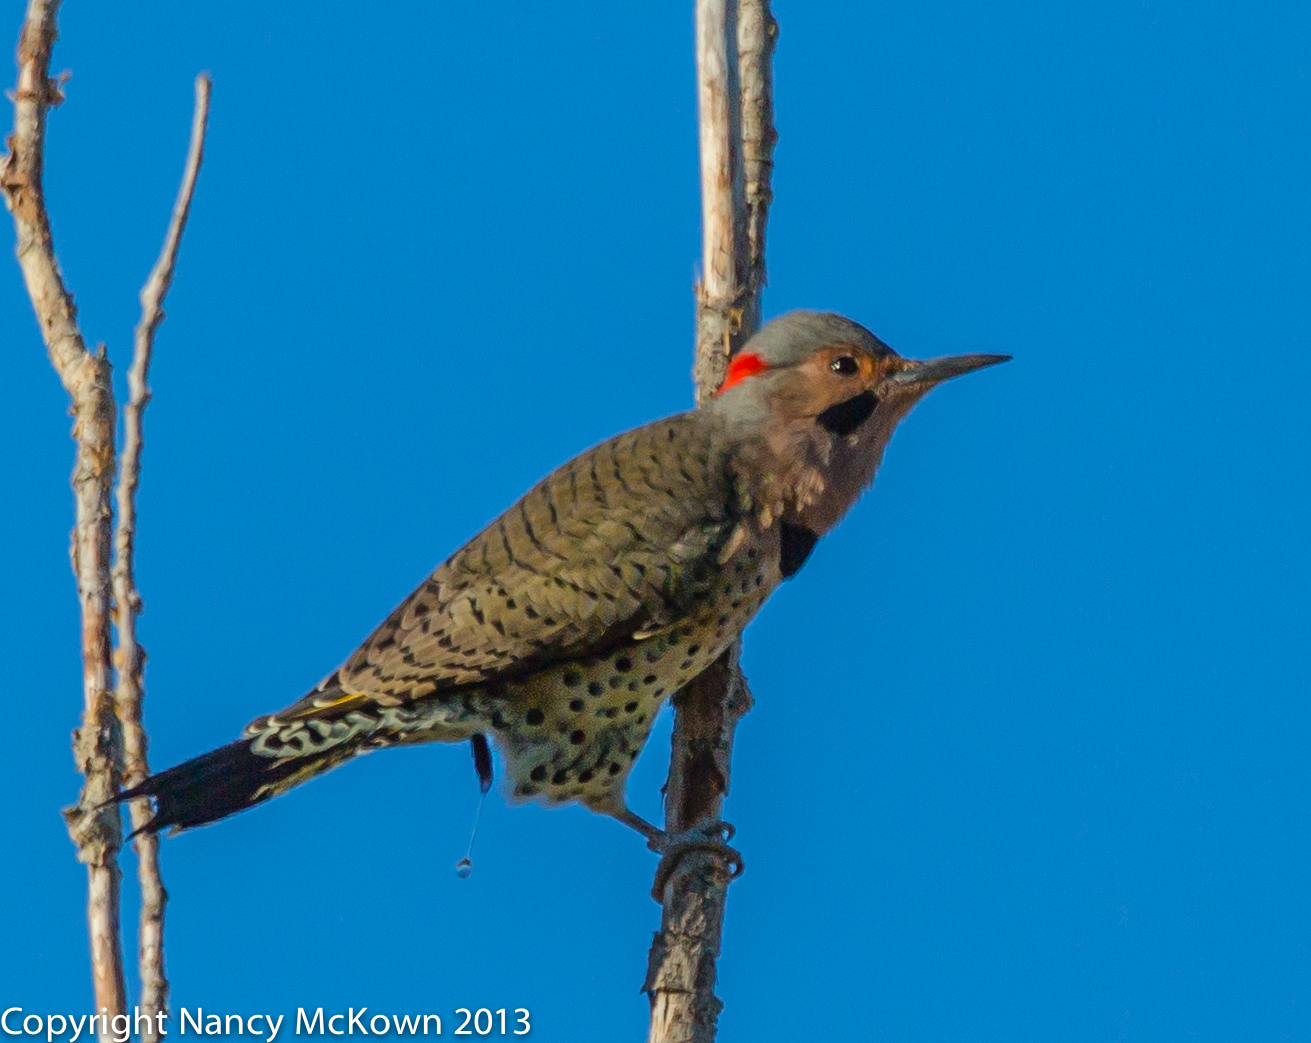
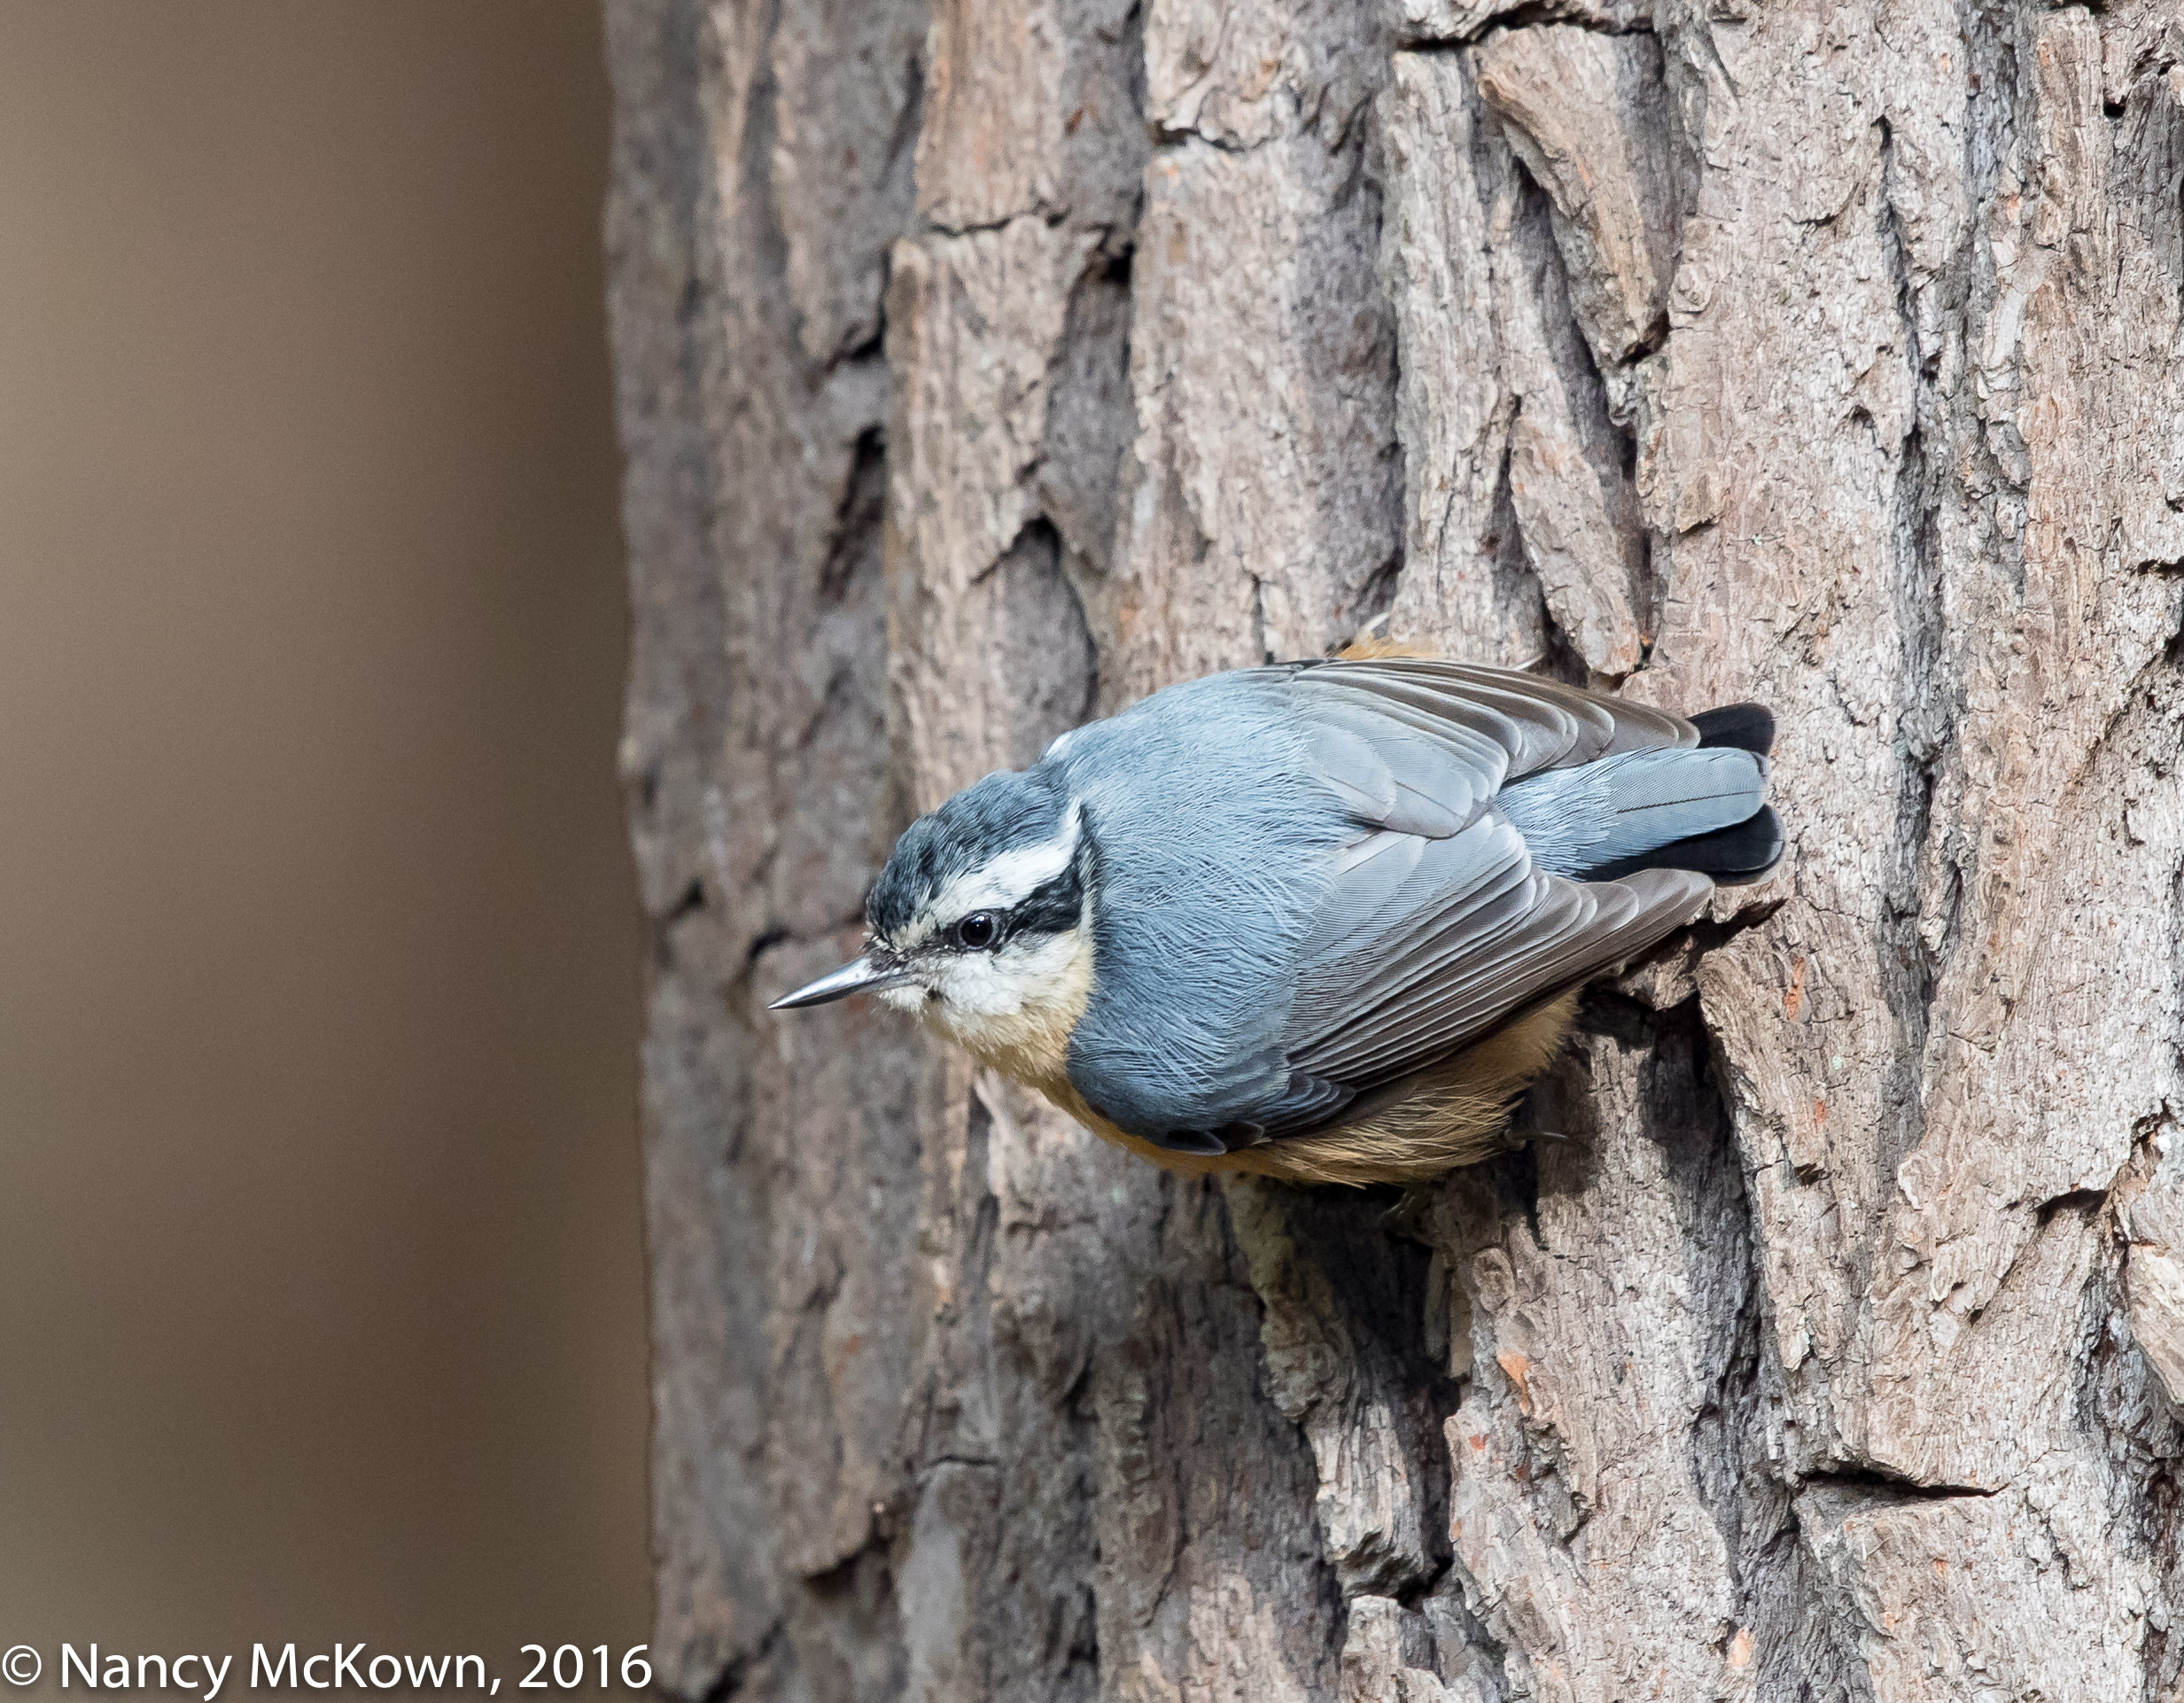
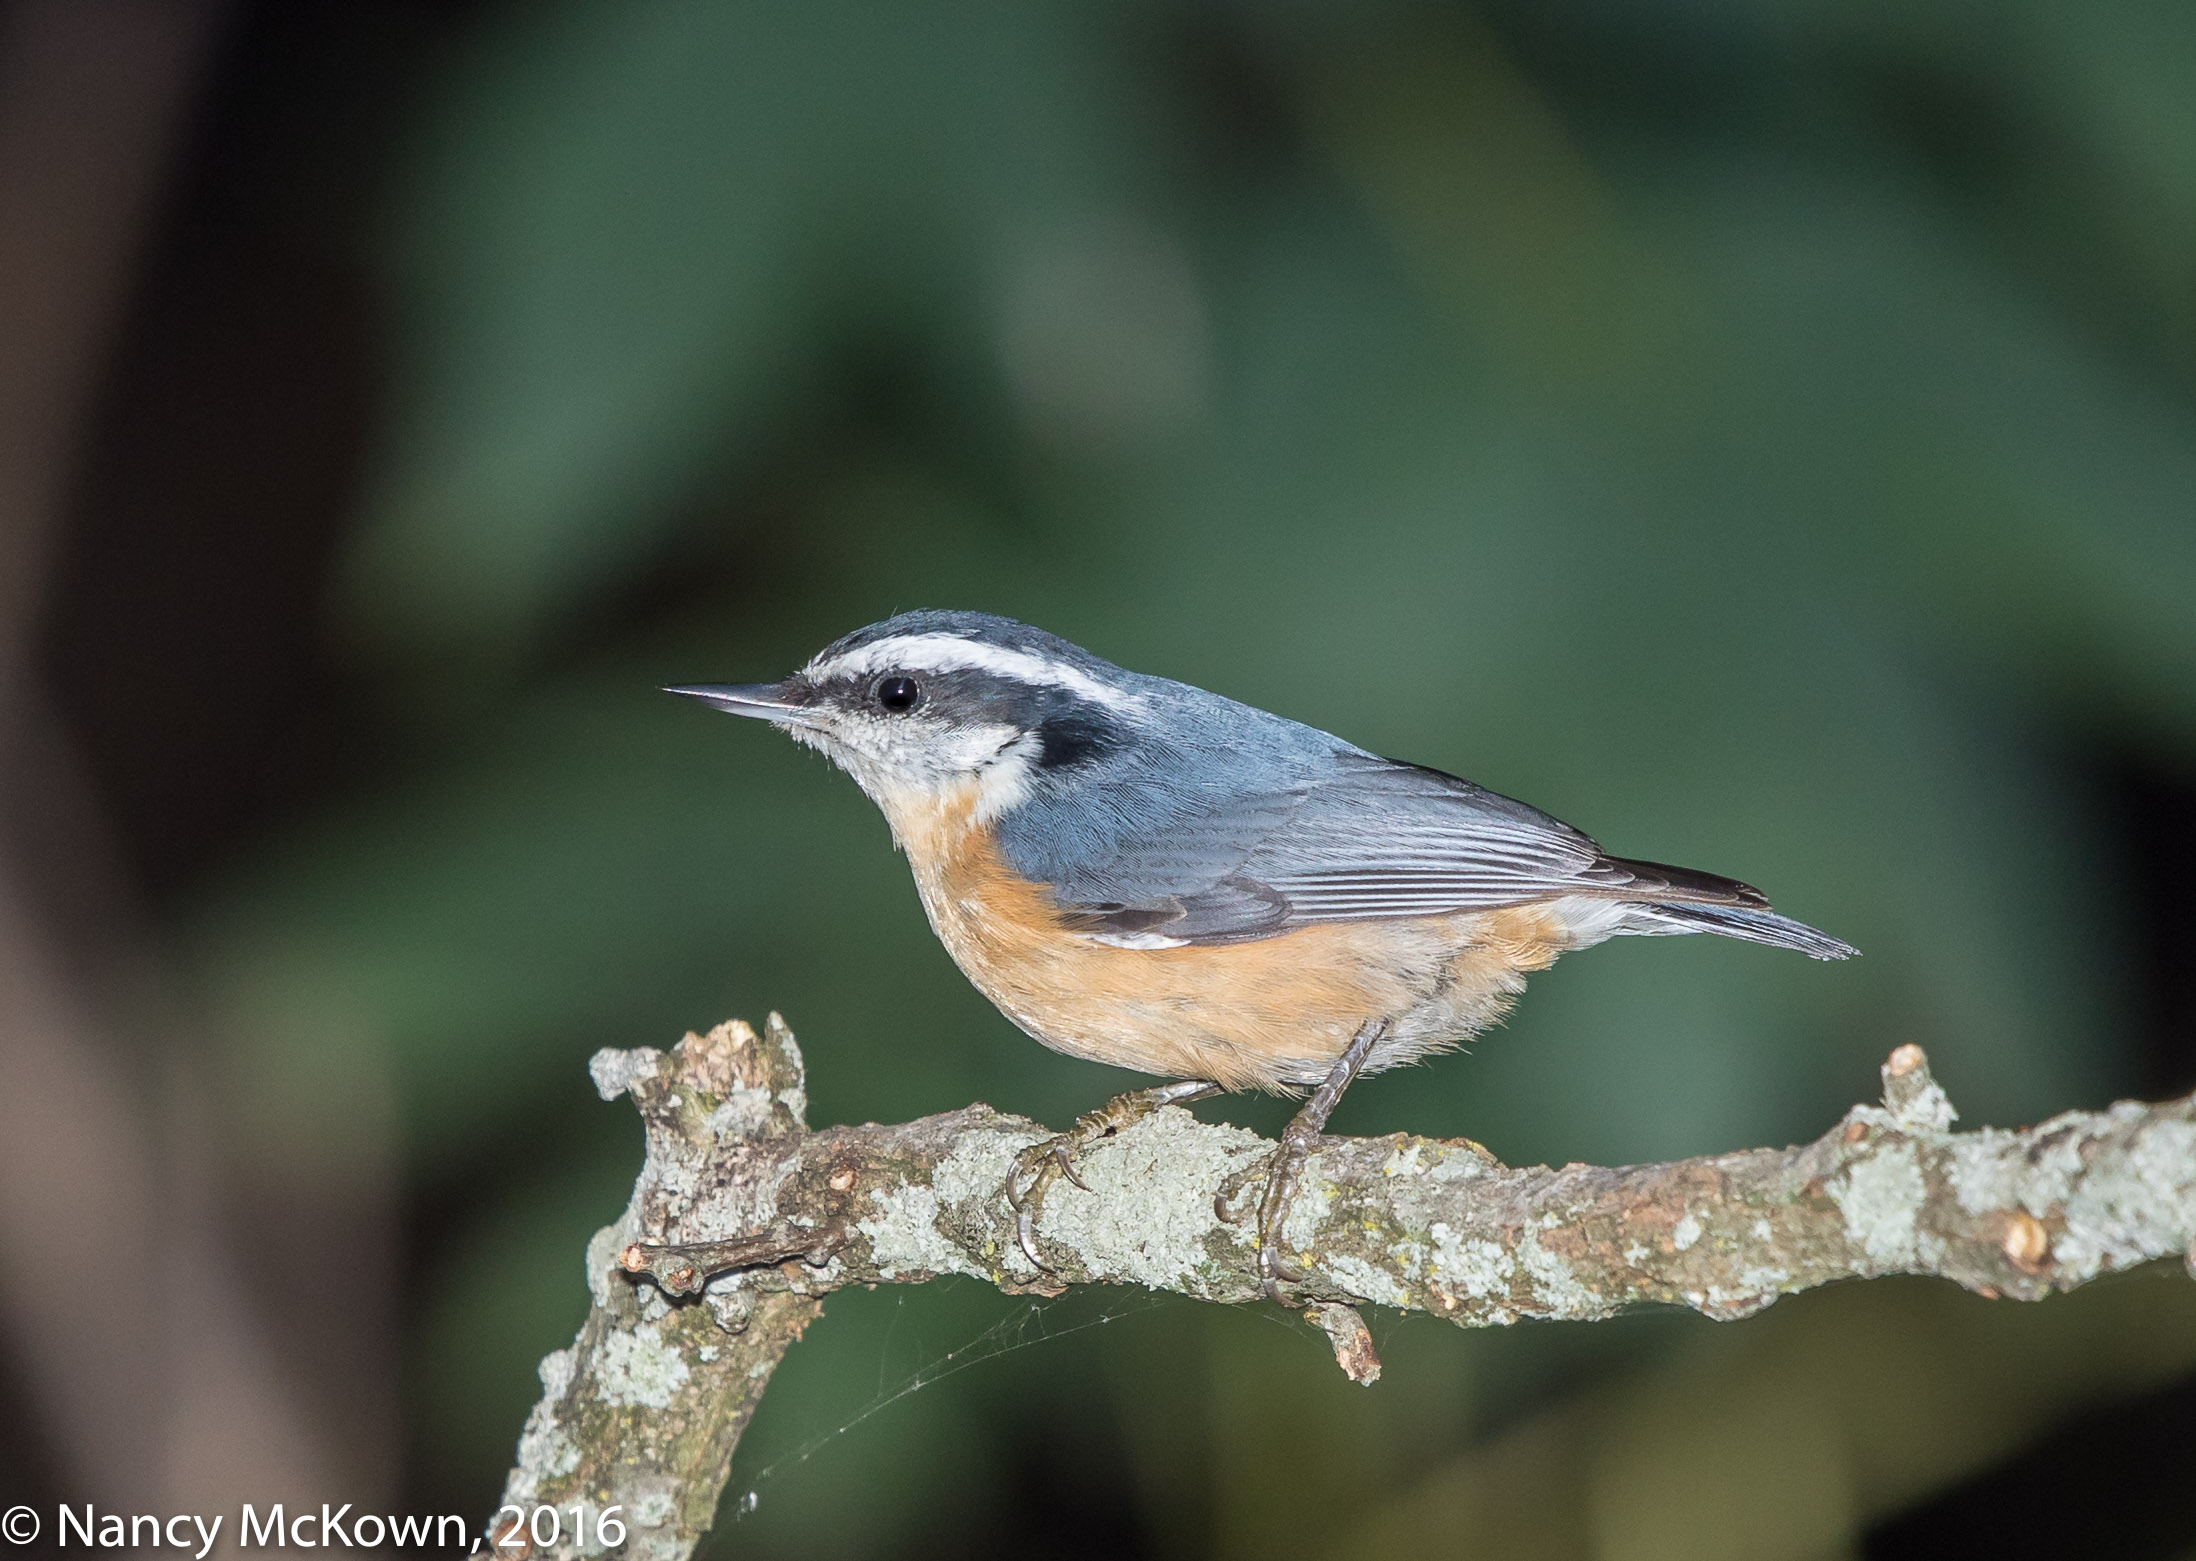
During these raucous times, I did manage to photograph the owl’s heavily feathered head while he sluggishly perched at the circular entrance of his box. I did use the tele flash for these shots, but for the most part, the ambient light dominated the scene. (NOTE: I assume that his feet are propped on the ledge of the entrance but it’s hard to tell what’s beneath that thick blanket of feathers.) I was also able to photograph a few of the owl’s protesters. (In one afternoon, I saw and photographed the following owl agitators: A black squirrel, a gray squirrel, a Tufted Titmouse, a Chickadee, and a White Breasted Nuthatch.)

Photo of Eastern Screech Owl Hiding from a Tufted Titmouse
Eastern Screech Owl Hiding from a
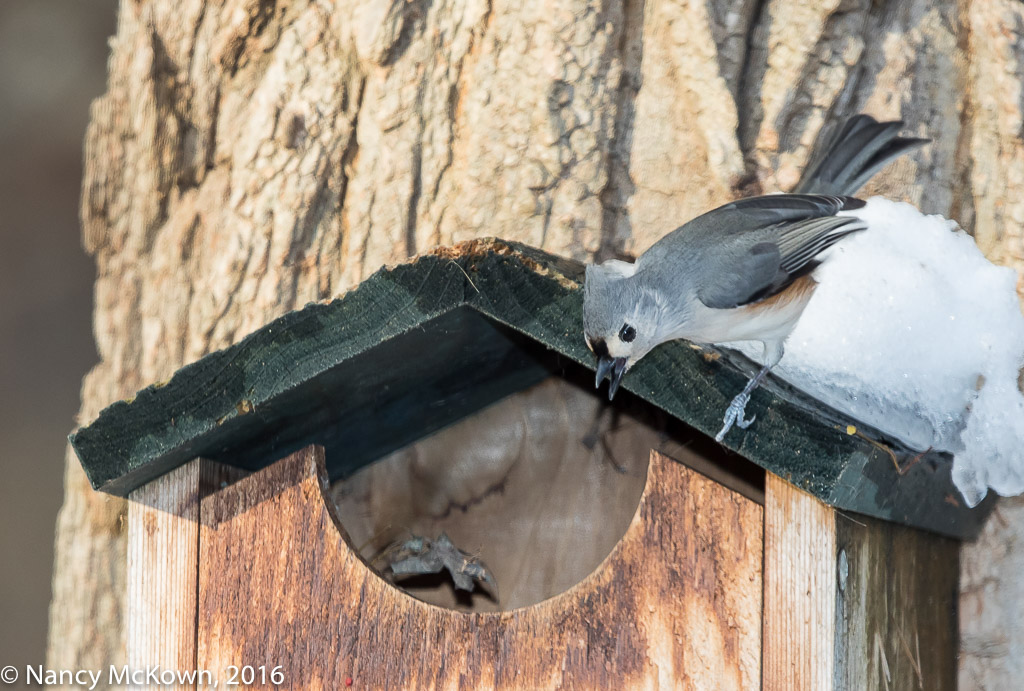
Complaining Tufted Titmouse.
(Titmice are usually timid and not aggressive.)
ISO400; f/8; 1/250 Second

I have not seen the owl for a few days but I am hoping he’ll be back. In the meantime, I’ll keep the camera rig in place and research less invasive methods for night time wildlife photography.

Wishing you all much joy in the coming New Year.

Photographing a Juvenile Northern Flicker – Techno Talk Isn’t For Everyone

Photographing a Northern Flicker

Some Northern Flickers hang around Southwest Michigan year around, but most retreat from the Michigan cold. This photo of a wary juvenile contemplating his options was taken this past fall in our yard. He never did muster the courage to hop down to the fountain and imbibe with the other birds. I was lucky to get in this one shot before he flew off.

Another member of the hammering Woodpecker family, Northern Flickers are brown and tan all over with distinctive face markings, richly patterned plumage and long sticky tongues. They don’t use their tails as a prop like most woodpeckers do and can mostly be found on the ground with the Robins and Blackbirds foraging for ants and beetles.

Photo of Northern Flicker
Juvenile Northern Flicker
Contemplating His Options
ISO2500; f/5.6; 1/320 Second

DSLR Camera Fluent

I love posting my images and writing about how DSLR technical competency translates into rewarding nature photography. Spending time and energy learning to be DSLR fluent gives me more control over the camera’s digital imagery. I find it challenging to navigate the labyrinth of precise terminology needed to figure it all out. It’s my path to creativity.

Techno Talk Isn’t for Every Photographer

I know a few photographers who choose to concentrate only on the artistic components within the frame and let the camera handle the rest. They reject my approach and ignore the mechanical, electronic, chip oriented functionality, like they do (most likely) with their computers and smart phones. Just not their thing.

These photographers are more interested in how the image strikes them emotionally.  Wildlife photography is more about the challenge to create rather than working through exposure conundrums in their head.

Camera automation is their key to artistic vision and therefore they don’t often cross the line into the technical. Manual Mode is a layer they don’t want or need. The practicality of learning how cameras work is superfluous to achieving the end game. Why bother when you can instantaneously see your image on the LCD screen? If it doesn’t work…move on and try something else.

Photo of Northern Flicker
Northern Flicker. Taken near
Lake MI a few years ago.
A Better View of the Backside
of this Beautiful Woodpecker.

Different Paths

Very different methods, motivations and interpretations lead photographers onto divergent paths. Every photographer has to decide how much she will let the camera do the thinking…..how much she will detach from the techno to accomplish her vision.

One thing bird photographers have in common. Birds come and go so fast. Often there’s only time to lift the lens and press the shutter (assuming you’ve got the camera setup on the tripod). There’s not much time to think it through right before taking the shot, artistically or technically.

So…..To bird lovers and photographers everywhere, whatever your philosophy and however you use the tools of the trade, Best Wishes and Merry Christmas!


Photographing the Northern Parula Warbler and Thoughts About Canon’s New Flagship Camera

Photographing the Northern Parula Warbler

This migrating Northern Parula Warbler posed for me for only a minute… but it was long enough capture the details of his striking array of pattern and color. Ample fill light from the flash accented his delicate profile, white eye crescents and the sunshine on his breast. An enticing bokeh complemented his beauty.

I am enchanted by his shape, colors and form, features I did not notice when I photographed this species in the Fall of 2015.

Photo of Northern Parula Warbler
Northern Parula Warbler
ISO400; f/9; 1/250 Second

I attribute the stellar quality of these images to a very cooperative bird, the wrap around fill light provided by telephoto flash extender, an isolated perch with no foliage distractions, and my new camera; the Canon 1 D X Mark II.

The Canon 1DX Mark II DSLR Camera

I am still giddy about owning the Canon 1 D X Mark II. I’ve had it for close to 6 months now and I find myself wanting to use it for bird photography almost exclusively. I read everything I can find about this new camera (much of it covering features that are too technical for me to understand) and spend a lot of time putting this fabulous camera through its paces.

A few thoughts and observations.  (NOTE: All comparisons made are based on my 5D Mark III or my 7D Mark II. I have never owned a Canon Flagship DSLR camera before.)

  • Time spent downloading and managing RAW files into Lightroom is about the same. The file sizes are slightly smaller on this new camera (20.2) compared with my 5D Mark III (22.3) with full size sensor and the same size as my 7D Mark II (20.2) with 1.6 cropped sensor. This megapixel size does not overload my 4 year old computer’s processor and hard drive.
  • The image quality right out of the camera is better. Once the images are in Lightroom, my post processing work flow is less time consuming and tedious. There is less need to use the Lightroom sliders that impact sharpening, clarity, vibrance, highlighting, saturation, shadows, and noise reduction. Light metering seems more on target compared with my other cameras, and consequently, I spend less post process time with exposure, brightening and contrasts sliders.
  • New/Improved CMOS Sensor.  Birds are (for the most part) unapproachable and as a result, I often depend on luck to get a close-up shot. The majority of my (warbler size) bird shots (with 500 mm lens and 1.4 extender) are taken at a not-so-close distance of 20-25 feet. My 5D Mark III and the 7D Mark II cameras deliver exceptional image quality at low ISOs if I’m lucky enough to be 13-16 feet away from my subject. As you would expect, the more I have to zoom in on the image, the more the overall quality diminishes. (These are not monster megapixel cameras.) I’ve spent time comparing images from the old and the new cameras. The improved image sensor technologies incorporated into the Canon 1 D X Mark II (20.2) deliver expanded dynamic range, more defined texture, richer colors and more clarity in the details– all of which are noticeable even after extensive zooming. This is especially true when light is sufficient to shoot at lower ISO values (ISO 100-800).
  • Low Light-High ISO quality is very good on the Canon 1 D X Mark II.  I am much impressed with image clarity in the 6000-7000 ISO range- especially when I look back and compare it to the high ISO image softness I got from my previous cameras.
    • NOTE I: To get the best low light results, Canon recommends using one shot auto focus mode with only the center auto focus point activated. Good to know, but not much help when photographing birds on the move.
    • NOTE II: For the last 5 months or so, I have relied on telephoto flash in low light bird photography because I prefer to have more flexibility in my exposure choices and, most importantly, the low ISO clarity this camera delivers is outstanding.
  • Focusing is more accurate and less hesitant especially when tracking birds. This improvement is most noticeable when I attach a 1.4 or 2.0 tele-extender to track fast moving birds. (All 61 focus points are usable even when the camera is at f/8 max aperture.)  In addition, the auto focus coverage area is slightly larger (24%), so auto focus works even when subjects are close to the edges of the focusing screen.
  • The high speed continuous bursting is faster and quite a bit louder. The speedy image transfer rate (thanks in part to the new CFast 2.0 memory card and the unlimited buffer) is highly desirable for capturing (in focus) a rapid sequence of moving birds. NOTE: The duo memory slots have one CFast card and 1 UDMA 7 Compact Flash Card. I would have preferred if Canon had decided to install two CFast cards instead.)
  • Other Camera Choices:  I have researched and seriously considered purchasing the Canon 5 DS or the Canon 5 DS R DSLR camera. In both of these monster megapixel cameras, the sensor’s light gathering potential is sacrificed to bump up the megapixel count. Since I am confronted with many low light scenarios in my bird photography, these cameras are not for me. (I have not researched Canon’s new 5D Mark IV camera.)
  • Ease of use and overall ergonomics: The 1DX Mark II is a heavy and bulky camera that is not easily maneuverable off tripod. (NOTE: I am so excited to be an owner of one that its bulk is only noticeable when I pick up my comparatively light Canon 7D Mark II.) Once you get past the bulk, the function controls are laid out in a predictable “Canon” manner and feel comfortable to use.
  • LCD screen is much clearer – especially when zooming in on detail. Makes me feel more confident about deleting images right from the camera.
Photo of Female Northern Parula Warbler
Female Northern Parula Warbler
ISO400; f/9; 1/250 Second

A More Discriminating Photographer

Anybody who spends a lot of time reviewing images and looking for image quality detail and sharpness is bound to (over time) develop a more discriminating eye. Finances permitting, this may lead some photographers to invest in equipment that will have a better chance of getting them to where they want to go in future photographic adventures.

It is important to note that these detail quality improvements will likely not knock-the-socks-off the typical fan of bird photography. In fact, I have learned NOT to expect people who are not photographers to notice or care.

Challenges, Frustrations and Rewards

Overall, I like the comfortable way this new camera feels and behaves when I use it. As with most new technology, my understanding is incomplete. At times, instead of referring to the manual, I make assumptions that may or may not be valid. There are challenges and frustrations, and sometimes when I’m weary, I think that it’s just easier to let this ultra complex computerized expensive camera do all the thinking.

Slowly but surely, I am figuring it out… and finding joy in the results.


Photographing the Red Breasted Nuthatch and Upgrading Firmware

Photographing the Red Breasted Nuthatch

This Red Breasted Nuthatch is a compact cutie with his short tail, barrel chest, and stub neck. He is considerably smaller than his cousin, the White Breasted Nuthatch but is highly vocal, and thus stands out in a crowd. The blueish gray male sports a cinnamon breast, a bold blue or black cap, a sharp black line through both eyes, and two white stripes under and over his eyes. His long, sharp bill is used to excavate the tiny crannies in the tree trunks for hidden insects.

Navigating with their heads pointing up, sideways, or down, Red Breasted Nuthatches are bold and acrobatic in their dealings with other birds at the fountain. They are however, not so aggressive as to dare to compete for a nest box (in our yard) with the tinier but more aggressive House Wrens.

Photo of Rose Breasted Nuthatch
Rose Breasted Nuthatch
ISO1600; f/9; 1/250 second

A Surprise Find

Red Breasted Nuthatches were a surprise find in our yard….. we have not seen them since I photographed them last in late 2013. As a species, they are unpredictably irruptive in their travels. NOTE: “An irruption is a dramatic, irregular migration of a large numbers of birds to areas where they aren’t typically found, possibly at a great distance from their normal ranges.”

When these little birds do come, they display very little fear around humans and are a treat to photograph. Like hummers, they zoom in around the camera to get a better look at me. I’m hoping the food supply around us is sufficient to keep them here all winter.

Keeping the Camera Current

While I sit behind the camera watching for birds, I often peruse the endless photography resources on the web for news, rumors, announcements, and inspiration. It doesn’t take long to come across information about the newest firmware upgrades available for DSLR cameras.

Modern DSLR cameras are basically sophisticated computers, especially pro grade cameras. Camera manufacturers respond to customer input and complaints by researching and developing software enhancements, new camera features and bug fixes having to do with improving camera functionality. (Image processing, auto focus, camera lockup, battery draining, etc.)

Rose Breasted Nuthatch
500 mm lens with tele-extender.
ISO1000; f/8; 1/250 Second

My First DSLR Firmware Update

My first foray with updating the firmware in my DSLR camera came two years ago. It had to do with enhancing the autofocus mechanism when a tele-extender was attached to a lens. I did eventually download the update, but only after I spent some time researching the benefits that this particular fix was suppose to provide. I also checked various Canon user on-line resources to make sure that other photographers did not experience unintended problems with this particular update.

Some Background Information on this update:

In order for a photographer to see optimally through the viewfinder, she needs light. In order for the camera and lens to accurately auto focus, they need light. When preparing to take a photo, the len is always set to its widest aperture to get the most light for auto focus purposes. It immediately and automatically stops down to the aperture needed for correct exposure when the shutter is released.

One of the disadvantages of attaching a tele-extender to a lens is that the len’s maximum aperture becomes smaller and light transmission through the lens is reduced. Example: My 500mm lens 4.0 L II lens with a 2x extender attached would lose 2 full aperture stops; so its widest aperture would be reduced from f/4 to f/8. That is a significant loss of light, so much so that autofocus may be unable to work at maximum capacity.

Firmware Fix:

Per Canon’s technical specifications, this firmware upgrade allowed “the central AF point to act as a cross-type point when working with lens/teleconverter combinations that give a maximum aperture of F8. This option effectively expands the size of the AF detection area to enhance autofocus performance with subjects that are small in the frame and difficult to track, such as small animals and birds in flight.”

Essentially, the firmware upgraded my camera’s microcomputer so that auto focus was able to work better with less light at the (tele-extender) max aperture of f/8. Pretty important fix for a bird photographer who uses 2.0 tele extenders.

Downloading Firmware

Firmware does not automatically download to your camera (like it may do on your internet connected computer and smart phone), but it’s an easy process. To find out if firmware (major or minor) is available for your camera, surf to the manufacturer’s website and search for firmware specific to your camera’s make and model.

Before you download any firmware:

1) Determine if the update is relevant for the kind of photography you do; and

2) Check to be sure that other photographers have had no technical problems with the upgrade.

Once you are comfortable that this technical fix is right for you, click the link to download it to your computer and copy the file to the camera’s compact flash memory card. (NOTE: Specific instructions for downloading and installing Canon Firmware Updates can be found at this link.)

I have always treated my DSLR cameras with kid gloves – and am intent on keeping them operating optimally so they are available when and where I need them for bird photography. It’s the smart thing to do, especially with such pricy equipment.


Photographing a Sharp Shinned Hawk – A Backlighting Mess

Photographing a Sharp Shinned Hawk

I am sitting in the library behind the camera, working on my computer. Suspiciously quiet outside. I soon see why. A Sharp Shinned Hawk alights on a high branch above the deck. I point the lens up to capture him. Focus was immediate and I get one shot in before he notices me and flies away. I know before I preview it on the camera’s LCD screen that this will be a very disappointing image.

An Underexposed Silhouette

The exposure settings taken right before I moved the lens were based on the ambient light coming in from an open deck area with a woodsy background. The second I tilted the lens upward toward the sun to capture the image of the hawk, I no longer had an evenly spread distribution of light…. in fact, the light was substantially unbalanced.

Photo of Sharp Shinned Hawk
Sharp Shinned Hawk
As shot….No Lightroom Enhancement
ISO1250; f/8; 1/250 Second.

Observations

  • Light meters work by measuring the reflective light that passes through the lens. The camera’s internal light meter was in Evaluative mode— meaning it was set to analyze the light intensity of the entire frame. (NOTE: Evaluative mode is considered to be the most intelligent in-camera light metering mode.)
  • The intense background light dominated the E-TTL II light meter readings.  E-TTL II -working with Evaluative mode-metered the ambient light on the entire scene and did the calculations to determine how much (if any) flash would be needed. (NOTE: It doesn’t look like it, but according to the meta data, the flash did fire.)
  • The ISO was manually set to ISO 1200 to reduce impact of flash and allow more ambient light to dominant what I thought was going to be a camera level, low lit scene.
  • Four auto focus points were activated for this shot, all clustered around the hawk’s body. No help there. E-TTL II light meter algorithms no long figure in autofocus point exposure bias when calculating exposure.

Light Meter Algorithms

Complex light meter algorithms are designed to do countless calculations… comparing, weighing, averaging, determining distance from lens, figuring out what to ignore, and measuring tonality and brightness of the scene. Ack! So many different variables often make for unpredictable results, especially when the camera is set to meter in broad based evaluative mode, with flash.

Exposure Fine Tuning

Bird photographers often don’t have the luxury of time to fine tune manual exposure settings and take the test shots needed to compensate for unsightly back lighting.

I find myself wishing that the camera’s metering mode had been set to partial or even spot metering. This may have provoked less of a silhouette effect because the light metering calculations would have been limited to a smaller, more specific area…more metering on the bird instead of the background.

I usually take my chances with Evaluative Mode… let it calculate its best guesses, and then adjust from there. Sadly, for this shoot, there was not time nor opportunity to make adjustments.

Well, that’s the way it goes in bird photography.

Photo of Sharp Shinned Hawk
Sharp Shinned Hawk.
Same image as above – after Lightroom Shadow Enhancement
was applied to help to minimize the
silhouette effect- Shadow slider also made the image
look more grainy
ISO1250; f/8; 1/250 Second

NOTE:  November 30th is the last day for firearm deer hunting season in Michigan. That means I’ll be spending more time in the woods with my camera. I’m looking forward to some new birding adventures.